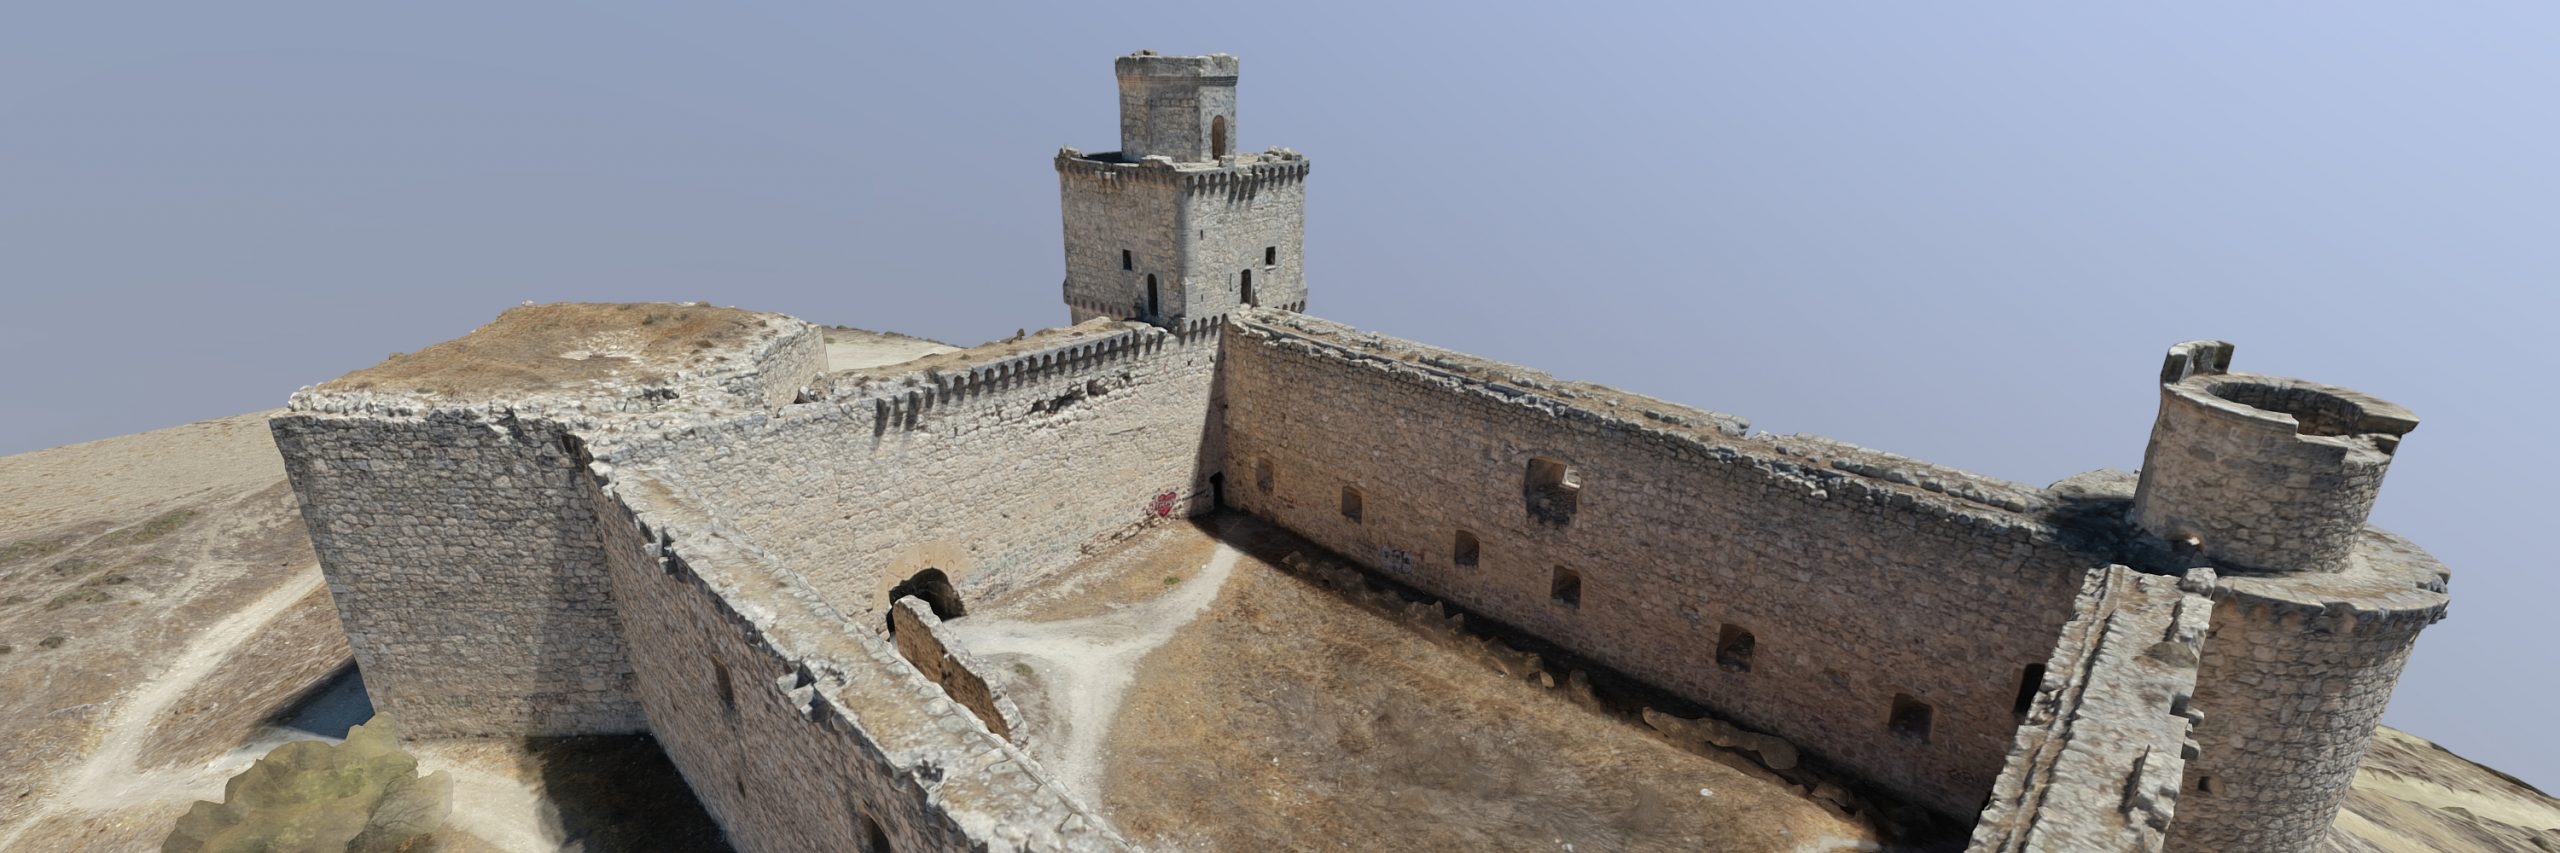
Sputnik7 recently recreated the Barcience Castle in high-quality 3D, for use in a Virtual Reality application as part of a project to help school children in Spain learn more about their history and culture.
You can find out more about its history here.
Located outside of Toledo, Spain, the castle is known locally as the Castillo de Barcience. It rises on a small hill from which it overlooks the nearby town. Construction of the castle started in the 15th century by Juan de Silva, and his grandson finished it. It was provided with artillery and a garrison in the 16th century and was later acquired by the Calderon family, along with the surrounding Barcience estate, which was converted into farmland.
3D Recreation of Barcience
Our goal was to create a 3D model of high enough resolution that the castle could be explored in the first person in Virtual Reality. We also needed the files that were created to be small enough in size so that the model could be easily viewed and shared online.
For image acquisition, we planned to use unmanned drones, and we ended up using two different models from DJI, each with their advantages. We used a DJI Phantom 4 RTK, which has strong positional accuracy due to its use of RTK GPS technology and a DJI Mavic 2 Pro, which excels at close-up photographs due to its large 1” CMOS lens and high-quality Hasselblad camera.
A total of 557 images were captured across four separate missions using the drones. These were processed using Pix4Dmodel, a high-end photogrammetry suite from Pix4D running on an 8 core Intel i9-9900k workstation with 64GB of RAM and an Nvidia 2070 card to create the 3D model.

We then used ZBrush to reduce the polygon count, and 3ds Max and xNormal to generate the final model, which featured multiple textures so that it would load faster and display better on consumer devices. It was then published on Sketchfab, where it was featured in the top 10 models on the site.
STEP 1. Image Capture and Acquisition
The first step of the project was to capture images of the castle and surrounding area, to be used by our photogrammetry application to create the 3D model. We used the Phantom 4 RTK to shoot the initial Aerial Grid, which is a large square area that covers the entire property at a height of 50 meters. This mission was run using the built-in DJI GO application that is installed on the RTK controller that manages the drone and camera.
The RTK ground station allowed us to capture images with very accurate GPS data so that each image could serve as a Ground Control Point. This approach results in faster overall processing and better alignment when creating the 3D model.
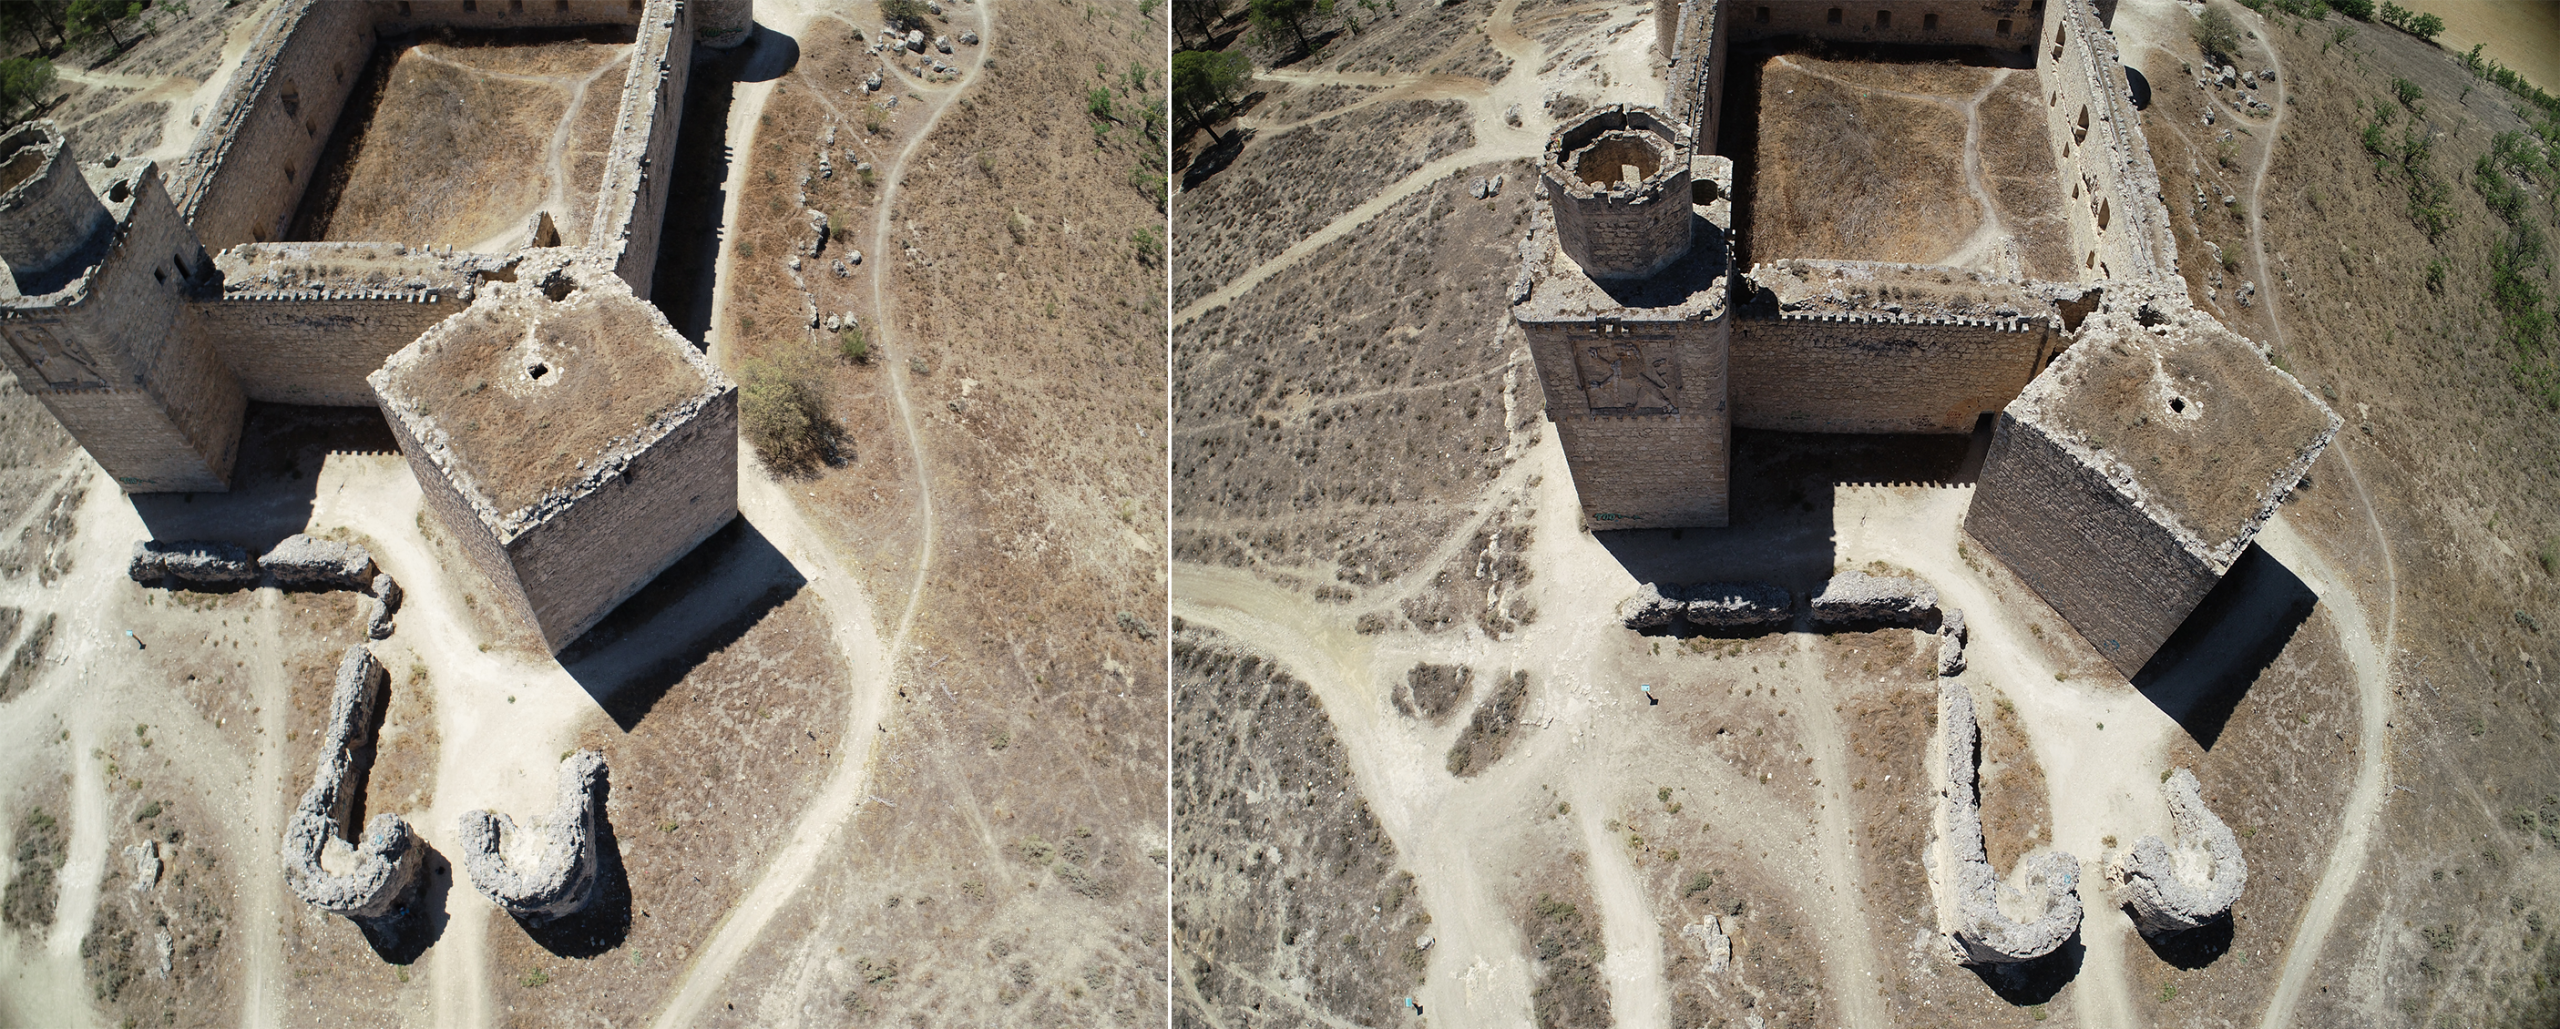
We then used the Mavic 2 Pro to run two oblique/circular missions around the building, each at different heights of 40 meters and 25 meters. These missions were much closer to the castle and were run to capture high-quality images of the sides of the building. We used Pix4Dcapture on an iPad mini 4 to run these missions since it automatically chooses the distance between the shots and the angle of the camera to create the optimal overlap in the images.
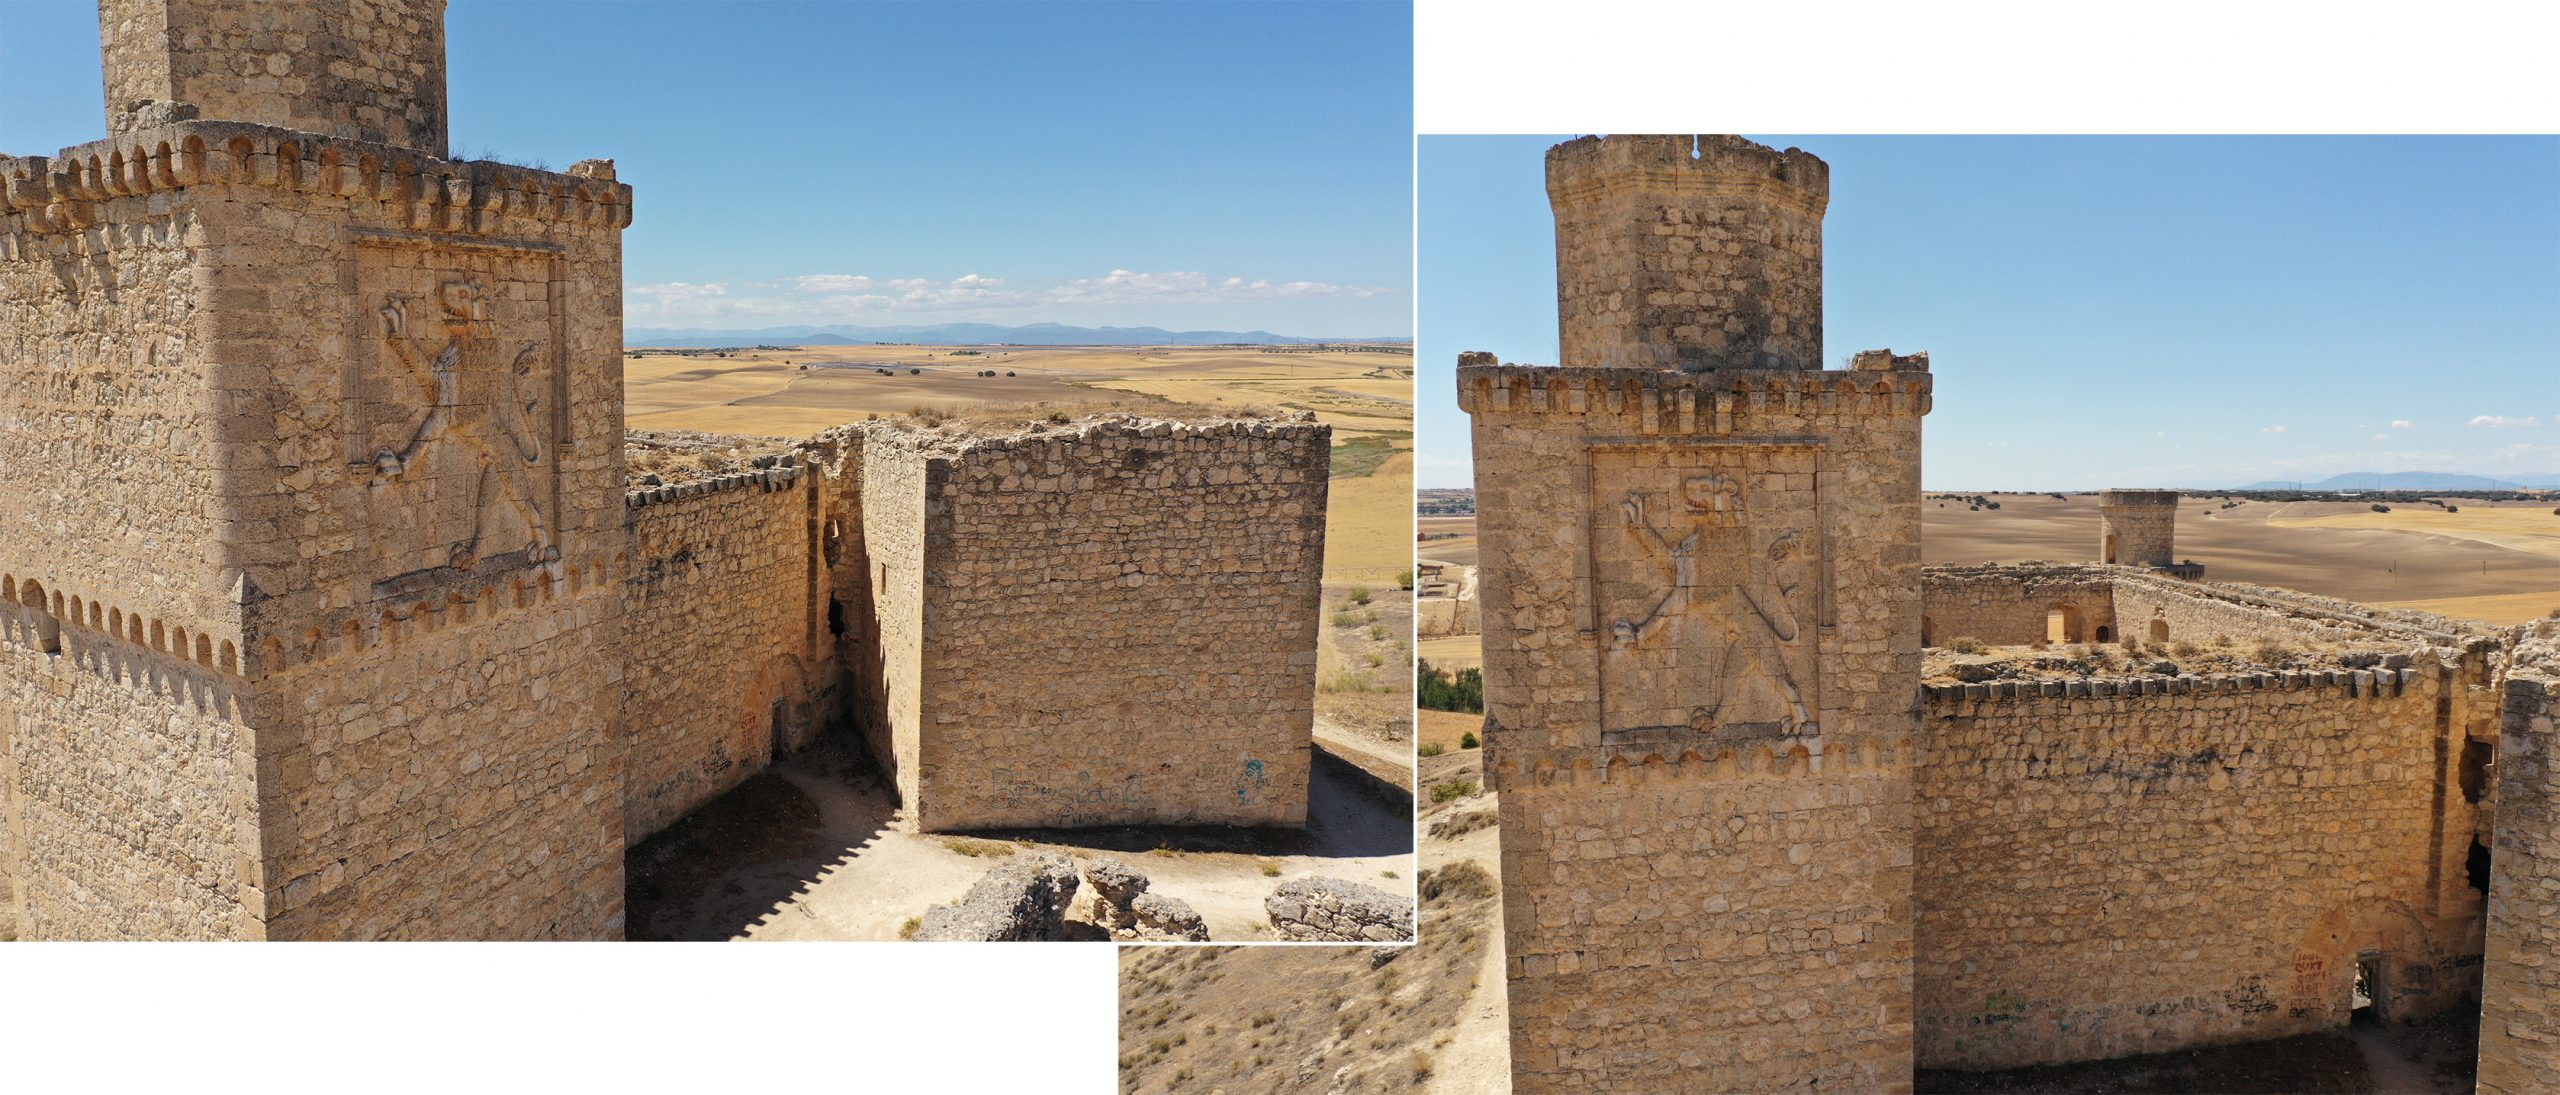
Finally, we used the Mavic 2 Pro to manually shoot around important areas of the building to capture as much detail as possible. The manual shots were done using a DJI Smart Controller, and the images were captured by moving the drone in small increments around the main areas of the building, such as the entrance of the castle, the façade, and the Barcience insignia.
Note: It is important to capture your images on a cloudy day when the light is diffuse, and there are soft shadows. The bright and shady areas change as the sun moves across the horizon during the process, which can generate alignment errors as well as errors in the textures. It is not always possible to get the exact day right, however, as you can see from the hard shadows in our photos.
STEP 2. Process the Images
Once we had collected all the photos from our missions, we loaded them into Pix4Dmodel and set it to generate our initial 3D model at regular detail. This approach is much faster than a highly detailed model and allowed us to review the scene before final processing at a higher resolution.
Since the Phantom RTK is recognized and supported by Pix4Dmodel, we did not need to create GCP’s to connect the different shots. We were able to load all the images from the various missions at the same time and process them simultaneously as a single project.
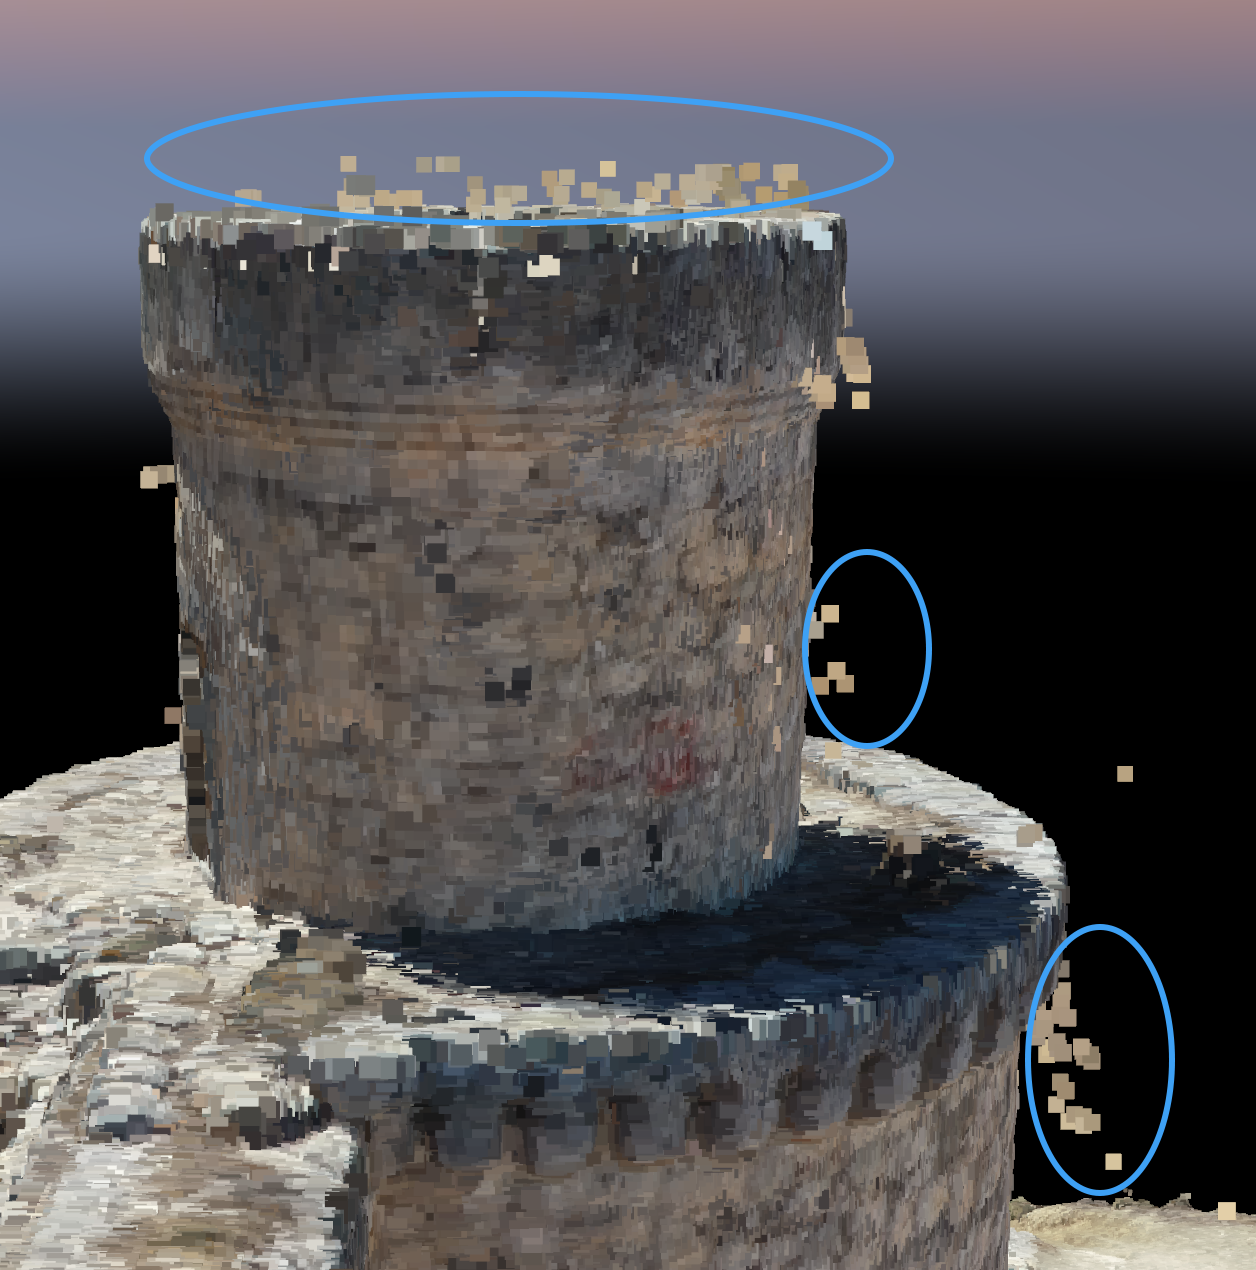
The model that was generated was very sharp, and the detail was very good, but there was some noise in the point cloud that needed to be removed. We used Pix4Dmodel’s point cloud editing tools to clean it up, eliminating stray pixels that came from the surrounding farmland and areas of sky that were captured in the manual mission.
Pix4Dmodel has powerful image masking tools that allow you to clean up the point cloud by masking out areas in the source images that you don’t want to be used. You only need to mask out a few images, and you end up with a clean, crisp point cloud.
STEP 3. Create the High-Resolution Model
Once we were satisfied with the quality of the point cloud, we then used Pix4Dmodel to create a very high-resolution model. We configured it to output a mesh of 5 million triangles, and a texture of 32768 x 32768 pixels (32k). We could have gone for a 64k texture, which would have given us even better image detail.
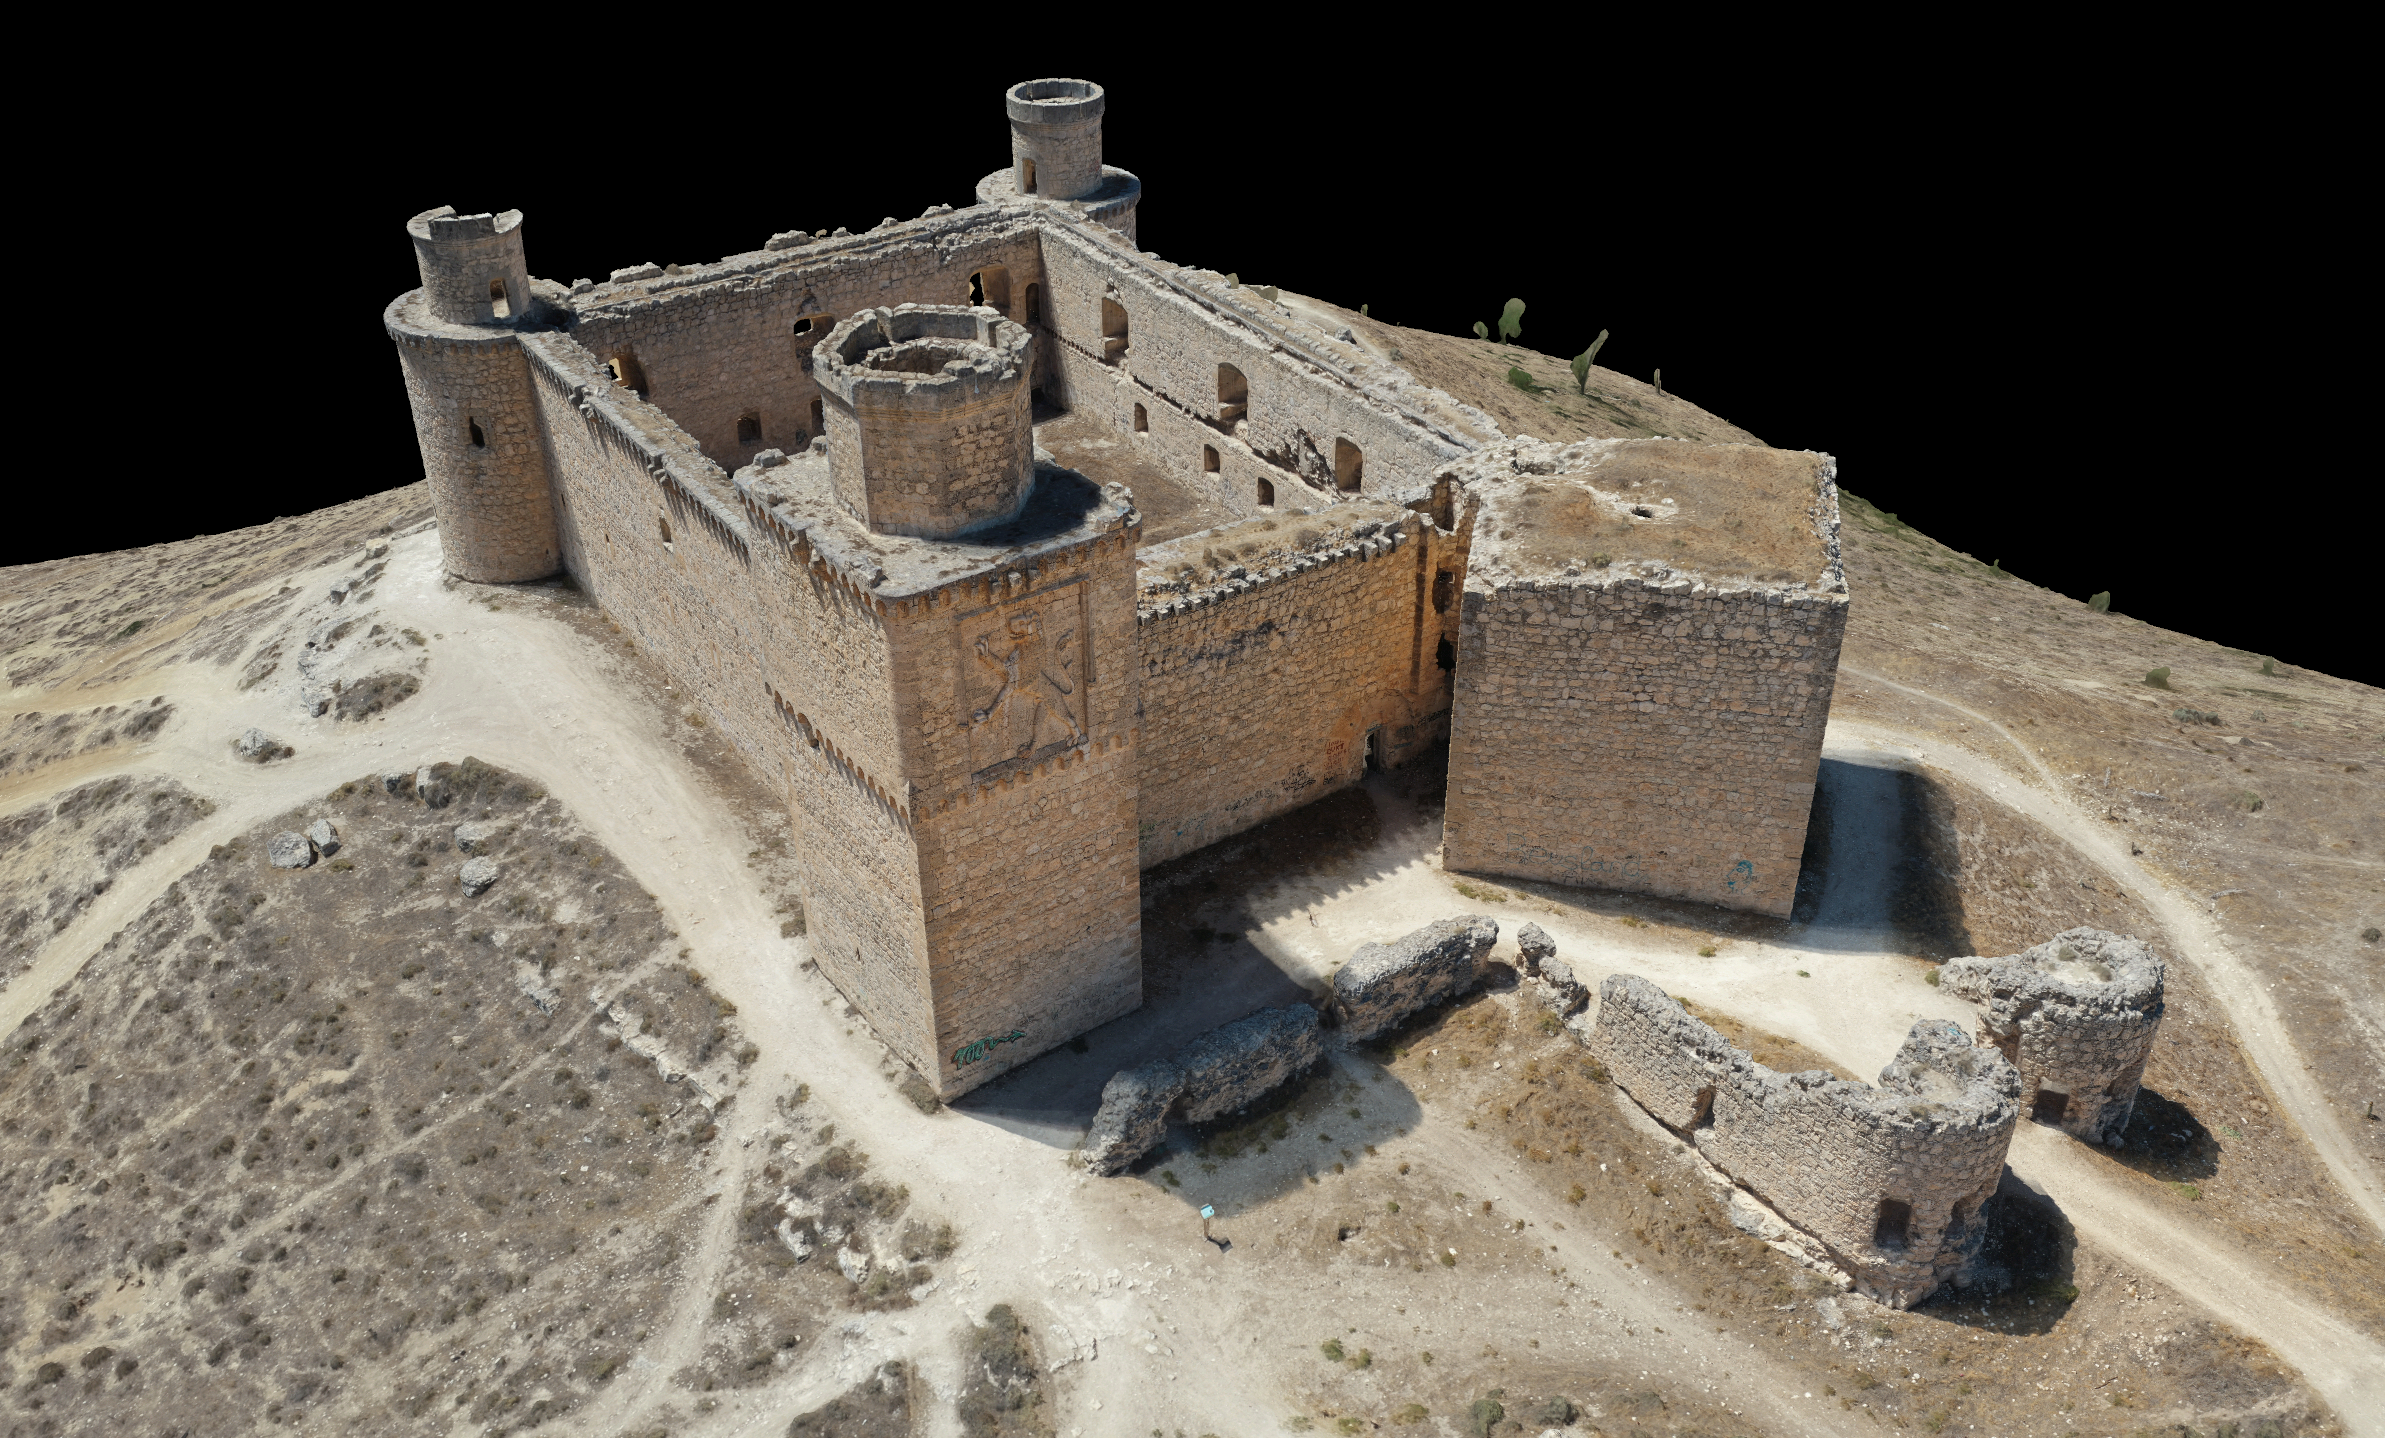
The resulting 3D model that was created looked impressive, but it was very data-heavy. It would be difficult for consumer graphics cards to view it or for us to play it back in real-time in Virtual Reality, which requires a high frame rate (60-90fps).
To optimize it, we needed to reduce the polygon count to something manageable, and break the texture into smaller, individual pieces that can load quickly and be optimized at the hardware level.
STEP 4. Optimization and Polygon Reduction
To optimize our model, we used ZBrush, a powerful 3D modeling and sculpting tool. First, we softened and corrected the noise and grain that was baked into the model as a part of the photogrammetry process. It is essential not to over-compensate here, as changing the geometry too much will result in poor baking of the textures later on.
We then used the Decimation Master tool to reduce the geometry, going from 5 million polygons to 500,000 polygons. There was no noticeable difference in the quality of the model after this process, which resulted in an amazing reduction of 90%.


Running this process in ZBrush also has the advantage of creating normal maps (or bump maps) that can be used later on to give the object more clarity when rendered in 3D.
STEP 5. Texture Re-Mapping
Before we could use our low polygon model, we had to optimize the texture, creating smaller pieces and additional maps for added realism. We did this using 3ds Max, which allowed us to break up the large texture map that was generated by Pix4Dmodel into multiple pieces.
We did this by separating the 3D model into four individual parts, including the front wall, back wall, and the left and right walls, each with pieces of the terrain, and then breaking the original texture and re-applying it onto each of the individual pieces.

The process of re-applying the textures was a lot harder than it sounds, and it required some manual positioning and tweaking to get it just right. It also allowed us to correct parts of the texture that were broken or off-set during the initial polygon reduction and to create LOD maps that could be used later on.

When we finished with this process, we ended up with four separate high-quality diffuse texture maps, as you can see in the image above.
STEP 6. Baking the Final Model
To create the final model, we then needed to project the new texture maps we created onto the optimized low-polygon version of the model. For this to work, they needed to be positioned in precisely the same positions that they were in on the original high-polygon model, a process known as “baking.”
We did this using xNormal, a free application that excels at this process. For our model, we used the new Diffuse map, Normal map, and Ambient Occlusion maps that were created in the steps above, and the result is the image you can see below.
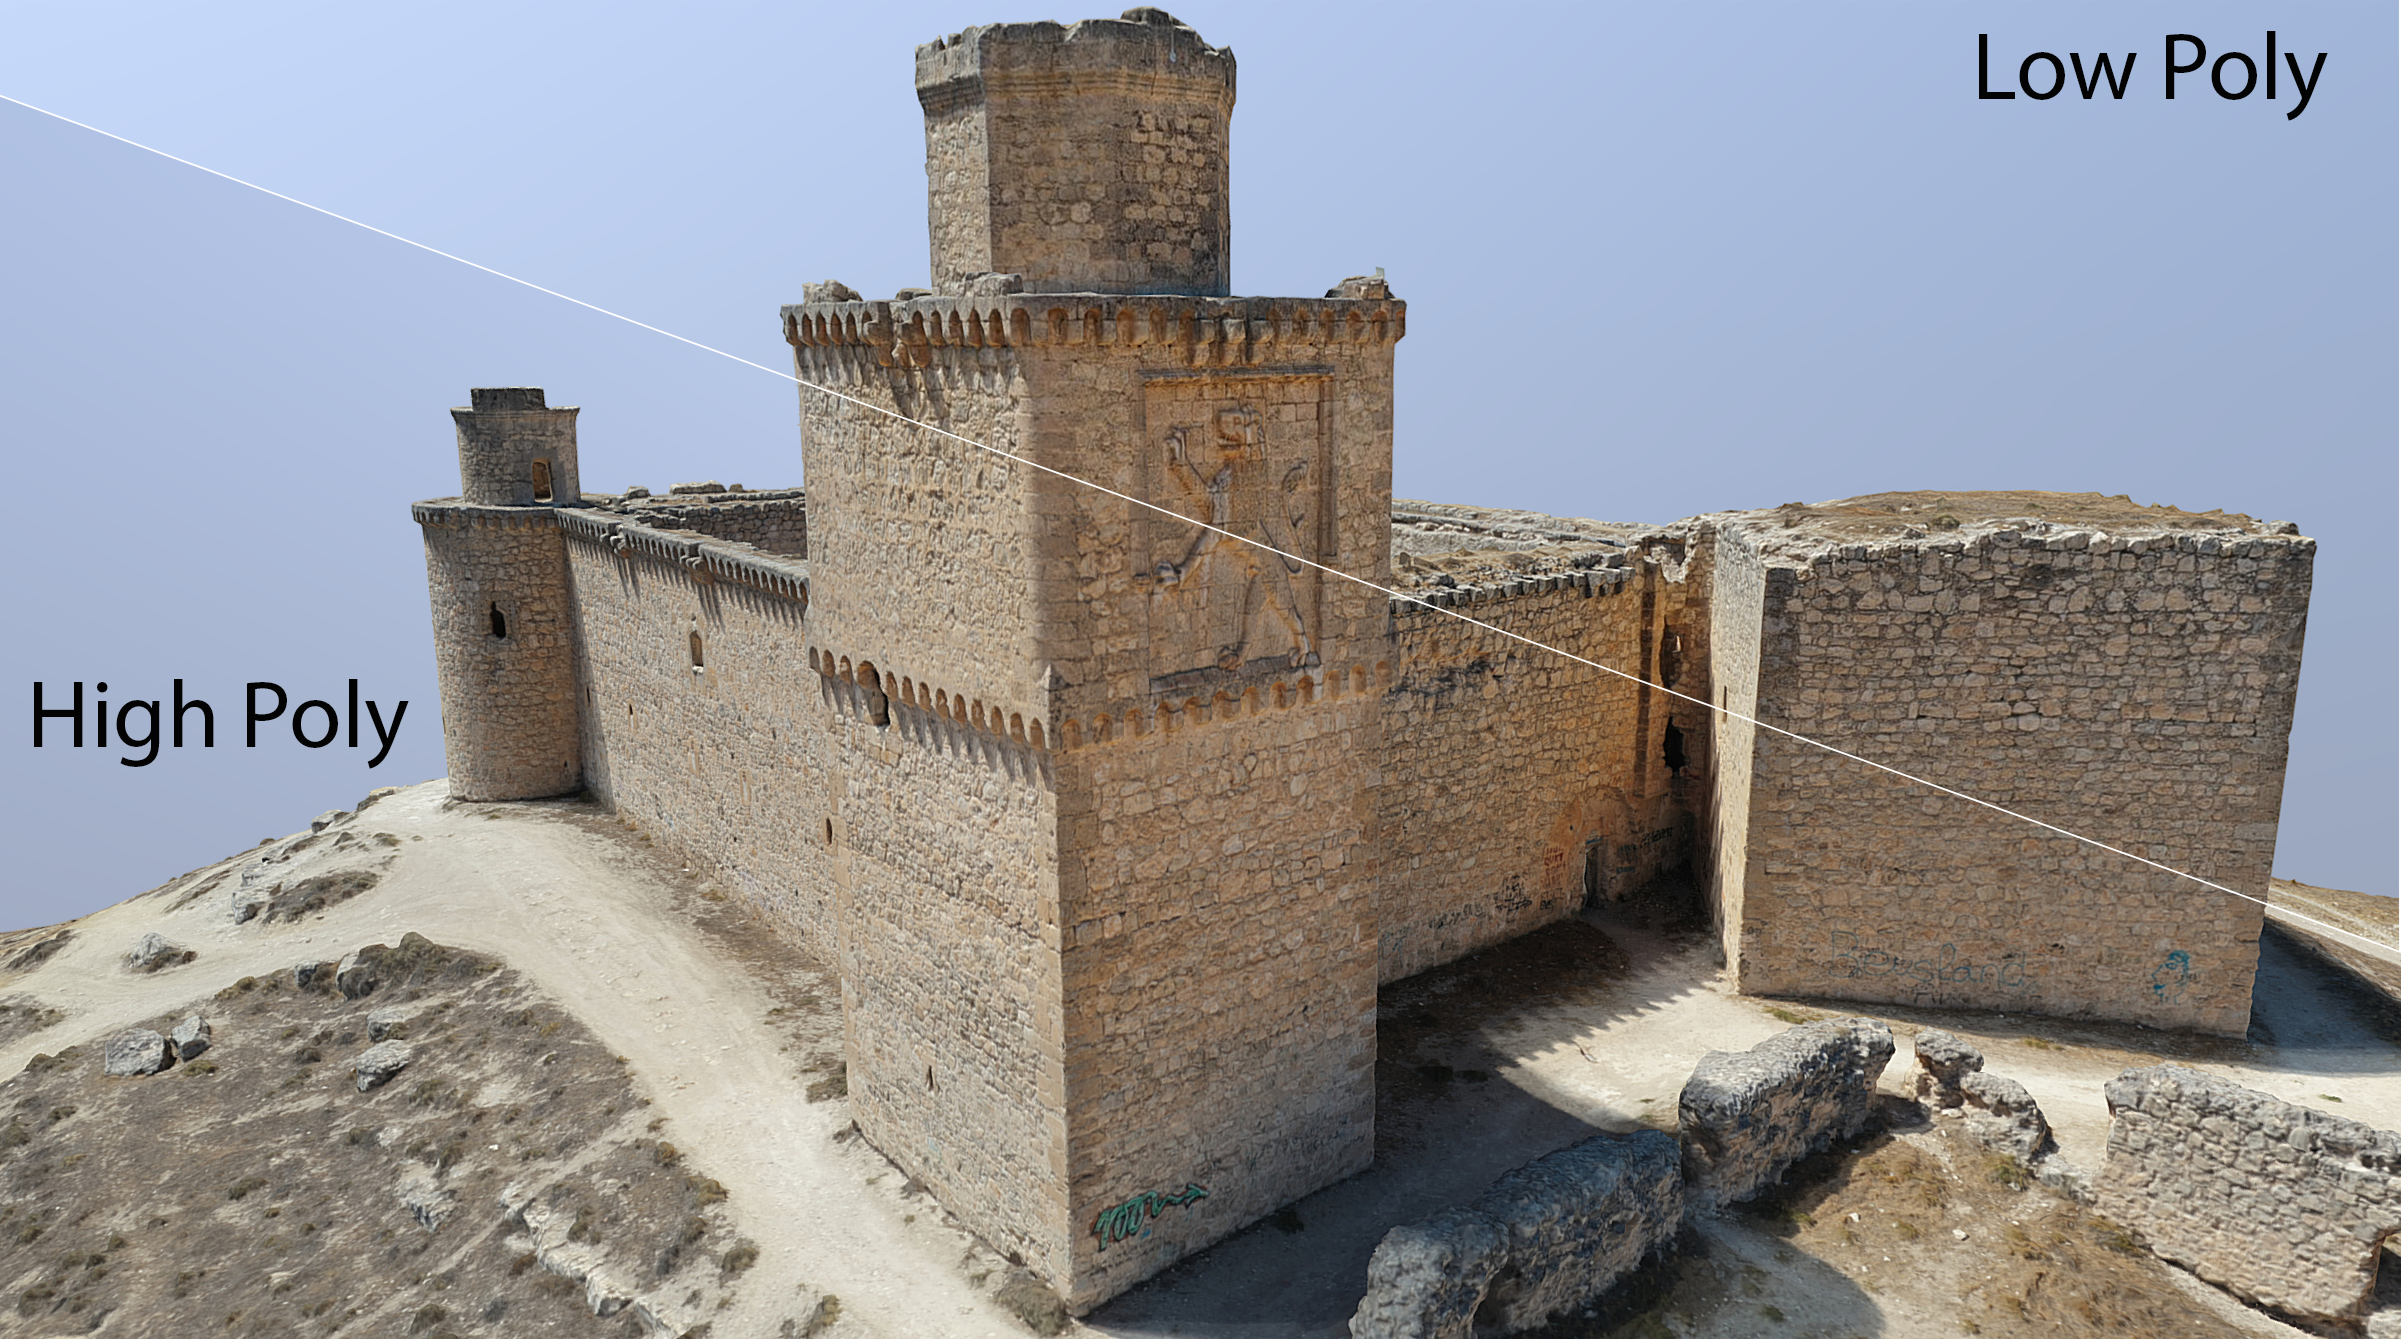
The final model was virtually identical to the original high-resolution one and looked terrific in VR. It was now highly optimized and had much better geometry, with a significant reduction in polygon count. It also had 8k textures and additional maps that would allow it to load faster and display better on consumer hardware.
STEP 7. Publishing our Model on Sketchfab
The last step was to publish the model online. Our goal was to make it available over the Internet using standard consumer hardware and a web-browser, as well as in VR using WebGL browser-supported VR headsets.
We used Sketchfab to host our model as we believe their 3D hosting service is one of the best. It has a powerful rendering engine with great quality, lots of options, as well as the ability to provide Level Of Detail functionality when loading models for a fast, smooth experience for the end user.
To publish the model, we bundled the 3D file along with the different texture maps into a single folder, zipped it and uploaded it to Sketchfab; in all, it came in at 192 MB. Once Sketchfab had processed the model, we used their 3D Settings to fine-tune how our model would be displayed.

First, under Scene settings, we used the PBR renderer, which gives us a much more photorealistic result. Since our model had lighting baked in, we then set the shader to Shadeless and disabled ground shadows in the Lighting module. For the finishing touch, we then enabled the Sharpness and Tone Mapping post-processing filters.
The model was then published and made available online to all viewers. The results far exceeded our initial expectations, with the final model being indistinguishable from the original castle after being further compressed to just 114MB.
Hardware and Software
- DJI Phantom 2 RTK, DJI Mavic 2 Pro
- DJI Smart Controller
- Intel i9 processor with 64GB RAM
- Nvidia 2070 graphics card
- Pix4D Model and Pix4D Capture
- 3ds Max
- ZBrush
- xNormal
About the author
Karsten Becker and Ismael Moreno, of Sputnik7
Sputnik7 is a next generation production company that focuses on the promotion of historical landmarks and local places of significant and cultural interest. Our focus is to provide engaging interactive information about locations around the world using 3D and VR technology. Find out more at www.sputnik7.com