About Me
Hey Sketchfab community! I’m Alexandra Neville, an Australian 3D generalist and student based in Sydney. I’m currently completing an Advanced Diploma of VFX and Animation at AIE and I also work as a 3D artist in the games industry. In a previous life I used to be a costume and prop designer working in theatre and film. However, I moved into 3D art as I loved the idea of its unlimited creative potential. Also, a decent PC set up takes up a lot less space than my workshop of sewing machines, materials and tools. Other than 3D Art, my other passions are plants (I have over 70 indoor plants), gaming, bush walking, and learning to surf.
https://www.instagram.com/p/BzdCN0bJhCm/
Inspiration
Inspiration for this work all started when the artist Behemot Crta Stvari posted a #drawmystyle challenge on Instagram. They posted their artwork of the cat and challenged other artists of Instagram to draw this artwork in their own style. The work that other artists were posting to the #behemotchallenge were so creative, unique, and inspiring. I had been a big fan of this artist for awhile, loving their dark, whimsical and gothic style. It was the perfect storm for a personal project. Also, who doesn’t love cats?
When I started the project I had the intention of creating the cat with a stylized PBR aesthetic. However, I had been doing this style pipeline for most of my recent work and I was eager to try something new.
I browsed through Sketchfab to find some more inspiration. I came across some of my favourite toon style artworks like Teivadict’s Meyoco – Breath of the Wild Cooking Pot and JuanchoAbad’s PostBirb Diorama, which really motivated me to take a different approach. I had always wanted to try to create a toon-style asset for Sketchfab and I felt this was my perfect opportunity. So I decided to make a change of plans in an attempt to learn something new.
Modeling
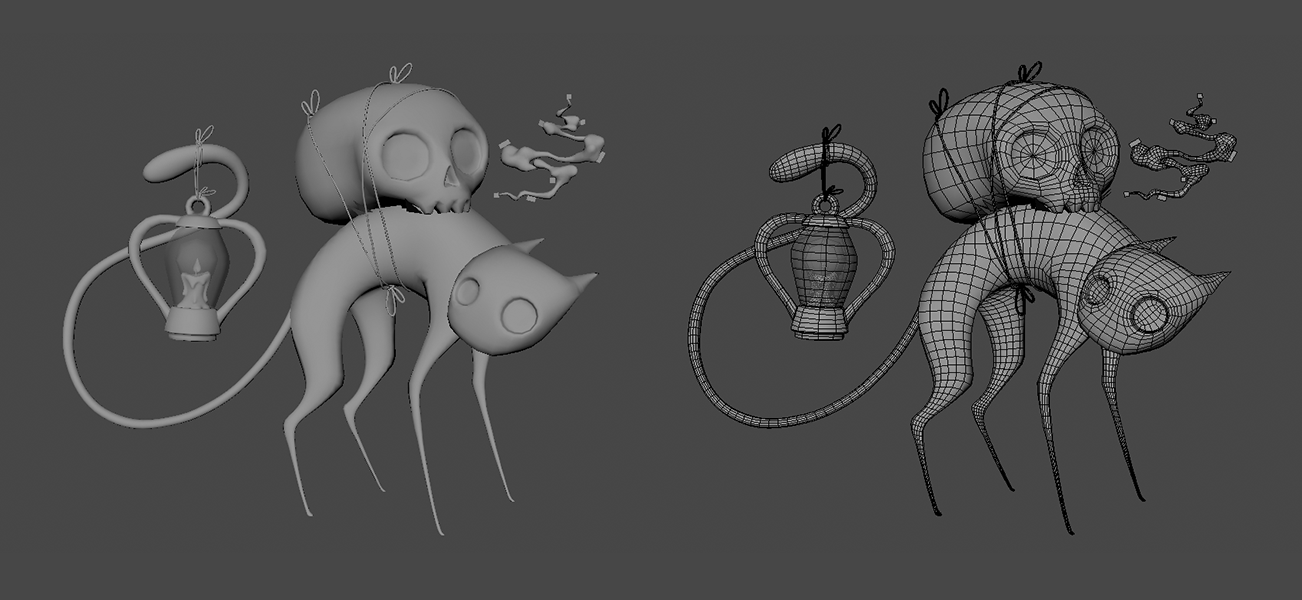
For a project with mostly organic style objects I find it quicker for me to get the initial shapes roughed out in ZBrush, then retopologize in Maya.
When creating something based off an image or concept, I’ll start by bringing the original artwork into ZBrush to help make sure the proportions are correct. I’ll create a blockout, which is a rough sculpt made from cubes and spheres where I just get the overall shape of the asset feeling right. Everything will be broken up into subtools so that it’s easy to adjust. I used mostly just the basic ZBrush brushes, including Move, Inflate, Pinch and Trim Dynamic, for most of the sculpt. The ropes, ties, and tail were made with the Curve Multi Brush.

Once I am happy with their overall shape, I’ll merge the subtools, dynamesh, and quickly smooth out the joint seams.
As I said, I originally was going the PBR route. Luckily I realised I was changing style directions not too far down the sculpting rabbit hole, so it ended up working great getting the initial shape bashed out in ZBrush.
Once I felt I had a good base, I exported into Maya and created a low poly. For some parts like the smoke, candle, and ropes/ties, I found the remesh tool did a fine job even with creating the low poly mesh, which saved me some time. However, for big items like the cat and skulls, the mesh gets a little too chaotic and I’d rather just retopo manually.
I created the low poly mesh for the cat and skull using the high polys as a live object and the quad draw tool. I created the mesh for the lantern and the flame. I then placed planes and spheres in sections where I wanted black lines: for example, around the flame, black spikey hair, and smoke.
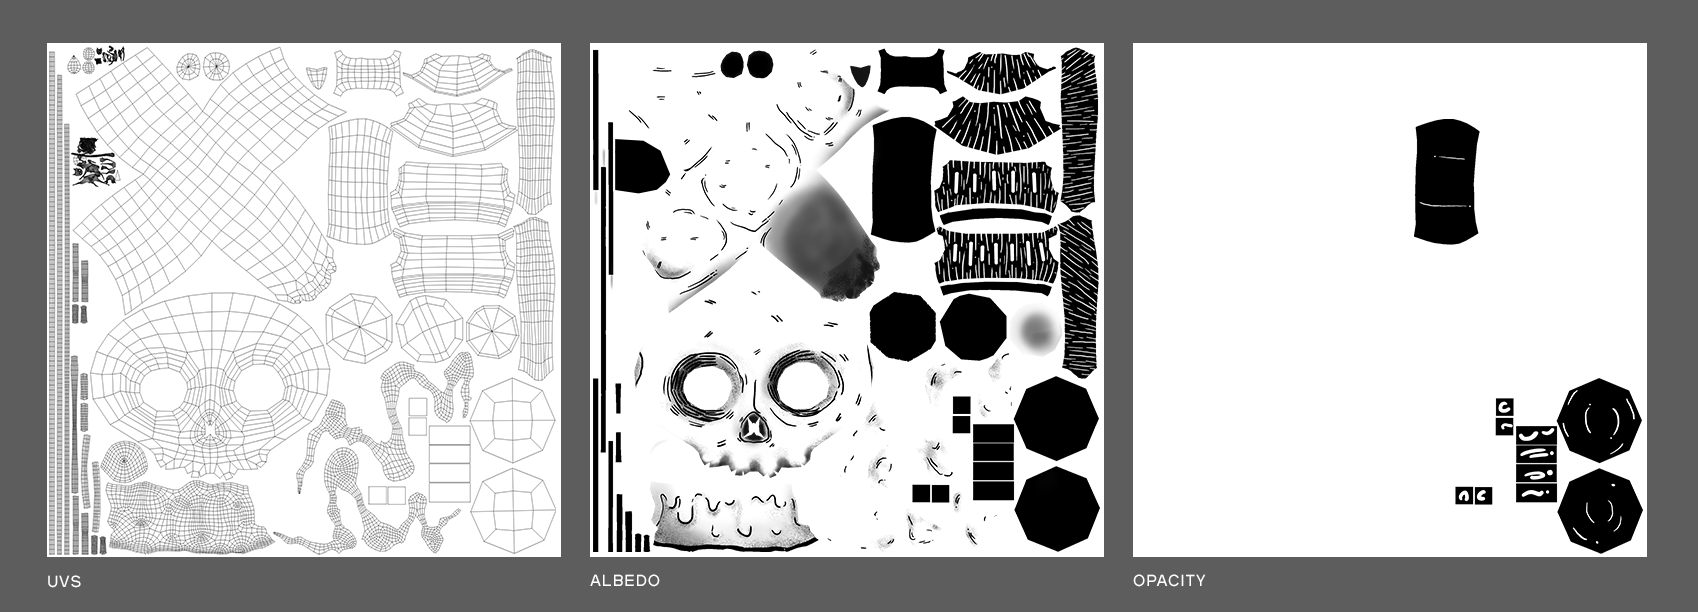
I unwrapped all of the assets. I did this before creating the toon outline, as it saves having to unwrap twice.
Outline
To create the outline for the toon style, I followed this tutorial most of the way. I did make a few adjustments along the way.
First off, I enabled backface culling (under lighting in the viewport).
To create the outline I needed to create an extruded version of each mesh I wanted an outline around. So, all of my mesh except the planes for lines.
I did this by selecting the mesh and using the extrude tool in Maya, then extracting/separating the meshes from each other, then reversing the extruded meshes’ normals.

However, there is an issue for more organic shaped meshes like the cat, candle, and skull, which have a “rouge vertice” issue. Usually you can just Mesh > Average Verts and this fixes the vertices. But for me this would be way too time consuming. So I took these meshes back into ZBrush and used the deformation “inflate” tool, then brought them back into Maya. Problem solved!
I took the extruded outline mesh’s UVs and shrunk them down. I made a small area in the UVs for white lines and black lines. I put all the corresponding UV’s into this area. I also “soften edges” of the mesh before exporting. So with my meshes separated and UVs laid out I was ready to move on to texturing.
Texturing
I textured this mesh in Substance Painter. I didn’t do anything particularly different in terms of setting up in Substance. However, I did import the mesh without the extruded outline mesh; they just get in the way, and I would paint their UVs in Photoshop later. I also didn’t need to bake. I only used the colour and opacity channels.
First off, I assigned base colours of black and white to the appropriate meshes. Then I added lines and details on top. I used the “Basic Hard” brush for lines and “Dots” brush for the shading.
I kept the original artwork for reference to make sure all the strokes were the right thickness and in the right position.
I’d occasionally change my view from “Lighting – Material” to “Single Channel – Base Colour” so I could see a shadeless view of the model. I found it easier to paint in this view.
For the lines on the planes around the smoke and lantern, I first set all the planes to black. Then I added a fill layer with just opacity with a white mask. Then I used a brush with black on the white mask to add the stroke revealing the black layer underneath.
Once I felt happy with my textures in Substance, I exported an albedo/base colour and an opacity texture map. I then brought my albedo map into Photoshop and made sure that the areas where my outline mesh UVs were were filled with the appropriate colour.
Animation
For the flame, I added three joints in a hierarchy running up the centre of the flame, bound the joints to the mesh and then rotated the joints from side to side on the X axis. For the movement of flame flickers, I added a joint to the centre, bound it to the mesh, then scaled it out and in for the animation.
I then selected the animated joints, then the mesh of the Behemot Cat, then exported them as an FBX (making sure I baked in the animations).
Sketchfab Setup

Sketchfab set up was pretty simple. The important thing for a toon style setup is to set your renderer to “PBR” and shading to “Shadeless”.
I added the albedo to albedo with “Specular” workflow. For the floating lines around the smoke and lantern, I added the opacity texture to opacity (blending) with “invert texture” on.
Lastly, I added a bit of post processing to the SSAO, Grain (animated ticked on), Vignette, Bloom, and Tone Mapping.
And Voila! One finished toon-style Behemot Cat.
About the author
Alexandra Neville
3D Artist, Student at AIE and plant enthusiast.