Intro
Hi everyone! My name is Natalie Crabtree and I am a 3D artist based in the Seattle area. I studied game design at the Academy of Art University and have been doing 3D work now for a few years, both freelance and working on an indie game with my husband. At first I focused on more realistic environments and textures (a good example is my sci-fi cargo bay), but recently I’ve been experimenting with low poly characters and scenes. I love creating low poly interiors because they remind me of miniature worlds, like train museums and dollhouses and the insides of snow globes.
Inspiration and Concept Art
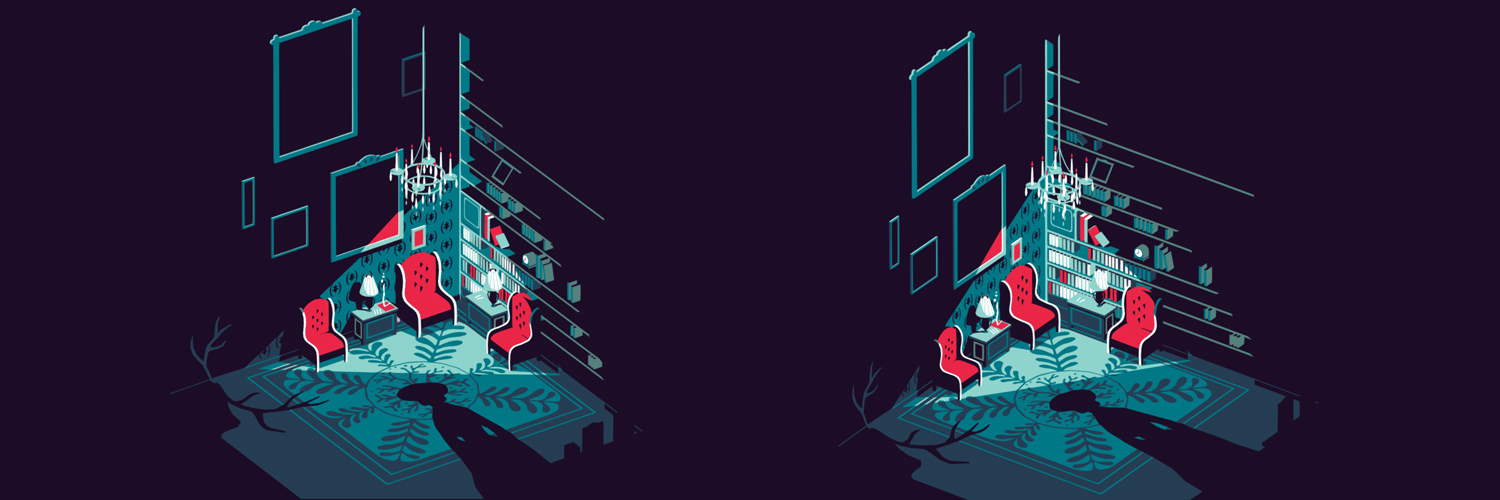
A few months ago I began collecting 2D images that I thought it would be unique and interesting to translate into 3D. This is how I stumbled onto the gorgeous art of Tom Haugomat. In a blog post entitled “Rejected Book Covers by Tom Haugomat,” I found the illustration that I used as my concept art. I had been looking to do an isometric room and I loved the murder-mystery appeal of the cover, so it was perfect.
 Concept and other works by Tom Haugomat
Setting up my scene
Since this piece was for fun, I decided to jump into Maya and see if I could figure out how to model it in the isometric style. After a brief online search, I discovered that I could use a camera angle of x = -30°, y = -45°, z = 0° to achieve an isometric look in Maya. I created a new orthographic camera and set the rotation.
I imported the reference image and turned it towards my camera. Then I created a 5×5 meter plane for the floor with one corner at the origin. From here, I scaled the reference image so that the edges of its floor roughly matched the edges of my floor plane. It wasn’t an exact fit, but it was pretty close. Because I tend to do all of my modeling in perspective view with a reference open on my second monitor, the isometric camera becomes a quick way to check the position and scale of my work.
Future isometric scene setup
After Sketchfab asked me to write about my work, I became curious about whether it was possible to get a more perfect alignment between a 3D model and an isometric reference image.
With the help of some awesome diagrams on Wikipedia, I learned that the angles that I had used for my camera were actually called “dimetric perspective.” I also discovered that if I wanted a true isometric POV in Maya, I should use the rotation x = -35.264°, y = -45°, and z = 0° for my camera (the settings are different in Blender, see here).
 Trying out the new settings… camera and reference have the rotation x = -35.264°, y = -45°, z = 0°. The floor fits more closely with the image now.
Another thing that I might do differently is to change the rotation of my reference so that it is exactly the same as the camera. In my case, I rotated the reference sideways to face the camera, but I found that if I also rotated it upwards to “look at” the camera, then the proportions of the reference were no longer foreshortened in the camera view. This would have been helpful to realize when I was creating the model, but I’m glad to know now for future pieces! I may go back and tweak my model later on, but for now I am happy with how it turned out.
Building the scene
On to building the scene! I began by modeling the furniture; first the chairs and then the tables, lamps, cigarettes and smoke. Next up were the bookcase, paintings and chandelier. Once I lined everything up with the reference and tweaked the verts I was satisfied. Though not entirely realistic, the books had to be spaced out on the shelf so that they would match the concept.
Texturing brainstorm
At this point I started thinking about how to create the pattern on the floor. This led me to the essential question: how was I going to texture the scene?
Up to this point, I wasn’t sure. I knew I wanted it to be an unlit scene with areas of flat color just like the illustration. I toyed with the idea of UV mapping and hand painting the textures in Photoshop, but it was going to be hard to get the angles right.
My next idea was to cut the polys on the model to show the location of highlights and shadows as a guide for painting the texture maps. This led me to assigning flat colors to those areas. From here I wondered if I could use my cutting tool to essentially “paint” the designs onto the floor and other parts of the piece.
Creating the floor
What I had planned out could never be used in a game, but there was no poly limit on this model so I was excited to experiment. To try out my idea, I used Photoshop to create a square floor reference. With the skew tool (and some creative manipulation), I was able to get an approximation of what the floor might look like from an overhead view.
I brought the image into Maya and modeled a quarter section of the floor. I duplicated it three more times and merged the verts. Then I made the cuts for the shadows of the woman and the deer head. It was an exciting moment when I used the eyedropper tool to start assigning colors to the model. The floor was a chaotic mess geometry-wise, but I was pleased with the end result.
I then proceeded to use the cutting technique to create polys for each colored area and assigned the corresponding shaders to the rest of the model.
Presenting in Sketchfab
When I was done, I animated the model to move slightly from side to side and exported it as an FBX file. For the final step, I uploaded it into Sketchfab. I selected shadeless textures and set the camera angle to 1° to get an isometric perspective. At the end I assigned my background color to match the darkest shadow in my scene. When it was done, I was thrilled to see that it looked just like a moving illustration!
One of the cool things about using Sketchfab is the Sketchfab GIF Exporter. I love using it to generate GIFs of my work to post on Twitter. Another way I’ve been using it recently is to render out beauty shots. Since the exporter will render your GIF at a resolution of up to 4096×4096, it is possible to render a GIF at a high resolution and then open the file in Photoshop. All of the stills in the GIF will open, but then you can choose which one to include in your portfolio.
I’ve been using Sketchfab for a little over a year now and it is always a rewarding experience. I love the hands-on viewing experience, as well as using it to take beauty shots for my portfolio. I’ve discovered so many talented and innovative artists in this community and this motivates me to push my work to new levels. Without Sketchfab, I might have never been inspired to create this kind of piece or to experiment with shadeless textures. A big thank you to Sketchfab for giving me the opportunity to share my process!


