About
My name is Fabian Orrego, I am a 3D artist and developer for video games at Xunulu Studios (my indie studio located in Colombia).
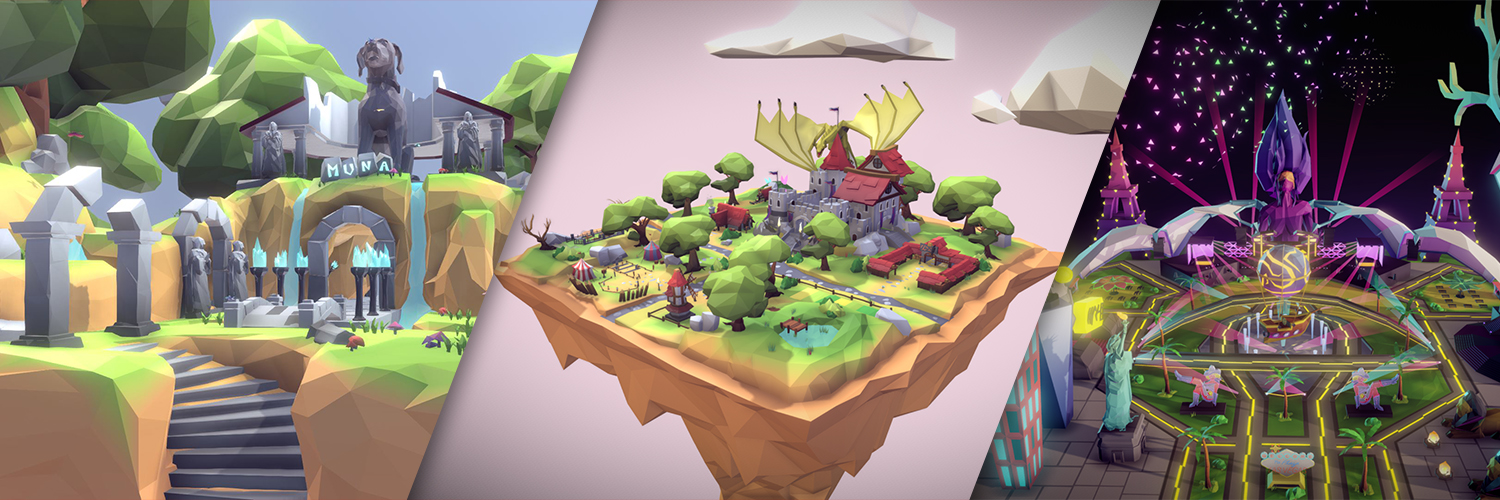
I am currently working freelance creating art for video games. I do concept, modeling, texturing, rigging and animation of characters, and environments in a low poly faceted style.
In this article I want to show you my workflow in the creation of low poly plazas for Decentraland, a virtual reality platform powered by the Ethereum blockchain. In this platform the users can create, experience, and monetize their content and applications. This project is still under development.
The tools I use in my workflow are Photoshop for the concept, Blender for 3D and animation and Sketchfab for the final presentation. I also use ArtStation and Pinterest to get references for the concept.
Blender is a free and open source 3D creation suite. It is a powerful tool that allows me to do sculpting, modeling, retopo, texturing, rigging and animation. I use Blender throughout my workflow except for the concept and the final presentation. It is very helpful to have an excellent tool for free.
Concept
Having an established concept is a great help when creating a scenario, especially if you are doing it for a client. This is a way to have a clear objective to follow and to be able to quickly build together with the client a clear idea of the scenario that is going to be created. I am not saying that it is necessary, sometimes I do the concept directly in 3D, but I feel that doing this step can make the process more agile and avoid big changes in 3D. I think it’s easier to make changes to the 2D sketch than to make them in 3D.
The first step is to obtain a lot of information about the project and about what the customer wants. I also like the client to send me references in images of other games or concepts to have a clearer vision of what he is looking for. If he is not so clear about what he is looking for, I look for the references on Pinterest, Artstation and Sketchfab based on the information given by him. Then I share the images and/or links with the client and together we choose the references that are closest to what he is looking for.
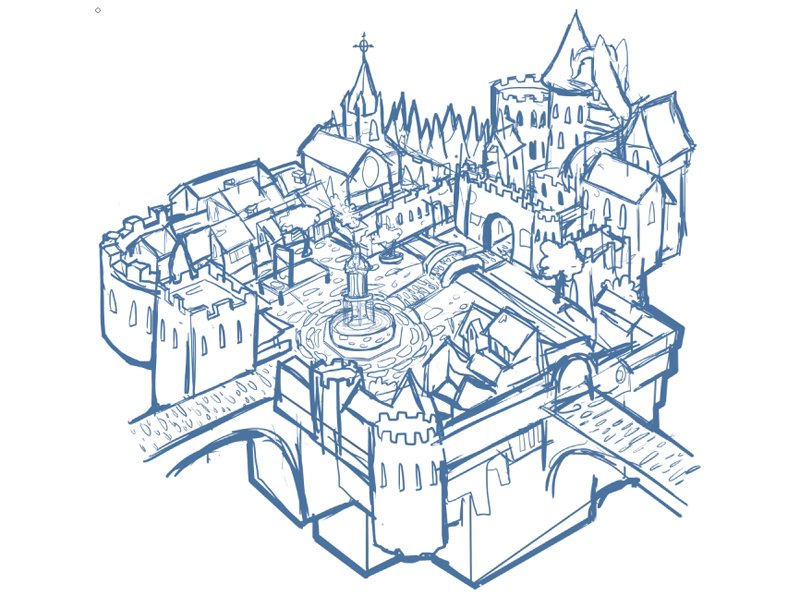
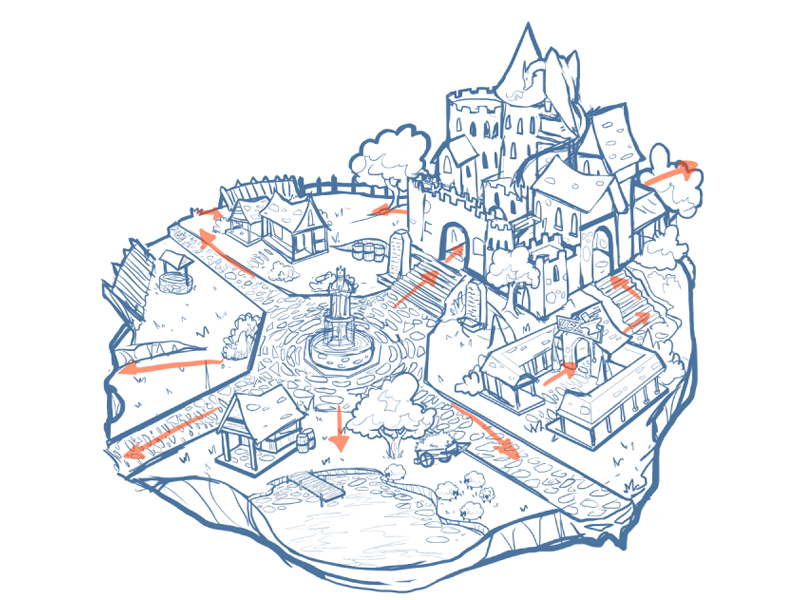
For the next step, I make the first sketch of the scene in Photoshop and I show it to the client to approve it or tell me that he would like changes made. Usually the customer requests many changes and it is important to make the big changes in the initial stage of the concept – it is easier than making a change at the end.
Here are some images of the sketches with their changes:
- First sketch
- Second sketch
- Final sketch
After the final sketch, and be sure that the client is satisfied with the result, I continue with the color to present the final concept.
After finishing the concept I start with 3D modeling.
Blocking
In this step I try to get a quick sketch of the scene with basic forms, especially cubes.This helps me a lot to define the scale of the elements that make up the project and identify if the concept is well adjusted to the area of the scenario, or if there are things that should be modified. For example, in this project I could see that the concept had problems with the scales, so I had to add some extra places: the cemetery and the mine.
The blocking also helps me a lot with the modeling of the terrain. From the basic forms I start modeling or sculpting the different parts of the terrain.
Finally, I use many of the blocking pieces to use as colliders at the end of the project.
Modeling and Texturing
At this stage I tried to start with the biggest thing, so the first place I did was the castle and then I continued with the different places like the stable, the farm, and the blacksmith. Lastly I made the terrain and the vegetation. I tried to follow an order and finish the different areas, but as it is an extensive work, sometimes I got bored with some place and simply changed to modeling another part of the stage to clear my mind a bit.
To control the scale I used one of my characters, with a height of 1.8 meters, as a reference.
It is important to organize the project by layers and name each model correctly because in the end we will have many elements on the scene and the work can be difficult if the objects of the project are not named correctly.
When I model any element I try to use as few triangles as possible without affecting the style. I always model keeping in mind the triangles limit of the project, so I have to be aware of the polygon count.
To make the terrain I used the blocks that I had made initially and with the sculpture tool I gave them the shape that I needed. I divided the terrain into 6 parts: the castle, the stable, the blacksmith and the mine, the farm, the training ground and cemetery, and the central road.
For texturing I used the color atlas with gradient colors that I made in Photoshop. Texturing with color atlas is an optimal technique because it allows texturing an entire scenario with a single texture (well, in this case I used two, one for the diffuse and one for the emission). In addition, texturing in this way helps accelerate the process because the UV mapping is easier. Usually I use “Project from view” that makes a UV mapping of the selected object from the camera view; I usually use the front view to apply the gradient from the bottom to the top of the model.
Rigging and Animation
With the scenario ready I begin to make the rig of all the models that are going to be animated in the scene. In Decentraland there is no bone limit, but it is very important to optimize a lot at this stage and try to use as few bones as possible; so before starting, I dedicate a little time to plan what I’m going to animate, what objects can be grouped to use only a rig and how I can create good animations with the least amount of bones.
After having clear objectives I start rigging the models. It is important to name correctly each Armature in Blender, in order to identify this easily in the workspace.
After doing the rig I continue with the animations. In these projects for Decentraland I try to animate animals, trees, water, flags and other objects that can move with the wind. For that I imagine the direction of the wind and I animate some objects respecting that direction, so the stage looks a little more alive.
Before starting to animate I also spend some time planning what I am going to do. First, having defined which models are going to be animated I set the time of the global loop. I do this because all the animations are going to be a loop and these animations must have a time equal to or a smaller multiple of the time of the global loop. For example, I decide that the global loop will have a duration of 300 frames, that is 10 seconds if I work at 30 fps, the animations of all the models must have a duration equal to this or less. The important thing is that the number of frames in the animations are multiples of 300, like, 150, 75, 50, etc. This is in order that all the animations can be repeated without problem during the global cycle.
Organization and Colliders
This is the final part. Here I try to organize the scene by zones in different layers of Blender. I also check the names of the objects and try to get everyone correctly named.
In this image each zone is represented by a color, which means that each of these is located in a different layer within Blender. Also on the right side you can see how I try to name each element of the scene in order to identify and locate them easily.
Finally, I use the blocking I did at the beginning of the project to work the colliders. These are basically used so that the user does not pass through the elements of the scene such as the floor, walls and objects. To make the colliders I simply add a cube that covers the object.
Each collider must be properly named to work in the Decentraland engine. The way to name it according to the documentation found on the official page is with the suffix “_collider”.
Sketchfab Publication
I like Sketchfab a lot because it has an excellent real-time rendering engine on the web. This allows me to show my work to my clients. Using this is very easy and fast. The Sketchfab editor has very good tools that make my 3D models look great
I use the Sketchfab addon that allows me to export directly from Blender. First I export it as private to verify that everything is good and show it to the client for approval (to export it as private you must have a PRO subscription). After verifying that all is well and the client has approved it, I proceed to export it again from Blender to edit it in Sketchfab.
In the 3D editor of Sketchfab, the first thing I do is change the background in the Scene tab. For scenarios I use a background color. Then I go to the Materials tab and configure the materials with their respective textures. Here I usually use the PBR Specular workflow and add the corresponding textures to the Opacity and Emission channels.
After configuring the material I go to the Lights tab and I choose an environment suitable for my scene and some preset lights. I slightly change the direction, brightness and intensity of the environment and the lights.
Then I go to the Post Processing Filters tab where I add SSAO, Depth of Field, Vignette, Bloom, Tone Mapping and Color Balance.
Finally I add several annotations to allow users to easily explore different areas of the scenario.
This is my workflow to create low poly scenarios for VR with Blender, specifically for Decentraland. I hope you liked it and if you have any questions you can contact me through my social networks:
Sketchfab Store / ArtStation / Facebook / Twitter / Instagram
