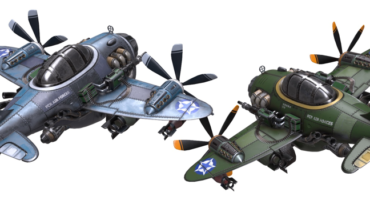
In Art Spotlight, we invite Sketchfab artists to talk about one of their designs.
Hello, my name is Robbie and I am a 3D artist working at Trendy Entertainment in Gainesville, FL. I’m working on a game called Dungeon Defenders II, a co-op tower defense RPG hybrid and I’d like to share a little about one of the models I made, the Goblin Airship.
The concept
Enemies generally trek through forests, caves, sewers even, towards you and the things you need to defend, they’ll even employ the use of giant metal angler fish if they have to. Here is the awesome concept art, by Sebastian Cevallos:

Check out Sebastian’s art at sebascevallos.tumblr.com
The Model

The airship acts directly as an enemy spawner. Orcs have to be able to fit through the mouth into the playable area (and orcs are pretty big enemies), so the model has to be pretty big in-game, and the tri count and texture resolution on this ship is pretty high.
UV Layout

I use Headus UV Layout for laying out UVs. This program is awesome and I highly recommend checking it out if you haven’t already. I mapped the shells across a 1×2 tile space for the two diffuse maps that make up the model.
Preparing for Export to 3D Coat
Before I start painting, I duplicate my model and harden all the edges, and then export that out of Maya. This ensures that during the painting process in 3D Coat, faces won’t have their normals pointing in a direction away from the camera. If I actually use the correct smoothing groups, there will be instances when I try to paint on a surface with its normals averaged in a direction too far away from the camera view, and that will result in either 1) the brush strokes not making it onto the model and/or 2) the paint bleeding onto faces I can’t see.

Also before painting, I break the model into different pieces, focusing mainly on separating elements (like wood and metal for example), and sometimes even extracting faces into different meshes (only on the duplicated model, the original never even makes it to 3D Coat).

It’s a little extra step but sometimes it ends up saving a little time because I can use the paint bucket tool in 3D Coat to do flats. The program has a polygon fill brush also, and that works really well. It’s a good amount faster than doing flats in Photoshop and it’s just a really convenient option in general, especially when coupling it with the masking function.
I also try to combine parts of the mesh that are similar (like bolts and small stuff). Separating it into different meshes before export allows me to turn on/off or mask parts of the model while I paint and combining small stuff together keeps the Objects list in 3D Coat short and easy to manage.
Painting the Model
Once in 3D Coat, I flat the model making sure that each type of material is on its own layer (wood, metal, purple, cloth, etc.) and lock the transparency on each layer. This keeps everything clean and reduces the frequency that I need to mask things off.

I bake an occlusion map, merge a screen layer into it (light purple works pretty well), set it to multiply, and then merge that into all my layers.
I’ll also project a gradient through the model and set it to something like overlay or multiply, which can easily be done by turning on the Orthographic Projection and Project Through checkboxes, snapping the model to the appropriate axis, and sending it to Photoshop. It helps me to control the values and keep the attention on the front of the ship. Typically I’ll do this at the end of the painting process as well but it’s pretty handy right at the onset.

At this point, I just paint directly onto the layers that are already set up. For this reason, I don’t have anything from the original painting process. Therefore, for the sake of this post I’ve recreated the set-up until this point to show a general idea of what the model looks like when the painting begins.
The Final Result

Sorry there’s no more in between steps, I know it’s sort of a leap to the end result. It’s just a lot of painting really. To help push the contrast a little bit, around the 90% mark I did another round of projecting gradients in Photoshop and I merged a second occlusion map in, this time using the diffuse colors as my screen layer instead of purple.
Goblin Airship
by robbiereed
on Sketchfab
And that’s about it! If you are interested in seeing more stuff for Dungeon Defenders II, check out the game at www.dungeondefenders.com/2/. Thanks for reading!
Thanks Robbie!
Don’t forget to check out Robbie’s portfolio here on Sketchfab.


