About
My name is Rakan Khamash, I am a 3D Artist who just moved to the US in 2018.
I have worked in many fields such as cartoon movies, industrial, and 3D printing. I am currently looking for a full time job, preferably at a gaming company, where I hope to work and develop my skills as a 3D artist and be a part of a great team that makes cool stuff!
Inspiration
Karrot is a cool Character that I immediately fell in love with after seeing the amazing 2D concept by Tiffany Chiu. It had a cool shape, nice contrast and amazing character.
Workflow
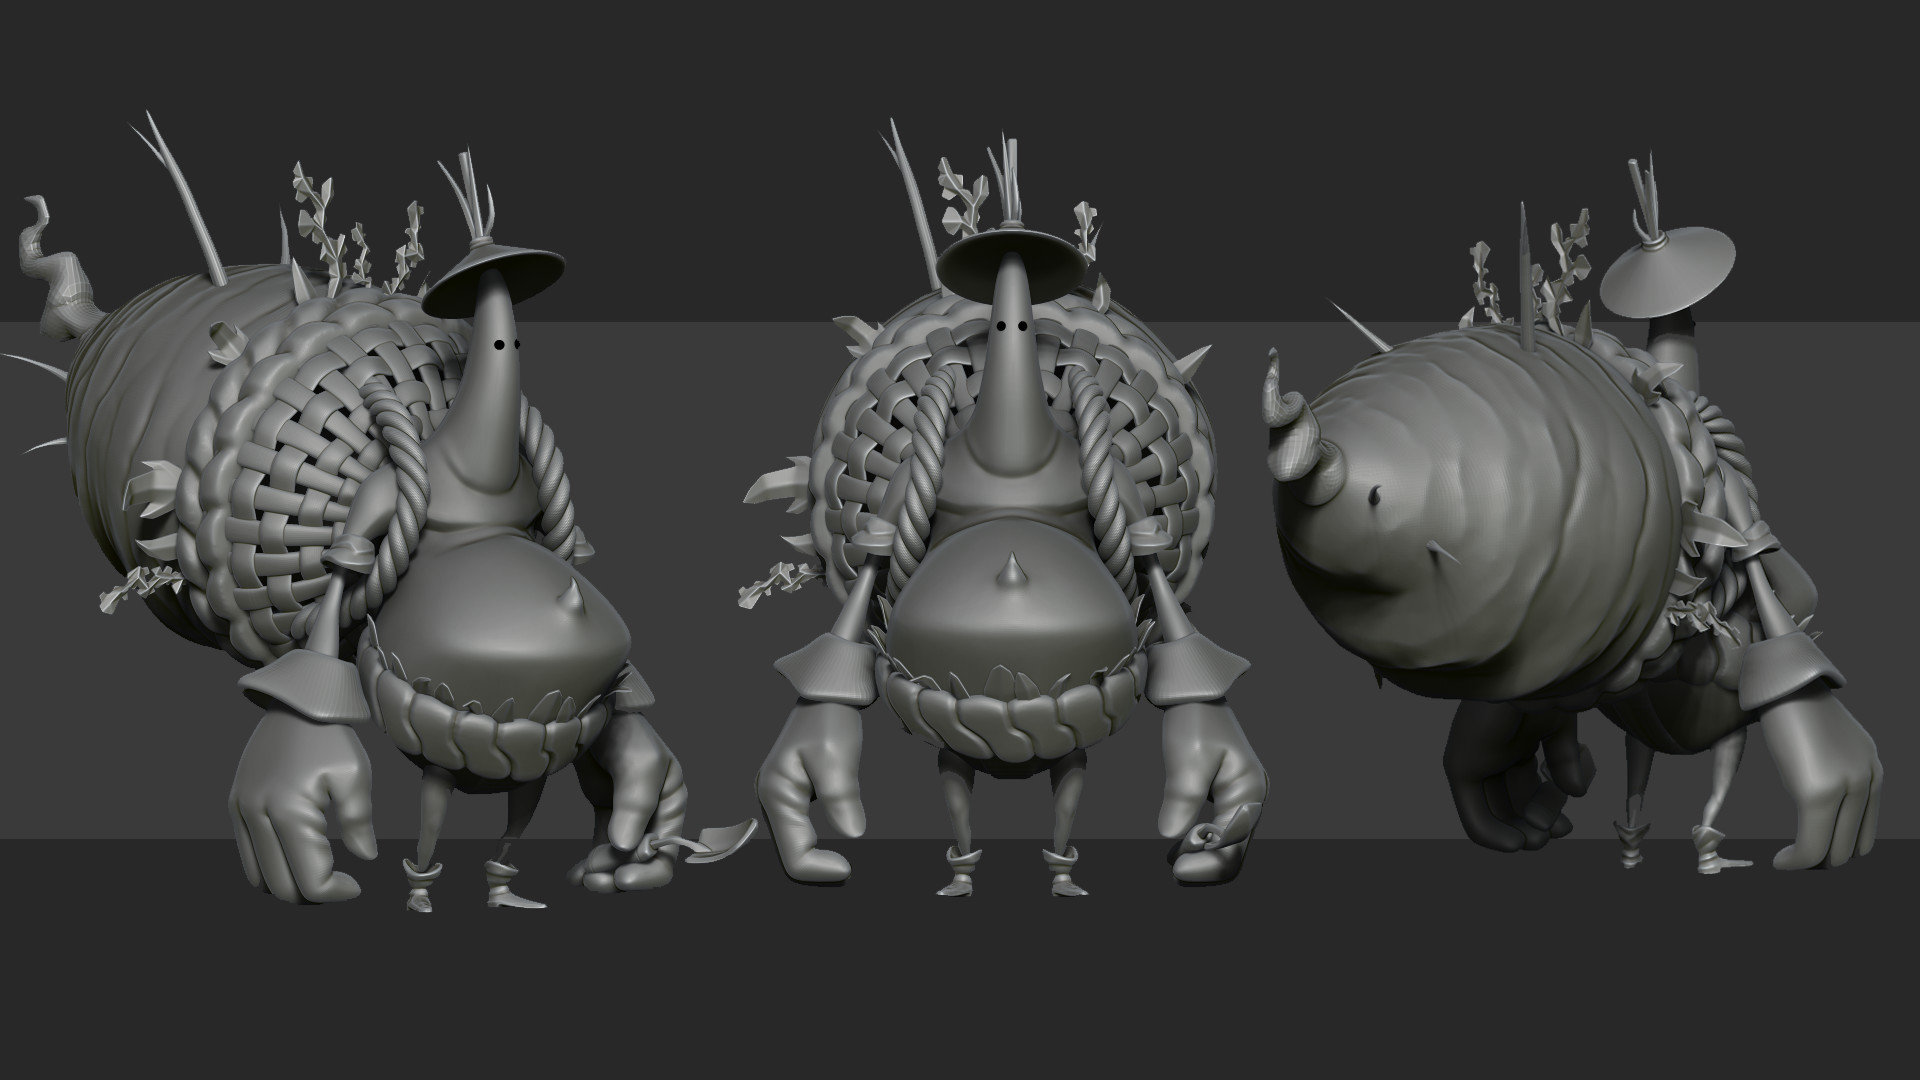
The basket weave section was challenging.
Sculpting was a bit tricky so I ended up modeling in ZBrush and Maya. I started from a sphere and sculpted in low res to get the shape first, then I added more subdivisions for detailing. The basket and flowers were created in Maya using poly modeling. I added small random edits to make it look more natural. Slight imperfections can give your character a lot of character
For the gloves part, I started with a very low res mesh in ZBrush, blocked out the shape and made sure the volume matched the reference. Then I sculpted the high res details like wrinkles and folds around the fingers using brushes like “Standard / Dem stand / inflate”. To add a little bit of a stylised look I used the Hpolish brush to flatten some areas and get nice edges, for example around the knuckles.
Same thing goes for the boots…
After finishing everything and having the low poly ready, I needed it to look more alive, so I gave him a little pose and broke the symmetry in some areas like the hands. I also added a slight rotation to the head and neck. A nice way to do that is to import your model into ZBrush and use the Transpose master to pose using masks in a simple and quick way.
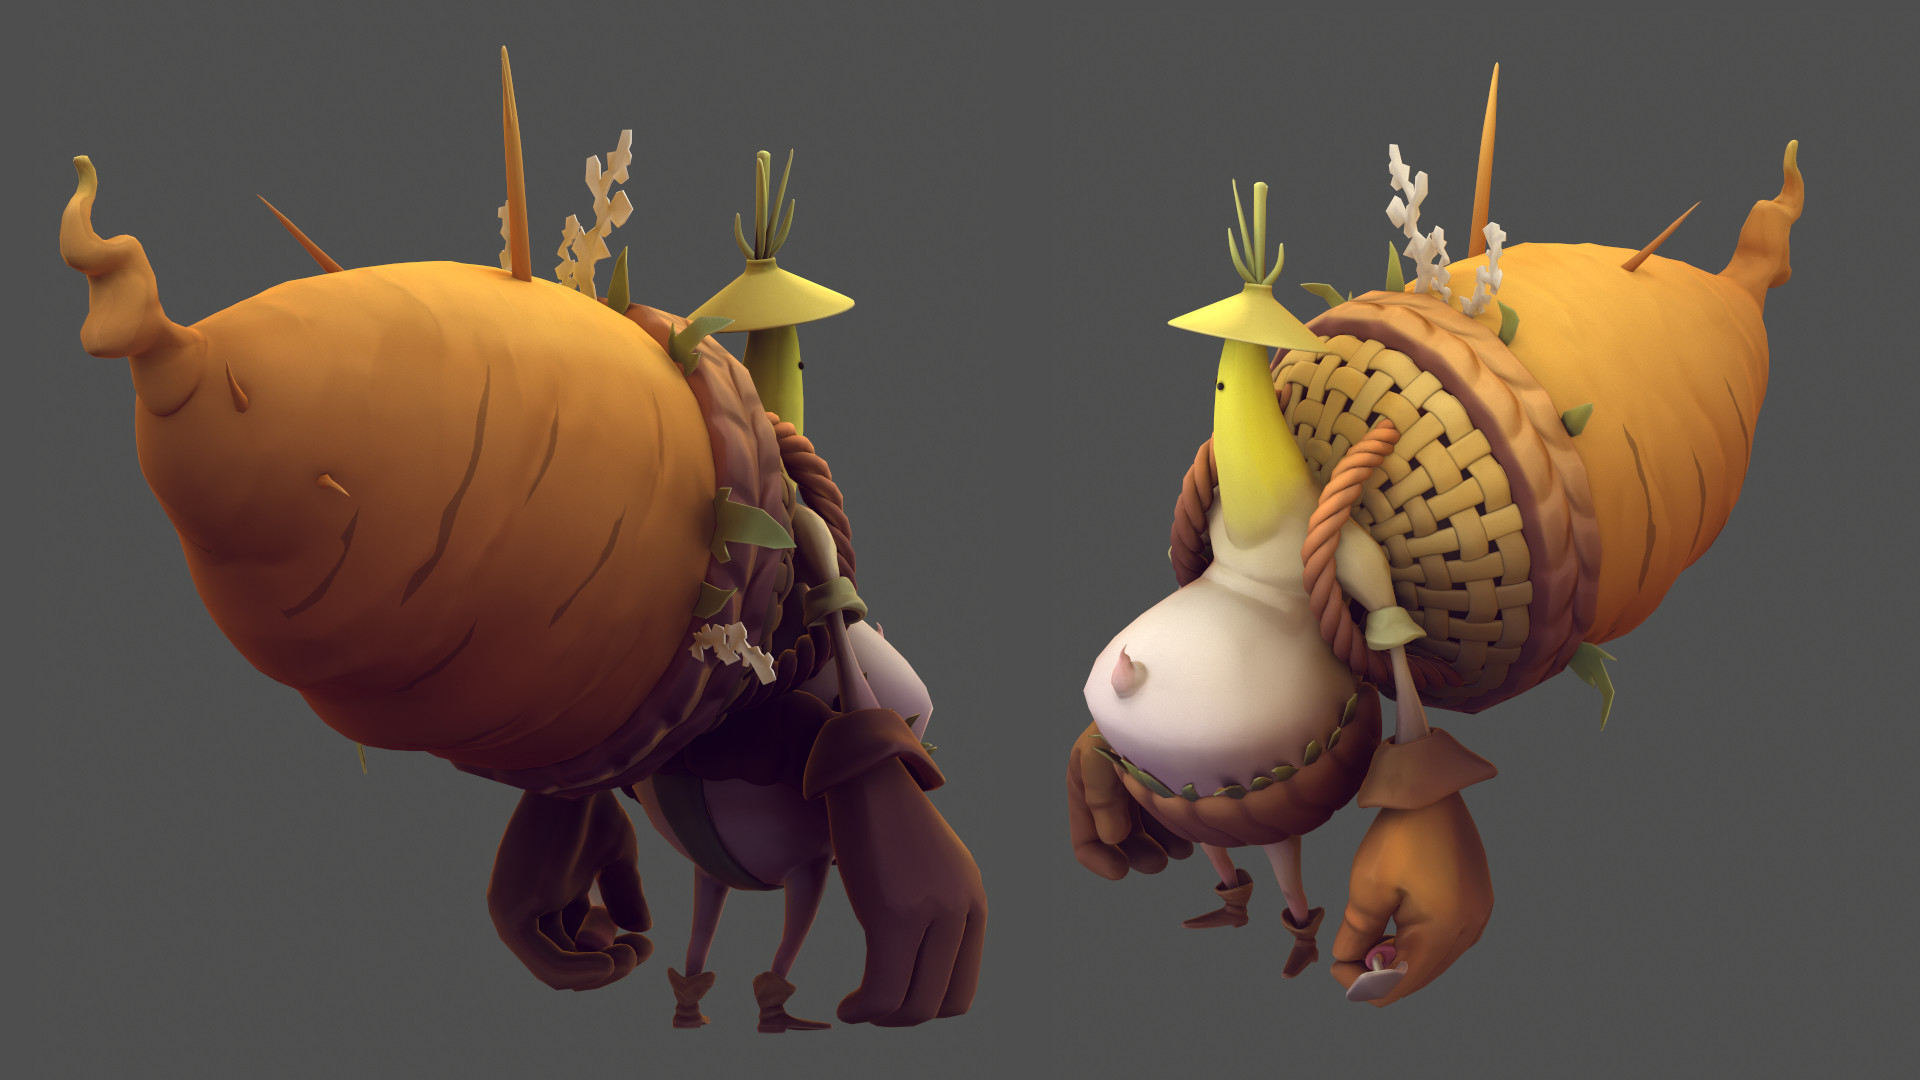
Focusing on the colors and trying to match the concept was a nice practice using the paint brushes in 3D-Coat. It was the first time I used the “gradient brush” – it’s very cool for stylised style.
For the Basket Rope I used the Brush from ZBrush (always handy to have some brushes saved to help focus on the artistic side rather than wasting time on technical stuff).
I did retopo and UVs in Maya using the Paint Quad tool and basic Unfold methods.
I hand painted the textures in 3D-Coat and Photoshop using Gradients and fill colors.
I uploaded the model to Sketchfab for rendering.
Upload to Sketchfab
Sketchfab gave me a really nice light setup to work with and it was nice to experiment with cool effects and play with shadows, smoothness, and overall look.
I used an Albedo map + Normal map with an HDRI for lighting and added 3 Directional lights with colors to help showcase the model in a better way.
I also used some of the post processing filters:


