About Me
Hello there! My name is Juan Martin, but everyone calls me Juani. I’ve been a freelance 3D artist for 5 years, and have had the chance to work for companies located all over the world, all while living in beautiful Mexico.
I’m 30 years old, but my passion for 3D started in my very early years. I probably was 8 years old when I first played iconic titles in my old Nintendo 64, which my parents had gifted me for having good grades. Despite not knowing any English, I was mesmerized by the power of 3D in storytelling and I knew I had to learn everything about it!
Inspiration
I have the most beautiful and lovely girlfriend ever, and when she suggested we travel to Korea a little more than a year ago, I was puzzled and excited about her country choice. Turns out Korea is an amazing country, filled with color, culture, and marvelous people. I knew I had to do something to honor our stay, and so I chose to model a warrior from the old Joseon Dynasty.
This Ornamental Dragon is a smaller part of that project, but I decided to post it on its own as I couldn’t wait to see it rendered on Sketchfab.
Modeling
First I searched for lots of References. I’ve always found this process a little bit tedious, but it’s super interesting and important as you move on.
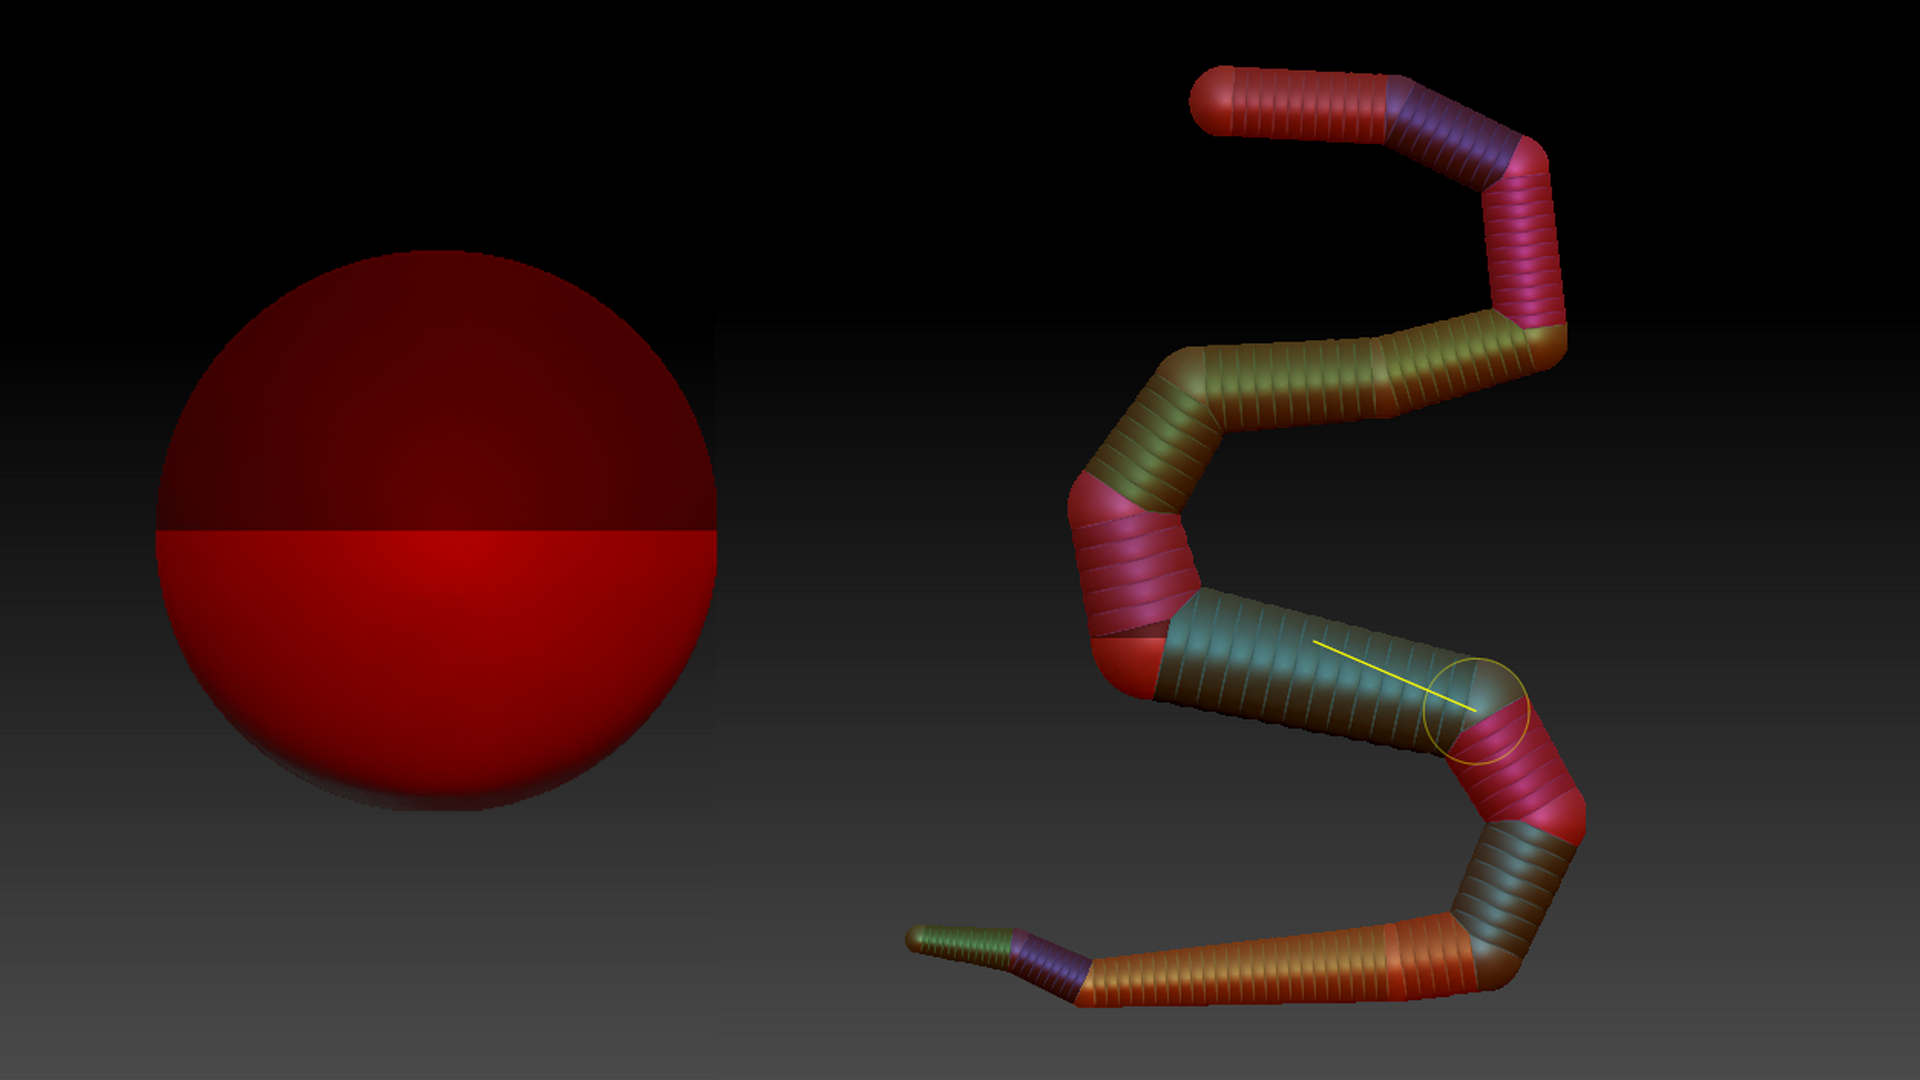
After finding out the main characteristics of a Korean dragon, I started by blocking out the bigger shapes of the model. ZBrush is great because it is super easy, artsy, and fun once you know your way around it. I started out with one ZSphere and then drew and moved the spheres to create the curves of the body, trying to keep it very simple.
Once I had the main shape blocked out, I went to the “Adaptive Skin” tab in the Tool menu.
I turned Dynamesh down to 0, and Density to 1. The preview had sharp angles. To fix this, I went to the “Deformation” tab, and adjusted the “Polish” slider a couple of times. You can inflate the model back up if it loses volume in the process.
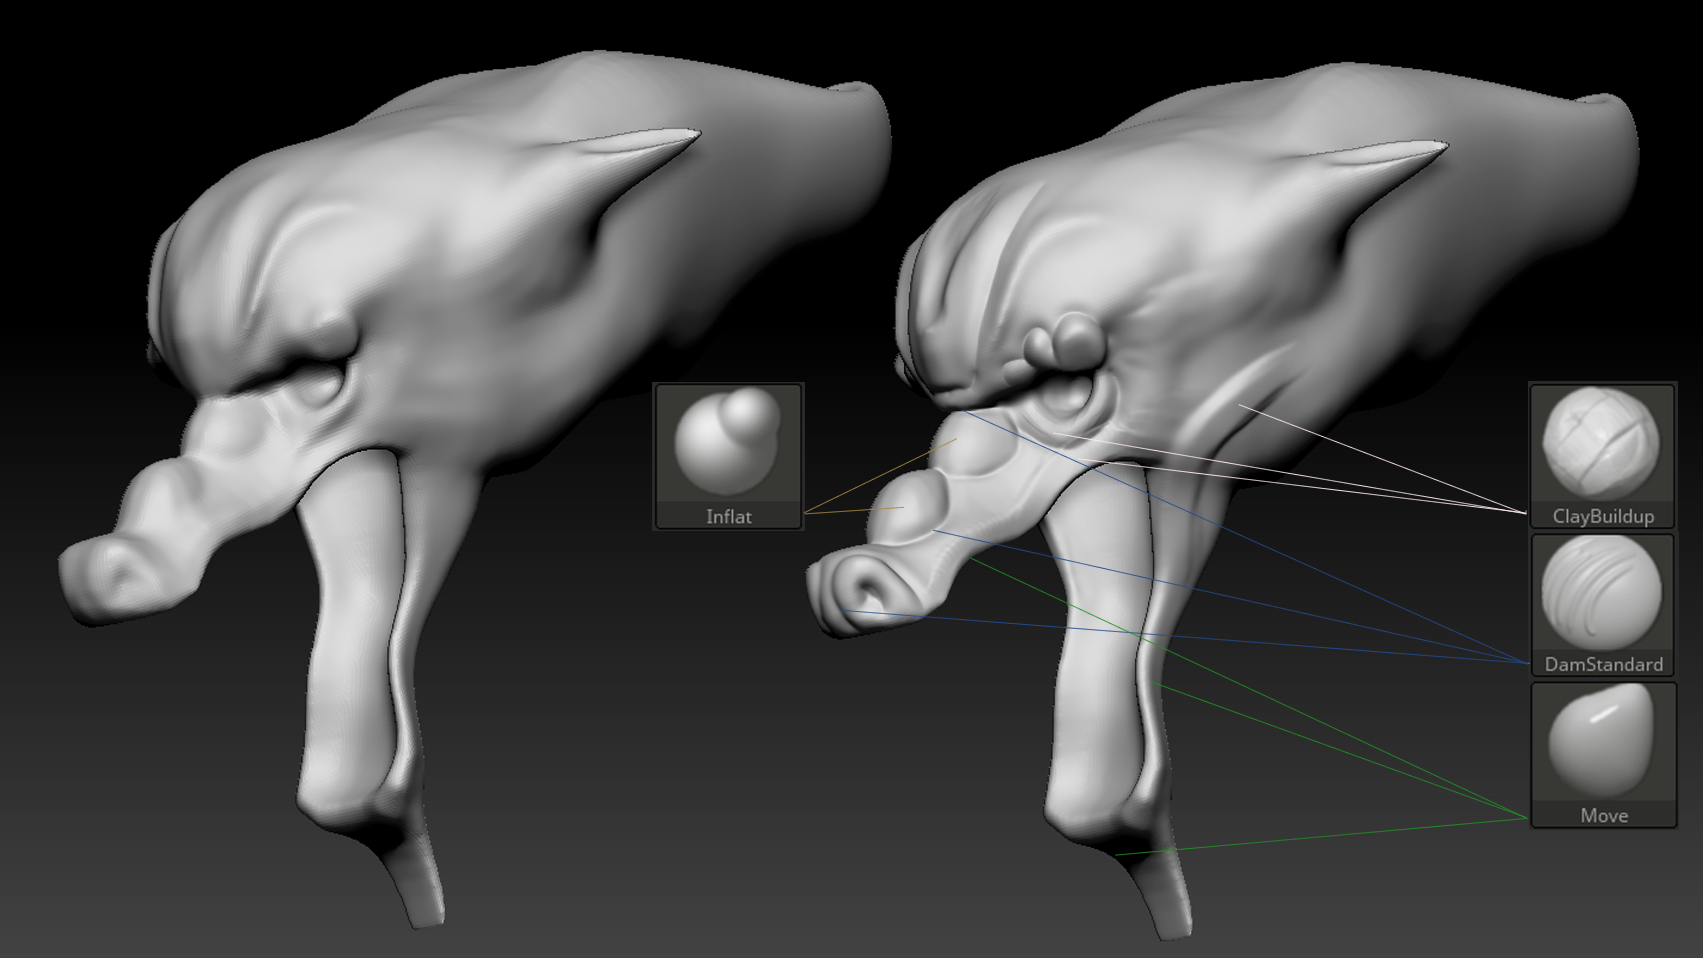
Working on the head was a little more artistic. A Dynamesh sphere and some masking and moving were used to create the main blockout. It can also be achieved by using ZSpheres. It’s important to work with very few subdivisions at first, and then start going up as more and more detail is added. Clay Buildup, Move, and Dam Standard brushes are perfect to define the main shapes of the model.
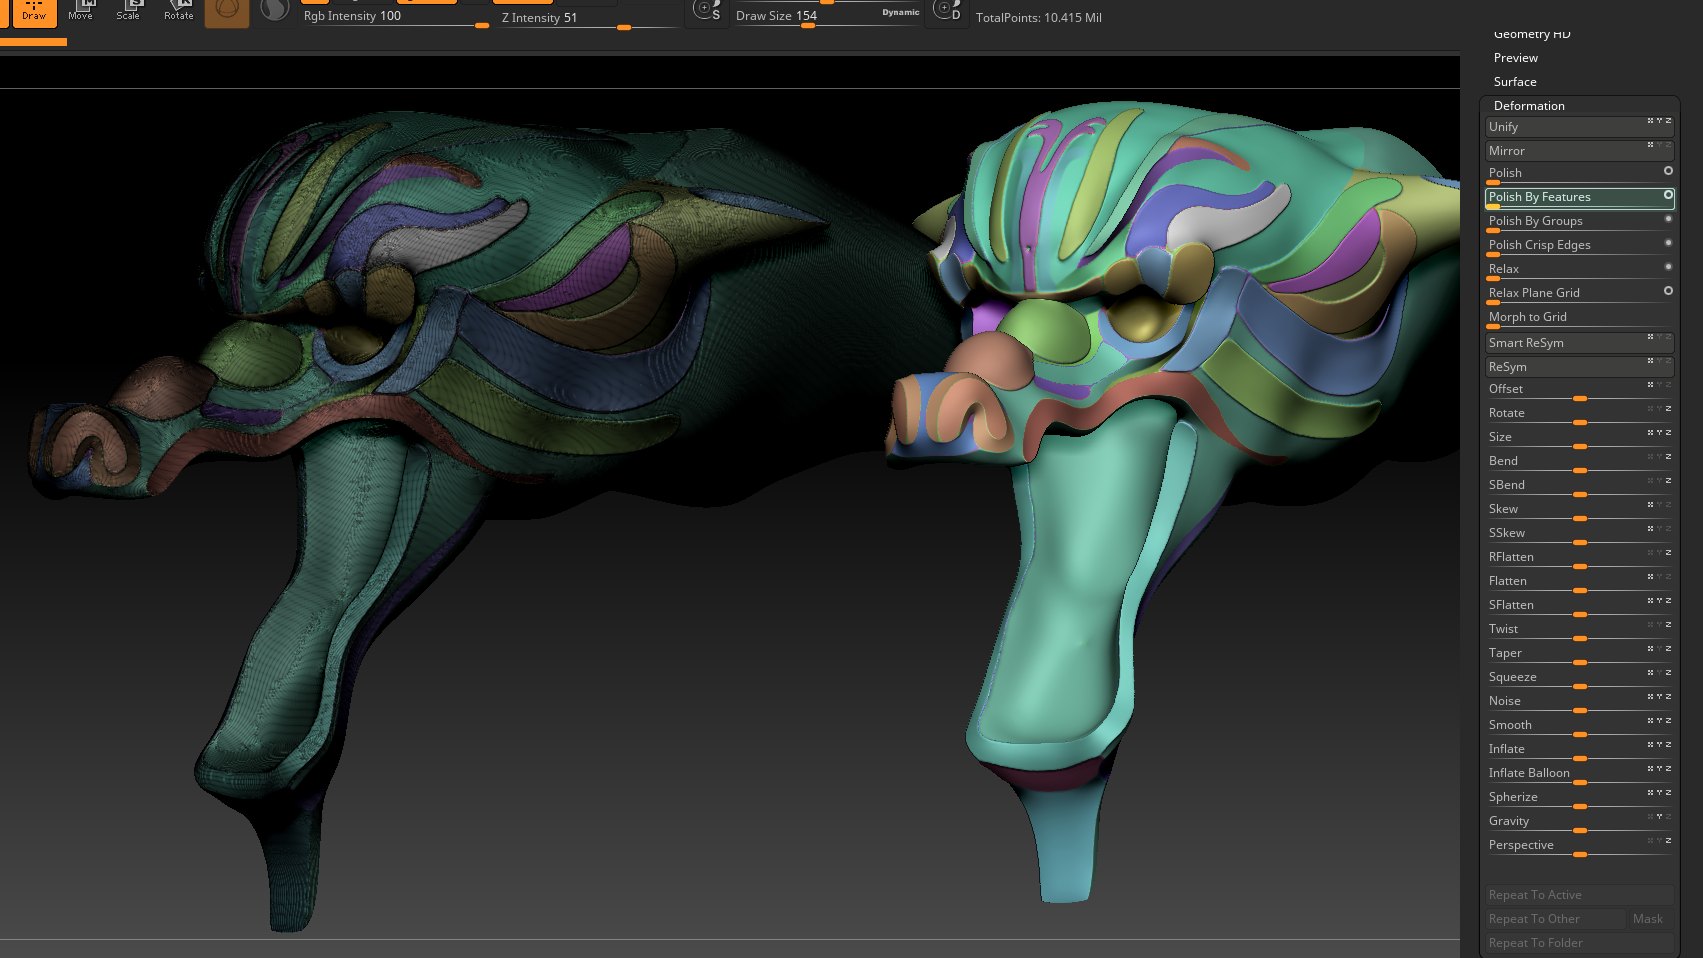
After taking some time sculpting the features, I started masking the surfaces by hand and poly grouping them. Then, I would use the “Polish by Features” slider in the “Deformation” tab. This would allow me to get a very slick and polished look for those features. It’s best to mask group-by-group as one polishes, as sometimes you might lose some form and feel the need to sculpt a little over in order to get it back.
30 Subtools were used in total for the smaller elements and details, all by using a similar process.
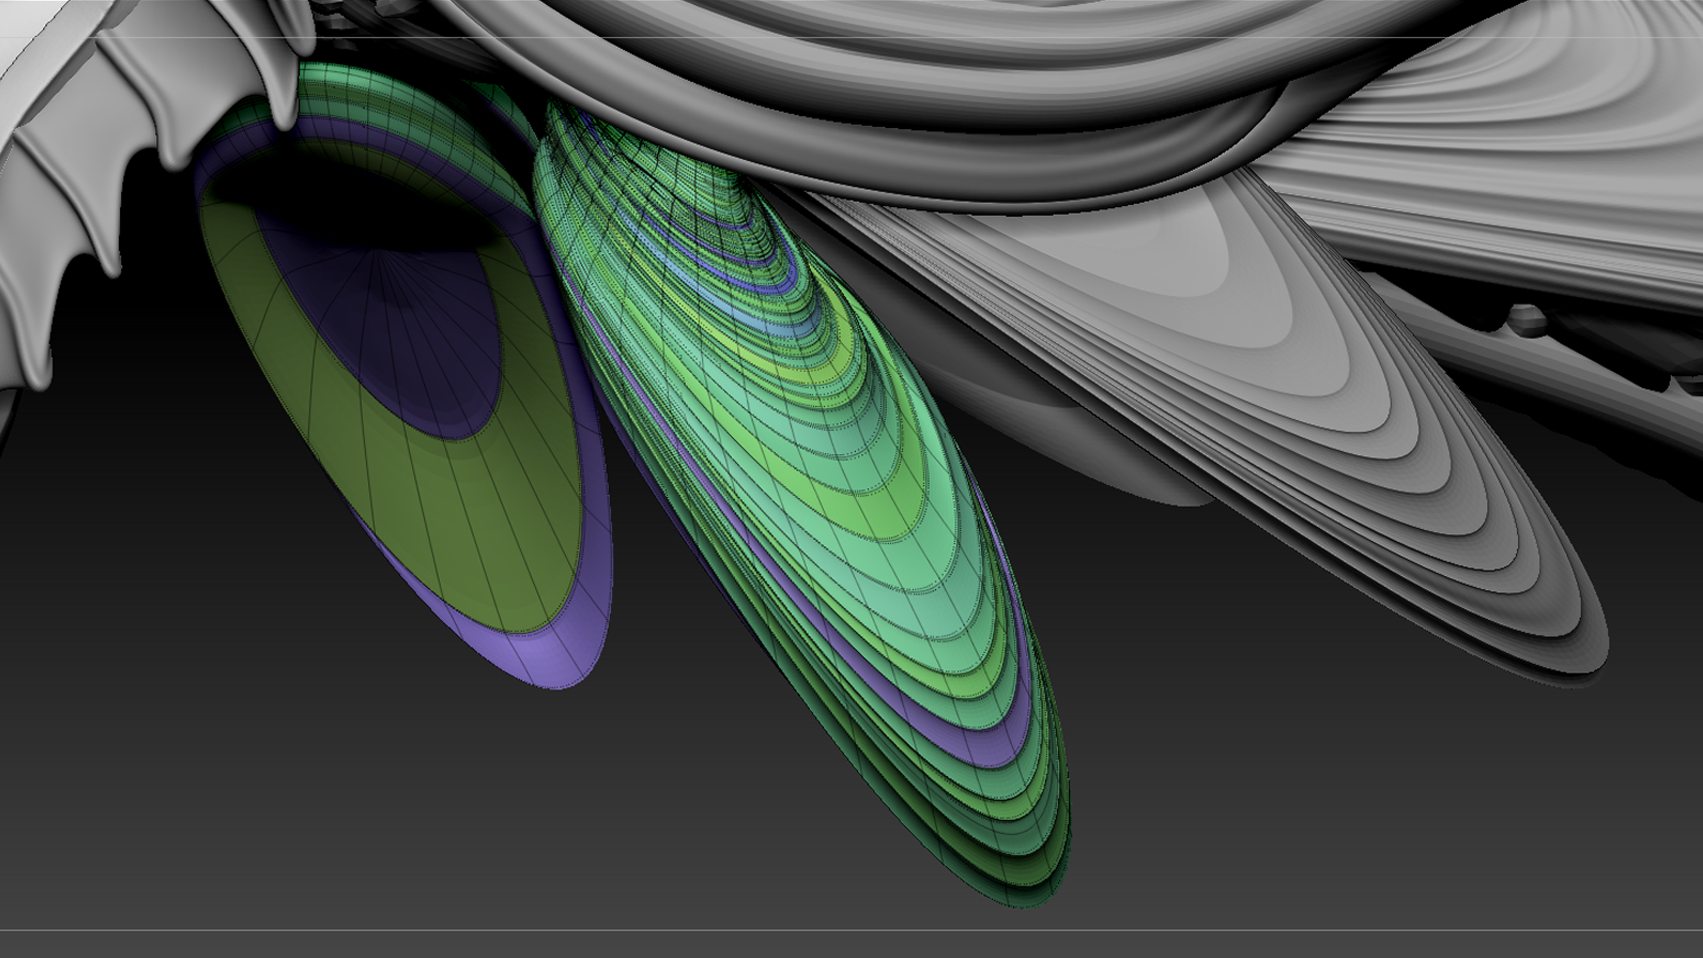
One of the coolest elements is the curved ornaments on the head, simulating hair or fins. To make them, I just added a low poly cylinder with subdivisions, used the “Move Elastic” brush to generate the shape I wanted, and grouped intercalated edge loops with the “Select Lasso” brush. Then, I used the “ZModeler” brush to extrude those polygroups out for some ornamental relief. Because everything was in different polygroups, repeating the “Polish by Features” deformer once it had been subdivided gave it a very neat finish.
I used Maya for retopology. Quad Draw is a very powerful tool and is super simple to use. I just made my high poly object a “live object” and started drawing polygons over it. The flow was not that important, since it was intended to be a hard object that would not move a lot. What I did try to do is to keep everything as one shell, both as a challenge to myself and for optimization purposes.
Texturing
UV Maps are very important to maintain proper detail and texture resolution, so I spent quite some time laying out the UV shells. After that, all I had to do was project my detail onto my low poly model. Marmoset Toolbag is an amazing tool for baking all sorts of maps. I chose to bake a Normal Map, an Ambient Occlusion Map, and an ID map. That’s usually enough information for Substance Painter to generate the rest of the maps.
The fun part was painting my model in Substance Painter. I did a dark blue base of rough metal, and then proceeded to add different layers of gold metals, using smart masks. I especially enjoy the effect of “Stains Scratches” and “Fabric Edge Damage”. After establishing the highlights, I put some work into the ambient occlusion and dirt inside the crevices of the model; I used a rough darkish gold, and dark green materials in combination with “Occlusion Strong” and “Sand Cavities” Smart Masks to give the piece a general worn feel.
After setting up my smart materials, I then went on to paint the colors underneath the smart materials. I chose a combination of blue and pink, since dragons in Asian culture are generally considered to have power over water. With the help of the ID map that was generated with Marmoset, I created a bunch of fill layers and used a mask with “color selection” effect to separate the different parts that would be colored. When happy with the color distribution, I then went on adding a “paint” effect to each mask in order to paint details by hand. I’ve learned that the more variations, the more authentic the model looks.
Sketchfab
What is incredible about Sketchfab is that it allows almost every exported PBR map for an amazing real-time render that you can share on the smallest of devices!
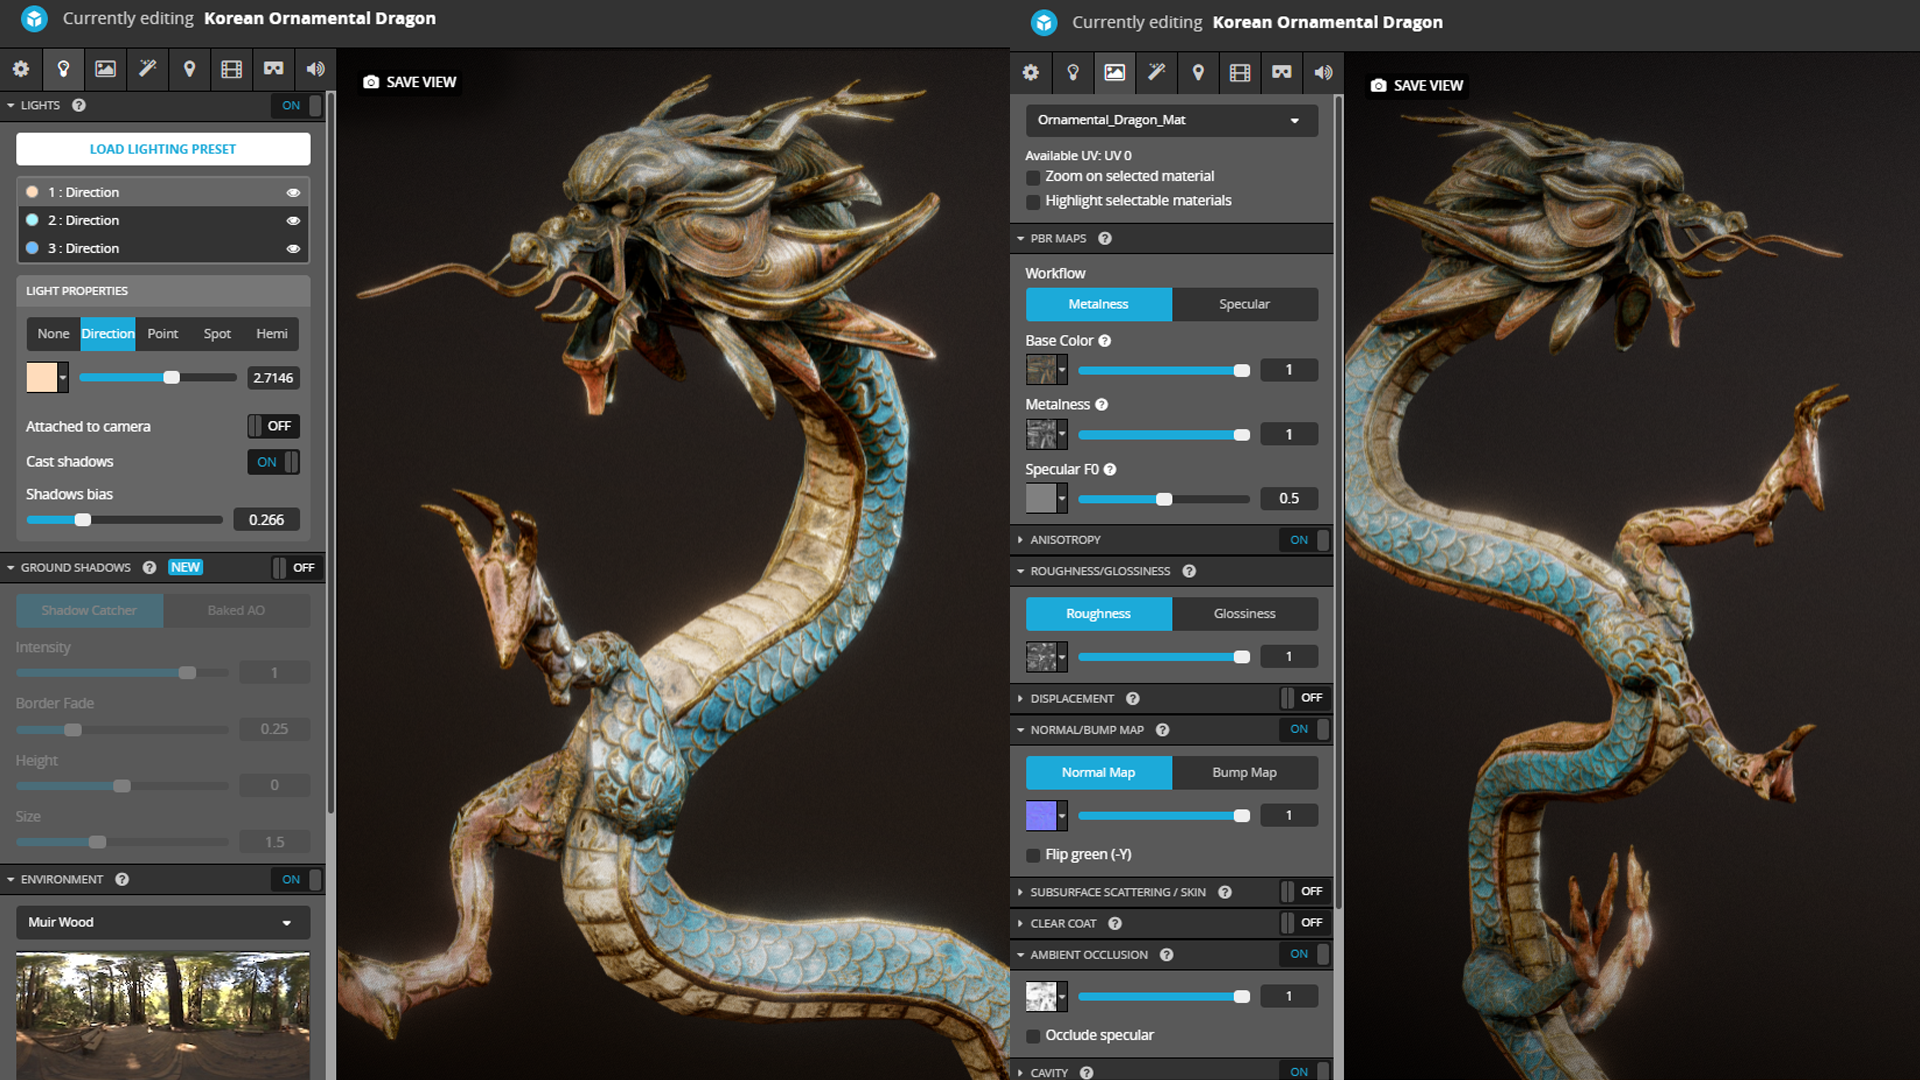
I did a simple light setup, taking advantage of the 3-point light preset, and then tweaked each individual light to my liking. For the Environment, I chose Muir Wood as it gives some really cool highlights on metals.
Setting the material was really easy! All I had to do was import my exported maps, and place them in their own slot. I even added some anisotropy for a more metallic effect.
Finally, I just wanted to thank the Sketchfab team for giving me this space, and this extraordinary platform that helps to share 3D art to the world, and to an astounding community of artists that have been inspiring and very supporting!


