About me
Howdy! My name is James Truhlar and I’m a Front-end Developer from Wichita, Kansas. My background is in fine arts and web design, I have a passion for mograph, and 3D modeling is something I love to do in my spare time. I primarily use Blender.
Inspiration
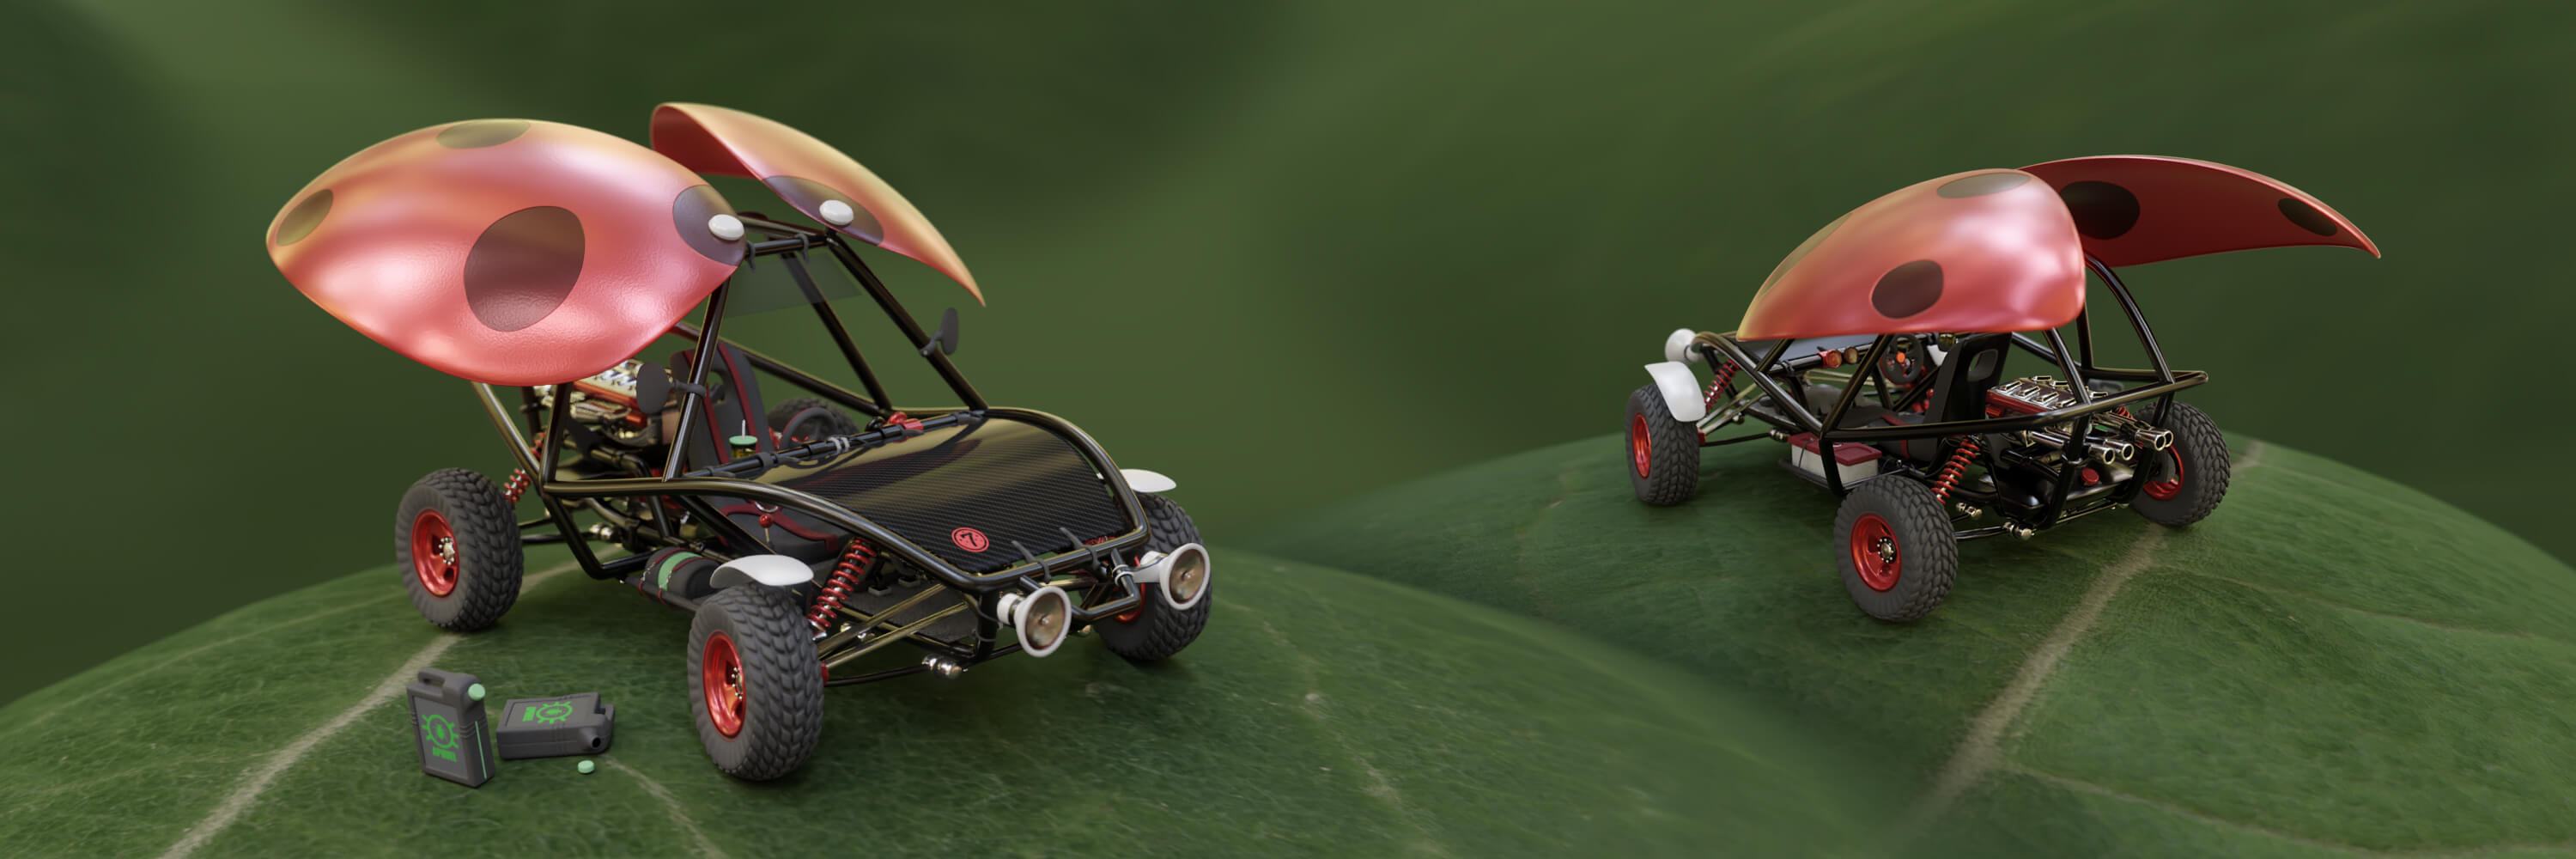
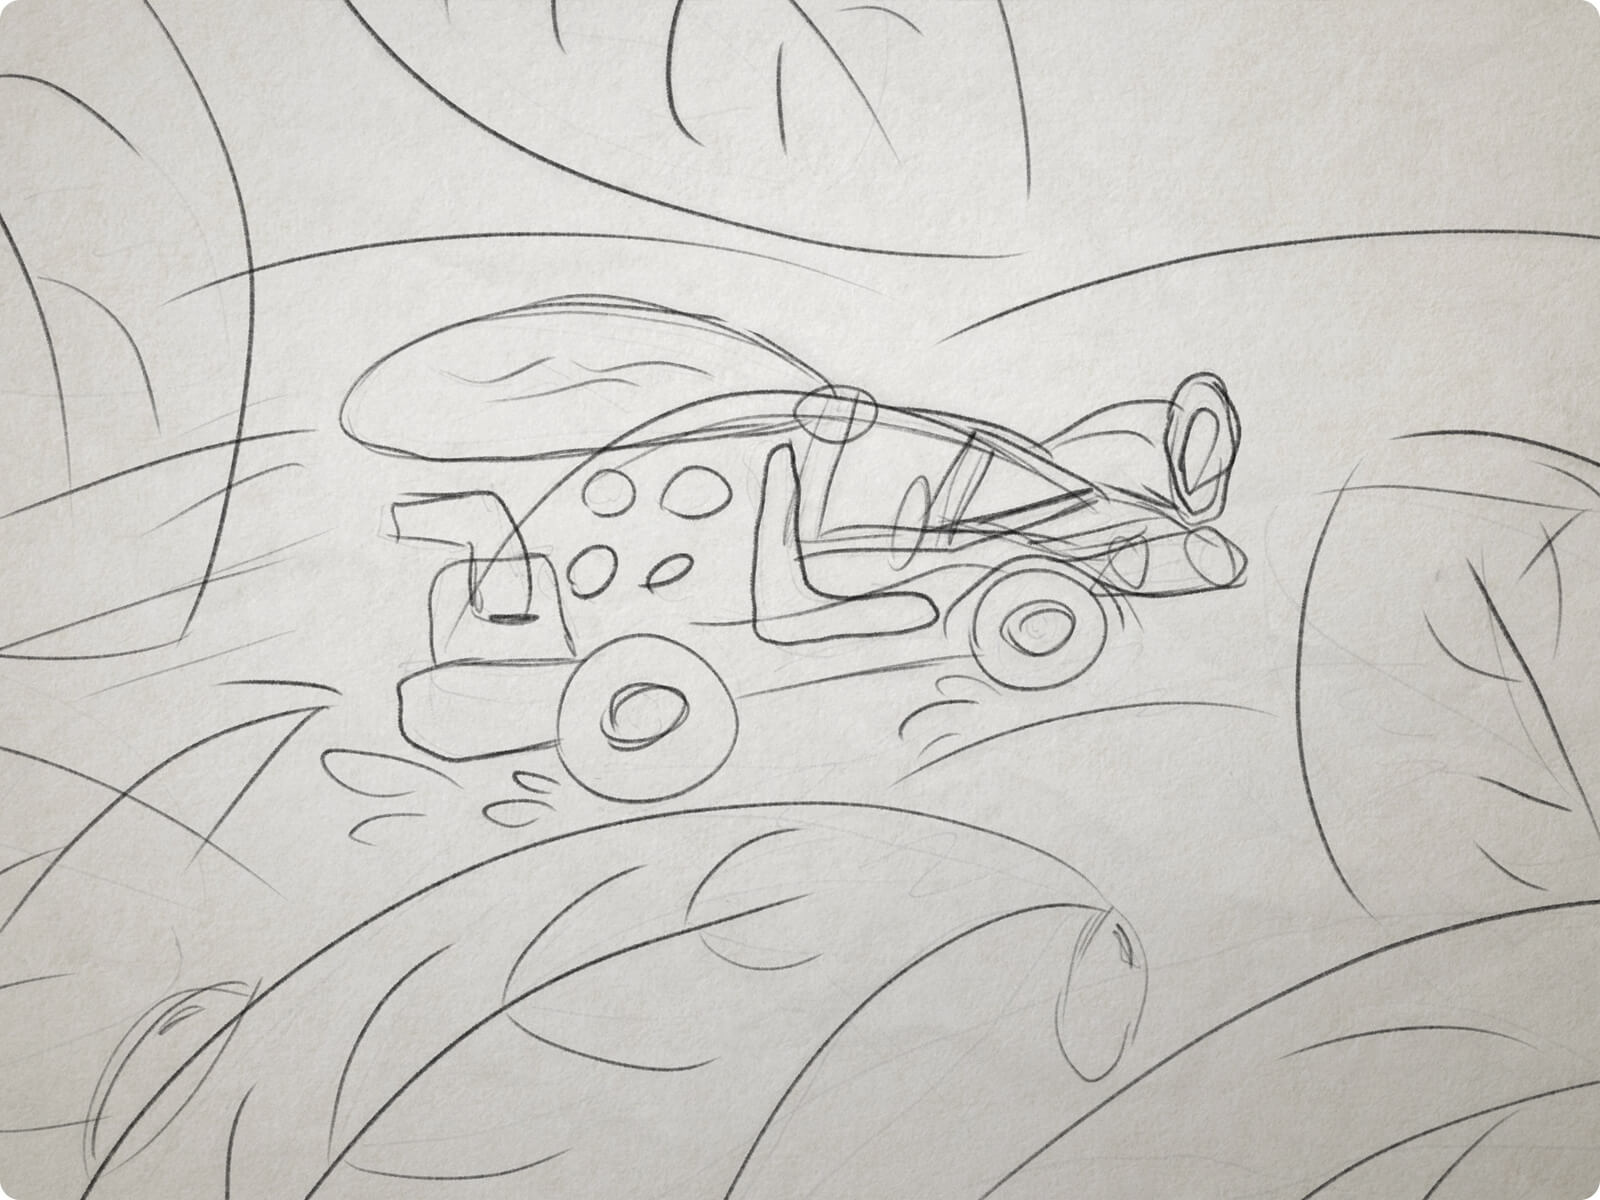
I haven’t done much machinery, but a “Dune Buggy” challenge caught my attention. I love having objectives to work towards and this was a great opportunity to get another vehicle in my portfolio. I thought about buggies in their natural habitat. Roaming across desert hills, kicking up sand and flying over dunes, then envisioned a much smaller concept—ladybuggies and leaves. I love puns!
Not my finest sketch work, but the idea was there—an idea that I was worried was entirely too obvious. In fact, I was so sure other people would do it that I decided not to follow through… At least, until I had a fortunate encounter during a bike ride.
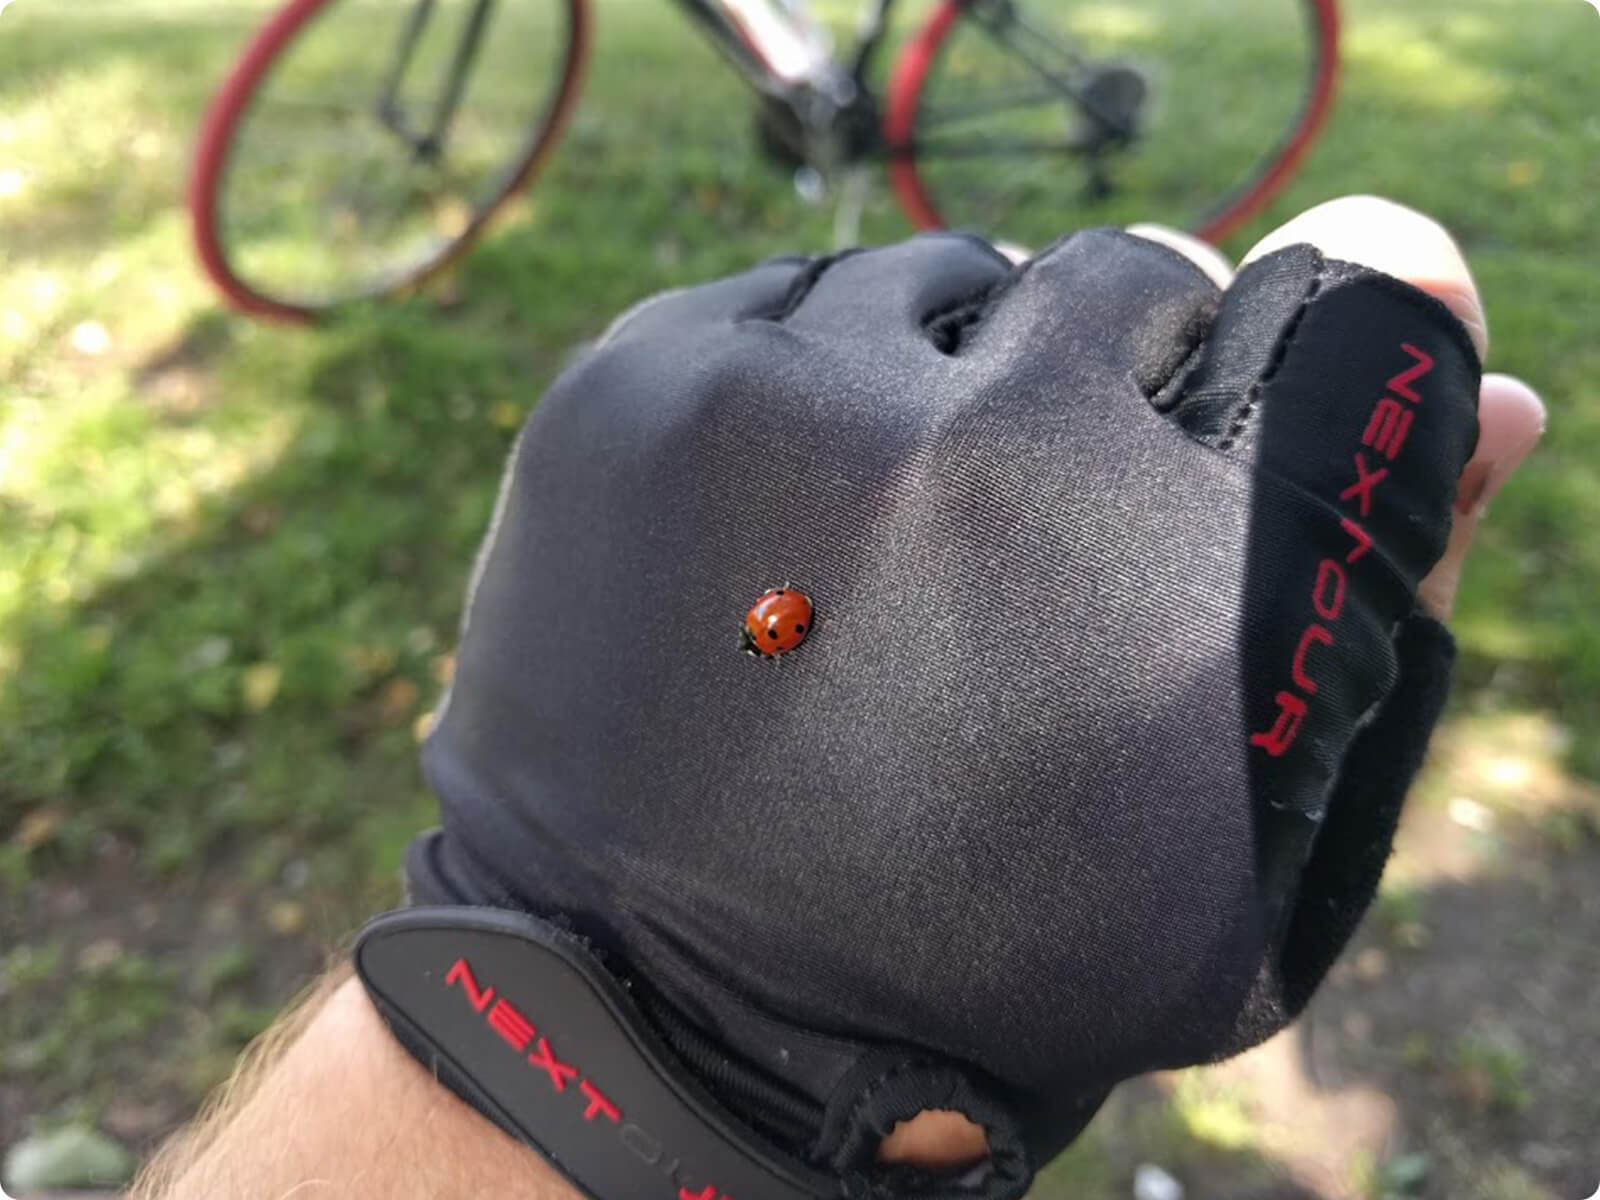
I stopped to take a break and this little fella landed on my hand. I’m not a superstitious person, but after that, how could I not commit? Good thing, too, as it turned out, because nobody else submitted anything quite like it.
 Creative commons image of a 7-spot ladybird by Pussreboots
Design considerations
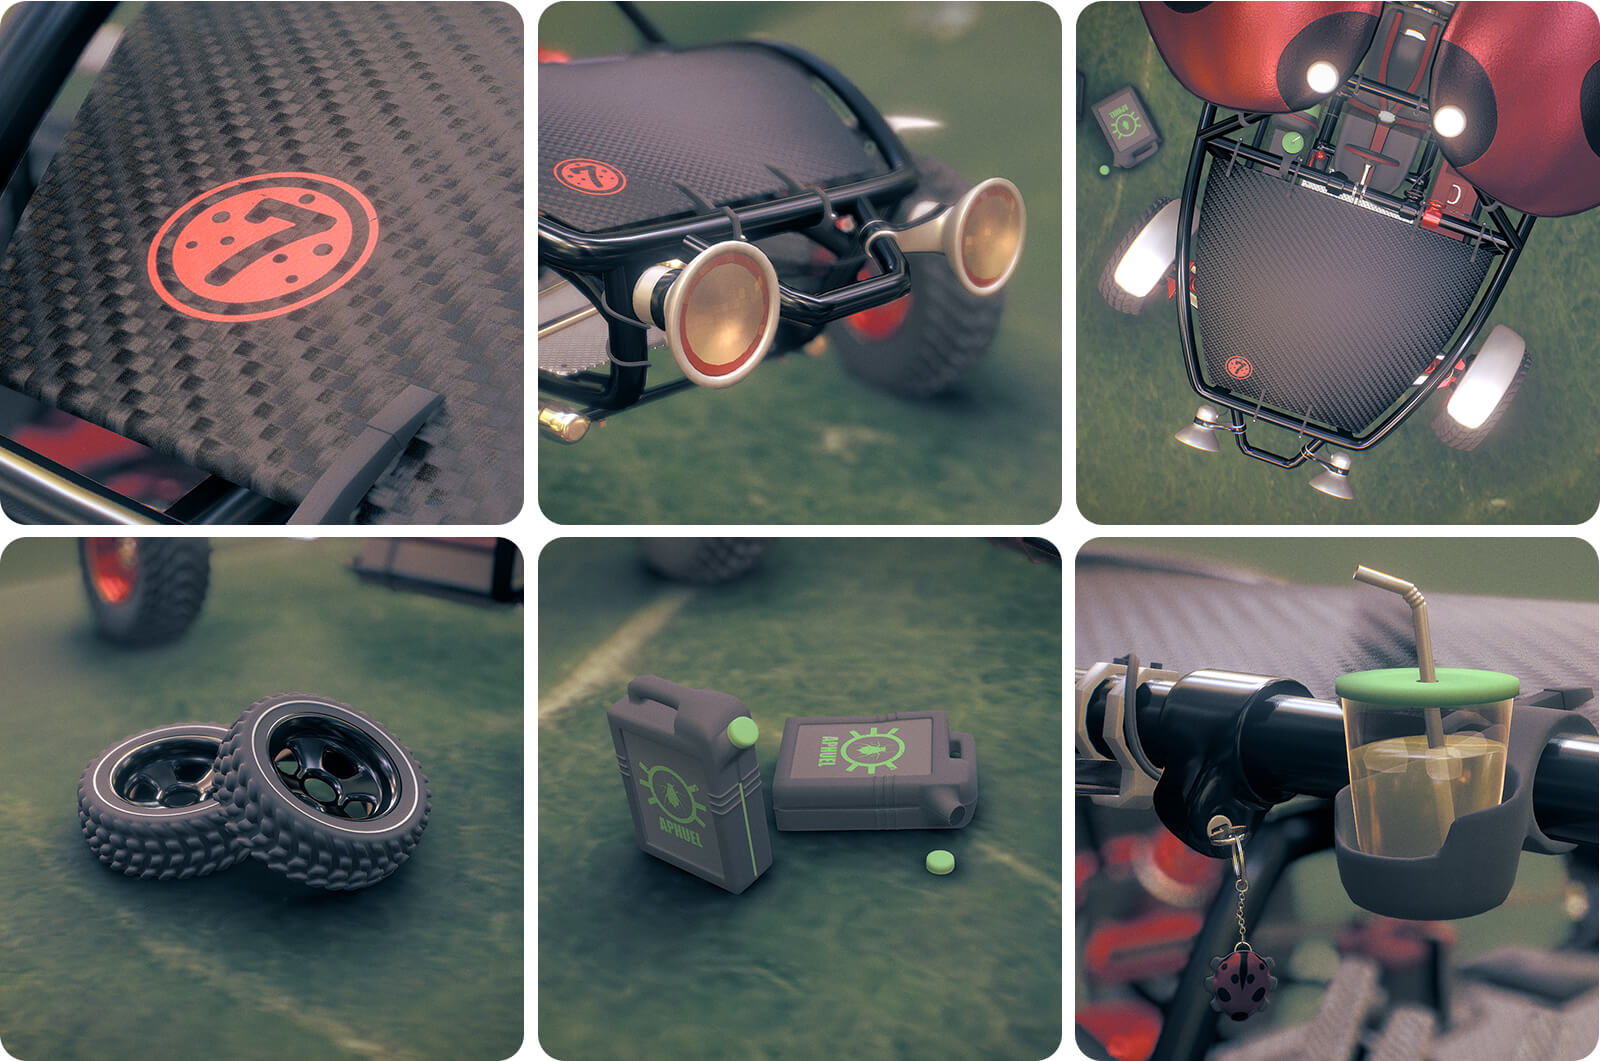
The ‘7’ decal represents the 7-spot ladybird, one of the most iconic types of lady beetle. I left flat shading on the headlights so the geometry would resemble compound eyes. The fenders and shell mounts are white to resemble secondary spots. The overall shape of the buggy is wide and rounded, echoing that classic beetle body.
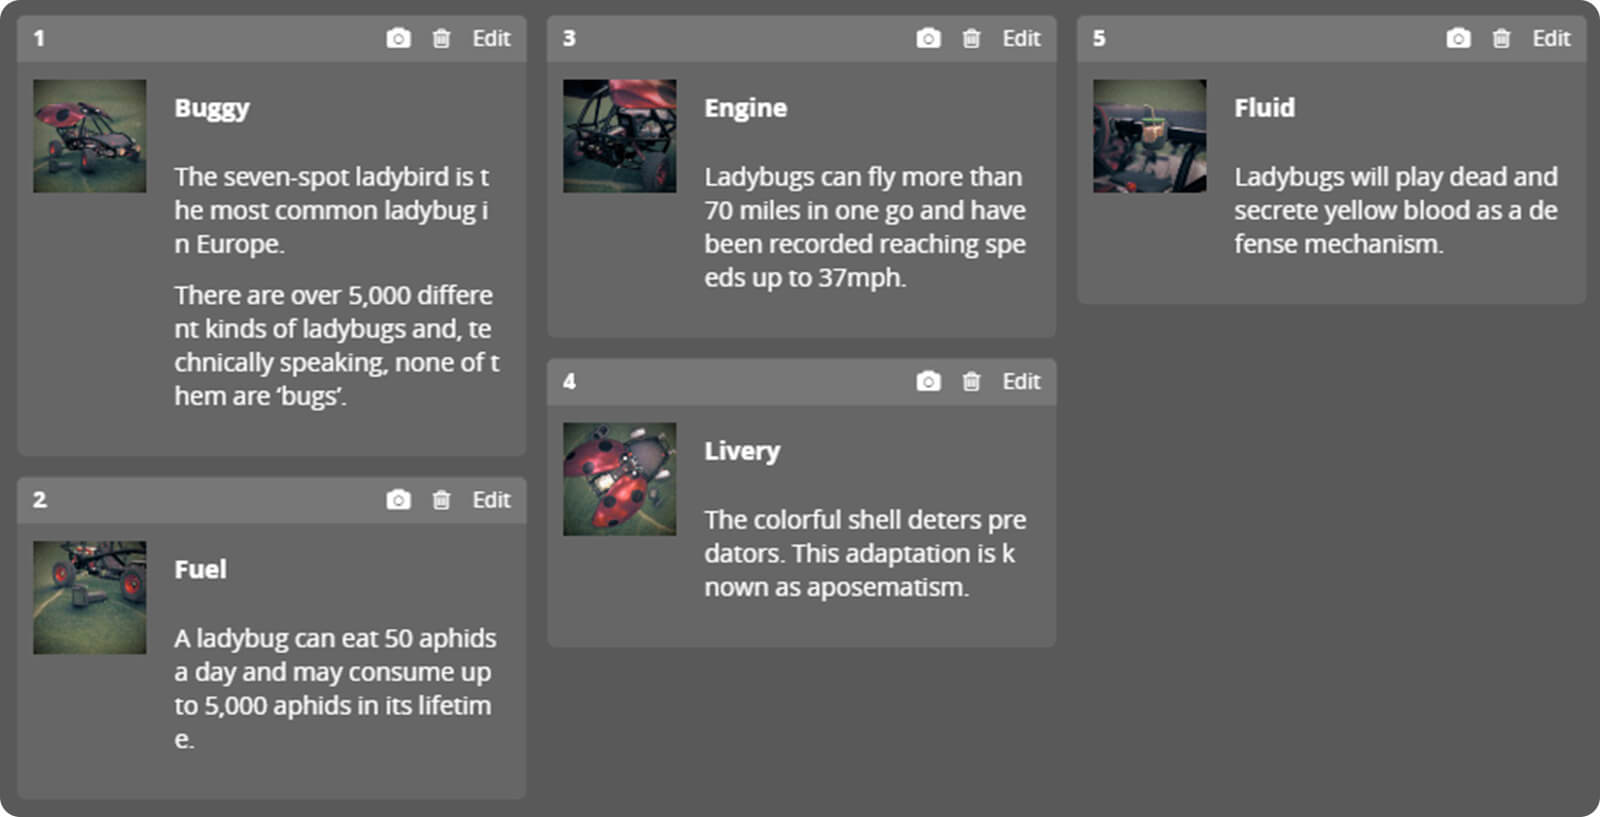
The spare tires off to the side represent two extra legs, for a total of six in the scene. Ladybugs eat aphids… cars eat fuel… aphuel. Anywho… I added a couple fuel containers with an annotation about ladybug food. The yellow drink represents a (kinda gross) fact about ladybug’s blood defense. And lastly, there is a little rubber ladybug dangling on the end of the key chain.
A lot of the other details were less bug-centric and more in an effort to make the vehicle believable. Like the shifter having a linkage to the engine, wiring to all the gauges, plugs, etc., or the steering wheel having control arms linked to both front wheels. Some last minute additions were the rear-view mirrors and baskets on either side of the seat.
Modeling
Disclaimer: A lot of these screenshots were after-the-fact. Things changed a lot from start to finish. There was a healthy mix of trial and error, tweaks, and changes both big and small. I hope nobody ever feels discouraged if their original idea starts to change. There’s a good chance that it’ll end up even better!
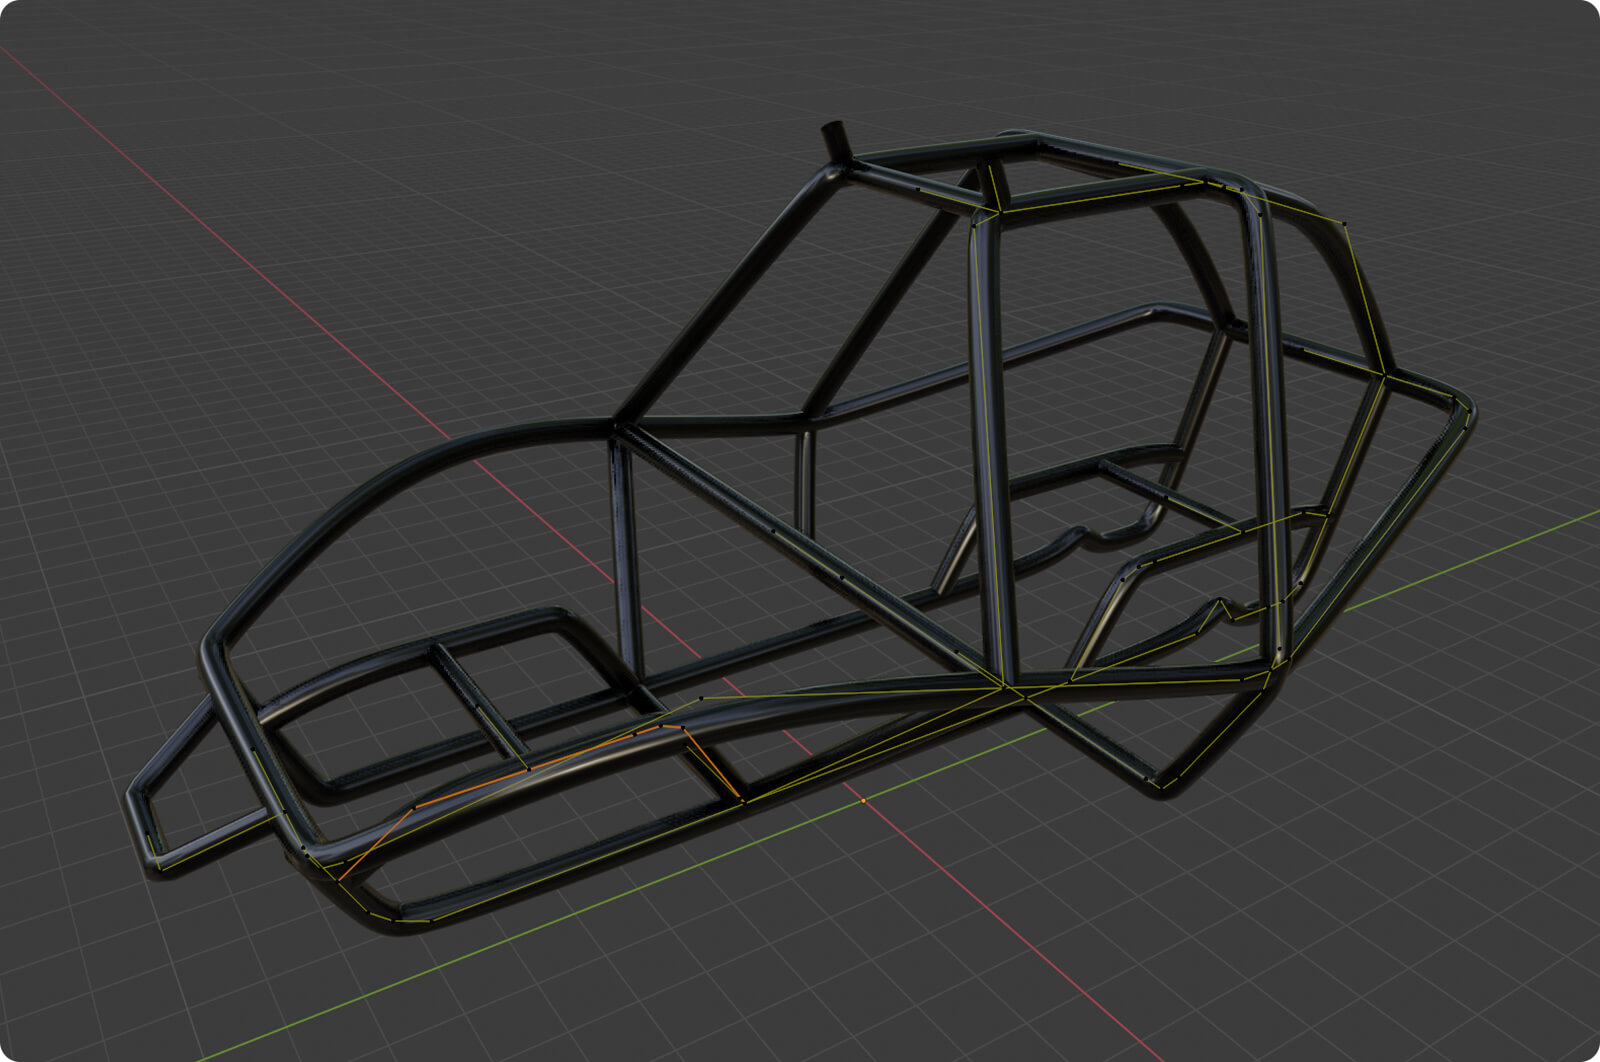
I started with the frame, using curves to assemble the pipes. All of this would ultimately be converted to a mesh and optimized, but this was an easily-adjustable platform to build on.
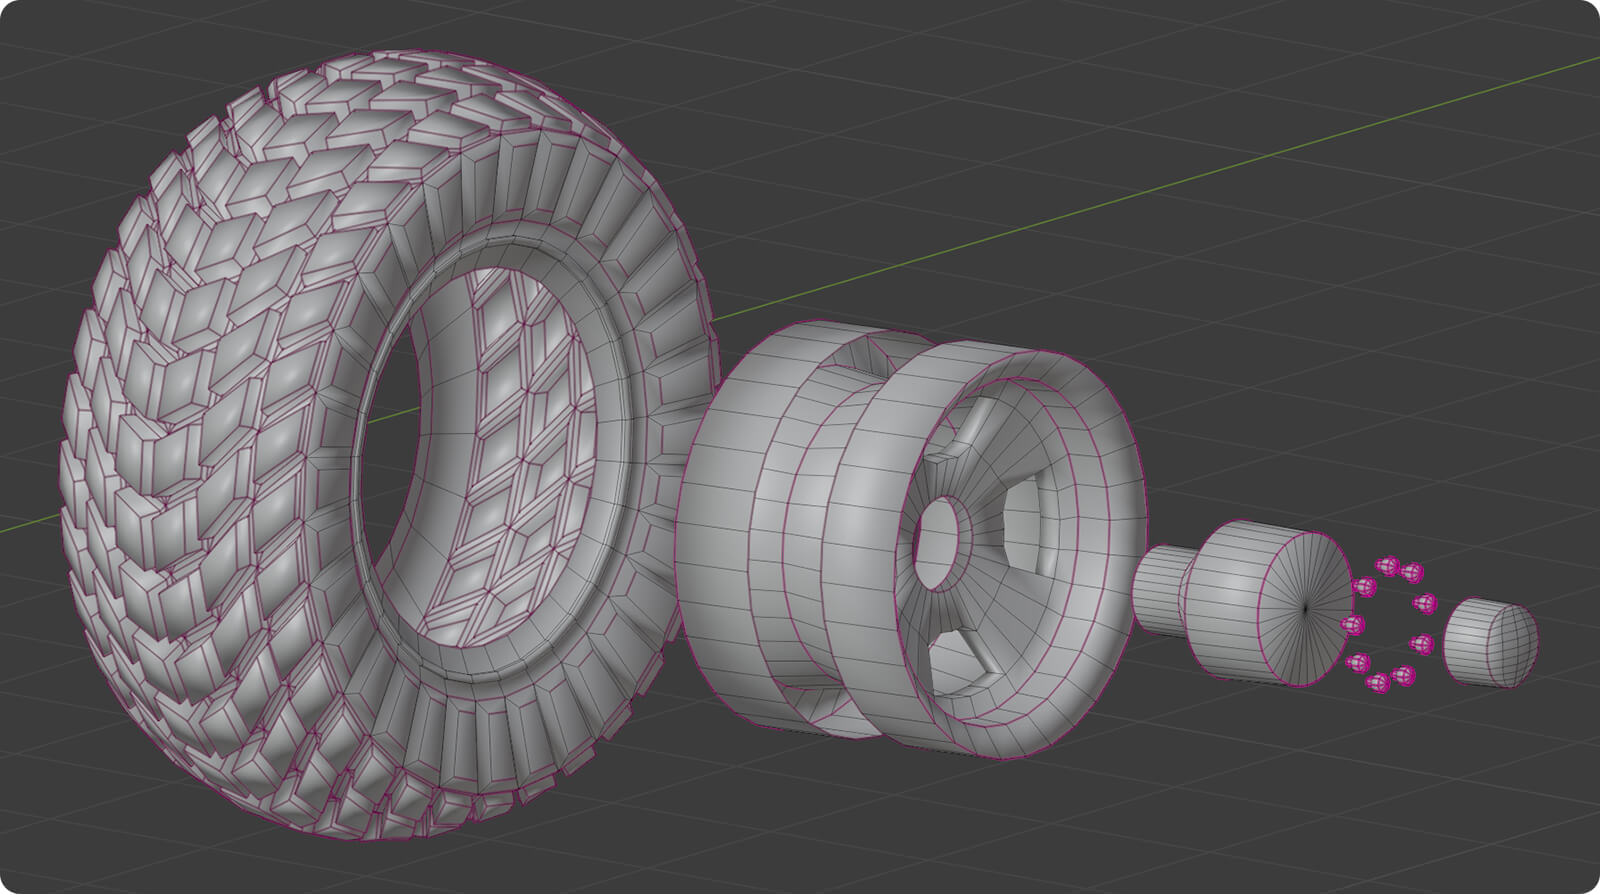
Next up, wheels. Two techniques I learned earlier this year came in handy. Inset(i) and extrude along normals(alt+e). I started with cylinders with a few subdivisions. I selected the outside faces and inset to get the gaps, then extruded some tread. I gave the center edge loop a proportional twist on the x-axis, then did some careful scaling to improve the overall shape. The hubs were more straightforward with mostly just scaling, extruding and bridging loops.
After that, I moved on to the shell. The “will this work?” moment. So far, I had just made a basic car frame and wheels. If the shell didn’t look right, then the idea might have fallen flat. Sure, I could have painted up some panels with spots or relied on the overall color scheme, but there’s something iconic about that red-spotted shell. I started with a sphere, cut out a quarter, and shaped it a bit before rounding out the edges. It worked… It worked really well and totally gave off beetle vibes. Try not to think about the aerodynamics, though.
The next hurdle was the suspension. I made a spring using the ‘Add Curve: Extra Objects’ add-on, then built up cylinders for the struts along with some extra linkages to connect the whole assembly to the frame. I was a little lazy making the suspension connect to the wheels. In my defense, I was trying not to focus too hard on areas that were not visually significant. A savvy engineer might notice some impossible parts here and there.
With the framework coming together, it was time to shift my focus to the guts. I put together an engine, seat, and front floor. None of these parts were heavily detailed. Most of that came towards the end, when I added electronics, support structures, and accessories.
I kept adding things as I thought of them. Such as the transmission and shifter, the gauges, and even a sun visor. It was easy to keep adding more details after I had the main structure set up.
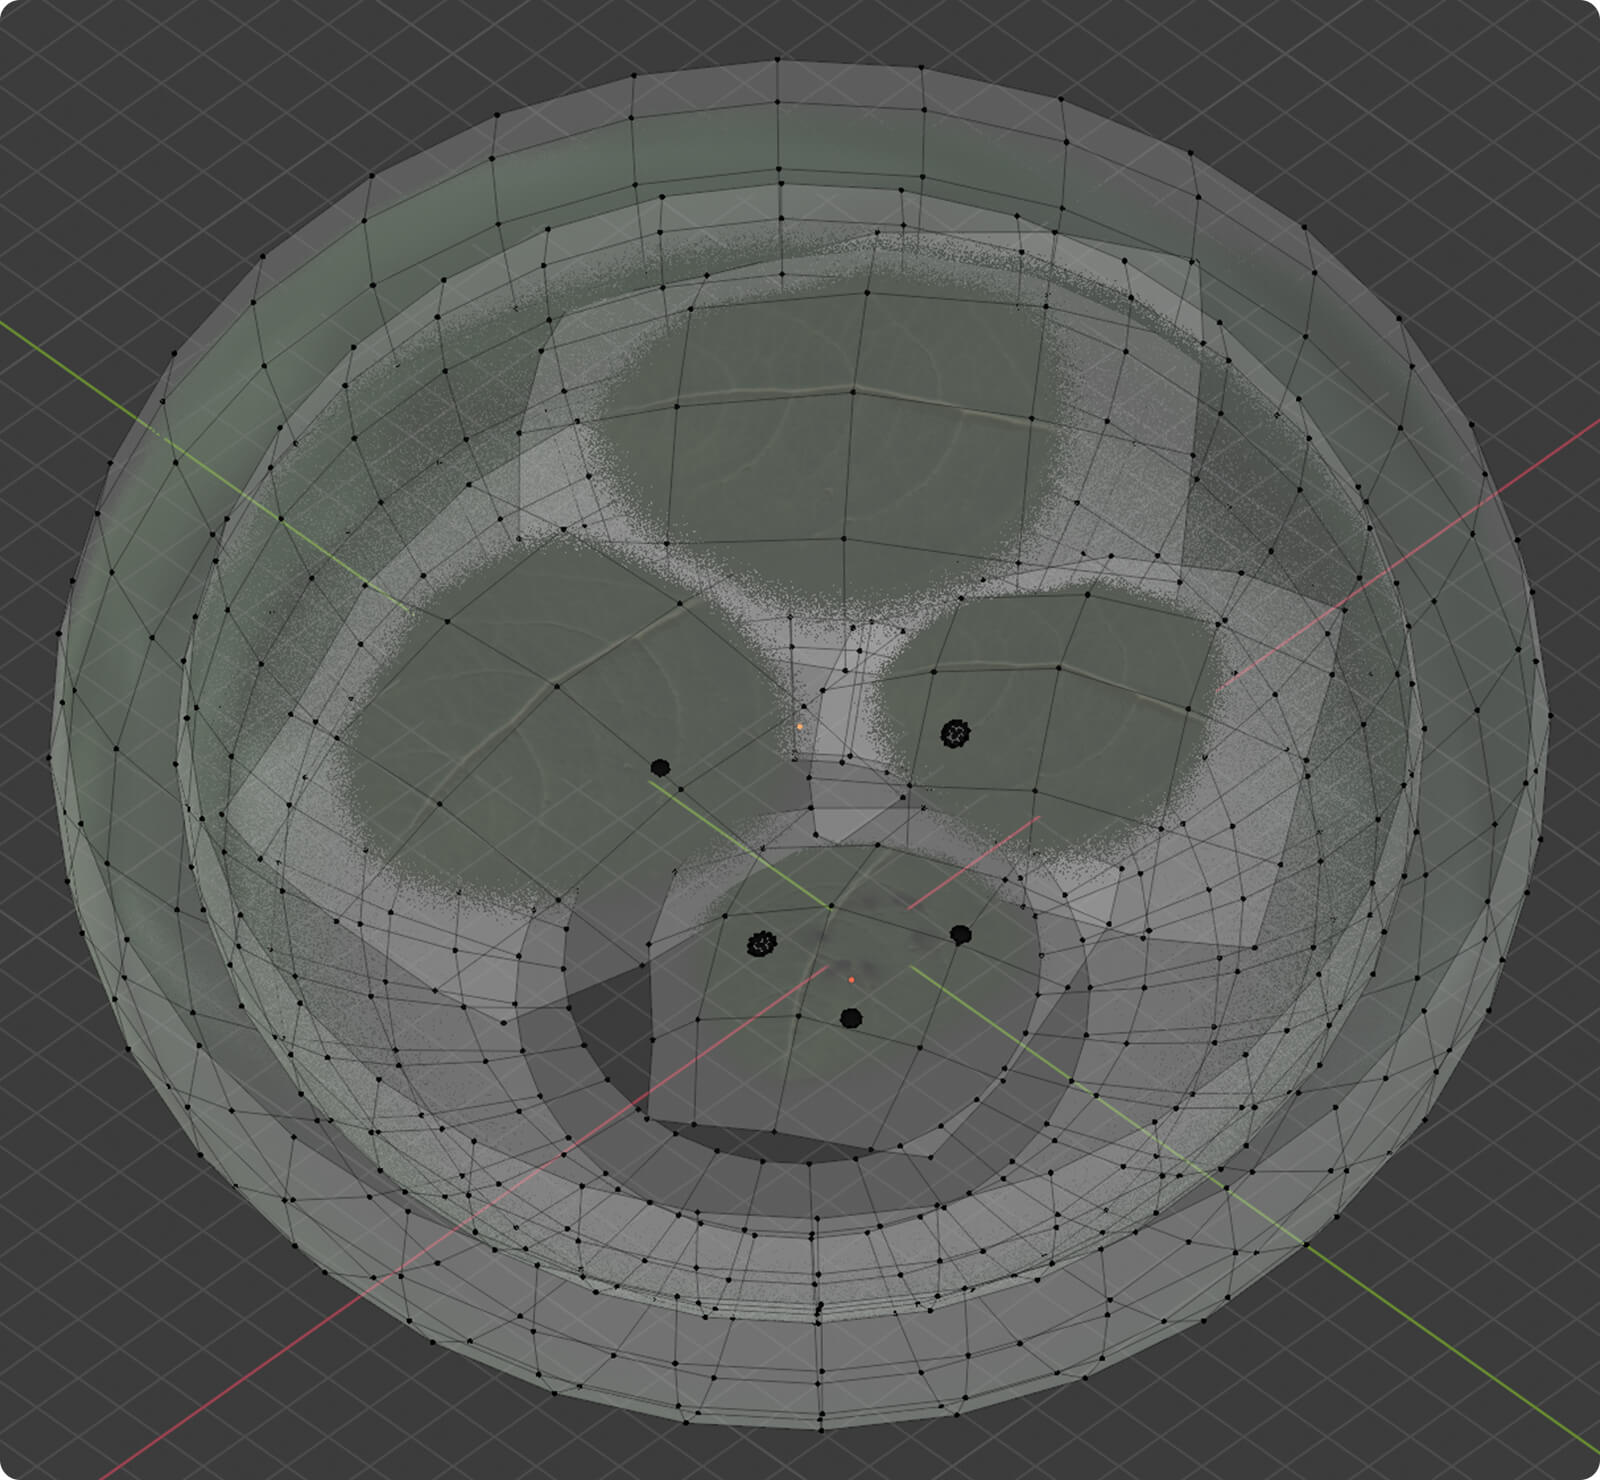
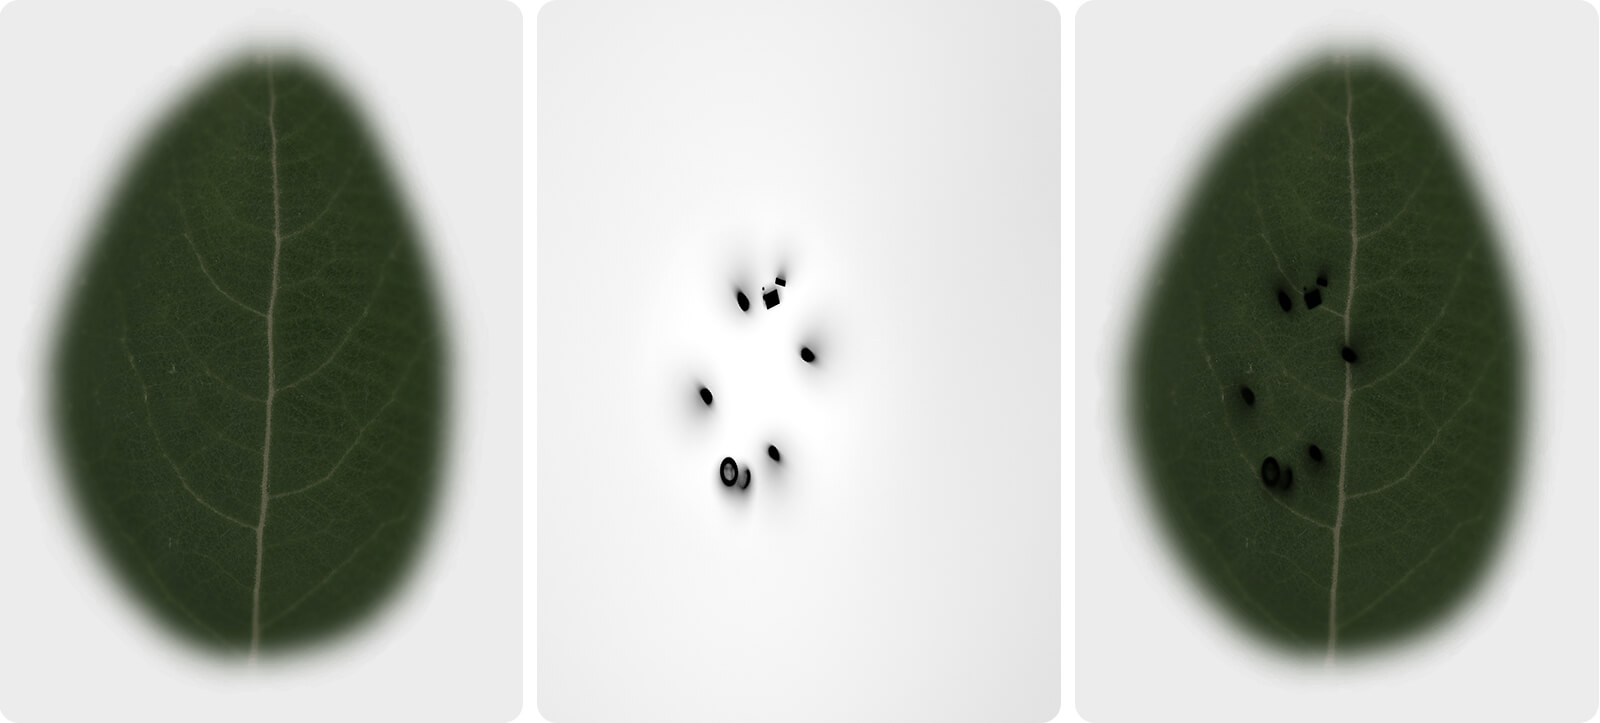
Of course, I also needed to complete the scene. This buggy needed a desert of leaves, right? To build an environment, I started with a leaf texture from cgbookcase.com. I placed a dome under the car, applied a modified version of the texture, and adjusted until things felt right. I wanted there to be distant ‘hills’, so I scattered dozens of temporary leaf instances around and rendered out a blurry panorama. This became a sort of sky-box, which I added to a pair of half spheres around the perimeter of the scene. I then added three more leaves to the middle ground so the level of detail fell off more gradually.
My workflow isn’t quite as refined as a lot of pros, so material making and polygon pushing were kinda happening simultaneously. Which brings me to…
Materials & texturing
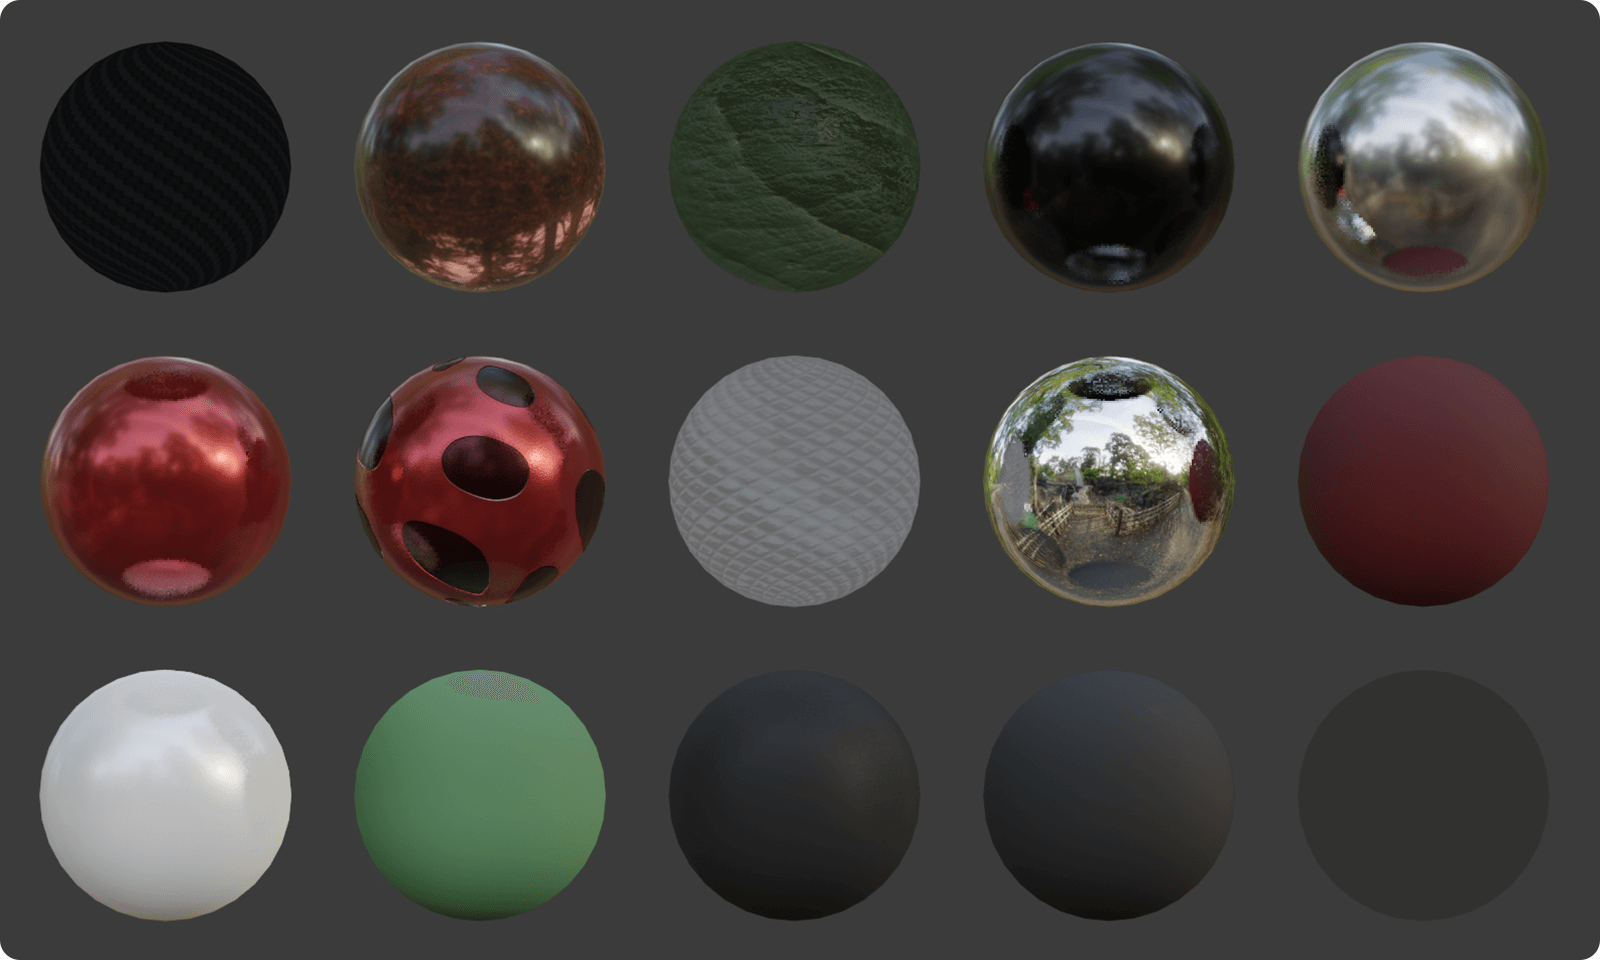
Most of the materials were straight out of a principled BSDF node with variations in the color, metalness, and roughness. Sketchfab does a great job importing these as they are. The only issues I had were with intensity on some of the lighter colors and opacity not being applied, but it was easy to fix in the Sketchfab Editor.
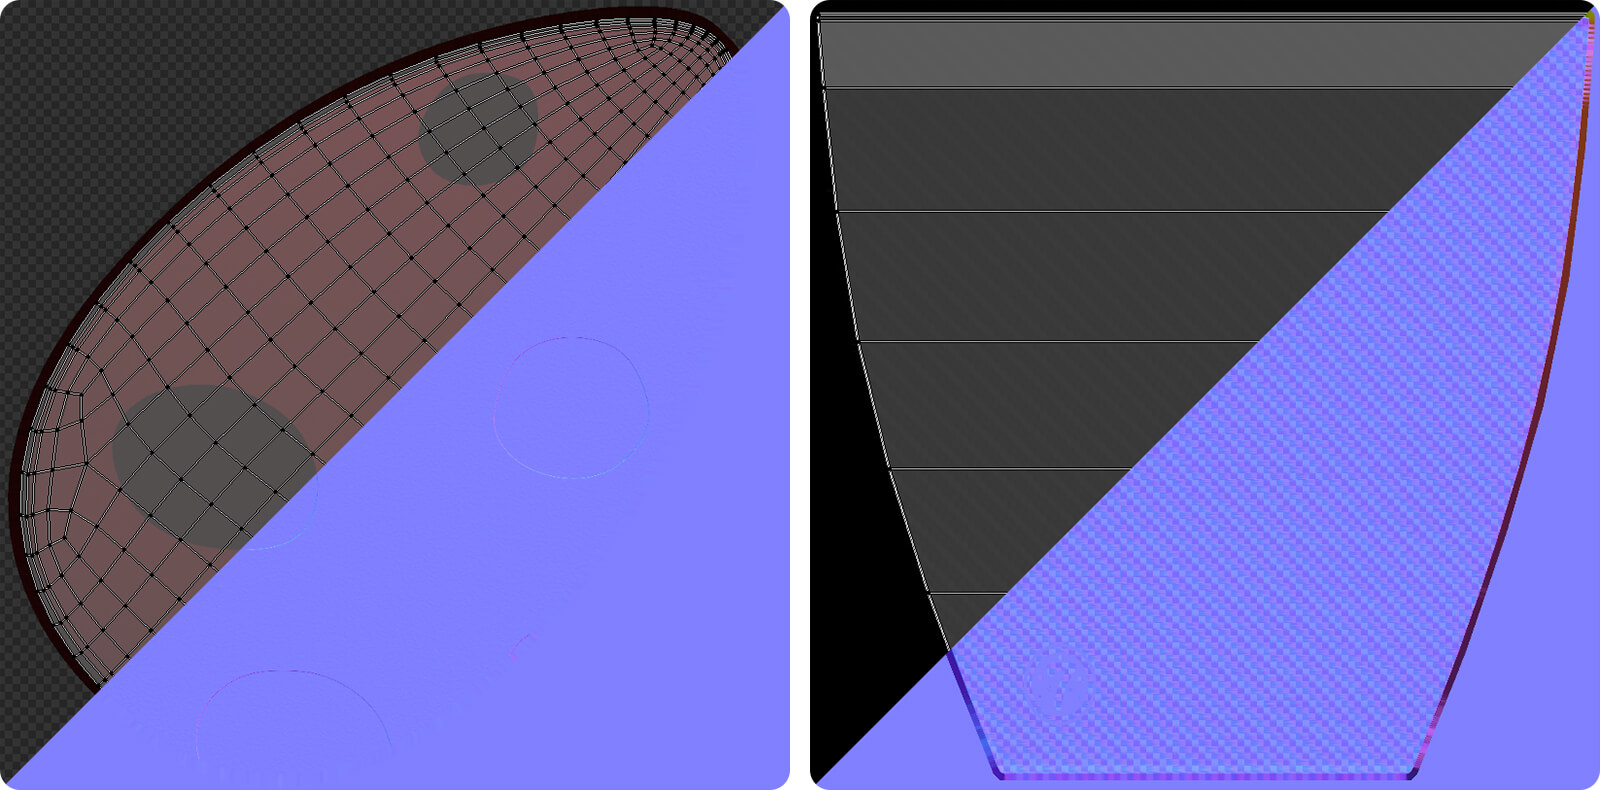
There are only a few image files—the shell, leaves, hood, metal mesh, and textured metal. Each with its respective diffuse and normal. I had to do some baking to convert procedural stuff to images, but it worked quite well.
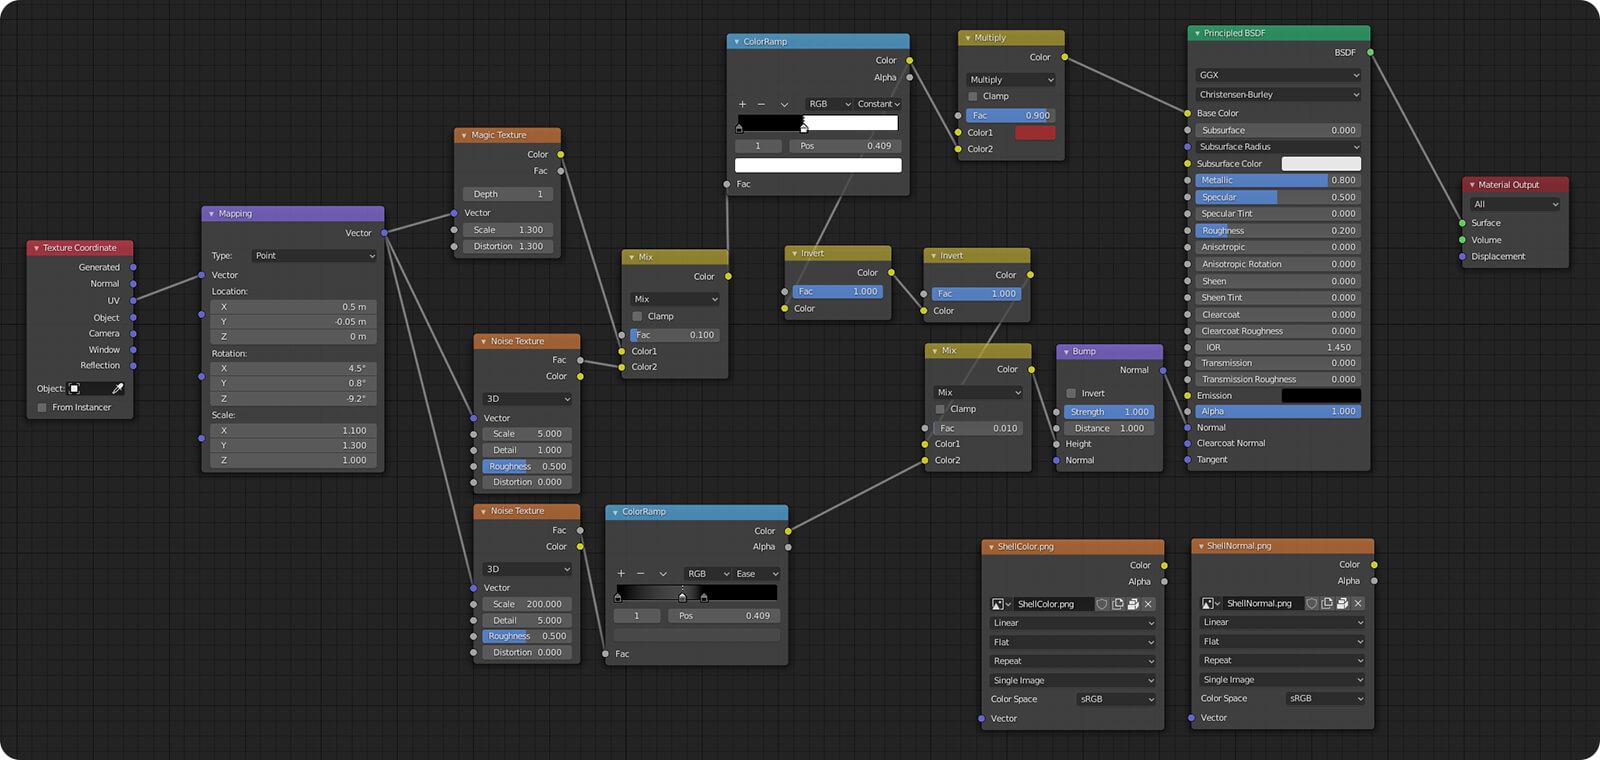
The shell texture was a combination of magic textures and high contrast ramp nodes for spots, and an overall noise texture to give it some roughness. I baked a diffuse and normal from my node tree and it translated perfectly into Sketchfab.
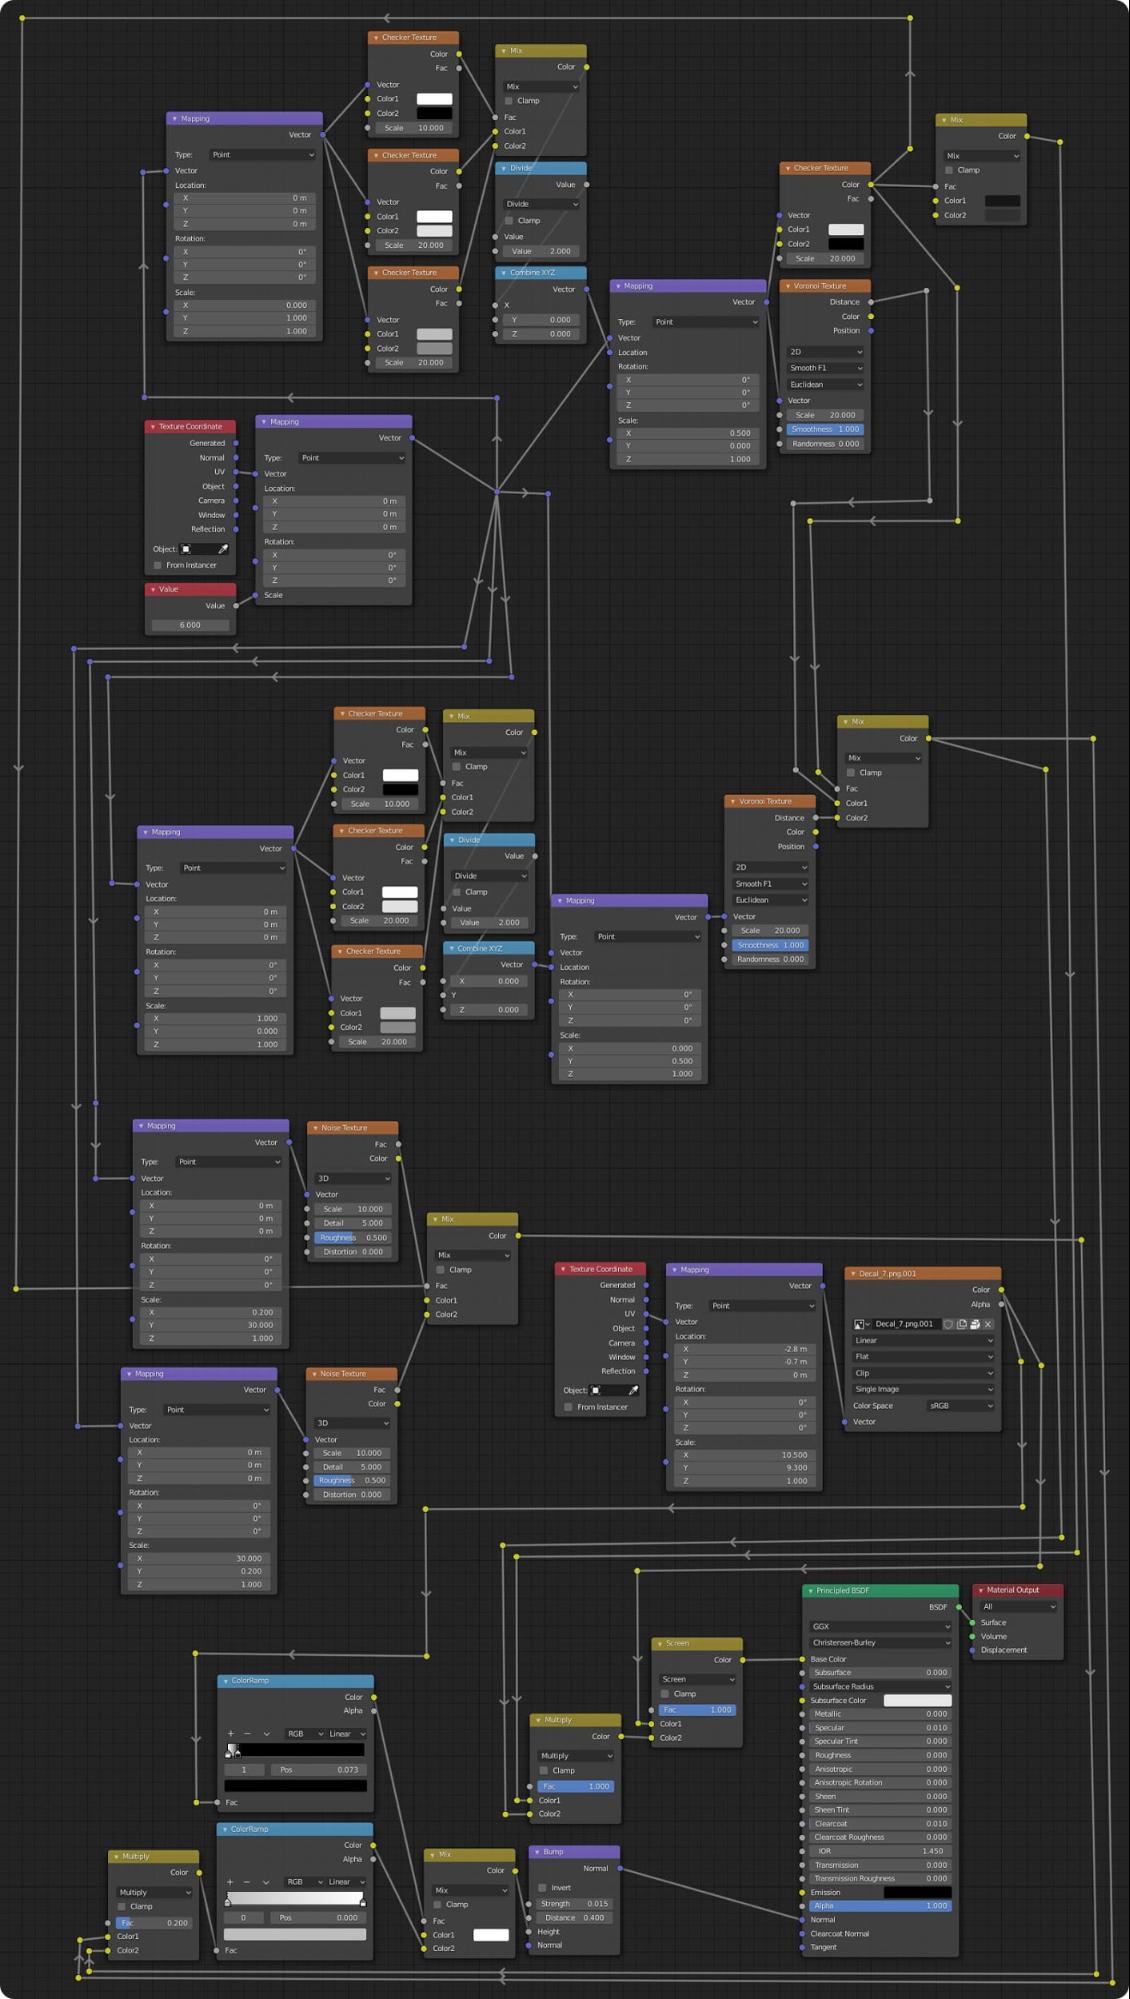
Similarly, the carbon fiber hood was procedurally generated. Credit to CGMasters for the tutorial. I didn’t want the decal to have the carbon fiber texture, since it would have been applied over the top, so the node tree was adjusted to account for the flatness there.
Woof, that was a doozy of a tree. Got what I needed though. The last few textures were a walk in the part by comparison. The textured metal nodes were just for the bump map and the mesh node was set up just for opacity. Both plugged into a principled BSDF for their respective diffuse, metalness, and gloss.
I also wanted harder shadows where anything made direct contact, so I set up a large area light and baked a version of the diffuse with shadows for the foreground leaf.
Optimization
Most of my image files were around 2k. I ran them all through tinypng to shave any excess bits before packing them back into my .blend file. My earliest ‘complete’ version was around 150MB, and most of that was from uncompressed textures. The current file is around 37MB.
I also spent time applying all of my subdivision modifiers and converted curves to meshes. This isn’t necessary to upload, but I wanted to be able to clean up the real geometry. Plenty of meshes had excessive edge loops in smooth sections. I was able to take it from somewhere around 600k verts down to around 273k by removing them. One good example of this was the hood. There are no bends along the x-axis, but my subdivision added a few unnecessary edge loops there. I also deleted faces wherever they wouldn’t be seen, like on the underside of the shell or under the empty fuel container.
Sketchfab
I spent some time looking at popular models and noticed annotations on a few. Then it hit me… ladybug facts! I started googling and found a handful of short factoids to plug into the scene. If not for this, I might not have added the fuel containers or drink, since both were the direct result of a ladybug fact I wanted to share.
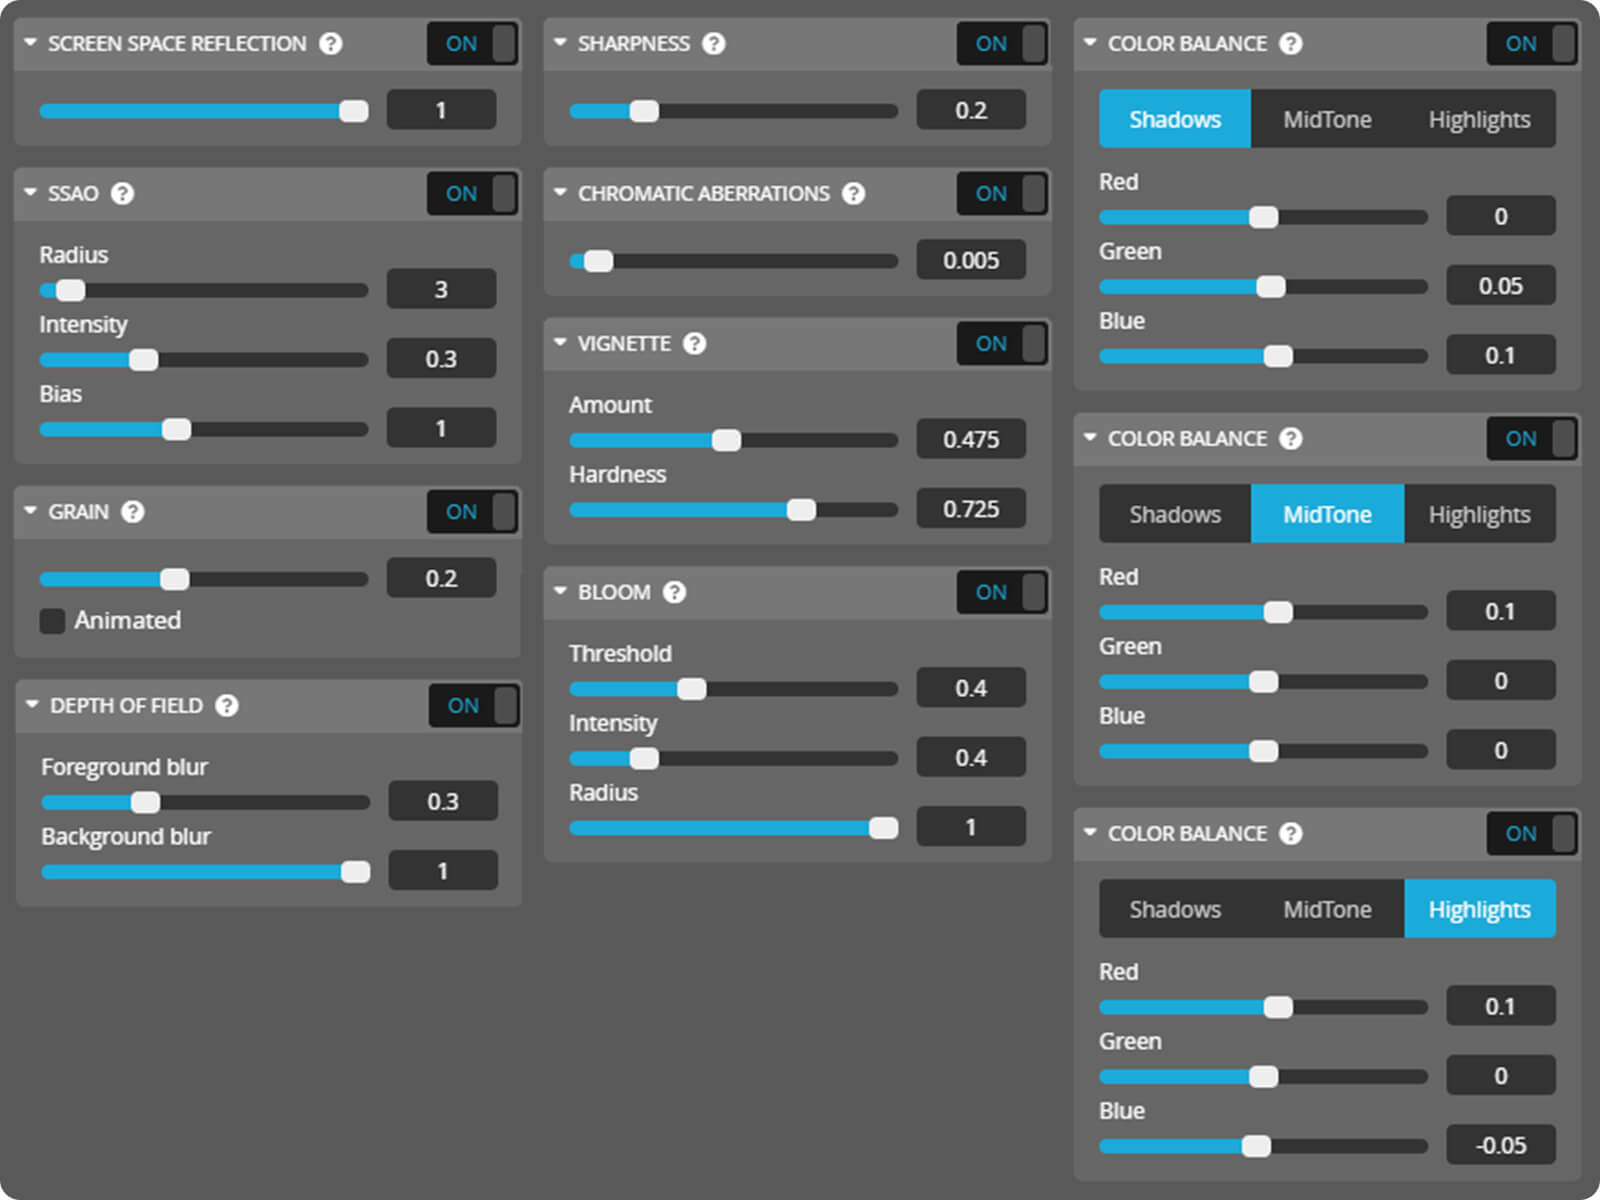
The area is lit by the Muir Wood hdr. I didn’t have a lot of control over the shadows and ended up turning them off in favor of my baked leaf and SSAO in post. Speaking of post-processing, I know the depth of field is a tad heavy-handed, but my intention was for the scene to look very small and to keep the focus centered on the buggy rather than the background. I was going for a ‘tilt shift’, or ‘macro lens’ feel. This was also the reason I turned on noise, aberration, and the vignette.
I also took advantage of the color balance settings, shifting the highlights towards red and the shadows towards blue. It’s very slight, but I love that Sketchfab gives me the ability to grade the entire scene so things feel more connected.
Final thoughts
I utilized some new techniques, learned better workflows, and had a great time making and sharing this model. As a bonus, here’s a cross-eye stereogram, a 6k render and, for anyone interested in using this buggy, I have a rigged version in the Sketchfab Store.
This may be the most complex model I’ve made to date, and to win a contest and find myself under a spotlight? What an honor, and a motivator to keep going. I hope people get something from this post and thanks again to Sketchfab for the opportunity to share!
You can hit me up on the Sketchfab Discord(Juice), my Sketchfab profile, or Twitter.
