Hi, my name is Nik. I live in Moscow, Russia.
I founded a motion graphics studio around 7 years ago after a long life as a freelance motion designer and videographer. I’ve also co-founded Extrabite.io, a two-man band of After Effects tools creators. So I had no real hands-on 3D experience save for a couple of Cinema 4D experiments.
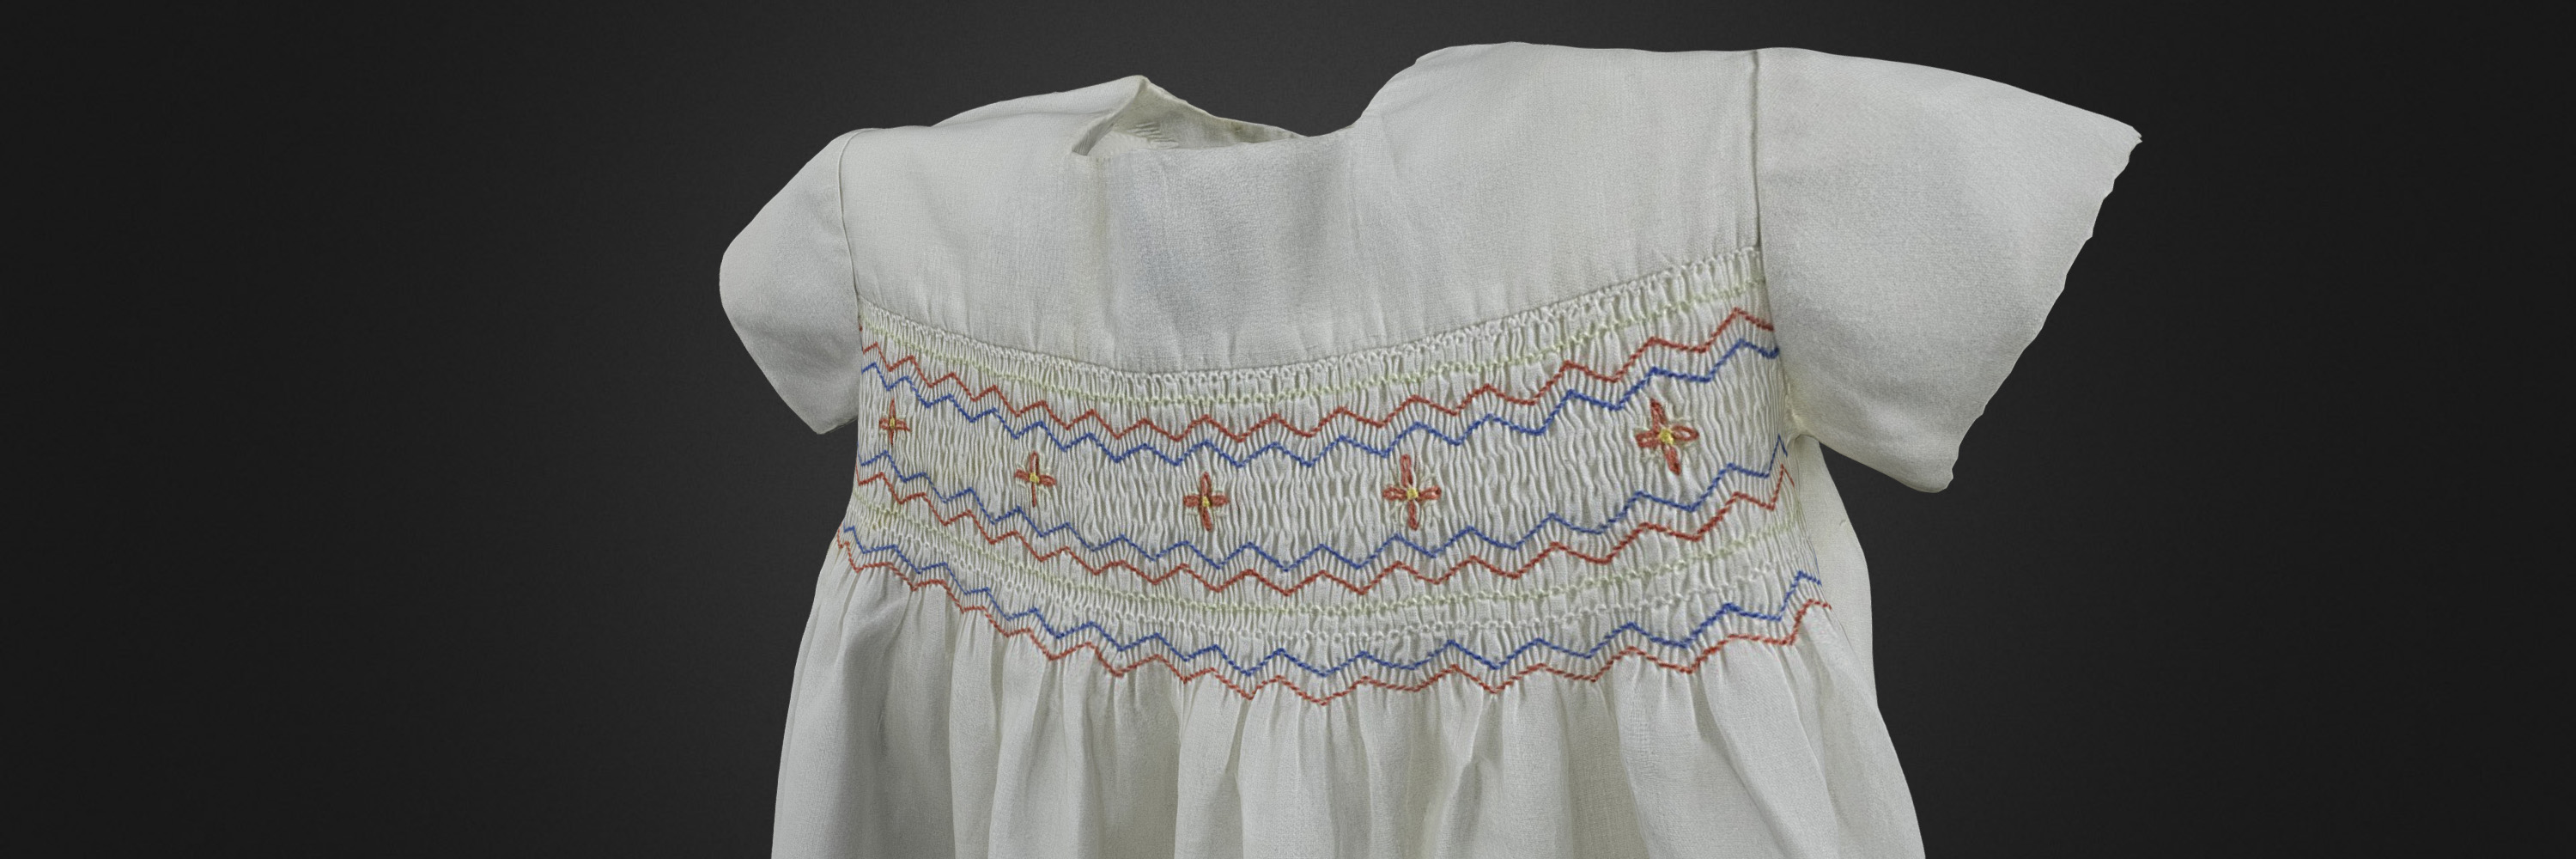
Mother’s Baby Dress
At the beginning of COVID-19 quarantine in Russia I moved to my parents’ countryside house with my wife and daughter. With all these changes I was able to focus more on the family and recalled a project I had planned a couple of years ago—making 360° photos of my grandfather’s collection of sailor figurines. He’s been collecting these figurines for 50 years and the whole collection is both huge and impressive.
After giving some thoughts to the whole idea of 360° photos, I concluded that this approach would not actually be sustainable, has no established standard for online viewers, and would eventually become obsolete.
At the same time, a friend of mine had been posting his photogrammetry experiments in the group chat. It looked like magic and was more or less what I needed. 3D models are standardized and I believe they will stick with us for some time.
I did not have much experience, but I quickly grew fond of experimenting with my Sony RX-100 camera and setups I made in the workshop. And I had the whole attic for my studio experiments, which gave me ample room to play around. A couple of iterations later I had a more or less solid setup collected from cheap aliexpress parts and used photography equipment that I got online. I was making 2 to 4 scans a day and it was not a surprise that in a month I hit a proverbial wall. Models became harder to scan, I was quickly losing motivation after 1.5 months of juggling work, family, sport activities, and scans.
That’s when I discovered Sketchfab’s challenges. Scanning a piece of clothing sounded intriguing and a bit intimidating. At that time, I had already scanned some shoes, but those were nothing compared to a shirt or a dress.
My parents’ house is filled with artifacts and pieces of family history. I’ve asked my mother to find something special for her and she brought a little dress she used to wear when she was two, around my daughter’s age.
Process
First, I made a stand out of a wood plank and a rod, to which I then connected a mannequin base made of styrofoam:
Syrp’s table has some handy holes drilled in it that I screwed the stand base into.
I also had some pieces of black fabric secured to a couple of photography stands and a wooden rod with clamps. Just like a real studio!
Mine is set up in the attic, so don’t mind all the mess.
Oh yeah, and the mannequin is actually made mostly of paper towels held up by the paper tape.
I also got a used studio tripod recently, which allowed me to do the shots from all the possible angles.
Shooting
The real challenge started with the first shots.
I used the Syrp Genie Mini 2 Product Turntable. It can do up to 100 shots per full rotation in Turntable mode, but those settings are good for solid objects. Every turn is a major jerk for the lightweight dress fabric. I could not figure out how to smooth out the action, so I switched it to the Video mode, which is also highly customizable. I set it to 10 minutes per full rotation, which turned out to be a perfect speed. I hooked up a simple timelapse controller to the camera to do one shot roughly every 6 seconds, resulting in about 100 shots per full rotation.
I usually shoot with ISO 200, which is the least noisy option for the simple sensor installed in the Canon 2000d. To shoot the moving object, I turned it all the way up to 800. The result was noisier, and it affected the details in the shadows.
I made a couple of not-as-successful attempts, which were affected by the slightest wind. I had to close every door and window to stop the air movement in the attic and spend a full hour—per attempt—in the now quite hot room.
It was not so bad, to be honest. At least I had Wi-Fi.
Processing
The second major challenge was posed by the model itself. Some parts just did not align, and Metashape could not catch enough tie points in the middle of the dress. I analyzed the photos and found out that they lacked details there.
The last shoot was done with a couple of close-ups and only in RAW format. This allowed me to color-correct the whole batch later using Datacolor’s Spyder24 color checker and get more details from the darks.
Using Reduce Overlap was fast but I was losing the details in the fabric folds.
Eventually, I enabled all cameras and got a more or less clean Dense Cloud and the model at the cost of more processing time.
I had nowhere to rush, though.
Since the challenge was focused on the use of Agisoft Metashape, I decided not to do much outside work. Well, not that I could do it in the first place. All the sculpting software is alien to me, and I had only the weekend to finish the challenge. After a couple of hours of 3D-Coat tutorials and trying to get used to its UI, I finally gave up to turn my attention to the shooting and processing techniques.
I made another attempt with the mesh created from Depth Maps and the result was truly impressive. There were some details lost, but after decimating in Instant Meshes (which I find to be a good intermediate tool for decimating), only a handful of weird polygons were created in the creases that I needed to clean.
Just a bit of smoothing, and the model looked good. At least, solid.
Results and thoughts
I am still amazed by the magic of photogrammetry and the power of Metashape. The level of detail in the rendered texture is astonishing, again, with the camera I got for less than 200 bucks.
The new experience is also quite refreshing in the current times of self-isolation. Come to think of it, this is the main driver for me to keep scanning and keep learning.
Here’s the final result:
I’m still pretty much new to the field of 3D and even the concept of PBR has been somewhat alien to me. It’s funny, but what I think has helped me is the standard Sketchfab black background image, which masked the lighting gradient on the model. I’m exploring Sketchfab’s shaders now and find them very useful, but have more to learn more about materials.
It might come as a surprise that I did not win the competition. The winners’ models are flawless and are made with such an amazing level of attention to detail that I can only silently bow to the authors and strive to do better. I appreciate Sketchfab as the go-to place for the industry professionals that showcase their works and motivate others to do better.


