About me
Hello there! My name is Gillian Morio (Yuguhtrrh), I live in Toulouse, based in the south of France.
For 3 years now, I’ve been studying 3D at the E-ArtSup School. I mostly do 3D stylized props and environments with a PBR workflow, and I am currently learning hand-painting.
Before choosing this school, I wasn’t sure what I wanted to do exactly, but at least I wanted to go into the video game industry. A huge thanks to Hassen Samaali, one of my first teachers at E-ArtSup who inspired me; through his lessons, my passion for making 3D projects was born and it is still going strong!
I always want to do optimized models and textures so I’ve made a lot of personal projects since I started to learn 3D. I have joined some Discord servers such as Stylized Station, Experience Point, and HandPainters Guild in order to have as much feedback as possible so that I can learn more quickly.
I started making 3D with Maya and ZBrush, essentially. It’s kind of funny because I truly thought I wouldn’t change from these softwares, and then Blender arrived in my life last year thanks to an internship I did at Ankama. For texturing, I mostly use Substance Painter and Photoshop in this order of preference.
I prefer to spend a ton of time on my projects and have the guarantee to get the quality I want to achieve, than to speed things up and have something I’m not satisfied with. This is why the project I will introduce to you took 4 months to make.
Concept
This project started during my internship at Ankama where I met someone I admired when I was younger: Fabrice Nzinzi, who is an amazing illustrator/concept artist that I had the opportunity to work with.
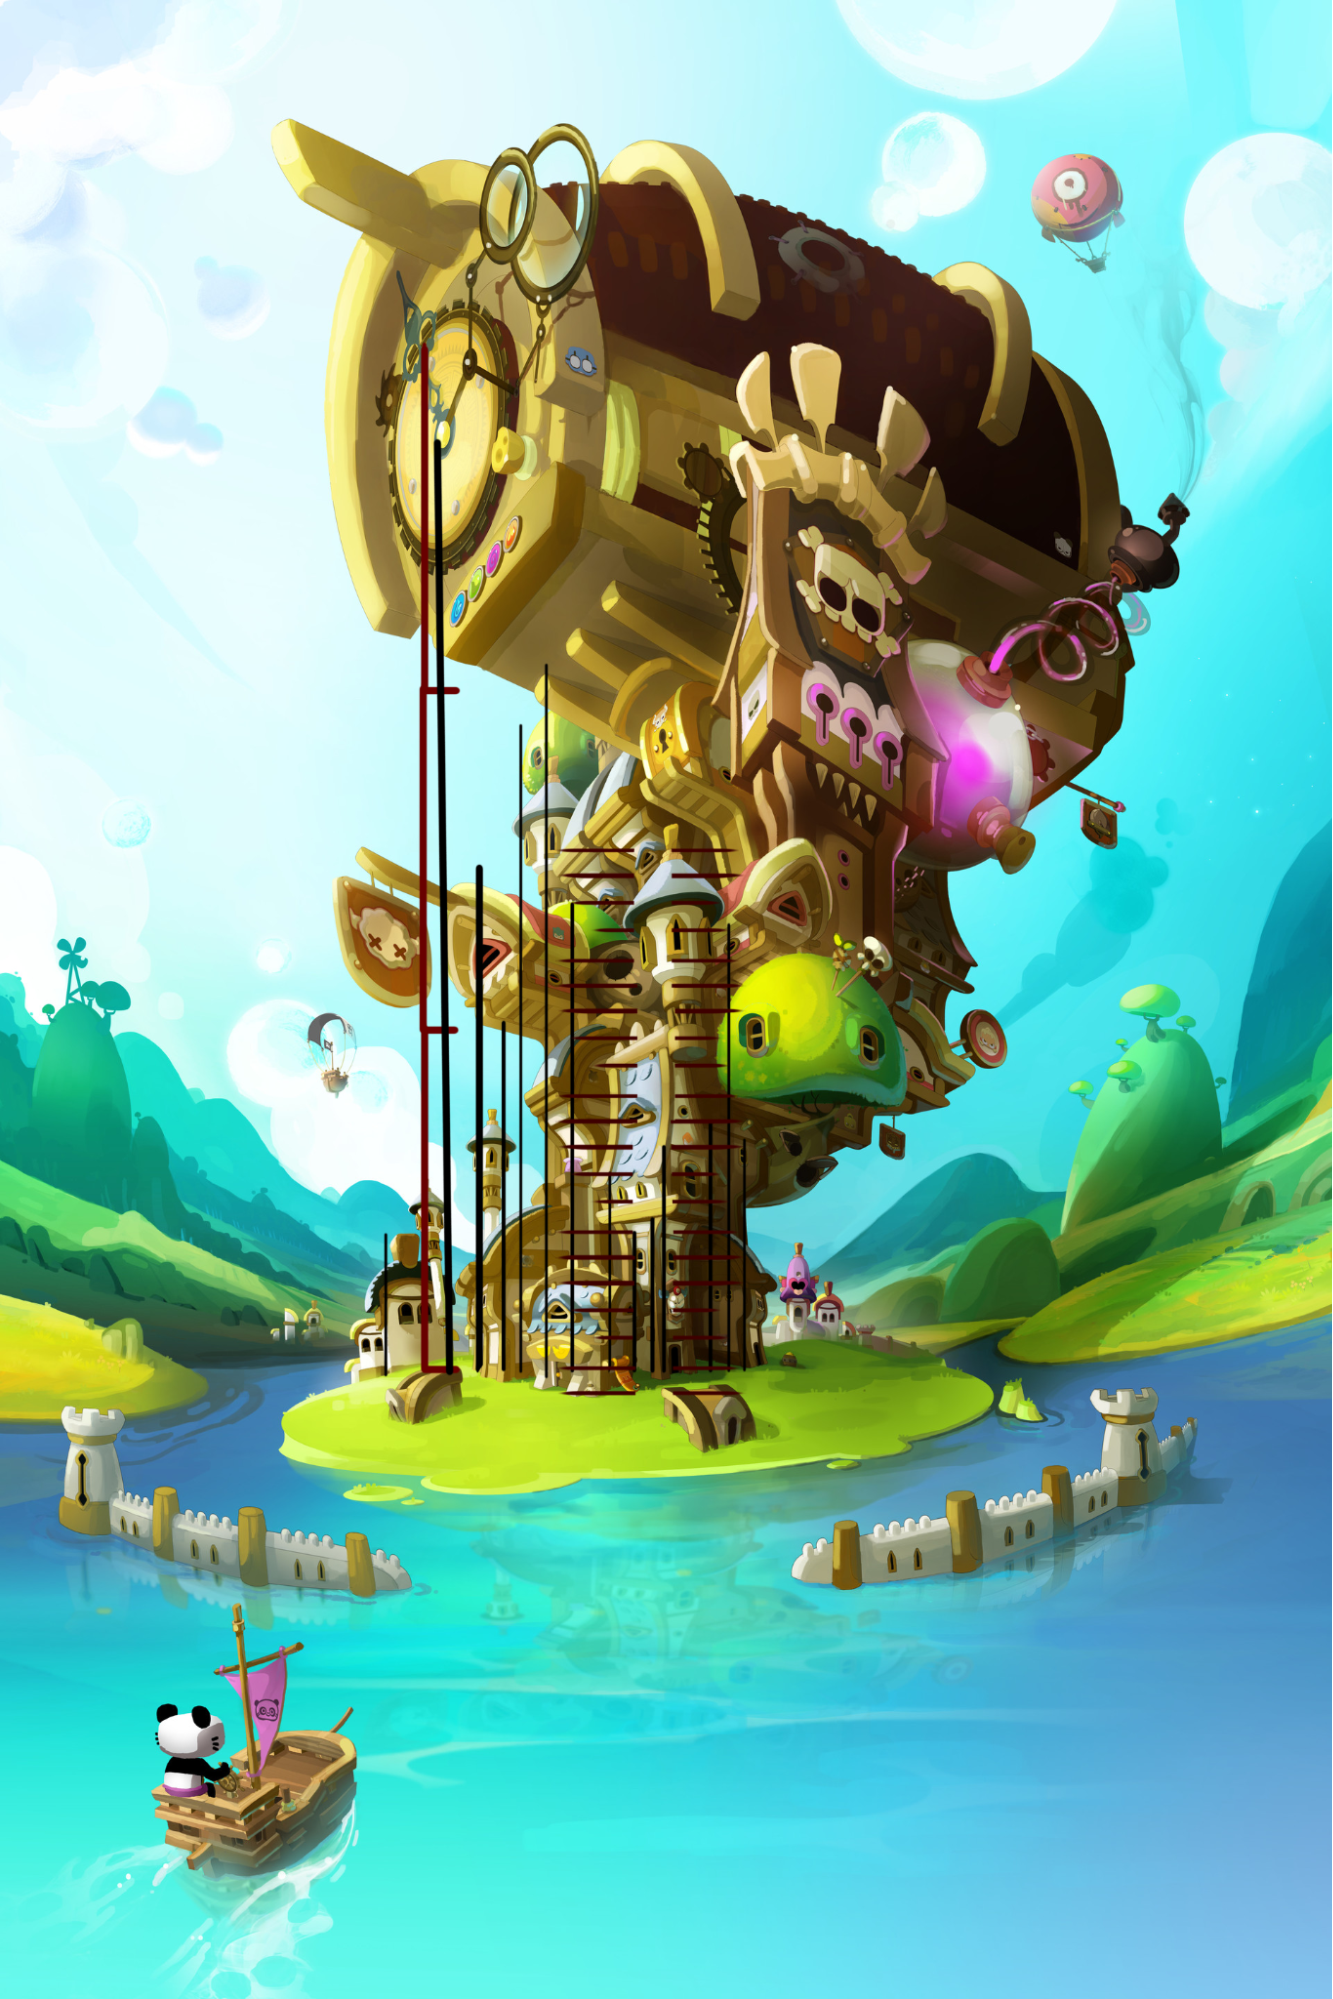
I wanted to know more about him so I took a look at his portfolio and I found a concept that instantly caught my attention and that I really appreciated. Here it is:
First of all, I really loved the composition: this enormous ascendant shape that constantly focuses my attention. Also all these new shapes, colors, and the general vibe this artwork gives.
I really appreciate making impressive things—even if they aren’t that hard to make—to give viewers that “Wow” sensation.
This project was the opportunity to recreate an old artwork in 3D, and to practice hand-painting with Photoshop, a first for me.
For modeling, I only used Blender. For texturing, Photoshop and Substance Painter, and for rendering, Unreal Engine 4. But, because it only gives a 2D view, I felt a little restricted and my work would feel unfinished. Sketchfab allowed me to share this piece with another perspective, which I find very useful and important!
Blockout
First of all, in order to have the best proportions possible, I had to establish the height of each house, and also spot their repetition. So I did a quick breakdown over the concept.
The left one is made for the repetition, the right one for the dimensions
Once I had both, I started to create each house’s blockout, and sent them into the engine in order to have a quick preview of the blockout.
Modeling
Now that I thought I had all the proportions fine, I had to make some changes to the modeling in order to stick a little more to the concept, have better shapes, and correct the wireframe, which wasn’t good enough for me.
At the beginning, I thought I would need a high-poly so I made it but it happened that… I didn’t need it at all. I just used the low-poly with sharpened edges and it did the job really well. It was a huge waste of time, but it is a part of the learning process!
As always, I am trying to push the optimization as far as I can.
My tools for modeling are often subdivision, Mirror, Array and Solidify Modifiers.
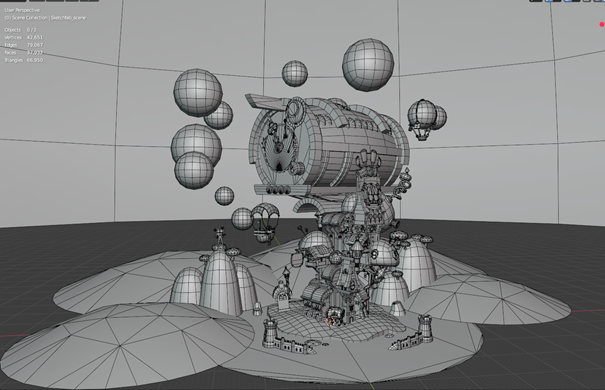
The thing I usually do for modeling is start with a cube, give it a subdivision modifier and manipulate it the way I want (by adding some loops, obviously). Once I have the shape I want, I apply the modifier and delete the edges I don’t need. The spheres you can see in the next image are basically a cube with a subdivision + cast modifier (applied). In my opinion, it gives a more optimized sphere with uniform shapes than using a basic one.
Also, as I like making optimized low polys, it is really rare that I bevel edges. It depends on whether the bevel offers a big improvement to the shape.
Texturing
I created one texture for each house, and every house is at 1024 x 1024 resolution except the biggest one at the top, which is at 2048 x 2048 resolution.
Because it was my first time texturing with Photoshop, I made a blockout of the texture with Substance Painter, and then I went to Photoshop in order to add the details.
At first, I tried to respect the concept as closely as possible, but it happened that everything looked flat so I had to saturate the values a little more. I also played a little more with the gradients and complementary colors. For example, overall there is a lot of yellow on the walls, so the shadows/Ambient occlusion are a little bit purple in order to contrast and offer something more pleasant to look at.
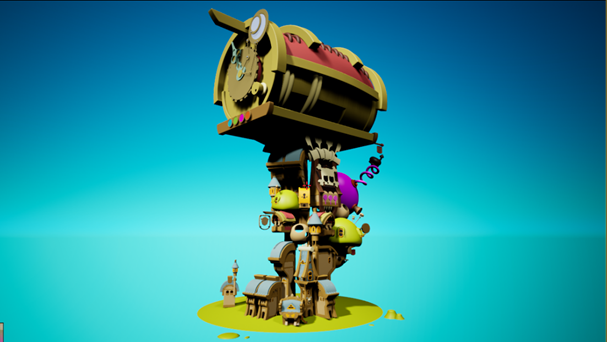
Here’s a screenshot of the final scene, with all its base colors at once.
I was really happy and satisfied with it because even just with the base color in Unlit Mode, it gave me something I considered cool to look at!
I will skip the Unreal Engine 4 render step because it isn’t why we are here. Let’s go right into the Sketchfab part!
Sketchfab
Here was my method for exporting the mesh. I reassembled everything within Blender, applied to each house its own texture and duplicated them as needed in order to avoid the emptiness the scene could have in the back. The “sky” was made with a half-sphere that I inverted the normals on and added a texture to. Once I had everything set up, I simply exported it as an FBX file.
Now within Sketchfab, I had to make sure every texture was properly applied. There isn’t a normal map, specular, or anything else—the base color was enough.
The only things that needed some modifications were the bubbles and the flask for their opacity and the liquid within the flask for its emissiveness.
For the general settings, I used these. I used the background in order to match a little more with the water at the bottom and the sky.
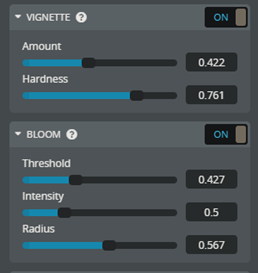
For the post-processing, I usually use the same settings for each project which are:
Ambient Occlusion in order to separate each element well from the others.
Sharpness to see better each house because there are a lot of elements and it could feel hard to distinguish them all without it.
Vignette for keeping the focus at the center. To enforce its effect a little more, I added a light on the clock to make the focus point more powerful.
And bloom effect to add a magical feeling to the scene!
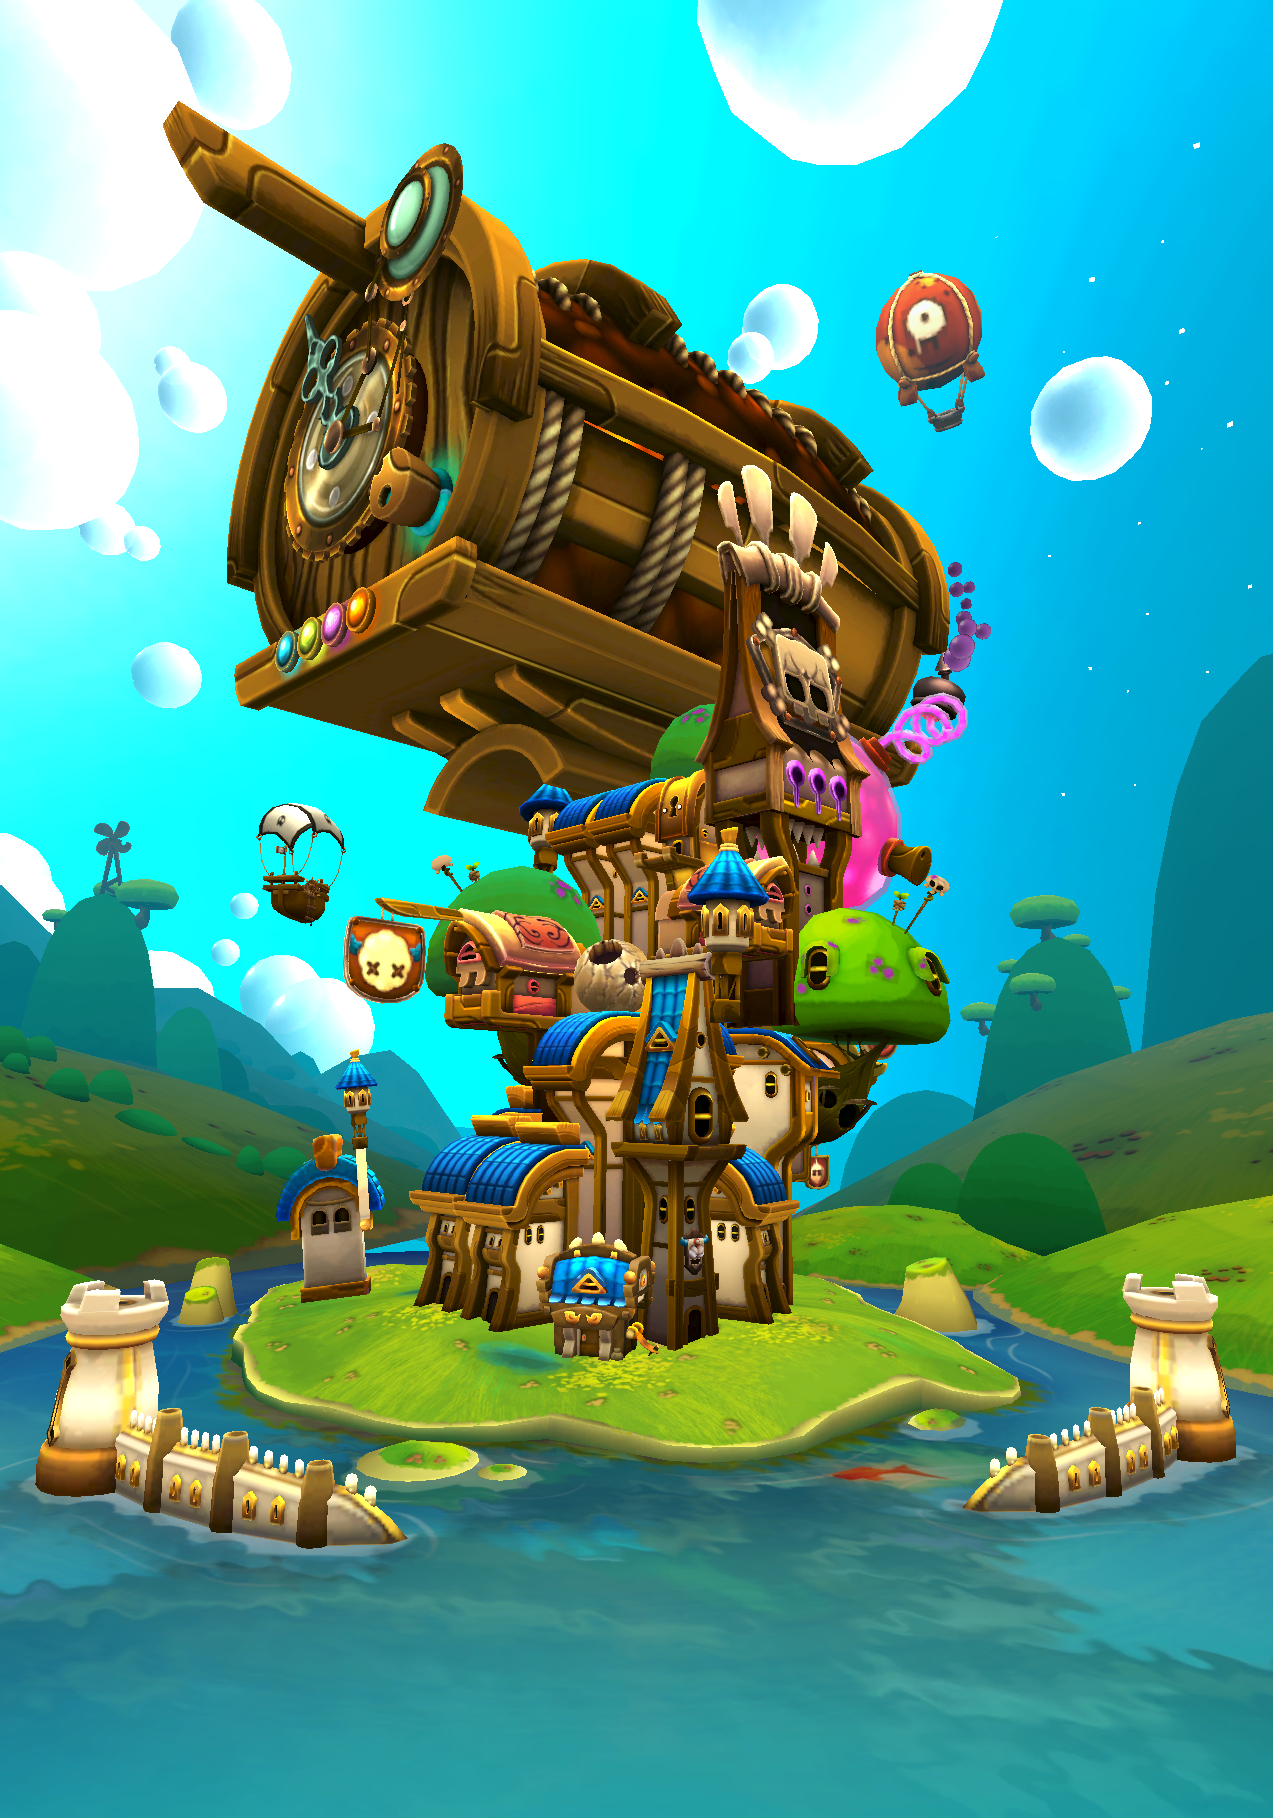
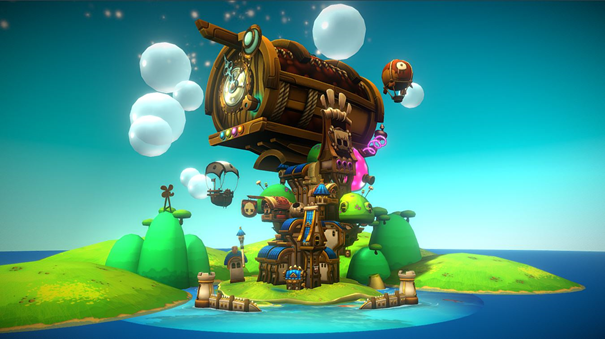
Finally, the most important thing to make you click on this artwork: composition! Without a good camera position, all the previous work wouldn’t have the punch it should have.
So I put the camera at a low angle, but I had to also keep every single element in the scene. Putting it at the very bottom would give the very impressive feeling I wanted to give, but by taking this option, we would see underneath the model and it wouldn’t be pleasant at all to look at. So I chose an angle that takes every single element into the shot, and saved the view!
And there it is!
Few words about works in progress
One thing I really appreciated with this project is simply taking screenshots of the work in progress as I made it. This is something I’ve totally included into my workflow now. From the 1st WIP to the last one, it is really satisfying to see how huge the gap of details is between them. It can show to everyone what steps you had to go through during your project, but also for you to take a look back at how it looked at the beginning and have this “Wow” effect in your own mind. ?
I think it is all I have to share about this project! I hope you found it interesting or useful in some way!
If you want to see all the others renders I’ve made, get over here! Feel free to check out some of my social networks such as ArtStation , Twitter , Instagram and, of course, Sketchfab!
A huge thank you to the Sketchfab team for giving me the opportunity to share my work!
And thank you all for reading this article! Please take care of yourself and have a good day! 😀


