Introduction
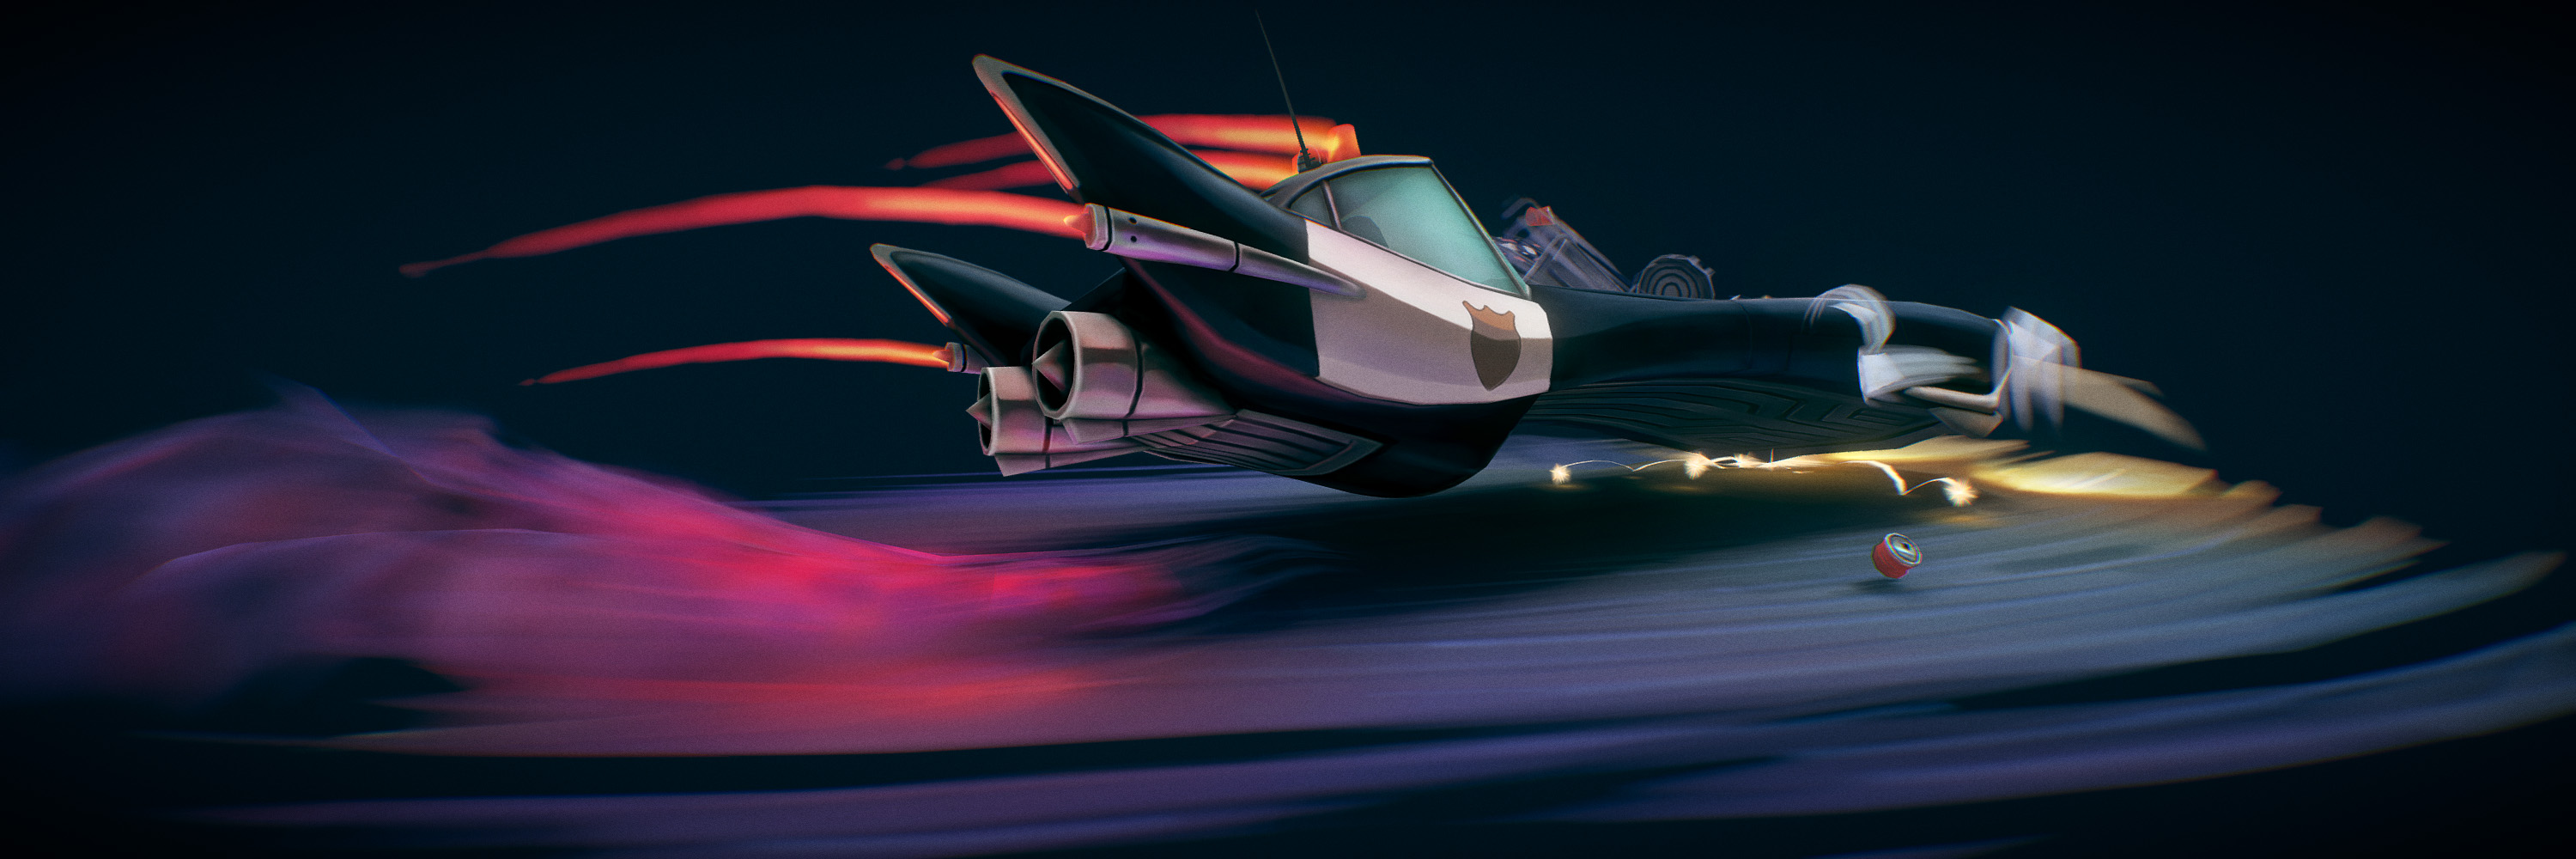
Hi, I’m glad to have you here! I would like to share my workflow process of making the “Police Chase” model.
Let me introduce myself first: my name is Pawel Matysik and I work as a Lead 3D Artist in Warsaw, Poland. I have loved to draw since kindergarten, and this fascination extended to computer graphics as soon as I laid my hands upon some photo editing software.
Video games were always my second biggest passion, but I didn’t consider them to be a viable career path until the dawn of the Indie Studios era. Just after graduating from college, an opportunity came to work on a small indie game, so I took it.
I’ve been working on games ever since.
Nowadays, I create everything related to graphics—concept art, 3D models, textures, GUI—you name it! After many years of practice, I am finally confident that I have a huge impact on how the final product looks and feels.
In my spare time (yes, I still have some!) I enjoy working on personal projects to display on Sketchfab. “Police Chase” is one such project.
Inspiration
I enjoy translating two-dimensional artwork from my favorite movies, comics, and other artists’ works into the third dimension. Since Blender (and other software) made it possible to paint directly on the models’ surfaces, it became much easier to make the final work feel like the original art. In the end, you get a painting which you can explore and experience from every angle—for me, it’s an experience like no other.
In this case, I stumbled upon great concept art by Ido Yehimovitz.
The elongated shape of the car screamed “speed!” at me, so I simply had to create a dynamic police chase scene based on this artwork. At this point, I wasn’t sure how the whole thing should look, so I decided to make the vehicle model first, and then experiment with the scene later.
Modeling and initial textures
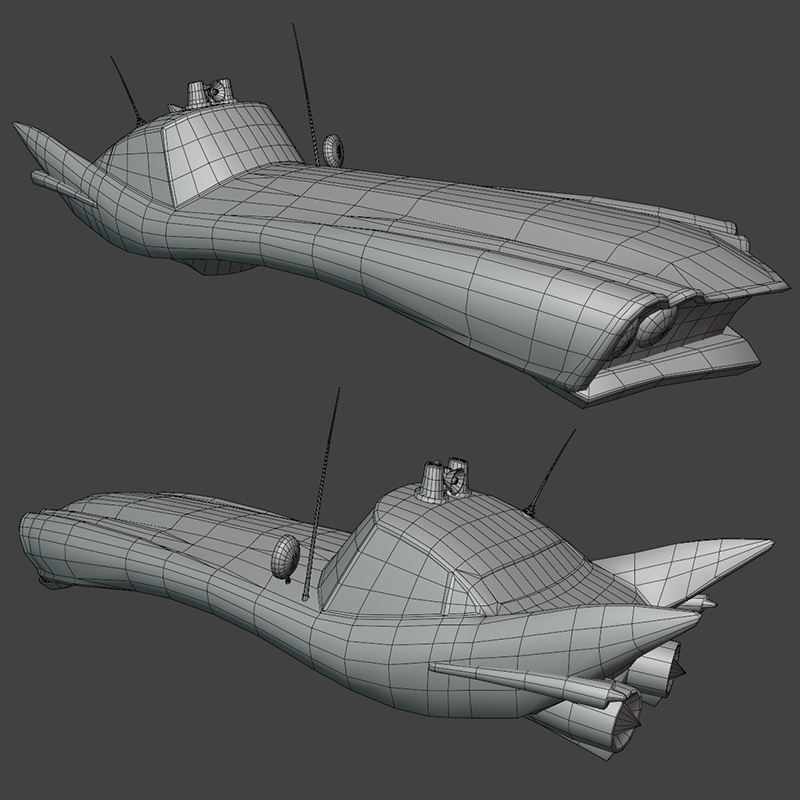
For stylized models, like this one, I use a combination of Blender and Photoshop. I start with a simple box, add a mirror modifier in Blender and then use the standard modeling techniques to make a rough shape. I prefer to create my models without any background reference images, unless necessary. This way I’m more focused on creating a proper three-dimensional form. I can add or remove geometry as needed—polycount is just a guideline and it doesn’t need to be perfect.
Somewhere in the midpoint of modeling, I use the “Smart UV Projection” option to quickly unwrap the model and paint a low-resolution texture over it. It’s quick and easy to do, but most of the time it’s way too messy to use in the final work.
BPainter is a great add-on, which makes it possible to paint in Blender’s viewport using layers. It also provides a simple option to switch to the shadeless mode in Blender 2.8.
In terms of painting, I just add roughly the right colors from the reference. This way I’m able to peek at how the final model might look and spot any errors that are simple to fix at this point. It also helps me to stay motivated when I can get a glimpse of a finished work early on.
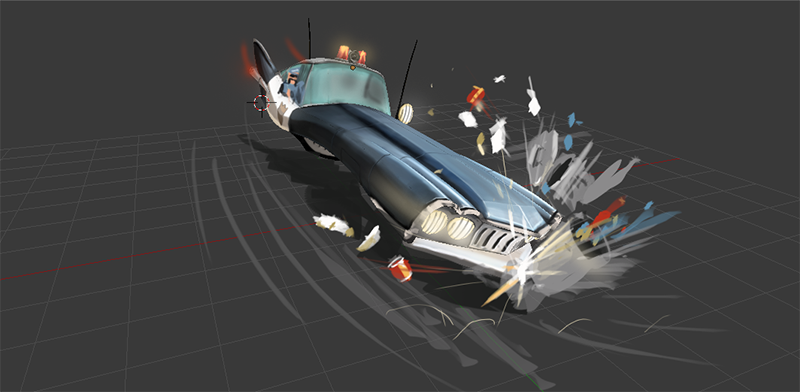
Now I’m ready to design the background. I usually take a screenshot directly from Blender’s viewport, paste it into Photoshop and sketch in all the additional elements. The result is rather primitive, but it works for me.
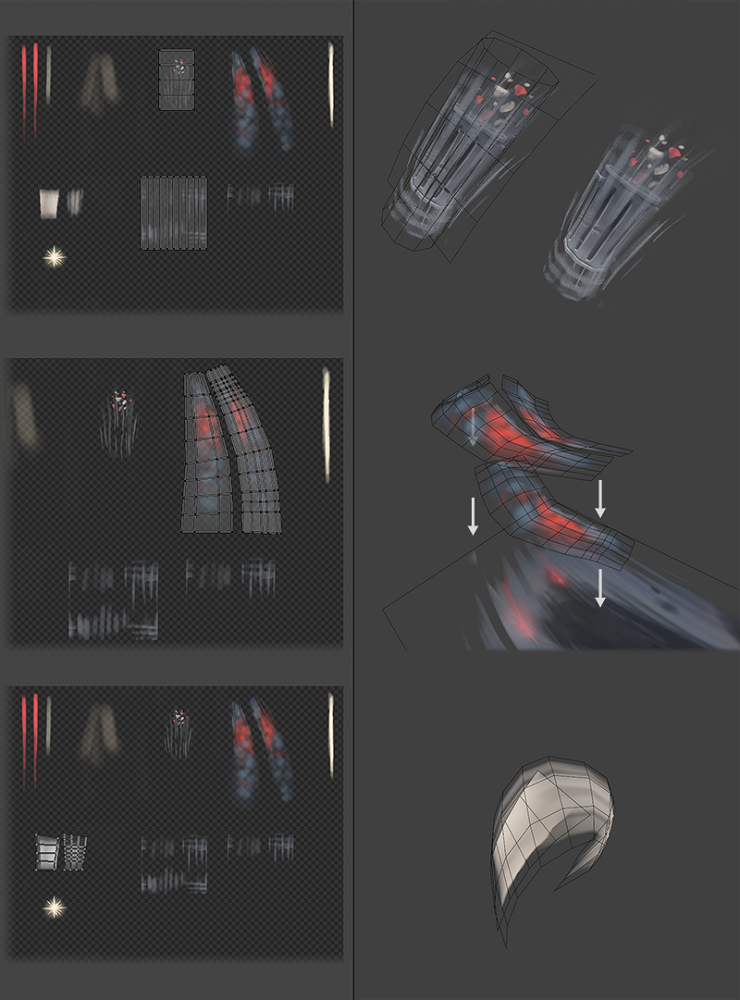
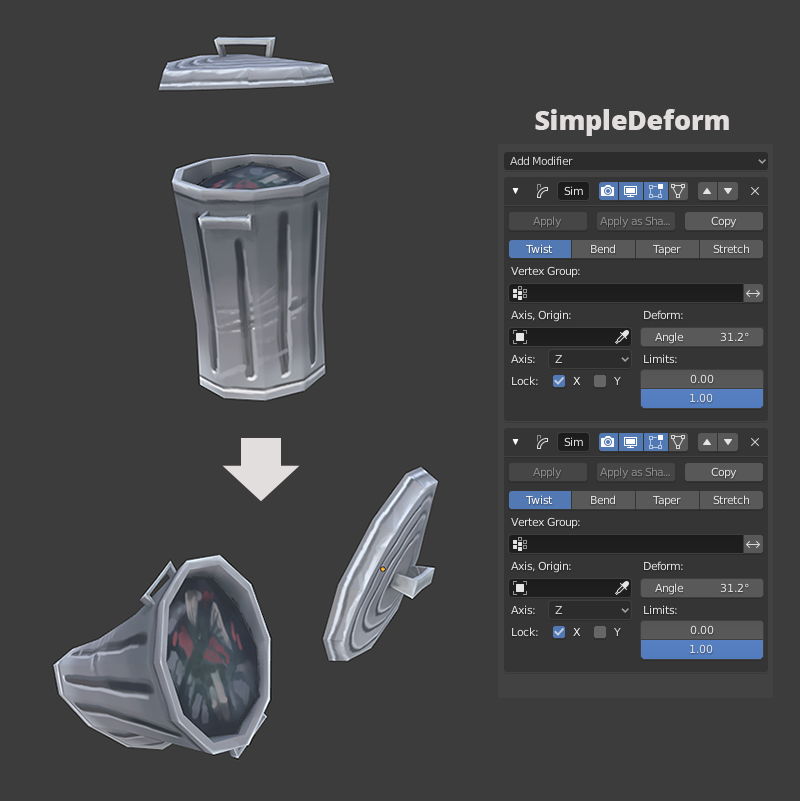
Back to Blender. I create a simple plane with transparency for ground, model the trash cans, and basic planes for the blurred smudges and sparkles. I unwrap them manually and paint them in Photoshop (in this case it is easier than doing it in Blender).
To make the trash cans more dynamic, I apply a “SimpleDeform” modifier with settings as seen below:
Texturing
When I am finally happy with the arrangement of the whole scene, I merge the mirrored halves of the car, create a fresh set of UVs and project the texture to a new, high-resolution one. This way I have a better UV layout and I can paint the lighting on a different layer using BPainter.
I repaint the whole model with more details. I correct any visible flaws along the way.
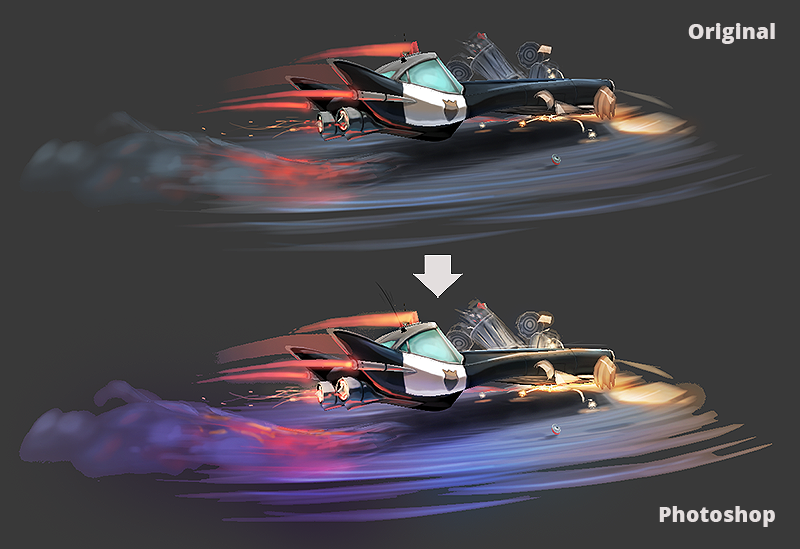
If I feel that colors are too dull, I take yet another screenshot directly from Blender and have some fun with it in Photoshop by painting over it on a layer set to “overlay” mode. I use the resulting image as a reference to repaint/fix the textures.
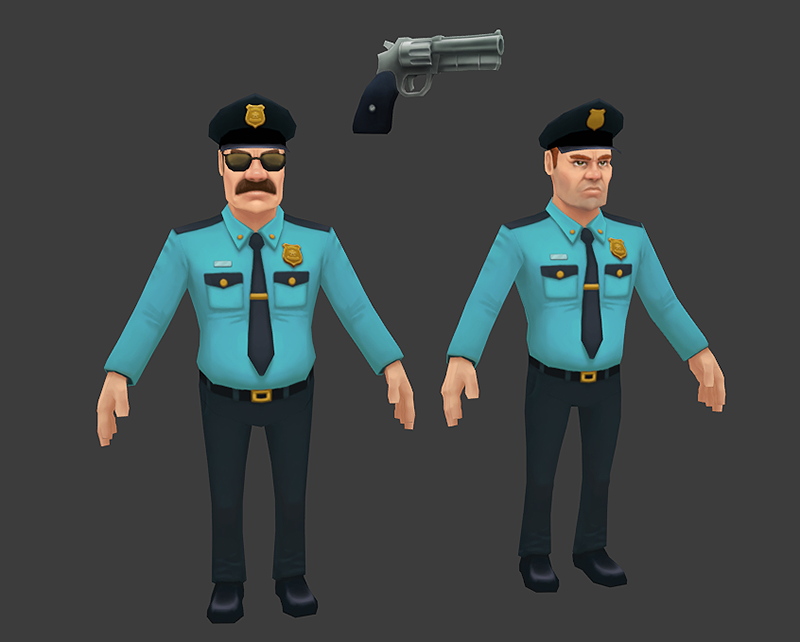
At some point, I had planned to include two police officers. One of them would aim a gun from the opened window and the other one would dramatically steer the machine. After I modeled them both (and a revolver) I realized that I strayed too far from the original concept so I decided to tone it back down a notch. I left only the driver and darkened the whole cabin. This way the final scene is more focused—adding two police officers would only distract the viewer and make the original idea weaker.
Sketchfab
As I mentioned in the beginning, Sketchfab is a powerful tool for sharing your models in full three-dimensional glory. You can achieve pretty amazing results with it, similar to those from Unreal Engine or Unity.
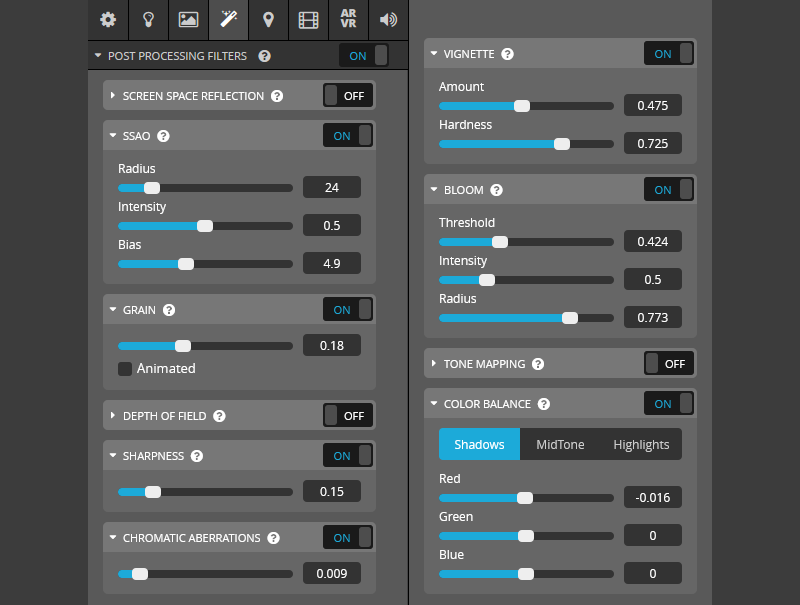
For this particular model, I used a PBR/Shadeless setup. The scene is supposed to take place during night time, and because the lighting on objects is mostly warm, I chose dark blue for the background color. Below are my Post Process settings:
I especially like the sharpen filter as it clarifies the image a lot. This kind of scene looks much better with non-animated noise, which reminds me of grainy paper. Don’t hesitate to experiment with those settings, as it is a lot of fun to see how drastically it can change the mood of your artwork.
Here’s the final result, I hope that you like it. And remember—it’s free to download!
