In Art Spotlight, we invite Sketchfab artists to talk about one of their designs.
First, a quick note: You can download the Houdini source file for this design to check it out for yourself! Here’s the link.
Go ahead and break it, mod it, pull it apart! Let me know if you make anything cool based off the design. You can grab the free apprentice version of Houdini from the SideFX site to open the file.
Background:
Howdy! Thanks for checking out my Art Spotlight, I’m Mike Murdock; I’m a Virtual Reality Director based in the Bay Area. Over the past few years I’ve done a lot of VR interface designs for companies including Oculus and Jaunt VR and worked on quite a few games and entertainment projects.
Idea and Inspiration:
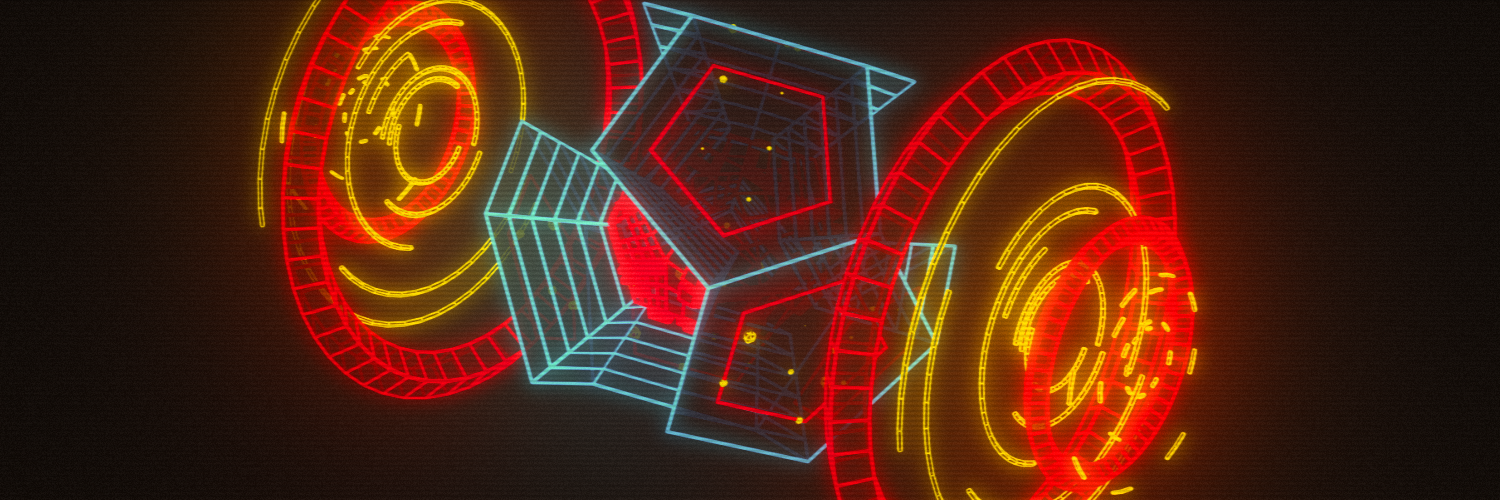
I started making these retro-inspired interfaces when I was consulting at a VR startup as a UI and UX designer. I did these “3d doodles” in Houdini on the train ride home to unwind from a day of designing actual VR interfaces. This was a good way to relax and let the art side of my brain take over.

To make the above images, I’d simply change my Houdini viewport to “Wireframe Ghost” mode and snap a picture of my laptop screen with my cellphone camera. Then, I’d tweak colors in SnapSeed or Instagram.
Primary Ion Drive:
For “Primary Ion Drive” I wanted to just stick to primary colors and try out a couple simple modeling expressions. The rest of the design emerged from just playing around in Houdini for about an hour. If you aren’t familiar with Houdini by SideFX Software, the key feature is its weird and wonderful node-based workflow.
I’ve been doing a daily interface sketch for the last 6 months… usually just as a 2d image, but for this piece, I wanted to upload the actual 3d model to SketchFab so people could view it in 3d.
Houdini really removes the penalty for exploring different ideas; I can just branch off a node network and keep working. If I don’t like the results, I simply go back up the network tree and try something else.

Here’s a screenshot of the final design showing the different pieces of this design. Each of those nodes has another node network inside of it, like a container.
It took a little while to get used to this style of 3d modeling, It’s really fun once you get the hang of it.
Here’s a screenshot of the final node network inside the center module container.

Here’s how the core was built:

I take a mesh, randomly subdivide it, select random faces using a little expression in the “group1” node, and then extrude those random faces up.
Here’s the expression: (rand($PR) * $NPR) < ($NPR * 0.2)
Don’t worry, it’s not as scary as it looks … I’m pretty horrible at math / coding, so I can only handle simple expressions 😉 At its core it’s just generating a random number for each face of the mesh and then adding the polygon to a group if it’s under a certain value.
The right side ($NPR * 0.2) generates the percentage of faces I want selected.
To select 20% of the mesh’s faces randomly: I put in 0.2 as the multiplier.
This mesh has 246 faces, so my number is 49.2 (or 246 times 0.2).
$NPR is a variable that means “Total Number of Primitives” in Houdini. Even if the number of faces changes in my mesh (like if I subdivide it more) I will still know the total number of primitives.
And now the left side: (rand($PR) * $NPR). This generates the number I want to check against.
The “rand” function gives me a random number between 0 and 1. So for each primitive, I’m generating a random number and then multiplying it by the Total Number of Primitives.
Let’s pretend I get 0.1 from the random function: so 0.1 times 246 = 24.6.
Since 24.6 is less than 49.2, that face gets selected and added to the group. The expression does this check on every face on the mesh. Any number generated that’s larger than 49.2 will be excluded from my selection leaving me with only 20% selected.

For ease of use, I added in a slider and replaced 0.2 multiplier with a reference to that value so I can interactively tweak the selection.
Whew! We’re done with expressions for now; thanks for hanging in there! Although my brain isn’t wired for math stuff, I’m finding it’s actually pretty satisfying to build these little modeling “tools”.
My design process is nonlinear: I’m constantly hopping around my node network trying out different ideas and modeling operations and colors until the design starts coming together. For example, If I change the input geometry at the beginning of the network, everything cascades down to the bottom. Here’s an example where I plug in a sphere instead of the dodecahedron from the final design.
 It only took about 5 seconds to try out this other idea, but ultimately, I liked the simpler form better.
When making this design compatible with the SketchFab renderer, I wanted more control of how the wireframes looked. Here’s the tool I built to do that:

It splits my geometry into two branches: one adds a “polywire” node that builds a polygon tube around every edge in the mesh before applying the holographic glow material. The other branch just takes the input geometry and applies a black semi-transparent material. Then both branches get merged together into one piece of geometry so I have the original mesh with the polywire edge on it.
The “null1” node doesn’t do anything; I’m just using it as a placeholder for any other mesh I want to plug into this network.

Here, I’ve added in some color nodes and moved the original mesh to the side with a transform node so you can see the different pieces that get merged together.
I end up using this technique a lot in my designs, so I bundled up this simple network into its own node, called “HOLO”. Then I can just drop it into my network wherever I need it without having to rebuild it every time.
 Outer Circles:
Here’s a GIF showing the node network I built for the outer ring module. Mostly everything is very simple and straightforward. A lot of magic happens in the “CopyStamp” node: I copy the original circle a bunch of times and scale each copy down by about 20%. I also used a simple expression that allows me to “carve” each circle copy by a different amount so every ring is a slightly different length.
Then I add a polywire, give it a color, move it over to the side, and mirror it on the X axis before applying the holographic glow material.

The Red rings are also made up of a very simple network: There’s that “HOLO” node again near the bottom.
 Animation:
Finally, I wanted to get some motion into my design.
I just set some keyframes and made sure they looped.
Uploading to SketchFab:
Since Houdini’s Color node allows me to add vertex color information to the mesh, I just checked the “Vertex Color” option on in the 3d settings menu in SketchFab.

Since the shader supports Vertex colors, I can get away with only 2 materials, even though I have 4 colors. (Red, Blue, Yellow, Black)
Finally, I added some post fx for bloom and color correction. Here are those settings.

That’s it for my “Primary Ion Drive” interface!
https://skfb.ly/Yx8S
I’m currently working on a VR game called “Wire//Frame” that uses this retro computer aesthetic: Here’s a sneak peek of that project!

You can keep up with Wire//Frame and my other projects here!
Twitter, Instagram, Artstation, Dribbble, Behance
Thanks for reading!
-Mike Murdock
Thanks, Mike! Inspired to try Houdini? Any favorite models? Questions? Post them below!

 Outer Circles:
 Animation:

