In Art Spotlight, we invite Sketchfab artists to talk about one of their designs.
My name is Emilie Stabéll. I’m from Denmark and am currently studying for a bachelor in CG Art at The Animation Workshop in Viborg (Denmark). My main focus is working with characters and concepts where detailed and high quality pieces are my goal. I constantly work to improve my skills and learn new techniques, as I believe challenging yourself will keep you in a dynamic development as an artist. Regarding the future I am hoping to become a part of the gaming industry, working with modeling, texturing and color.
Website: emiliestabell.com
About The Project
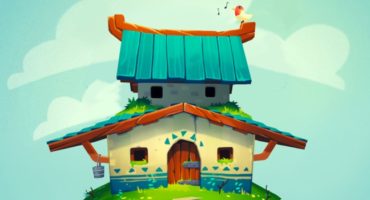
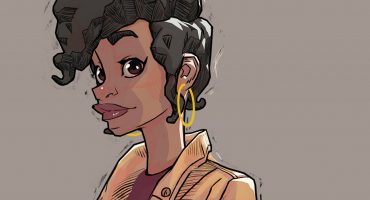
The whole idea with this project, was to create a colorful, quirky universe with interesting characters. I wanted to challenge myself regarding design, appeal, color and style, so I created Guam Bay – Chamorra Village; a cozy little fishing village in Guam, where Sam, a young girl and her friend Jib, her faithful little robot, lives. They never leave each other’s side and have a peaceful existence together in Chamorra. However, Sam dreams about one day getting her own ship, so they can sail away and experience the world outside of Guam.

The Workflow
The very first step was to do my research and find good reference for the world I wanted to build. Once the visual design was settled, I sculpted the characters in Zbrush and did a rough block-in of the environment in Maya. I put it all together to resemble the illustration I would like to end up with. Then I did a simple light setup and rendered out the image so I could paint on top in Photoshop. From there I did my line art, values, colors and finally rendering. Next step was to take the sculpted characters and make them into proper game models using Maya for retopo, shading and UV’ing and Photoshop for texturing. The illustration was later animated using After Effects.
My Inspiration
The very first thing I did before starting the project was research. I found tons of reference relevant for what I wanted to make, basically, anything that inspires me will go at this stage. For this project, I was heavily inspired by artists such as CreatureBox, Floriane Marchix (the artist of Rayman Legends amongst others) and the splashes from League of Legends.
 research
Time to Sketch
When I’m done researching, it’s time to start sketching. In my case, I knew I wanted 3 characters. A girl, a robot and a fish; I also knew they had to live in a fisher village, so with that in mind, I started drawing! At this stage, don’t be afraid of making something ugly and experiment, cause if you insist on making everything look pretty, there is a chance that you don’t explore enough and will end up with something generic and boring. Be bold. Also, keep in mind what universe you characters live in and who they are: what do they like, what are their fears and their goals? All of this will influence your deigns.
 sketching
 developing
 finalizing
Illustrating
Once I was finished with my rough character sketches and final concepts, I blocked out the characters in ZBrush and my environment in Maya, I put the two together to resemble the composition for my illustration I made in the concept stage. Then I did a quick light setup and rendered the whole thing out with a simple white shader making it easy to work with in Photoshop. I then did my line art and values based on the render, and proceeded to paint the final picture. The challenge was to tie all the different elements together without confusing the viewer. In the end, you want everything in the picture to support your focal point, in my case; it is the girl’s face.
 character development
 blocking
 value
value
 rendering
Modeling & Texturing:
Once the illustration was finished, I started working on the models. Based on my ZBrush sculpts I made for the block in, I did my retopology in Maya. When doing my UV’s, I make sure to put the seams in convenient places; if your models wear clothes, think about where the seams would be in real life and use that as a guide. I unfolded my UV’s in ZBrush, and went on to texturing. When doing textures, I always bake out an occlusion map to get an easy overview of where everything goes on my models. For this project, the shading was easy since I went so cartoony.
 uv
uv
 texture
 shading
I textured my models using Photoshop. For this project, some of the light and occlusion shadows was painted in to achieve a more cartoony and edgy look. The tricky texture seems were fixed using Mudbox. Finally, I did some very simple shading on my models. I used surface shaders on everything, and a toon shader on a separate render layer to create a light pass that I later comped on top of my turntable. I also modelled a base for the characters, put them all into one scene, and rendered them out!
The final result

Thanks Emilie!
Be sure to check out Emilie’s website and her profile on Sketchfab.


