Hello! My name is Glenn, I’m currently a third-year student of games art at Staffordshire University. I’ve always had an interest in art as well as drawing and sketching, which I did from an early age. I took an interest in 3D modelling in mid-2015 and since then I’ve been pursuing an education and career in games art.
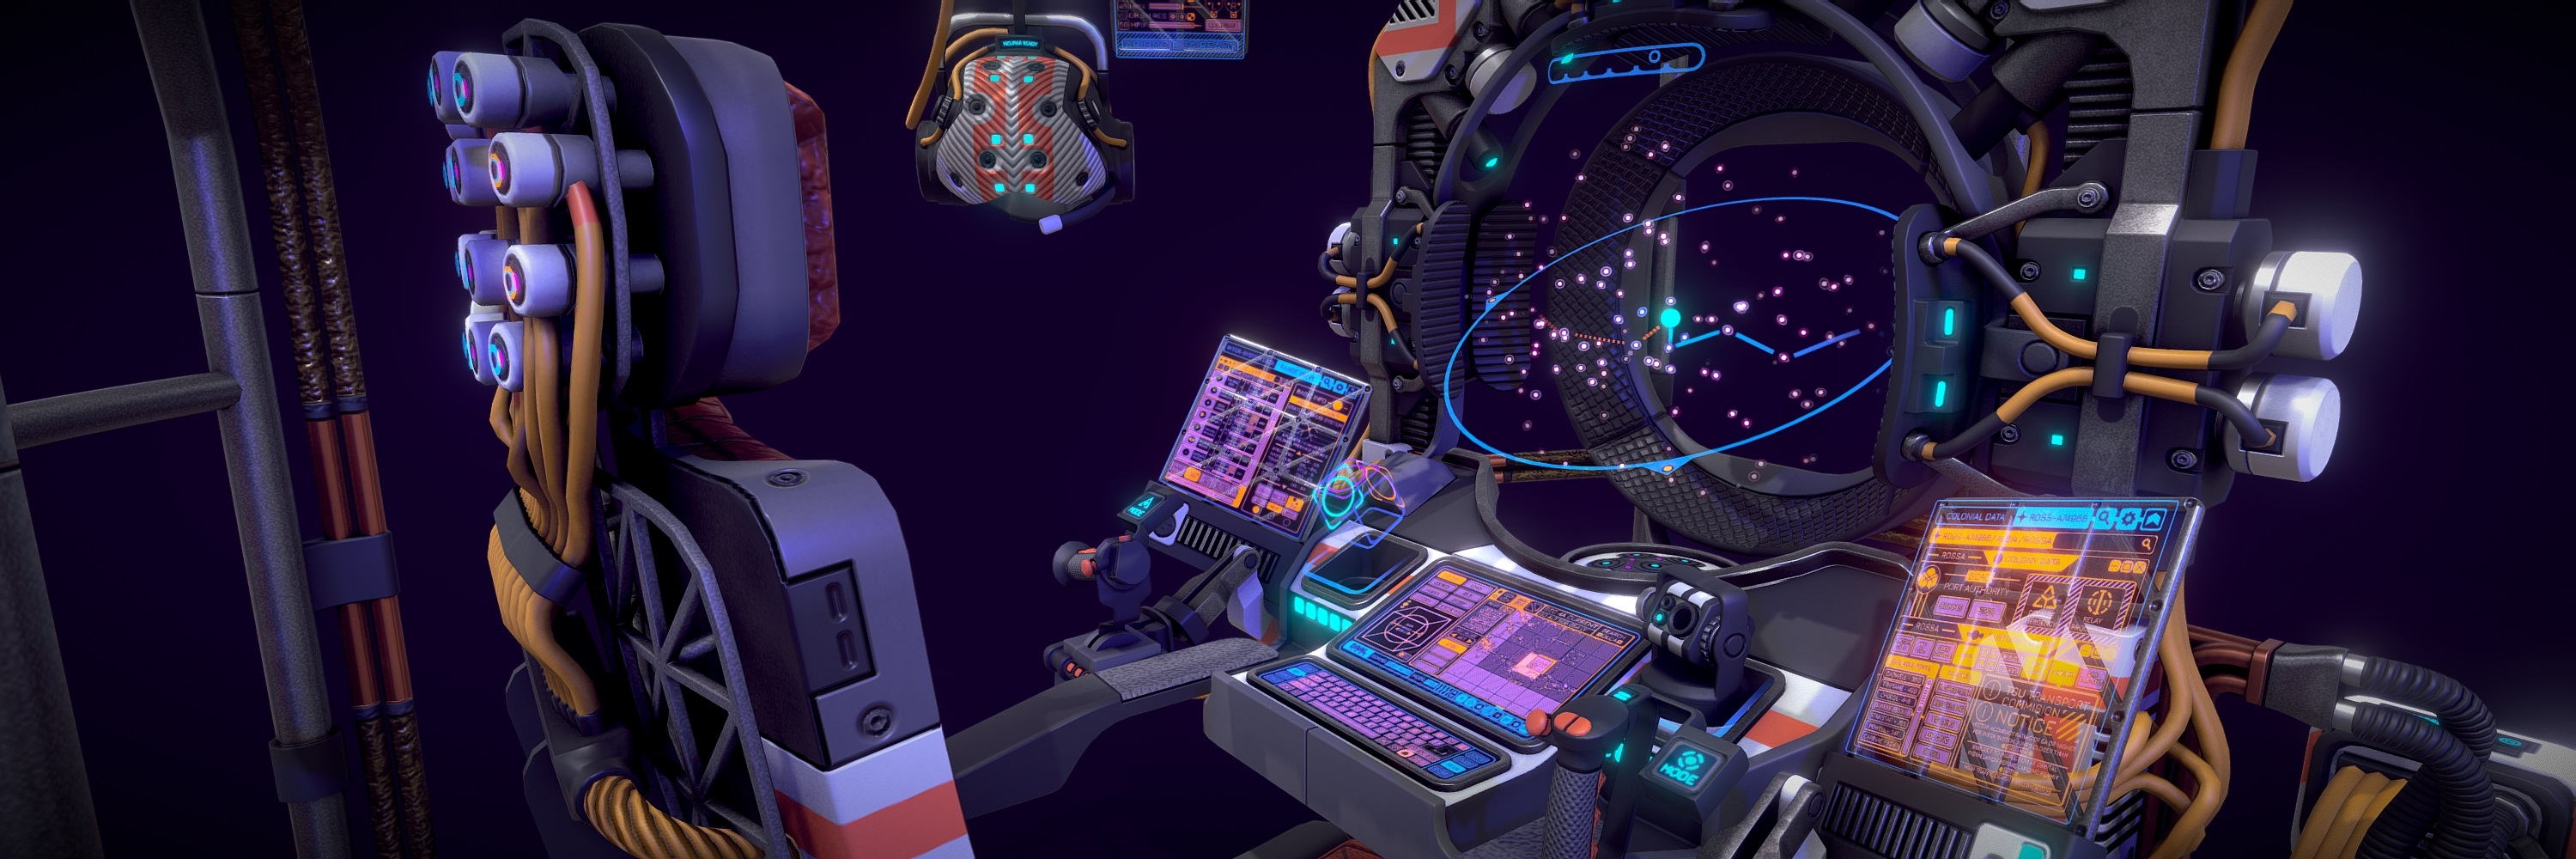
This piece of work is my most ambitious project to date. Although I’ve always had an abundance of ideas, I’ve struggled to bring my more complicated visions to fruition due to not having a lot of free time. When starting this project, I was given a unique opportunity to turn a terrible situation into what I would consider my best piece of work yet. Just as I began this project, the first wave of the COVID-19 pandemic was starting to heat up in the UK, where I’m based. In the beginning, I was down about having to stay indoors all the time, but putting my time and energy into this project was my escape. This personal project was a continuation of some of the sci-fi themed projects I’ve done in the past—I wanted to do something with more scope given the time I had.
Inspiration
The maps and navigation menus in Elite Dangerous and similar sci-fi games, such as Mass Effect, with an interstellar exploration aspect, were a massive inspiration. These 3-dimensional representations of hypothetical faster-than-light travel, and all of the information that goes along with them, have always been fascinating to me and I wanted to bring a more physical component to this idea. In media depicting science fiction, these controls tend to be integrated with an environment and feature multiple terminals and interfaces like on the bridge of a ship. I, however, wanted to create and illustrate something more self-contained and for a single user, much like a multitasking workstation.
Planning process
Like many of my other personal projects, generally, I prefer to do 3D block-outs rather than using drawn or illustrated concepts. This approach helps me to get a better feel for how things can be added or modified. Seeing where your creativity takes you as you progress is a great way to achieve an end goal with the same vision as when you started. If you’re doing your own personal projects, I’d recommend giving this strategy a try if you’re not sure where to start or think you will be able to expand on your idea as you go along.
Key elements I planned to include in the project were:
- Multiple holograms (flat planes and manifolds)
- Large overarching projector frame with interface
- Animated holographic interface swapping (Solid Animation)
- Multiple PBR texture sets
Programs
- Modelling, Unwrapping, Animation – Maya 2020
- Texturing – Substance Painter
- Alpha image creation – Paint.net
Modelling
I began the modelling portion of the project by beginning the holographic ‘star-map’. I created two concentric spheres inside of a circular plane and then used a ‘MASH’ node to distribute them randomly inside a spherical boundary. After I had found the right density and number, I tweaked their positions a little with the move tool and converted the objects to polygons. Next, I centered one of the components and grid snapped the hologram so that it would be easy to swap the components out during animation.
Housing the main holograms and interface for the initial frame was largely a case of box modelling. After I had completed the frame, I began thinking about what else could be added to expand on the idea. I settled on a rectangular frame that would overarch the structure, a seat on a sliding rail assembly that could be animated to ‘lock in’ to the terminal, and an AR headset suspended on a hook with its own display. After adding those elements, I decided to add two side panels for hologram projections.
- WIP seat perspective
- Overall Modelling progression
Unwrapping and Material ID setup
First, I started with the hologram meshes and decided to place shells by hand rather than use the UV layout. This way, all of the small spherical mesh UVs, such as the stars, were clustered together, making it easier to assign color variation to them in Substance Painter.
I began the unwrapping process by unwrapping the meshes with each texture set. As I progressed, I moved some mesh islands to other material sets by assigning them a different material with the use of the hyper-shader. This ensured that I had an equal texel density across material id’s. Using the UV layout tool, I decided to opt for a safe shell padding distance for a 2048 map and ensured that shells would use space as efficiently as possible.
Texturing
Hologram texturing
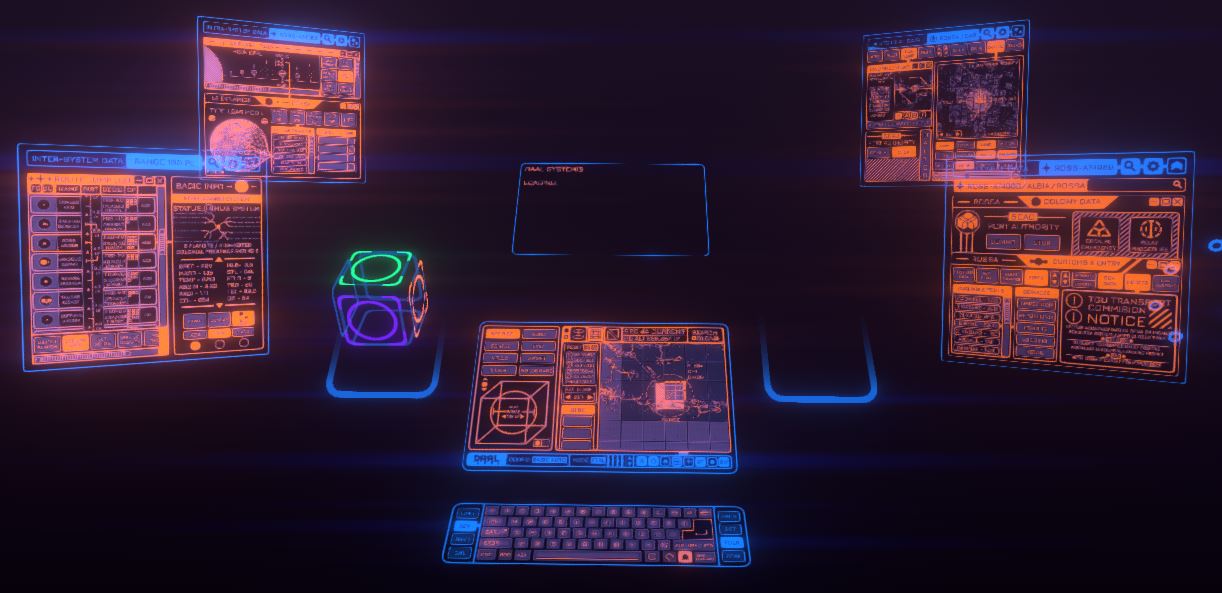
Creating the holograms was certainly a learning experience. It took hundreds of layers to get the right effects, with each distinct holographic element requiring its own folder just to keep track of everything. The use of color was critical for this part of the texturing. Only three maps determined the final look. I had to consider hue and value, and since the model would be presented on a dark background, opacity and emissive were also crucial considerations.
For the hologram decals and display panels, I went into paint.net, which is a great image editing program that provides a good balance between MS Paint and Photoshop, which makes it easy to create alpha decals. After I was done with creating the decals, I moved into Substance Painter to stamp them onto the planes and alter the color value for the outer borders and headers with a separate mask.
All things considered, I think they came out really nice. The panels include lots of visual information, with at least some of it intelligible information relating to the main display, which I had wanted to include since the start of the project. Although most of the buttons and widgets depicted on the display are random acronyms, I think it worked overall.
- Hologram alpha
- Textured hologram panels
Creating a falloff effect with the spheres on the star-map hologram was a fair bit of trial and error. I had to enter the xyz coordinates that centered on the central green ‘star’ and then apply them to an opacity gradient with the correct falloff amount. Overall, though, I got the effect that I wanted. If you’re replicating particle effects with geometry this is a great generator to use in Substance Painter:
Machine texturing
I started texturing the main machine by assigning key materials across all of the texture sets. Many of the smart materials from earlier projects that I’d saved certainly came in handy to achieve consistency across projects. Then I started masking off some meshes and UV islands to create a divide between materials. After this came the painstaking task of applying all of the normal details and seams, the vents, and the seat upholstery. I also went in and made decals and text using the program’s font alpha tool.
Animation
For the animation phase, I imported the opacity map for the holograms so I’d know how it would look when experimenting. I then snapped the pivots for each holographic element to the grid so that they could be swapped easily. Animating key elements was a case of transformation scale and rotation on key pivot points. The hologram side panels, for instance, had their pivots set to a corner so that they could complete a transition between minimising and maximising seamlessly.
- Gimbal animation graph
- Total animation graph
Sketchfab Setup
For this project, and like my other sci-fi themed projects, I made heavy use of Sketchfab post-processing. I used increased contrast and saturation as well as a blue tint to imitate a sci-fi environment; these settings were the most crucial and the post processing provided them to great effect. Among other effects used were increased sharpness to bring out the hologram details and bloom to accentuate the white trim and metal frame. I also made use of additional lighting sources to brighten the enclosed area and add a blue glow to the inner surfaces. These post processes did a great job of setting the tone of the model and its hypothetical surroundings.
- Before
- After


