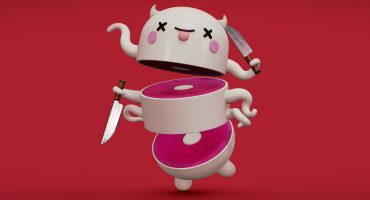
In Art Spotlight, we invite Sketchfab artists to talk about one of their designs.
Hi! My name is Alexandre Bissonnette.
I’m a 3D artist student at UQAT in Montreal, Canada. The Sketchfab team asked me to write about my workflow and what inspired me in my work, so I did and I hope this can be interesting for some people!

Inspirations
My first inspirations are Dr.Seuss and Tim Burton’s movies. I also like old cartoons like The Looney Toons, Betty Boop, Mickey Mouse, The Jetsons…
Much my personal work turns around American cliches like retro Diner, fun fair, hamburgers, food trucks, ice cream, Cakes, fast food, fat kids and a lot of 1950-60 retro stuff.
I don’t like to put text in my work, I want my things to be iconic, like this reference from the movie The cat in the hat. A mug for the coffee shop, a lollipop for the candy shop, a shoe, an ice cream, a phone, a donut. All the street is made like that and I LOVE it.

This next picture is an example of what I love to put in my work. These are some assets I made for a video game scene for UDK 4. The only place I put some text is on the beach sign but it could be something more iconic like a palm tree and a sun.

Texturing
A lot of people asking me how I’m doing nice cartoon texture and how I make all look that good. Personally, I think that a good Ambient Occlusion make all the difference.
I see a lot of people using the AO, just put a “Multiply” on Photoshop (or directly bake it on the final texture) and the result is bad because it looks gray and dark.
I have my personal recipe to bake my AO and make it look nice. It’s normally a secret recipe that I keep and share with my friends but today I will show you my workflow!
Let’s take the example of my new Super Ice Cream Truck I did for a personal video game:
At first, I place my base color on the different parts of the objects in Photoshop. Then, I duplicate my AO map (only black&white) in my photoshop file, I put one in multiply (20-40% opacity). and the other in soft light (40-60% opacity). The result make the shadows look a lot better.

This is the first thing I do when I’m texturing and then I can start to add texture, drawing on it and play with Curves and Color balance in Photoshop to get my texture nice.
Here, I chose to have a clean cartoon texture and simply add little details on it.

The first has no AO baked, the second is just baked with “Multiply”, and the third is the final result.
(The scene here is rendered with no light added and with unlit shader to see only the texture)
3D modeling
Correctly baking your AO can save you a lot of time texturing and trying to make it look good, but your models have to be interesting too.

For this one, I wanted to make the car look really fast, so I bent and stretched it to make a cartoon-speed illusion.
As you can see on this image, nothing is perfectly straight, everything is bent, twisted, stretched. I use Autodesk 3Ds Max and we have a lot of tools to make these deformations. I usually use the Bend tool, also the Twist and the FFD boxes to deform everything and make it look good. I also rotate the wheels on the truck to create the illusion that the truck is heavy
I hope you enjoyed this small article about my workflow, Thanks to Sketchfab and feel free to ask me more about my work and visit my page!
Here’s the Sketchfab 3D Model:
Thanks Lex!
See more of Lex’s work on his Sketchfab profile.


