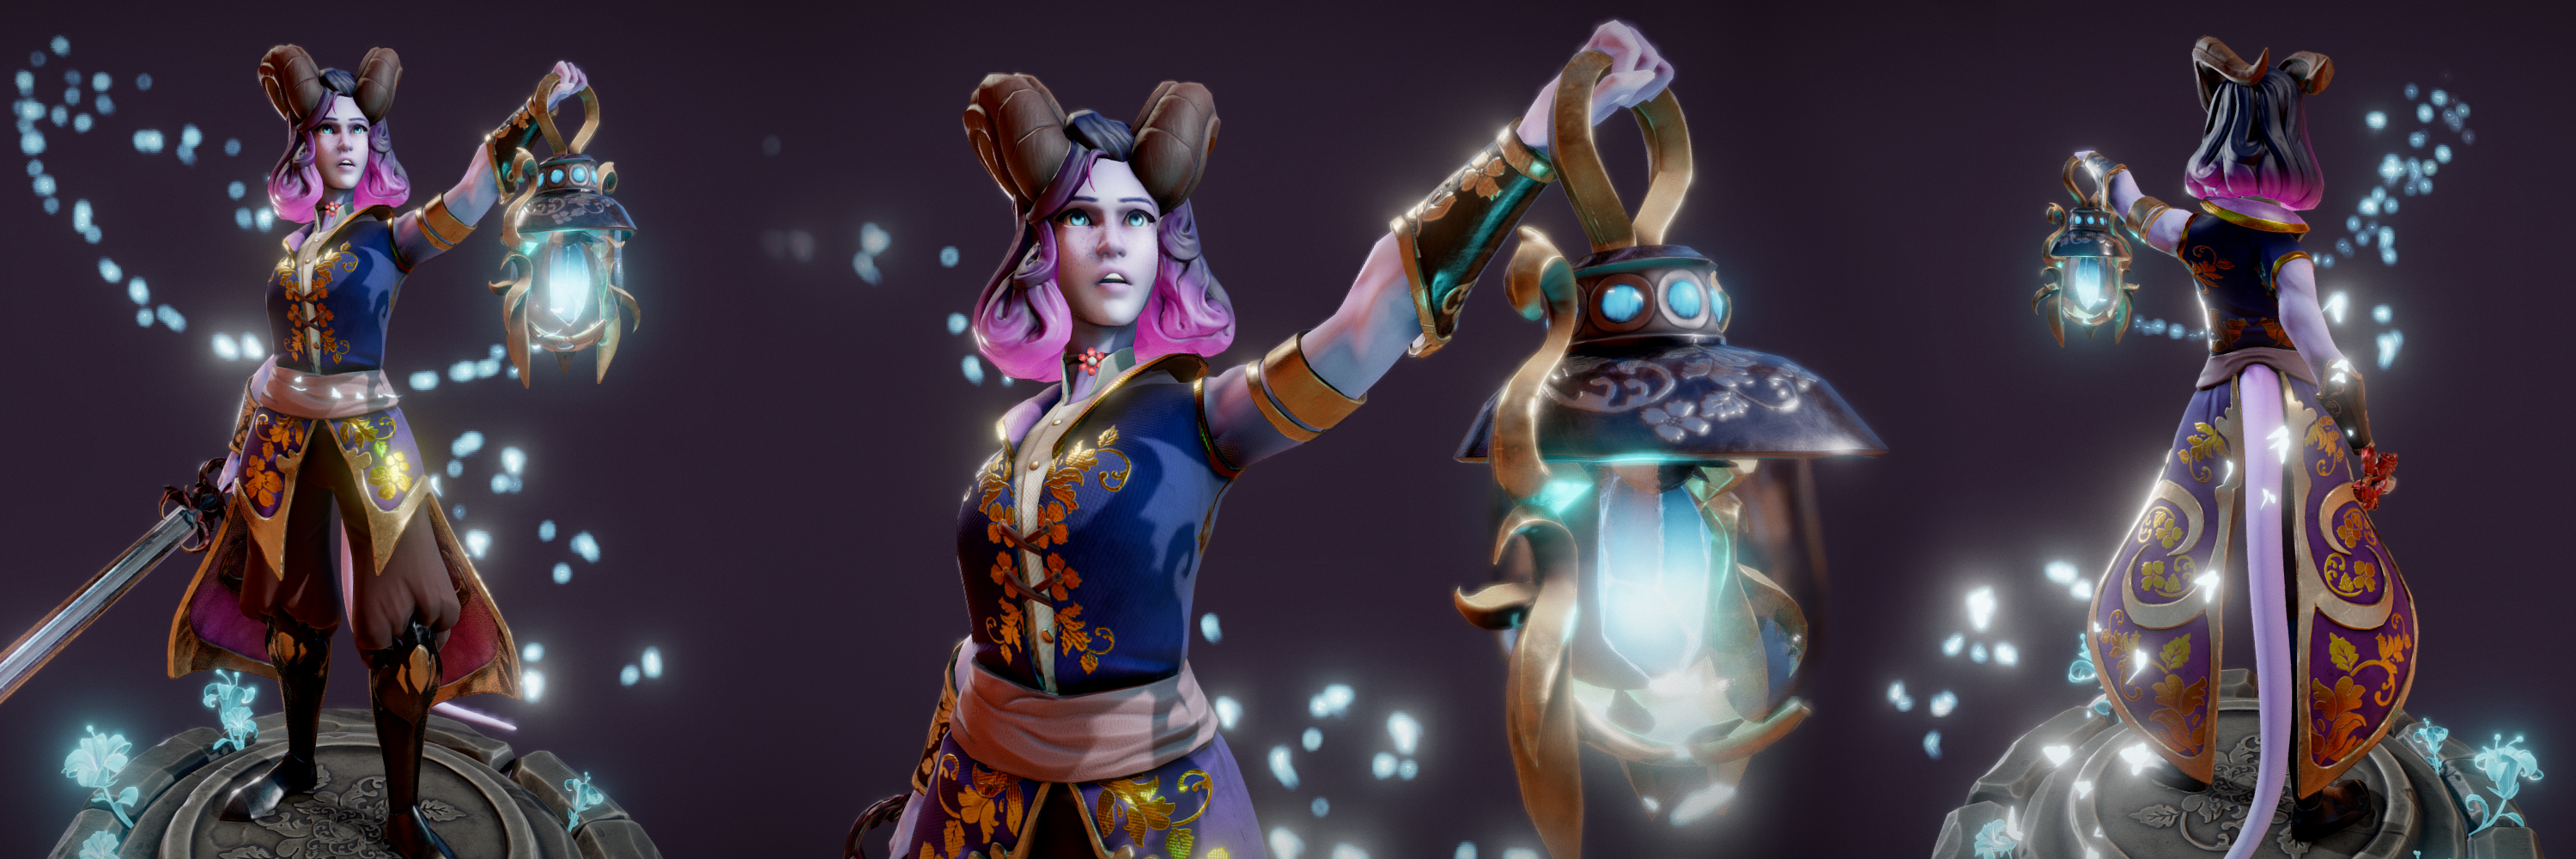
Note: this article is written with my classmates in mind. So, hello guys and anyone else who’s curious about the ‘behind the scenes’ of one of my pieces – The Explorer. I hope you’ll get something out of this! And with that out of the way:
About Me
Hello there! My name is Grzegorz Szargot (yes, these are 3 ‘Z’s) or Greg if you prefer. I’m currently a student of Games Design at Sheffield Hallam University, England. I started playing around with 3D back when I was 10 as my sister had to use Maya for one of her Uni projects. Immediately I was enamoured with the idea of being able to create anything I wanted in 3 dimensions. I have since switched to Blender as my main 3D software of choice. For this project, I have used ZBrush, Blender, Substance Painter and Sketchfab. But enough about me, it’s time to get into:
The Concepting Stage
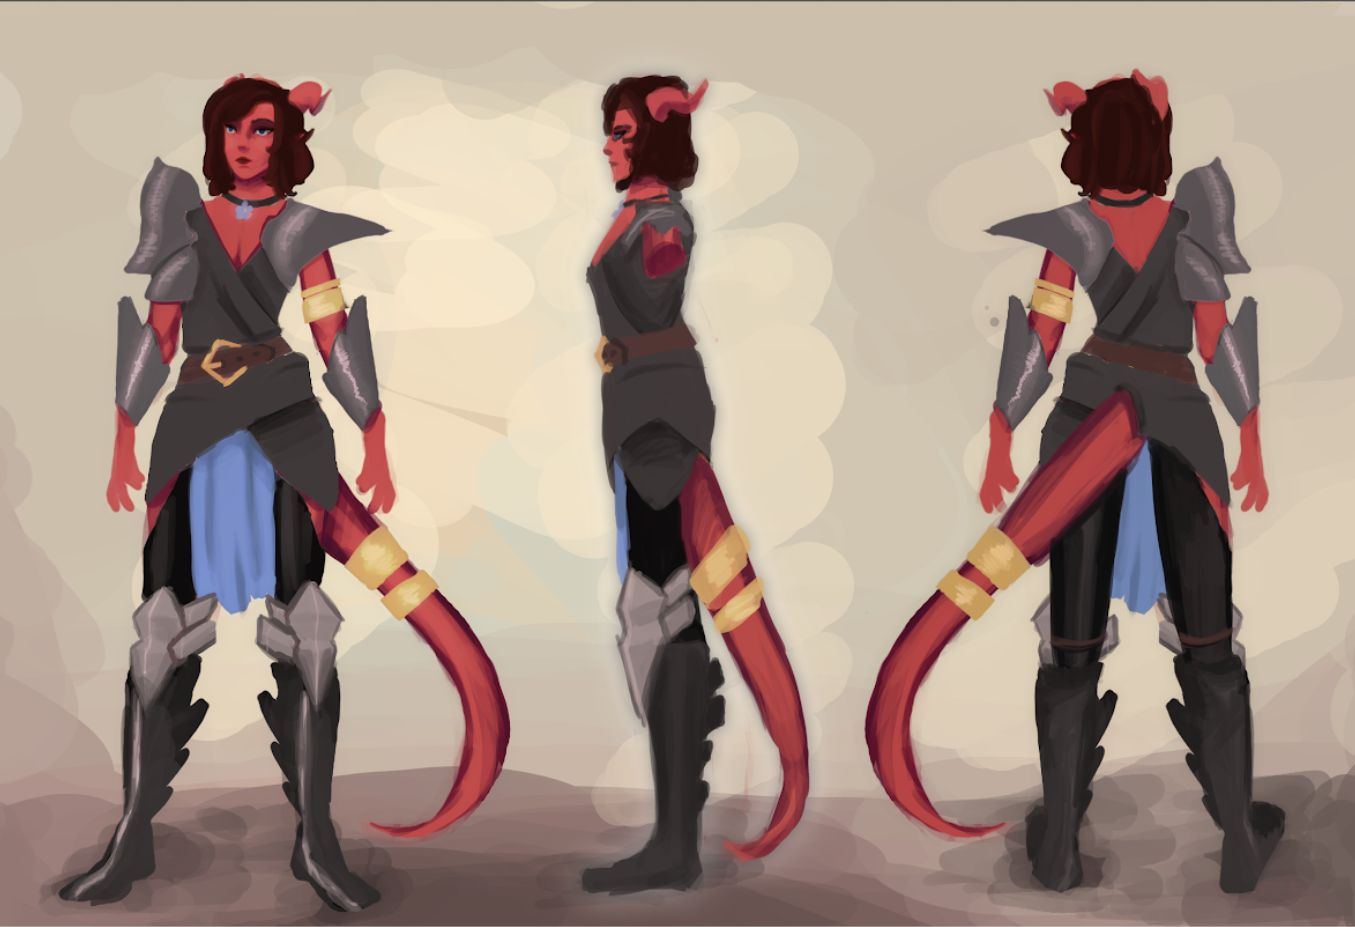
I know. I know. What is this? Looks nothing like the finished model. Yes, we were tasked, as a part of our course, to create a character concept that we would take into the next year and make a model based on. Soon after the start of the year though I began to like that concept less and less, thinking that sticking to it would limit the overall quality of my end result. And so, I began looking online for inspiration. My go-to place for references like these is always Pinterest. I simply love going down the rabbit hole of seeing one concept I like and discovering 20 more. In the end, my PureRef (a very helpful piece of software that I use for references) file contained ~50 concepts and references. Some added as they were needed of course. And I feel that this departure from my original idea was a good decision even though sticking to it could’ve also produced a nice result.
The Sculpt
I consider this the most important and often the most fun part of every character. Since, at least when it comes to the shapes, the end of this stage is as good as the model is going to look. We were provided with a base, but I wanted to have more control over the shapes, so I started with creating one of my own. I usually start by just appending spheres or cylinders and using the move brush to make them into really basic shapes of head and neck, torso, upper arms, forearms, thighs, lower legs, feet, and hands. Then I dynamesh and refine the shapes further until I have something like this:
Then I tackle hands (and feet, if applicable) almost as if they were characters all on their own. The same idea of appending spheres/cubes/cylinders, shaping and dynameshing them.
In my opinion, the most important skill to keep in mind when sculpting is controlling shapes. I see a lot of big muddy masses that stop good models from being great models. I think what was one of my major breakthroughs was learning about the ZRemesher>Subdivide>Project technique described here, under Duplicating your SubTool.
I try not to spend too much time on things that won’t be visible on the final model, so at this point, I would move on to creating clothes by masking and extracting new meshes in the vague shapes of the clothes. For the shapes that I found too difficult to pull off in ZBrush, I would take them into Blender for a quick retopology pass. One of the examples was the collar on the coat.
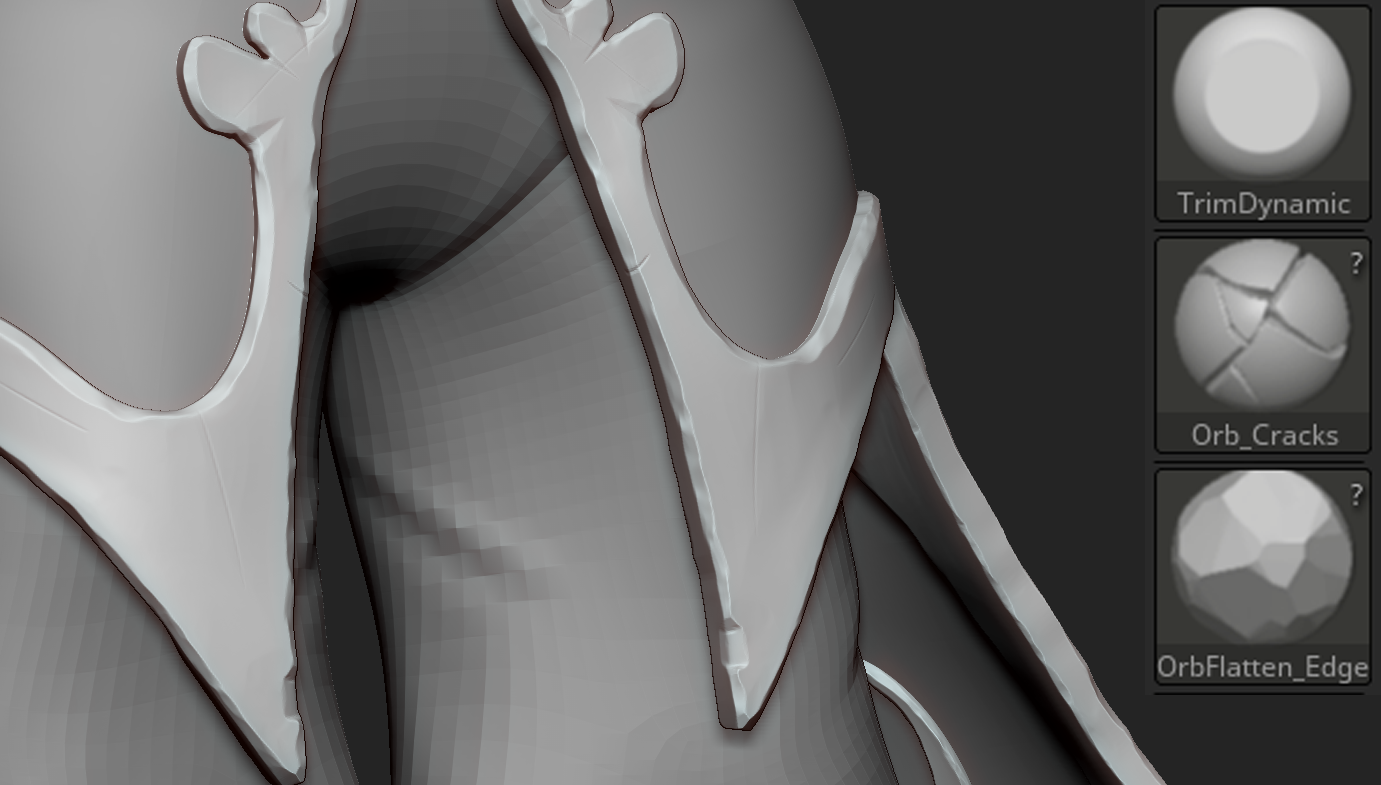
After all of the assets had a satisfying base mesh it was time to do detailing. One of the most challenging parts was certainly the metal bracings around the coat. For this and anything else that is “hard” but still somewhat organic and stylized (e.g., stone, wood or metal) I always use the Orb Brush Pack. It’s invaluable in situations like these!
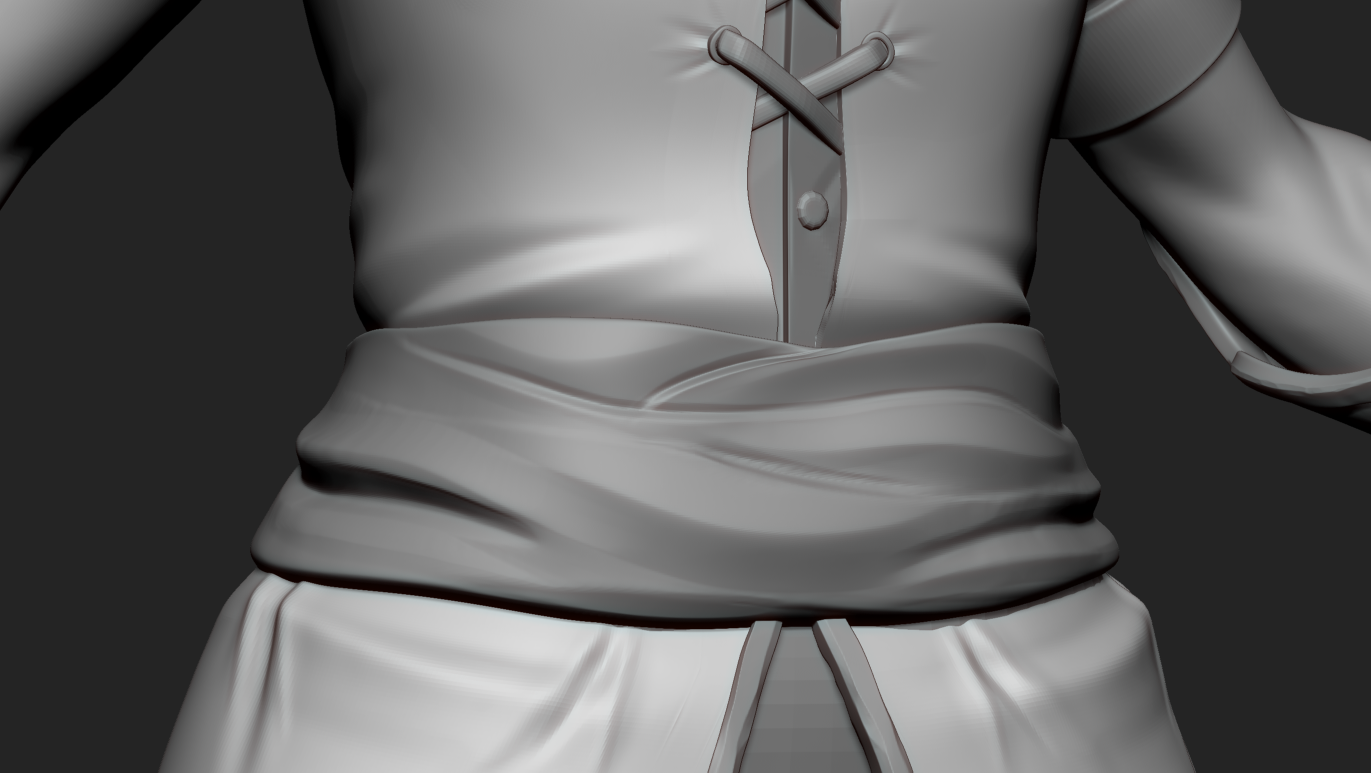
I’ve also used the Orb_Cracks brush for the stylized clothing folds as I find DamStandard’s falloff to be too soft. Then, since I usually work on this sort of cloth while the mesh is single-sided, to add thickness I Decimate>Mask>Extract>Add edge loops.
I generally try to stay away from small surface details while sculpting. I find it easier to add them in the texturing phase; this approach allows me to retain more control over them. When I’m happy with the high poly sculpt, I move onto:
The Retopology
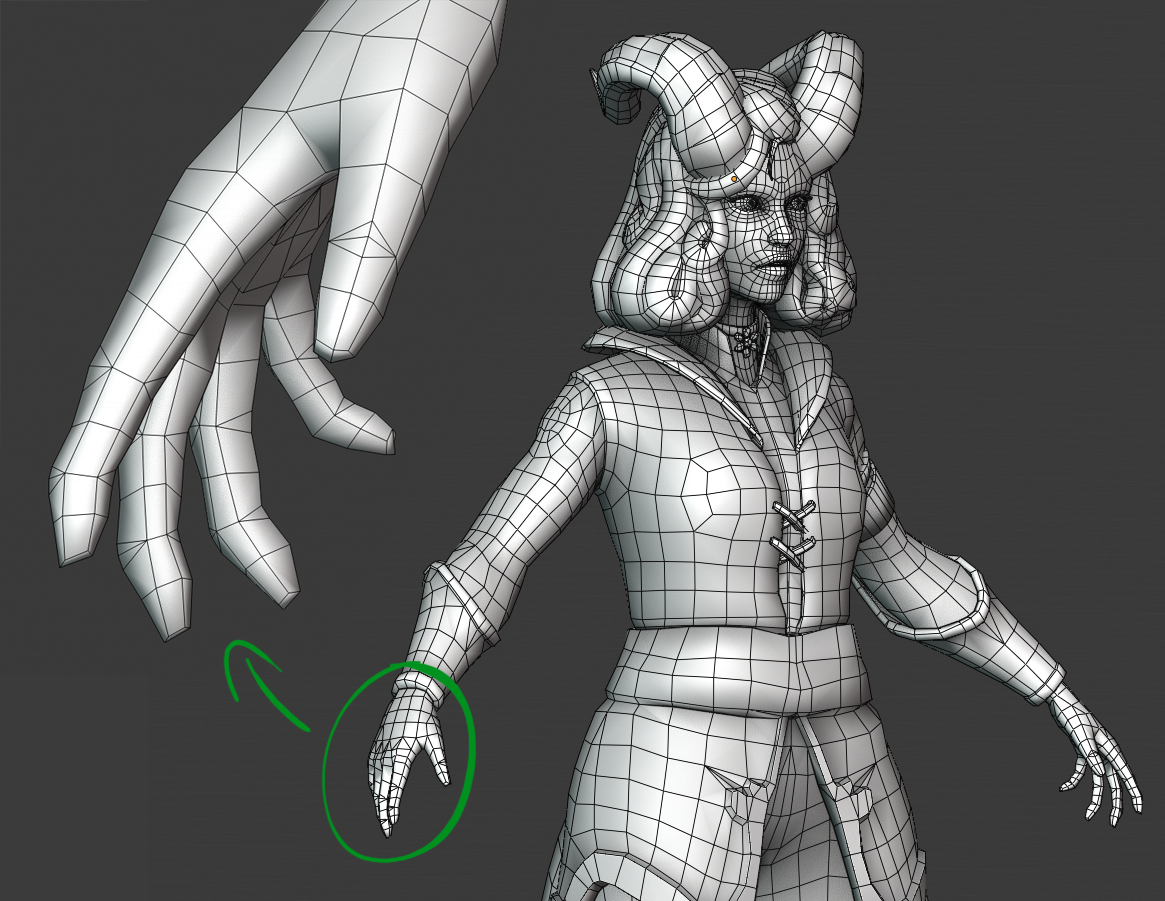
Yes, the dreaded retopology. I definitely think my retopology could be improved but I believe that once you get the hang of it, it can be quite a relaxing and therapeutic thing to do. The most important thing to keep in mind while doing retopology, in my opinion, is to retain the underlying shape of the high poly mesh. That, after all, is what the retopology is for. Second comes preparing the mesh for deformation. Adding supporting loops so that the mesh will still look good after some reasonable bending. And thirdly, something that in a way is a result of the two previous points: maintain even topology density. It holds curved shapes and allows for better deformation in places you might not expect. Of course, if you’re retopologizing a metal rod, then, by all means, use as few polygons as possible. But for organics, I’d try to avoid quads that are overly stretched in one dimension.
As a final remark, I’d say do not fear triangles in your topology. Triangles are an important tool for reducing the number of parallel edges and controlling relative polygon densities. That’s the main way I transition between areas of higher density (like fingers) to areas of lower density (like the palm and arm). Also, if you cannot imagine in your head how the topology of a certain part of your model should look, or you’re just unsure, something I used to do quite often was looking at models on Sketchfab and inspecting their topology (press 5 on your keyboard while looking at a model).
Preparing for Texturing
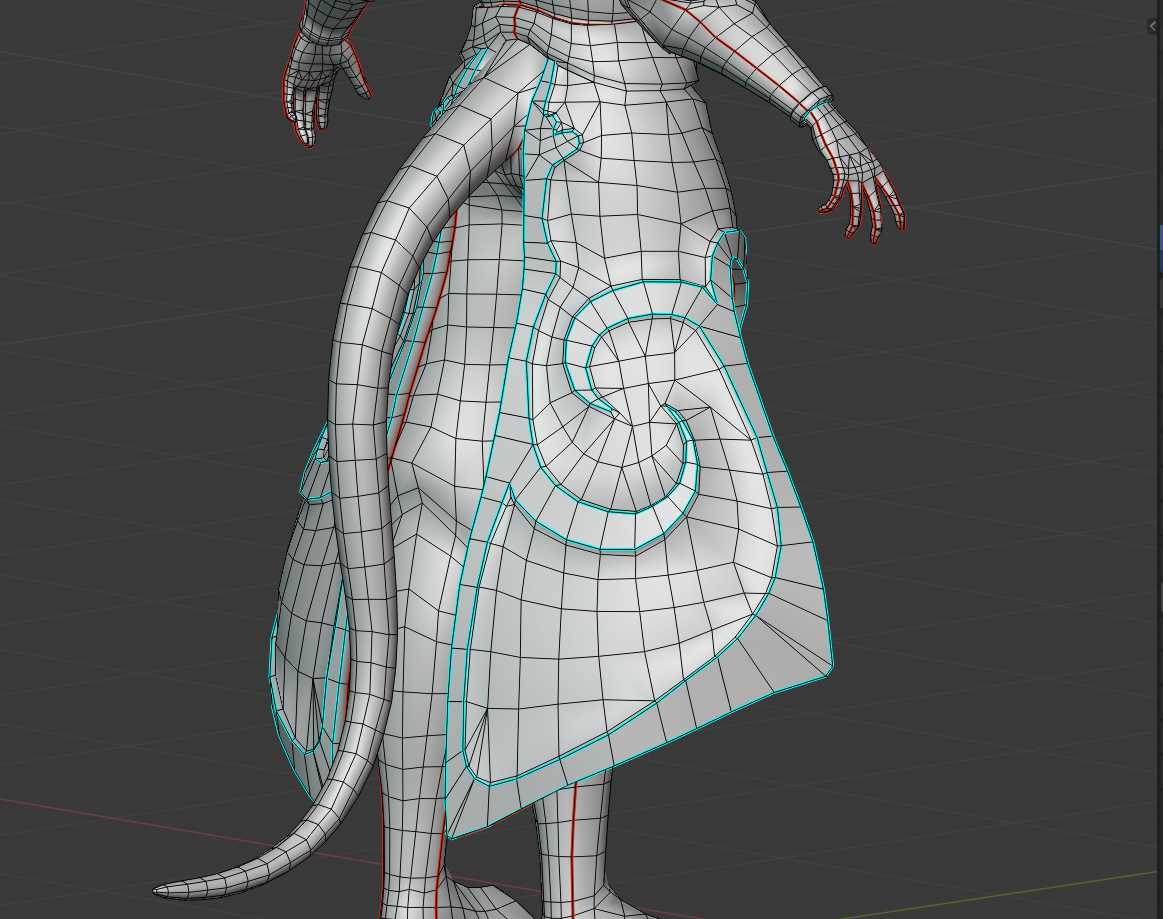
Marking sharp edges (smoothing groups for you Max folk) is something I would do now.
Fortunately, since most of the character is soft organic shapes, not a lot of edges are going to end up being sharp. Generally, big flat surfaces benefit from having their edges sharpened. In this image it’s the blue edges:
After that’s done comes UV unwrapping, which, based on your retopology, can range between being almost automatic and a slog. Something that helps me a whole lot when doing this in Blender is the “Pick Shortest Path” tool.
Select an edge > Ctrl + click another one.
This will select all the edges along the way that could then be marked as a seam for unwrapping. Since, again, most of these are soft shapes, I wanted to end up with as few UV islands as possible. As part of our brief, we had to use different texture sets for the head and the body. After some packing, this is what I ended up with:
Texturing
Now back to the fun part! Riiiiiiiiiiight after the bakes… Yes, a lot of back and forth with the bakes. A misplaced edge here, a misaligned vertex there. This is also when I start checking the model in the final rendering engine. It’s easy to fall into “it looks good in Substance” and treat the rendering almost as an afterthought. It doesn’t really matter how it looks anywhere else because the final result will be in the engine, so test early and test often. To save you some of the headaches I had, if you see these awkward dark squares on your model, it’s most likely your normals. You’ll need to return to your modelling software and mark some of them as sharp. In this case, the outline. Then back into Substance and rebake. Thank the good folk at Allegorithmic for a non-destructive workflow.
After that’s done and dusted it’s time to actually get into texturing. I mostly just apply the default materials from Substance Painter to my model, see how they look and adjust them a bit. Most of them are fantastic for more realistic models with all of the noise, grunge, and dirt. What I try to do is simplify them at that stage. Removing some noise and blurring the others. I found the “blur slope” filter to give me some nice results if I want bigger noise on my surfaces. That and gradients are my two most-used ways of creating some variation without just putting noise everywhere.
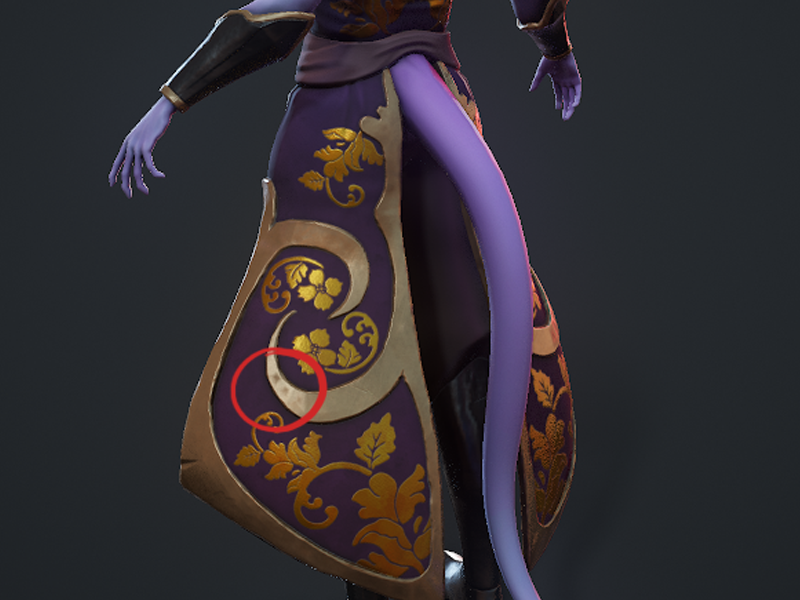
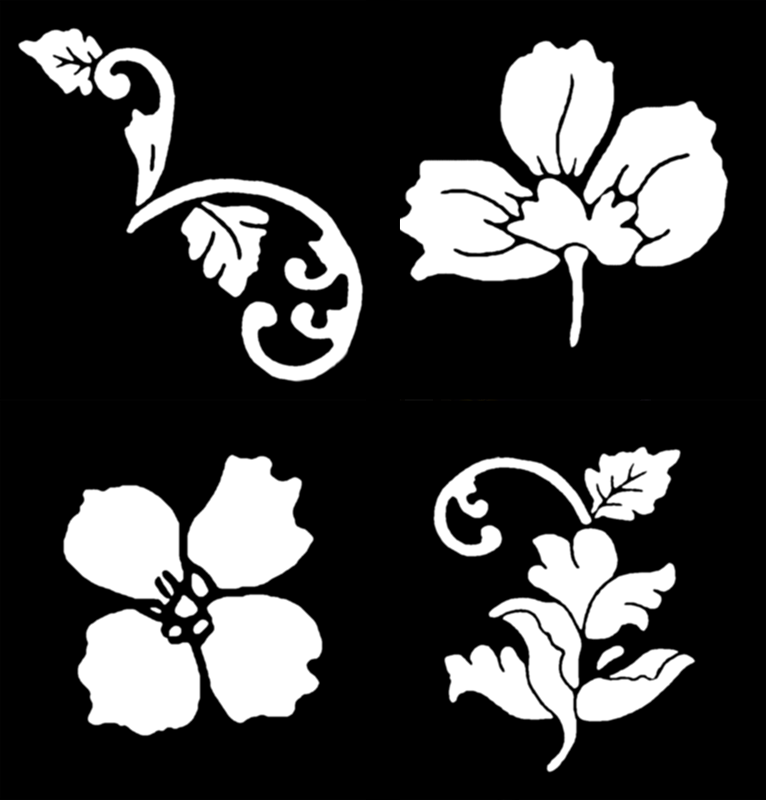
After I finished this step, though, I felt like the character was a little bland. I wanted to add some more points of interest. Fortunately, I found this texture and created the following alphas:
Then I used them as stencils to create masks for the golden details without ever having to draw out all of those complex shapes.
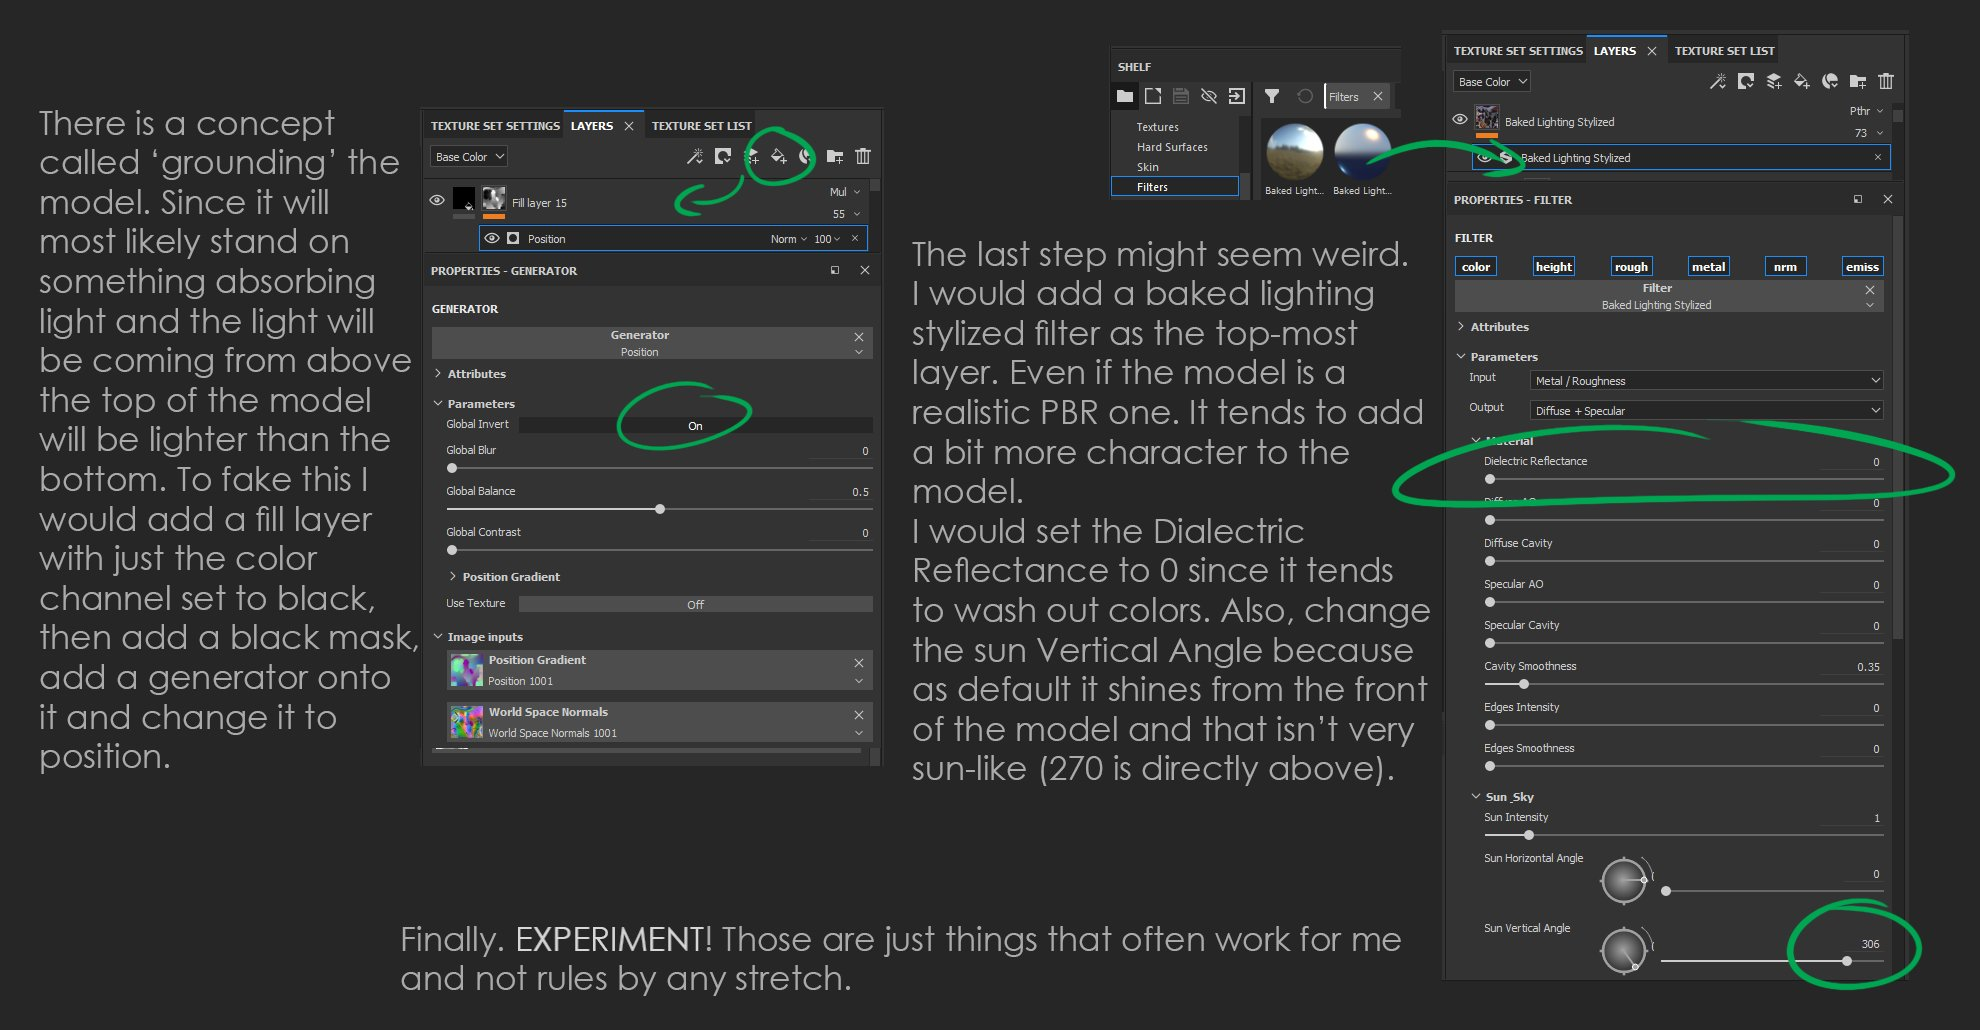
And at the end, I’ve added my top 4 Substance layers. These are the layers I always add to all my Substance Painter projects and they always help the models “pop” that tiny bit more at pretty much no additional effort.
Finishing Touches
I went with the same process for the props and the pedestal, only starting with a base mesh I created in Blender before bringing them into ZBrush. I posed the model and added a cone of butterflies by duplicating them and spreading them out at the end while also randomizing their scale. After that, I displaced them on a curve for that nice framing effect. Then I imported everything into Sketchfab, assigned everything, and then went on to my favourite part. The post-processing! I always find changing the Tone Mapping mode to Filmic improves the overall look dramatically. I also really like the intuitiveness of the Bloom settings. You get a lot of control with relatively little complexity.
And that is pretty much it! Thank you for reading. If you have any questions, I can be found on Twitter and ArtStation. Have a great day everyone and take care!
