About
Hello, my name is Petra and I am from Brno, Czech Republic. I have always been interested in graphics and modeling. About a year ago, I started working for a Czech game developer Bohemia Interactive as an Artist on Ylands, a low-poly craft video game. The Fabulous Baron Munchausen is my personal free time project. I used the time spent on it to relax off-work and also to push my limits a bit further and learn new creative approaches. As for my background, I’ve never actually studied graphics: most of my skills are self-taught. There are many open-source solutions I could use to create art. And thanks to Sketchfab, I can present my work publicly and in 3D.
Inspiration
Baron was made over a long period of time – and as such it went through a development on its own. I actually got inspired to create it after seeing a competition on Sketchfab a couple of years ago. Even though I had no time to participate myself, later I found the topic of the competition(Lights, Camera, Immersion!) very interesting and decided to try it out myself in my free time.
The work is inspired by a film scene from the “Fabulous Baron Munchausen” movie, and I chose it because of the film director, Karel Zeman. I’ve always loved Zeman’s movies for their original and unorthodox art settings, but this particular one is very special to me due to the coloring of the scenes and sequences. I really cannot admire enough the way simple effects are used in this film – it just perfectly matches my preferences!
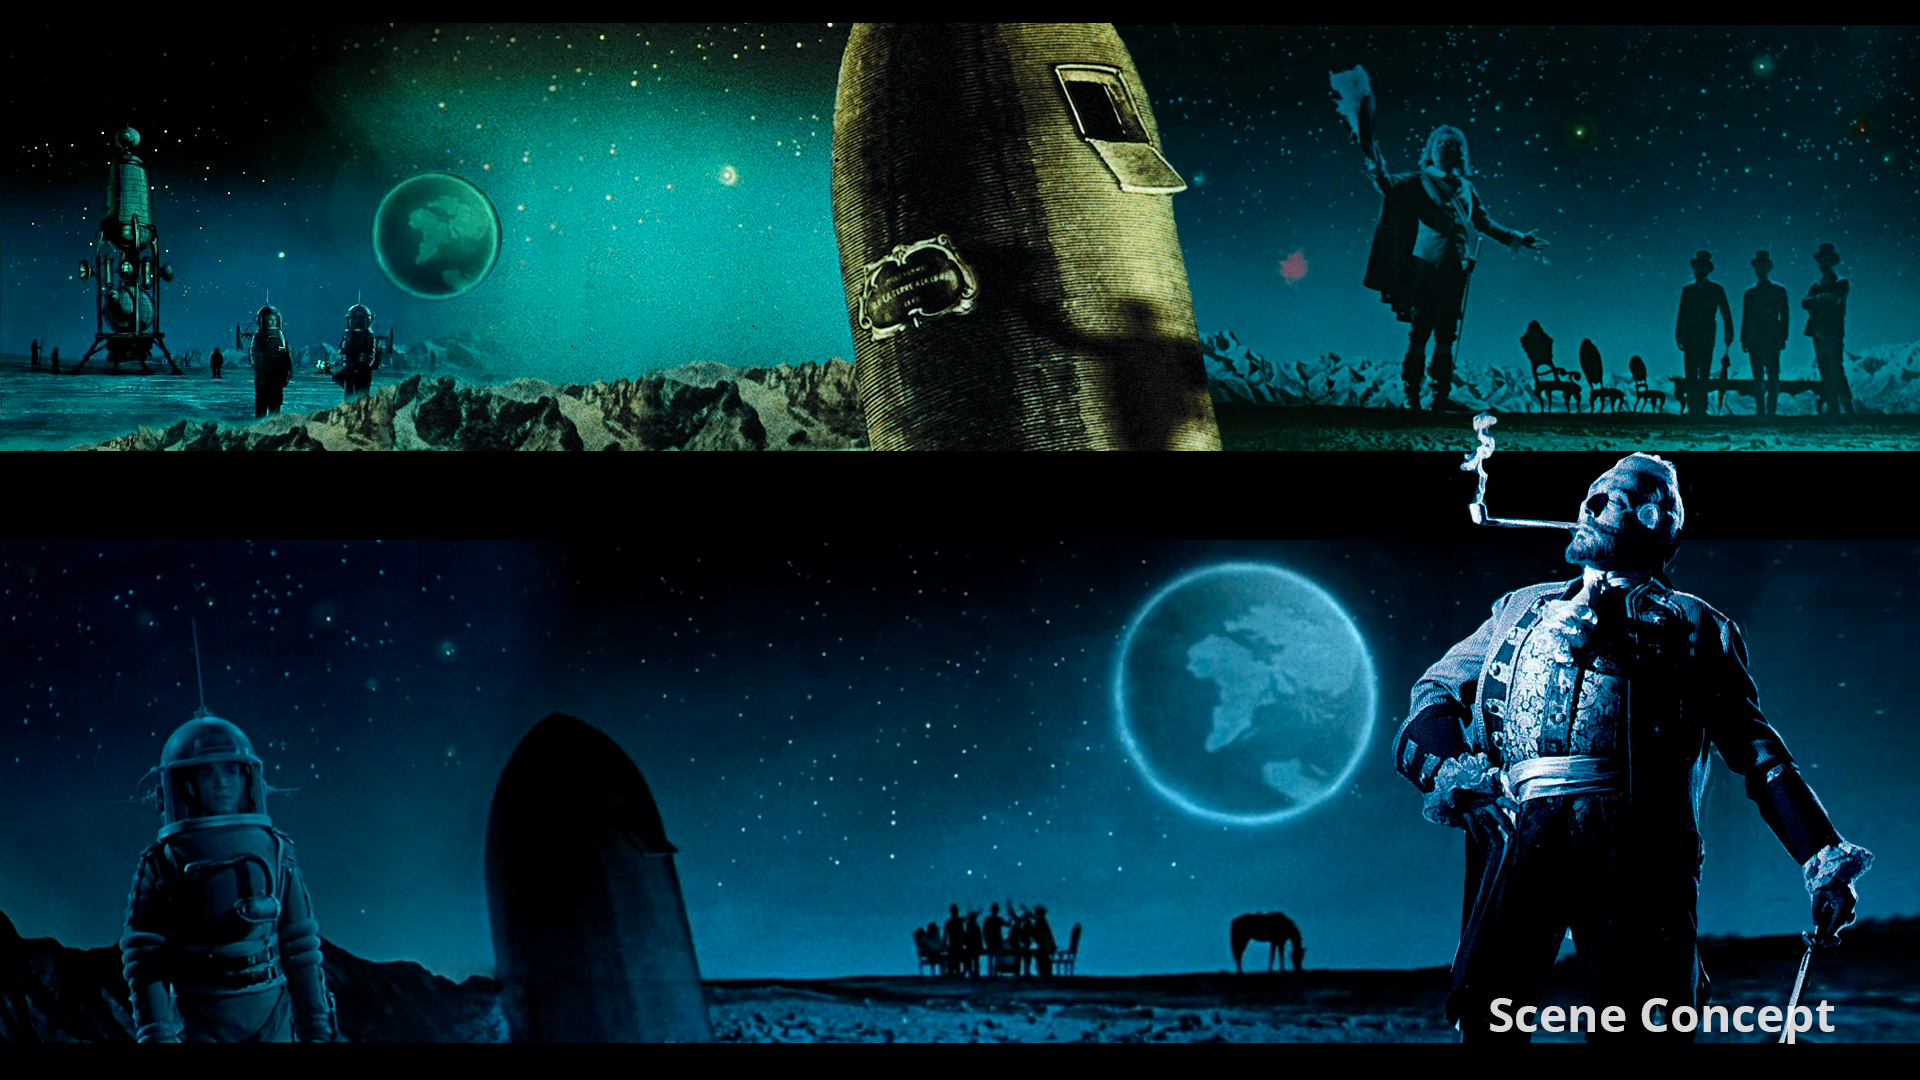
As for art references, I mainly sought inspiration in the Fabulous Baron Munchausen movie itself. I decided to create some of the assets that I saw in the film. The rest of the assets were made mostly on the fly so they would better fit the atmosphere of the scene. To decide on the lighting, selection of initial assets, and overall feel, I firstly captured some of the scenes from the film and quickly placed them in Photoshop (the Movie Screenshots picture). After that, to ensure that the scene would work together as a whole, I made a Scene Concept of the movie snaps. It did work together nicely, so I decided to proceed.
Workflow
I have always enjoyed scenes that can tell their own story – and even more so if the viewers get a bit curious and tend to explore what’s behind it. I focused on the Baron scene as a whole. Rather than modeling every single asset to the last detail, I tried to make sure they contributed to the scene altogether – some of them being more detailed than the others. Aside from that, lighting of the scene took quite some time and energy, as well as the final post-processes in Sketchfab.
In Blender, I placed the whole space environment of the scene in a sphere. The background environment was made by simple planes in the alpha channel. The mountains at the back of the scene are tiled. The whole setting of the scene aims to create a feeling of a film set with props. The assets on the sides of the scene (including the Earth on the sky) are planes. Assets in the foreground (which the viewers focus on more) are stylized to look like film props.
The whole scene was modeled in Blender. Personally, I wanted to discover new approaches and tools in Blender that I had not known before. Most of the assets are baked in Blender as well, but e.g., the binoculars, Baron character, and the gramophone are baked either in Marmoset or 3D-Coat.
Each asset was made separately and placed in the scene once done. All assets have their normal maps along with ambient occlusion. The diffuse textures are made of combinations of painting and textures with materials (such as wood, metal, and more). Most models have two UVs. One of the UVs is for an asset itself, and the second one is for the gradient (which is unified for the whole scene). The gradient was not used for every single asset, but only when it visually fit and helped enhance the atmosphere of the scene.
As the main model of the scene, the Baron character deserved quite a lot of focus. I started shaping it up by positioning the base mesh. For high-poly sculpting, I used the base mesh as a starting point, and worked mainly with the default selection of brushes that Blender has to offer. During the sculpting process, I was using Dyntopo and my main focus went into detailing the face. The retopology was done with the help of the default snapping tools. After the low-poly model was created, I made a UV map – it helped me when baking the normal map, ambient occlusion, and creating the basic diffuse texture.
Settings on Sketchfab
Last but not least, I applied some finishing touches directly in Sketchfab: settings for depth of field, screen space reflection, shadows, grain, and more. The final scene was enriched with annotations – they offer some alternative views on details the viewers could otherwise miss. I’m really grateful to have been able to pick up graphics as a non-professional, and thanks mainly to Blender, 3D graphics became accessible and understandable to me. There are some more projects I’m currently working on and I can’t wait to introduce them on Sketchfab later on!


