About Me
Hello, my name is John Perkins, and thanks for being interested in the watch! To talk a little bit about myself and about the things I create, my first entry into this whole 3D world was around 2009 using the 2.49 version of Blender, and my that was a long time ago… :). As I’m sure many people have, I used a lot of resources that I found online to start learning how everything worked, then eventually started doing my own projects as I got my sea legs, so to speak. Eventually, it also then led into doing freelance work for individual people and companies. In the end though, I think I’m really just someone who enjoys creating things, but more than that, I really enjoy creating things that will enrich someone’s life in some way. I also love the idea that art can be a way of expressing something that actually can be a blessing to someone along their path of life in some way. Sometimes that art brings truth, or maybe the art just brings joy and a smile, or even just to know you’re not alone in your struggle. As I’m sure we all know, life can be very hard sometimes, and it’s always a wonderful thing if you can help someone out and make it a little more worth living, or even just to bring a sense of wonder and excitement to life again. These are the kinds of things that I really enjoy the most.
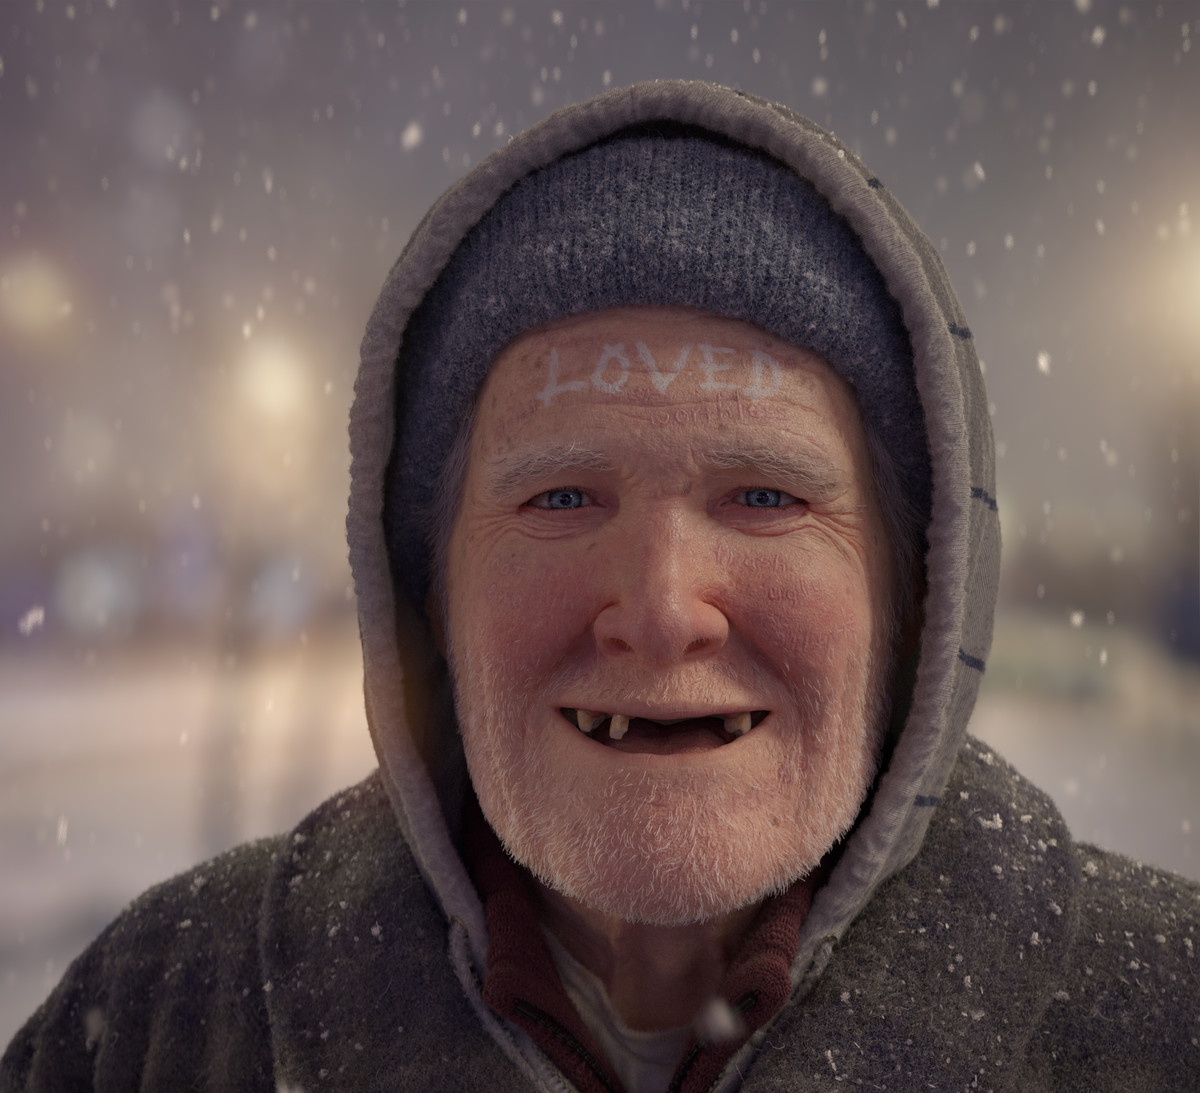
As an artist, you have to go with wherever the ideas are and wherever the inspiration leads, which I find can be quite a fun thing because of all of the different adventures you get to go on, and you never really know what adventure you’re going to be going on next. Those adventures for me have ranged quite far and wide: from realistic portraits, like the one below with the explanation for it found here, to more cartoonish work I did with a stick figure type person: Greatness, as well as the second image below that uses the same character; to my current adventure of creating art using a game engine as basically my paintbrush, that you can then walk inside of and experience: The Heart Game.
At the heart of these projects though, for me it’s always about doing something good with what I have made, and a desire to care and have love for others with what I do in life.
A lot of them have been quite fun too because usually, at the time, I had never done anything like it before. So as it still is with the game, the projects really did become quite adventurous as I would start creating something I had no idea how to do. Undeterred, I would start anyway, trying to learn along the way as I fleshed out this new idea. It really is quite fun and amazing the things you can learn as long as you can just start and not be intimidated by all the things you don’t know.
Inspiration
So for this adventure, what started it was an ancient calendar system that was actually used by the Jewish people for well over 1,000 years. If you have ever read the Jewish Bible, or the Old Testament part of the Christian Bible, this calendar system has its origins in the book of Exodus as part of the story of when God took the Jewish people out of slavery in Egypt, and is the calendar system that God gives them during the story. At its most basic, this calendar system used the moon to tell what day of the month you were in, each new moon to tell when a new month begins, and finally, there was something specific with the plant called Barley, that tells you when the new year begins.
Since it would take a little while to talk about the whole calendar and explain how it works, instead of putting all of it here, you can find more about it on my website. As a note, the first two paragraphs on the linked page are for anyone interested in where this calendar originally came from. If you would like to skip all of that, and just find out how the calendar works, and therefore what the watch was designed from and how it works, start at the third paragraph.
Implementing the Calendar
So with that explained, the question that started this whole adventure was: what would it be like to actually have a watch that used this method to tell time and keep dates, only instead of using the observable things on the earth, have the watch use all of the accurate mathematical calculations known to modern astronomy?
As I mentioned at the beginning, it can be a bit daunting sometimes not knowing where to start on a project, but the best way that I’ve found is to just start with what you know and go from there. For this project, what I knew was that I had to have some way to show all the different elements of the watch together, and they also needed to be able to move on their own without me actually animating everything by hand and trying to keep everything where it needed to be, which would have been almost impossible. So I would need some sort of rig to do that, and a way to feed calculations into that rig so it could animate itself. I also needed to find out what kind of data might be online that I could then use for that rig.
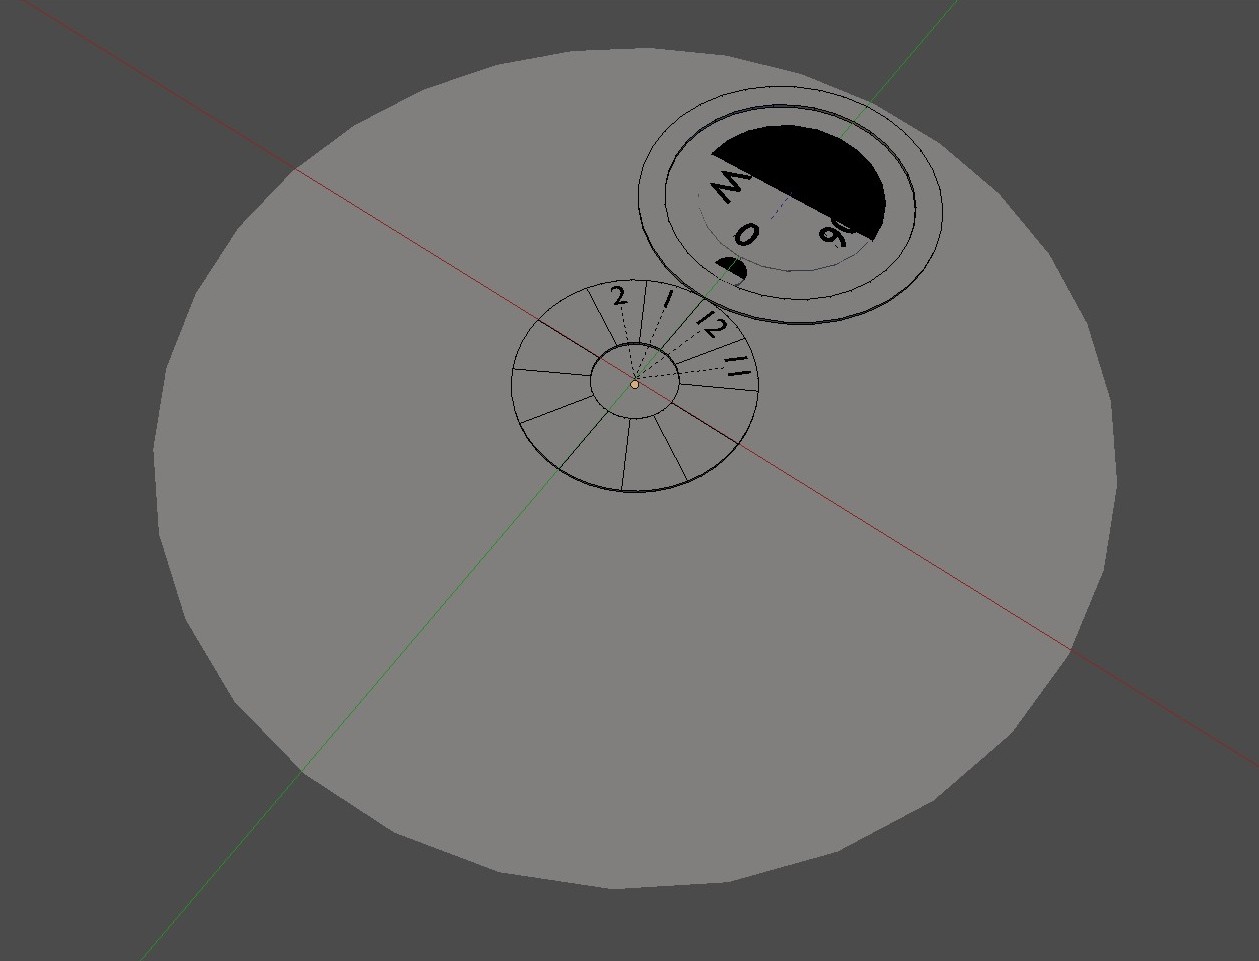
With those things in mind, here was what I originally started out with while I was trying to create a concept of how the watch might work. It was just a basic idea of having discs spin around each other, with the earth and moon on the outside, and a way of showing the months on the inside. Blender also has a way of writing text as a 3D model, so I started adding in some of the text that might need to be on the watch:
As I kept working with it, I thought it would really be neat to have the actual globe spinning around, to give a more visual idea of how this watch was working, and also because it would be quite cool to have a watch with the actual earth spinning around inside of it to tell the hour, instead of just a digital display of the time, or “hands” on older style clocks. Eventually, I came up with this design that is used for the final watch, where an actual globe could spin around the sun, which you could tell the hour with, the moon spinning around the globe for telling what day of the month it is, then have the actual month you are currently in still in the middle, but I also added in the middle a way to show how many days the calendar has become out of sync with where the earth is in its orbit. There is also a tab for the 13th month I added to that center dial that you can’t currently see in this image. Something else I started adding at this stage was some of the shell of the pocket watch so that I knew how big everything should be and how it might fit in the watch:
The other cool thing about this design is you can also see how the Earth’s tilt causes seasons to work in the real world, with the way areas become closer or farther away from the sun throughout the year.
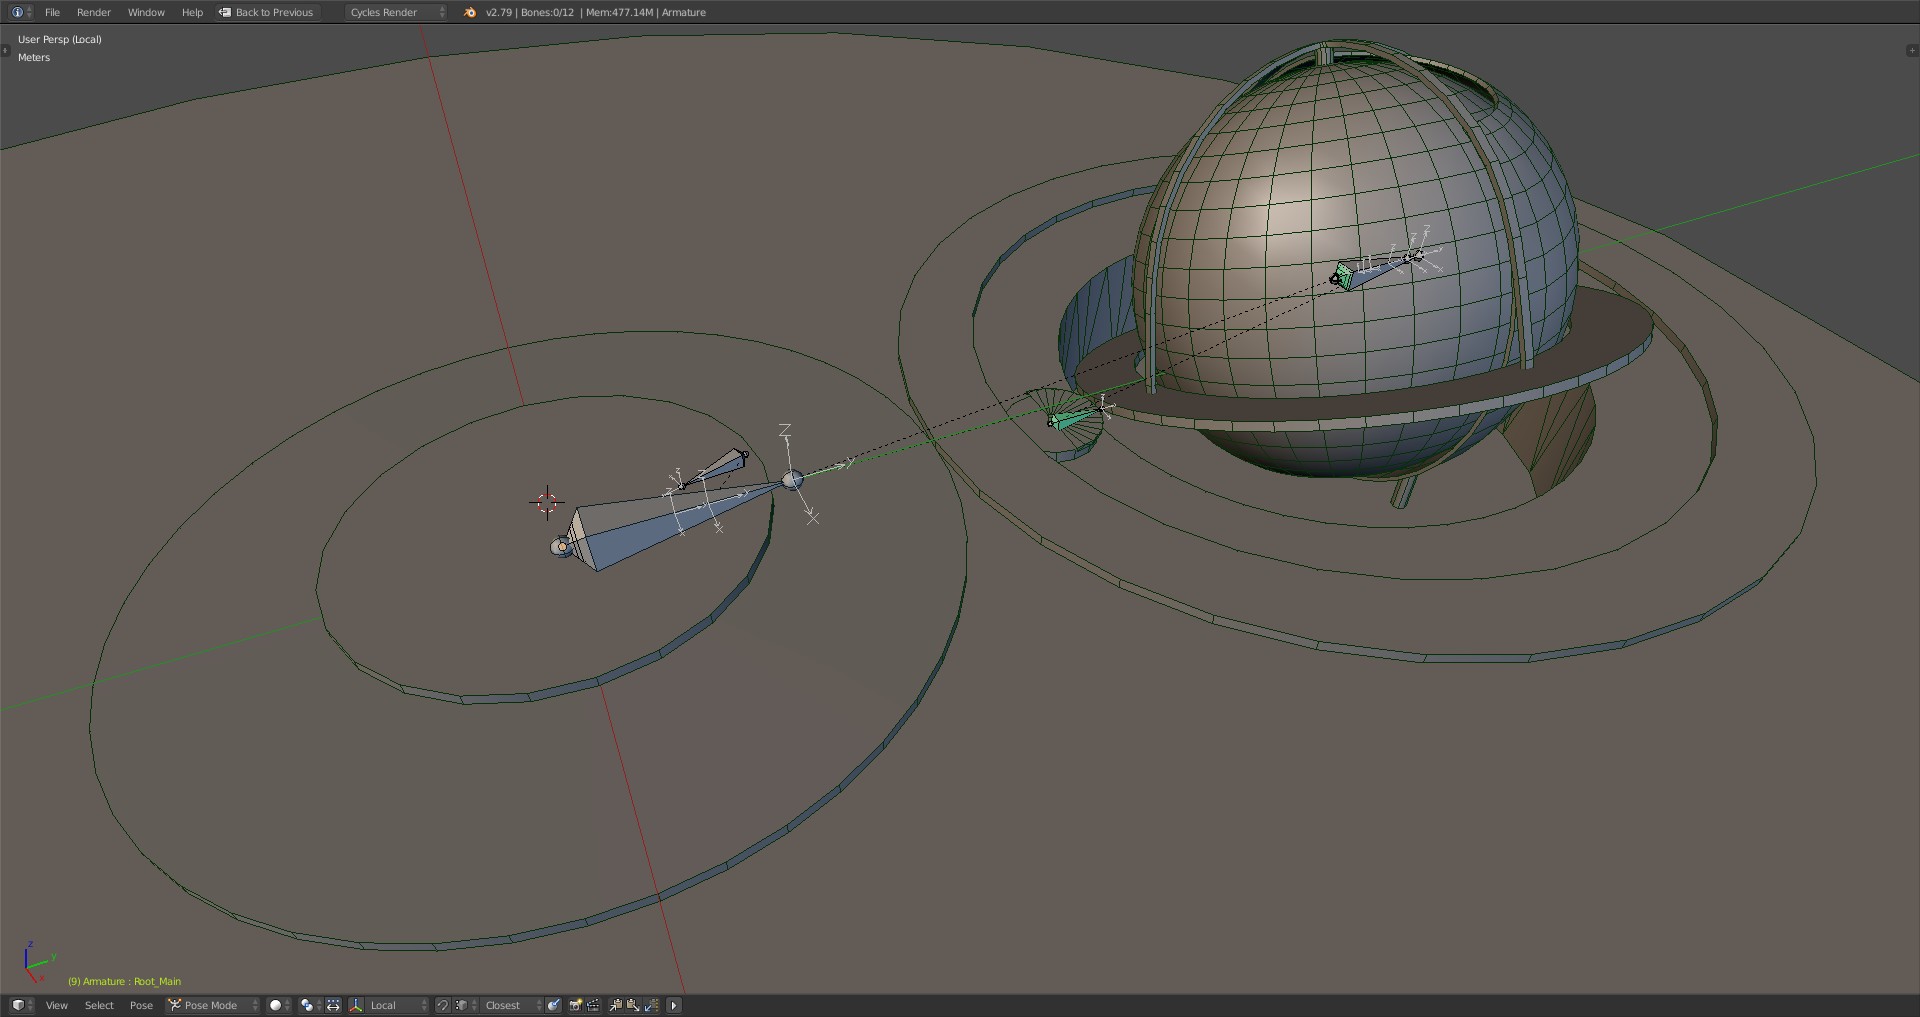
After I had an idea of how things might work together, it was time to create the way that all of it could move. Since I was eventually wanting to put it into Sketchfab, to do this I used a skeleton rig with bones, and a basic hierarchy that would make it possible to only have to animate the bone controlling the earth’s orbit around the sun. That bone would be the large bone at the center of the watch:
Then to derive all the calculations for the rest of the bones controlling everything else, I used what are called Constraints and Drivers in Blender.
I had not used Drivers much before, but they are a way to animate most any property in your Blender file, or any property on an object, using math that you set up for it, and the nice thing is you can even write limited Python code into them to do many calculations with something. This is another one of those things I had never done before, but was quite a fun thing to learn all about. In the end, I had to use it for the way the 13th month tab comes out when there is a 13th month, and for the dial that keeps track of how many days the watch becomes out of sync by each year. Things got a bit complicated with those 🙂
Now that I had the way of animating everything worked out with the rig, Drivers, and Constraints, it was time to figure out what kinds of data I could feed into the rig. For this, the original values I used were actually quite simple. One was 365.24237, which is how many days are in one year, and the other one was for the moon, 29.53059, which is how many days it takes for the moon to do a complete orbit around the earth, as visible from the earth. From these two values, I was able to then derive all of the calculations for the rotations.
And with that, I think that is everything for how the actual calendar was implemented, and hopefully it went into enough detail that you can see how the calendar works behind the scenes. The next stage was just modeling the rest of the watch around it.
Modeling the Pocket Watch
There isn’t really too much to say about the modeling process for this project. A lot of it turned out to be just basic cylinders and circles.
Texturing
Now it’s on to the texturing stage. For this, I was able to do almost all of the texturing in Blender. I also used a program called PhotoLine, which is pretty much the same as Photoshop, but it’s a much cheaper alternative that you can own rather than just rent. I used it for all of the lettering on the watch, the world map on the back of the watch, as well as the map on the globe. For the texturing in Blender, there is also a really nice addon for Blender called Bpainter that adds all of the layers functionality like Photoshop has, into Blender. I had just bought it on sale, so I was wanting to try using it in a project and see how it all worked, which it did quite well.
PBR
So to begin, since Sketchfab can use a PBR, or Physically Based Rendering, set up in their materials, I wanted to see what kinds of workflows I could figure out for painting with a PBR set up in Blender, with all of the models using only one material, and using that Bpainter addon with all of the layer functionality at the same time. Since it was the first time I had ever tried doing something like this, there were a lot of things that I probably could have done better, so instead of showing exactly how the material was set up, I’ll just go through the basic idea of the material and the thought process behind it. There probably are better ways out there that it could be done as well.
UVs
For the UVs, I used Blender’s Texture Atlas feature and put each model’s UV into one giant UV Atlas. After that, I could start working on texturing the models.
Creating the Material
The nice thing about PBR is the way that any material can be created using only a few parameters that every material interacts with in the same way. So the way that I used this idea behind it was to first create each of the different materials in their unworn state at first, then add certain kinds of wear to all of them, like scratches, that would modify those predefined parameters for all the different types of materials at once.
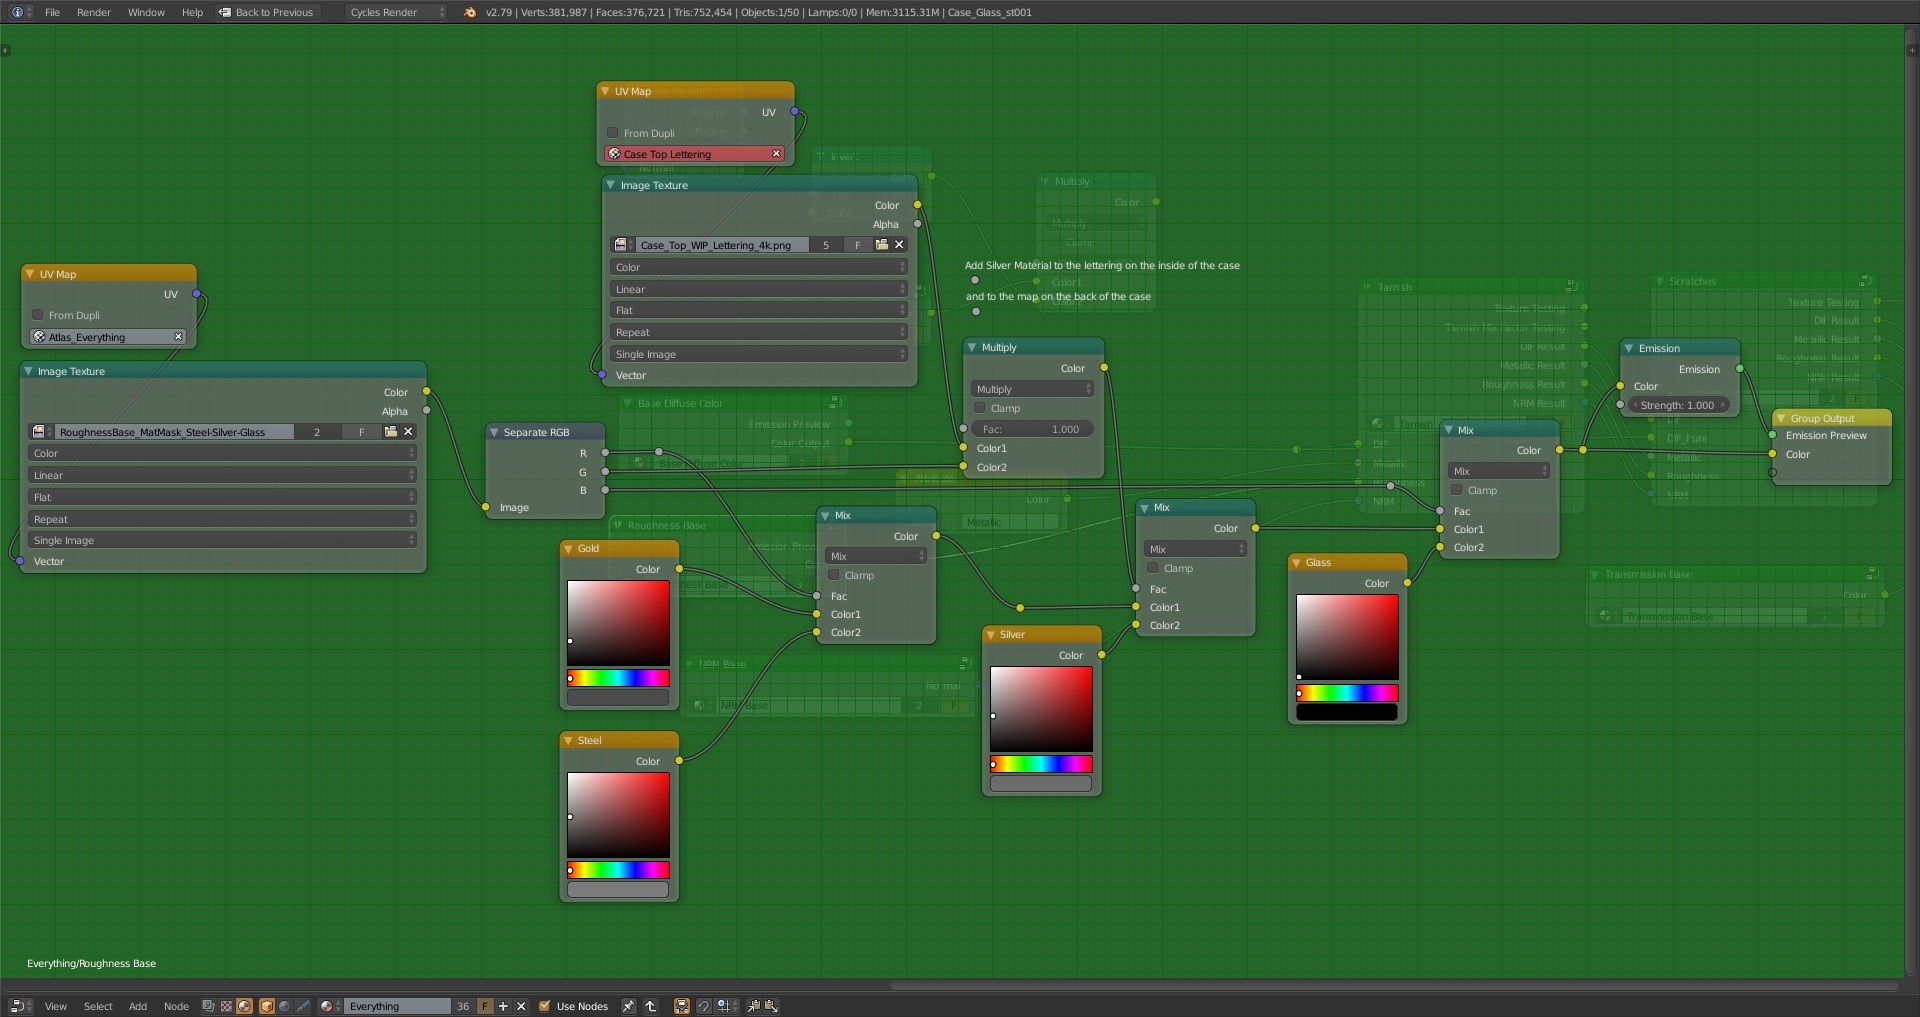
The place I started to implement this idea was to first tell the program which material goes where on each model. For this project, the materials were a brass or gold type material, silver, steel, an enameled metal for the watch mechanism that moves, and finally glass. In order to tell it where to put each of those materials, I created a texture mask for each one, using the UV atlas I had created earlier for the UV, and used those texture Masks in a bunch of Mix nodes, or Lerp nodes, as they are called in the Unreal Engine. Here is how all of that looks in Blender’s node editor for the Roughness values, where the Masks I painted are at the top, then get split into each of their RGB channels that correspond to each material, and go into each of the mix nodes that need them. You can also see which material is in each channel in the name of the image node on the left:
Nodes
With that done, I could then set a base value for each of those materials, which is what those color nodes are above. Instead of just using a single basic color for the base values, you could also plug in some textures or add some procedural textures to give a bit of variation so that the material starts out a little more realistic, because really, nothing in the world is perfect, even in it’s unworn state. I did something similar to this setup for the Normal parameter and the Diffuse parameter, but I also added some lettering and images to certain areas because those things needed to be there in the unworn state. Another example of something you might add is Normal mapping for the grain in wood, because wood usually isn’t perfectly smooth in its unworn state.
After I had that done, I then created a node group, which is basically a container for nodes, that each of the parameters could go into in order to start adding wear to the watch, like this:
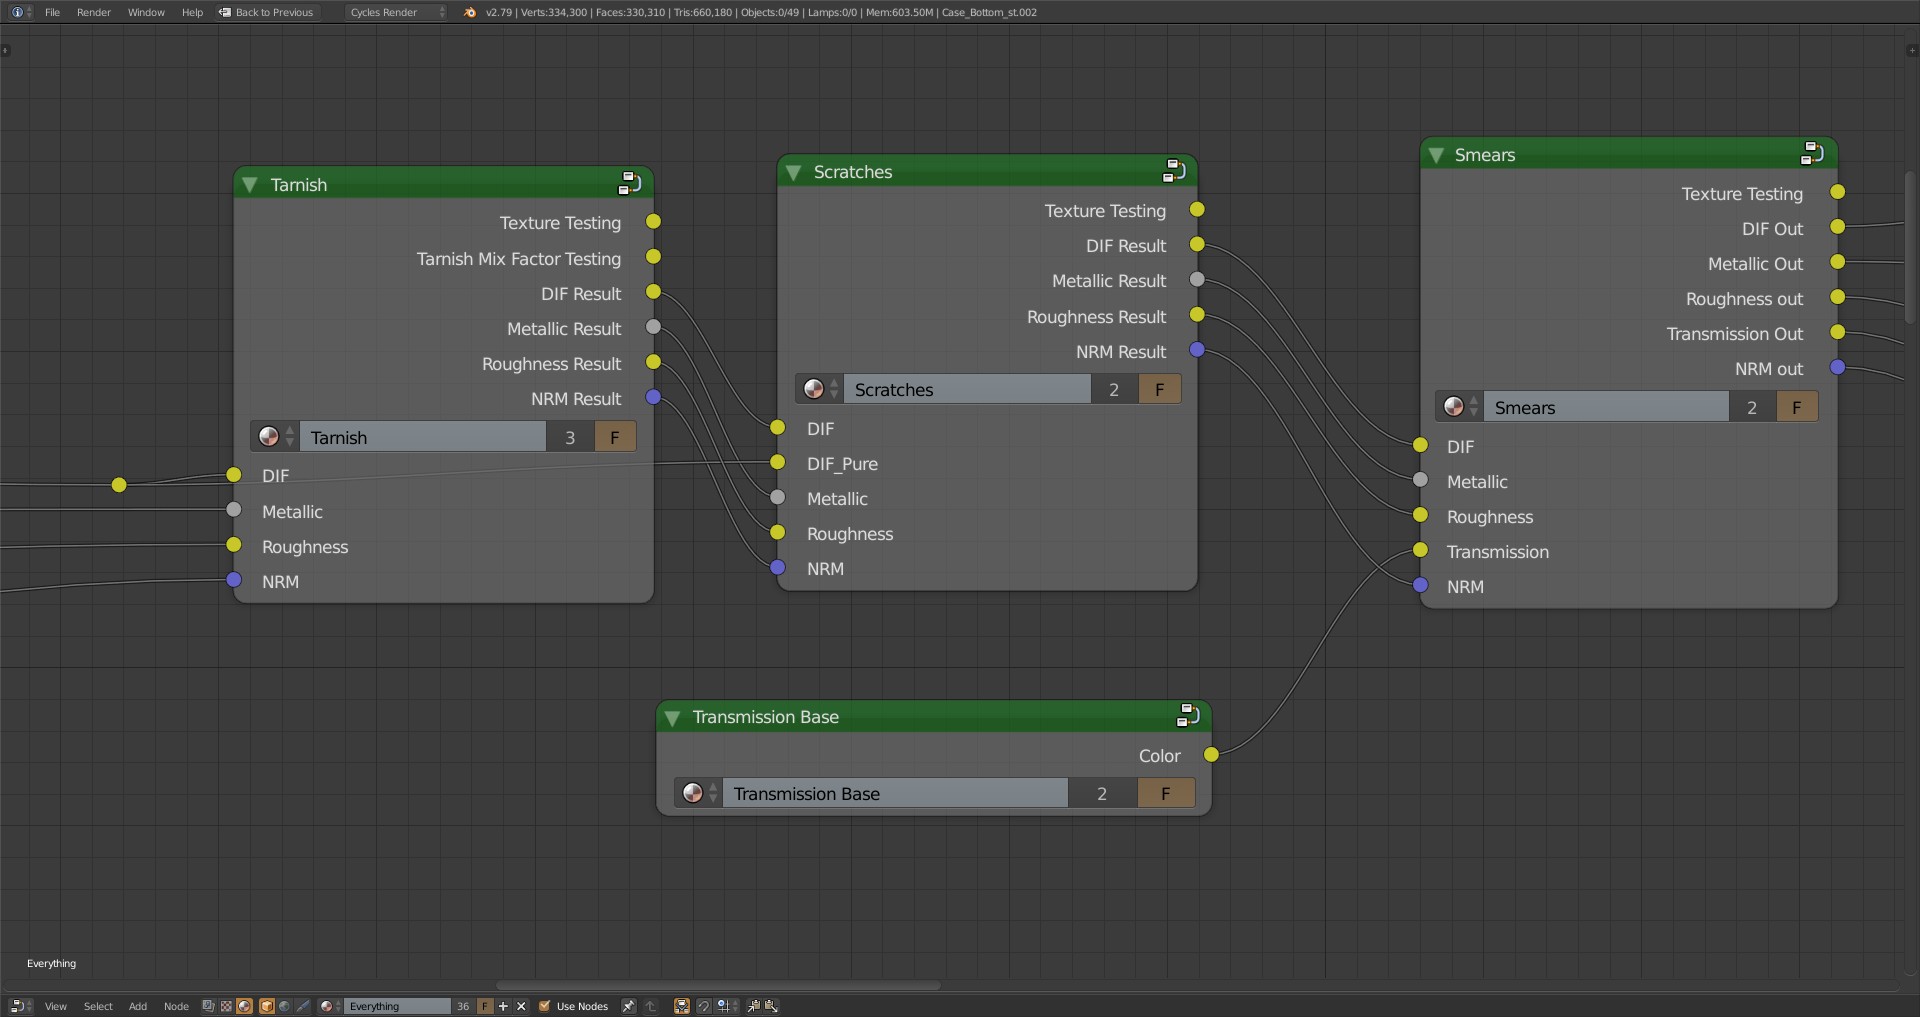
Each type of wear I added to the project, like tarnish, scratches, and smudging, also had its own node group:
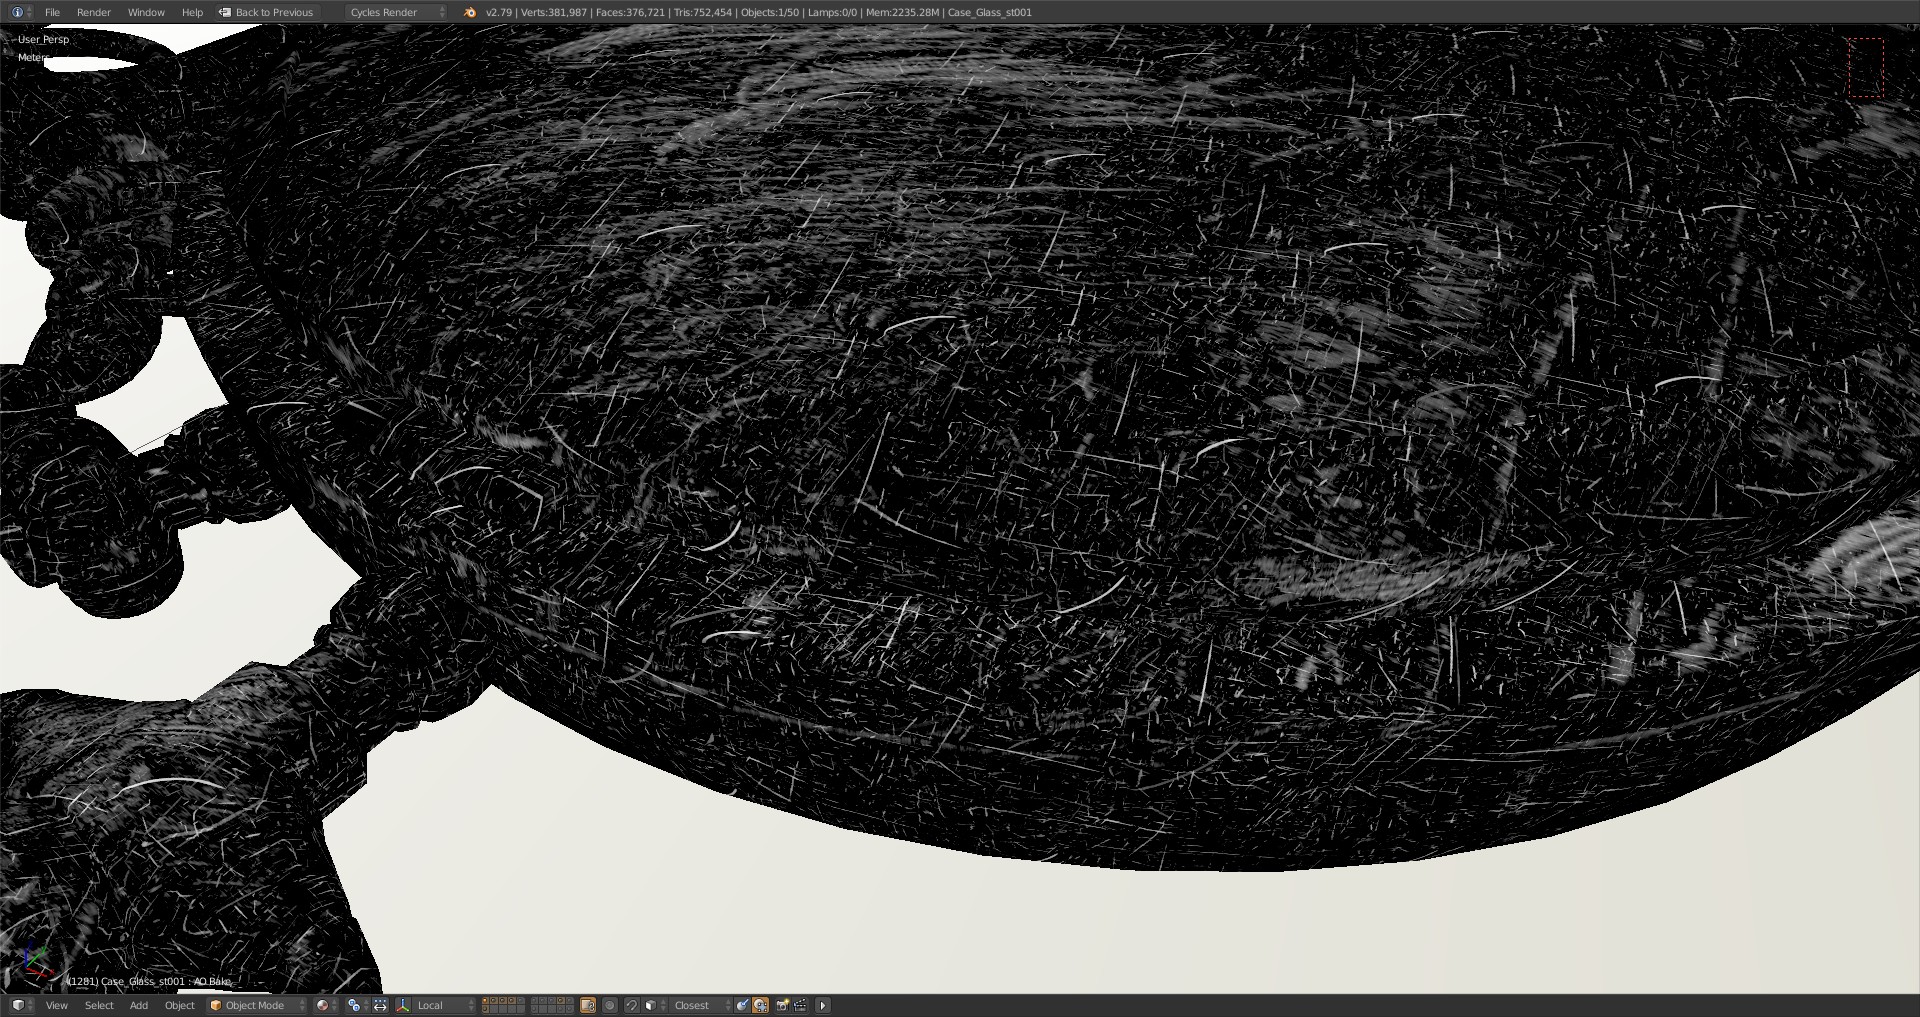
Within each of these node groups, I could then add that type of wear to the base values of each PBR parameter, in their own way they would need that wear to be implemented, and the wear could start to build on each other. To give an example of how I would use them, for the scratches, I first created tons of scratches going over the entire watch, like this:
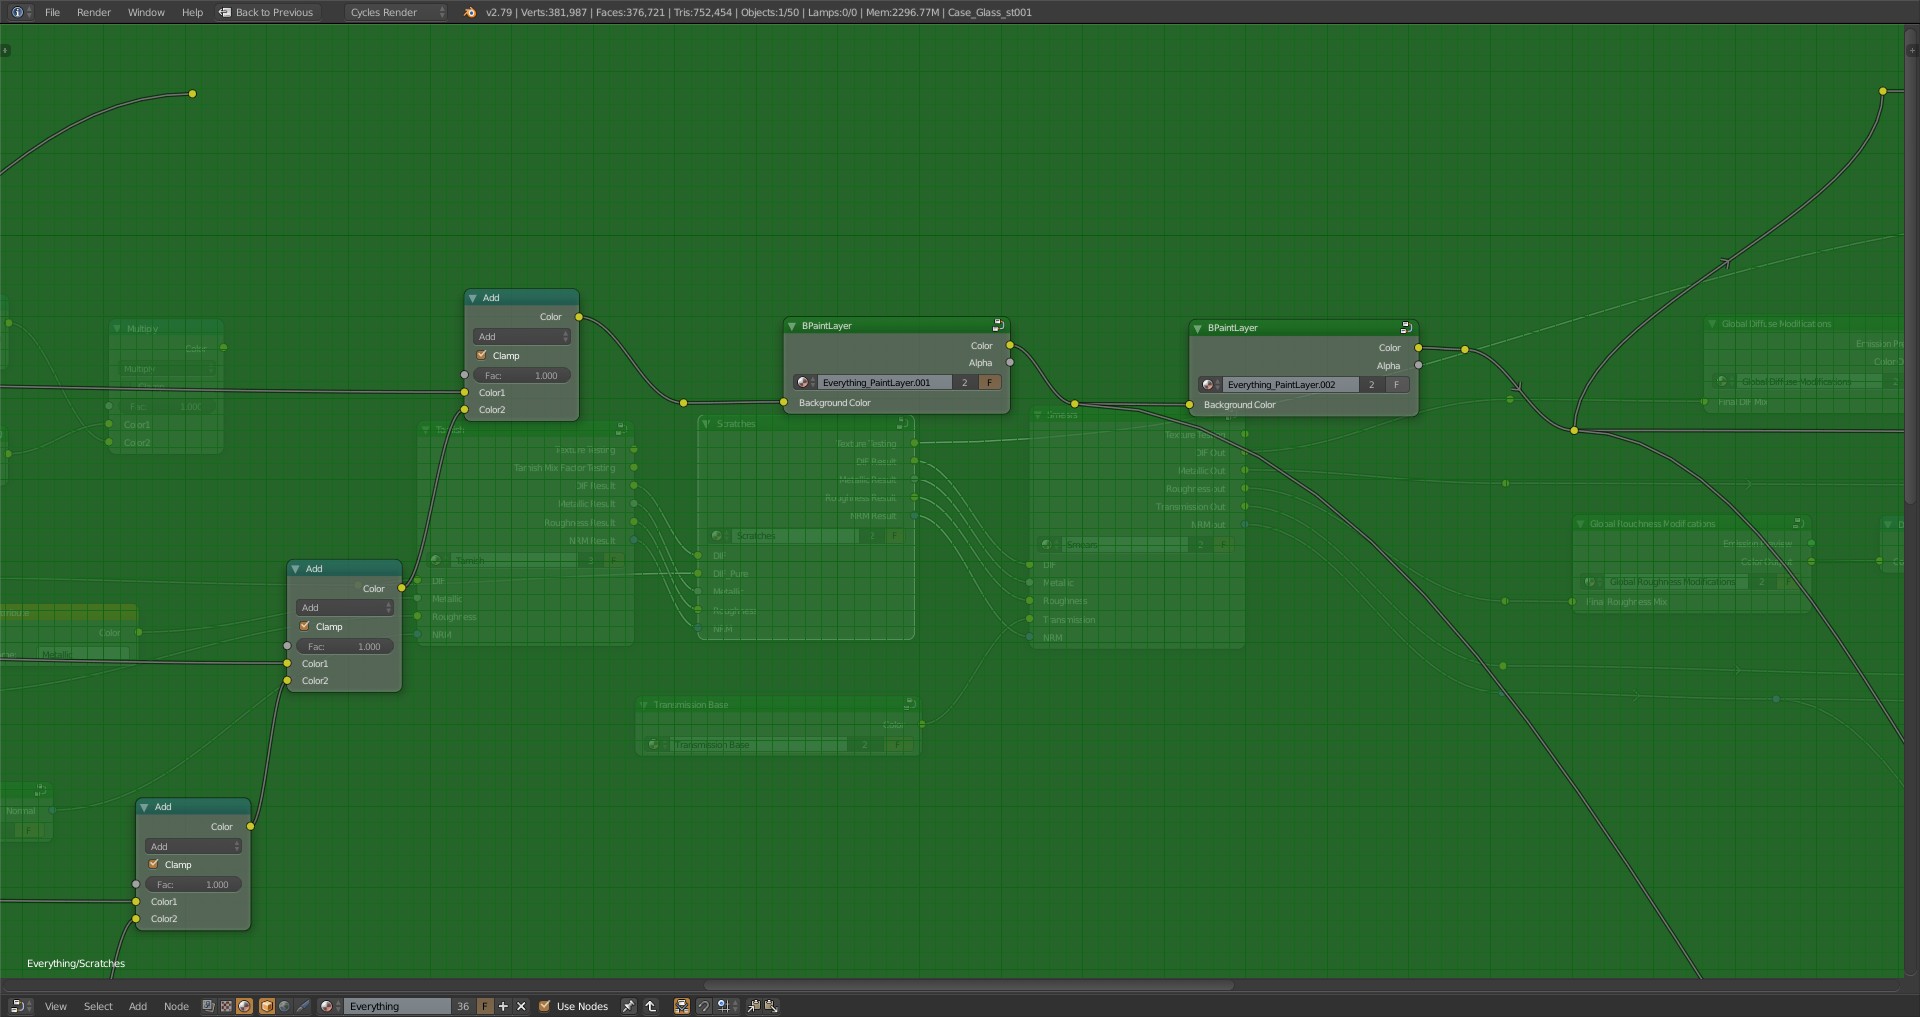
After covering the watch in scratches, I used the BPainter addon’s layer system to create masks that I could do a Multiply operation with and tell the material how deep the scratches should be in each area, by making the mask lighter or darker. I could also add painted scratches where I wanted by doing an Add operation on a texture that I was painting. Bpainter then adds node groups in order to implement the textures you paint and do all of those math operations you set for that texture. I put those node groups here, right after all the images I used to cover the models in scratches:
And here is the result of that on the model, where some areas are lighter and would have deeper scratches, and some are darker with fewer scratches. There was still some tiling that could be seen from the textures, but it’s not something you notice when rendering the model:
After all of this, I could then tell the material how to modify the base values with those scratches, doing something a little different for each PBR parameter. Here are the Diffuse and Roughness parameters:
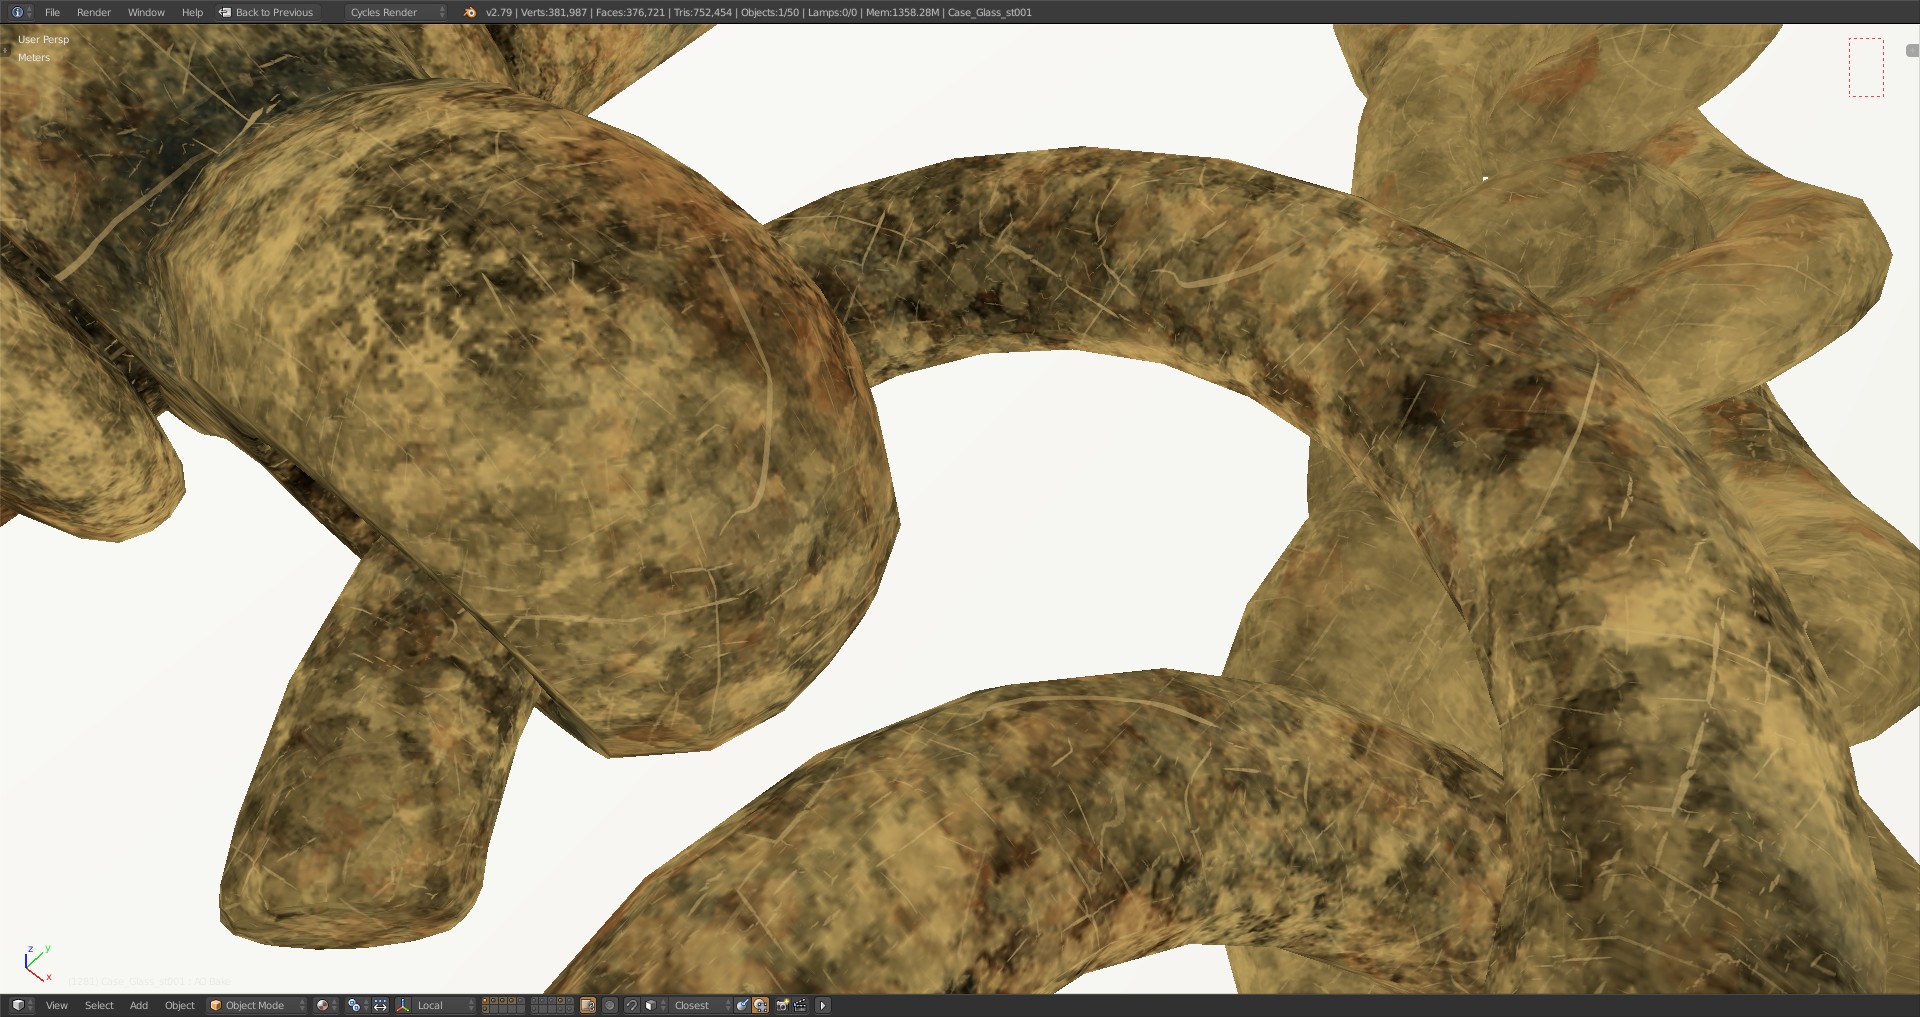
You can see the way that for the Roughness, I did an Add operation to the base values, in order to make the scratches more blurry in their reflections. Then for the Diffuse, I basically made it so that the tarnish was absent wherever a scratch might be, and tried to implement the idea that the metal would tarnish a bit, then get scratched, exposing new metal that wouldn’t be tarnished. This is how the Diffuse looked close up on the model:
Altogether, this created a way that all I would have to do is paint those masks with Bpainter, and the scratches would be added to the model automatically, with all of the base PBR parameter values being changed for everything at once wherever a scratch happened to be. I also did something similar with the Tarnish and Smears node groups I showed earlier, except with the tarnish, I hand painted it on much more instead of combining lots of images, as I did for the scratches.
And that’s pretty much how the whole texturing process went for the project.
The really nice thing about this whole system, and using the PBR workflow with it, is that you could create a single node group for each type of wear, like I showed above, then be able to import that node group into any project, and all you would have to do is paint a mask that made that wear visible on your model where you wanted. Since everything is using the PBR principles, that wear should then always be able to interact with your model correctly, no matter what type of real world material you were adding it to.
One last tip is that I combined all of the models into a single model in order to do the painting. So I had two sets of models, one combined and one left uncombined. This gave an easy way to paint on any part of the model without having to first select the object I was wanting to paint, then go back into painting mode to paint on it. You do have to keep all of the models in sync with each other if you change any models, but it does still help in the long run.
Adding Explanations to the Watch
One of the last things to add to the watch were the explanations of how it worked. To do a lot of these, as mentioned before, Blender has a nice way of adding 3D text as a normal vertex created model, and this is what I used for all the 3D text. Sketchfab also has a way of doing explanations, which I used for some parts of the watch, but I thought with all of the science-y kinds of things in the project, it might be fun to make it almost like a science fair type project that you might do in school, where you might have your little cards everywhere explaining things on your science project. I also used Blender’s Grease Pencil to add the pointer to where New York is on the globe.
Importing into Sketchfab
To import everything into Sketchfab was a fairly easy process. First I baked all the textures into their final PBR textures with Blender’s baking feature. Then I created a separate Blender file into which I put everything I wanted to import into Sketchfab, and finally just imported that Blender file into Sketchfab.
One interesting thing I had never done before was also baking the animations into final hard drive type files, instead of just importing the animation keyframes into Sketchfab. This was because I was using drivers and python scripts to calculate everything that Sketchfab doesn’t have a way to understand. So to bake the animation, I used a method found at the end of this tutorial.
A couple more things I added were a vignette in the post process filters, and baked the Ambient Occlusion on to the bottom plane that the watch was sitting on, adding it as its Diffuse color. This is mainly because I like having ambient occlusion on all the time for whatever the model is sitting on, instead of having it show only if it’s in a shadow, which is normally how it works. I feel the shading helps it look like the model is sitting on something, instead of just floating on the ground.
Finished Pocket Watch Model
Last, but not least, here is the final working model on Sketchfab:
Final Thoughts on the Pocket Watch
I think that’s everything for how the project was made. Hopefully that gives some understanding about the behind the scenes processes, and I hope too that some of the information might be helpful in some of your own projects! It’s one of those things that will probably never be able to exist in the real world, but personally, I would love to have a watch like this, where you could actually see where the earth and moon were in space at anytime, or see what time it was anywhere in the world. “Ah, looks like the sun is setting over there in England right now.” 🙂 That’s one of the great things about Sketchfab though is, even though the watch can’t exist in the real world, it’s still definitely quite cool to be able to have the watch on a web browser, and people can still look at it as though it were real.
If there is a bit of wisdom to share from the project, it might be just don’t get overwhelmed by not knowing where to start or how to approach the project, or get overwhelmed by what you don’t know. Just start with what you have and know needs to be there, and see where things go as you keep adding those things. Who knows, you might even pick up a bit of Python along the way 🙂

