About Me
Hola! My name is Carolina and I’m a 3D Character Artist from Spain. I discovered my passion for 3D characters almost 5 years ago and that’s when I moved to London to continue my studies, and pursue a career in the videogame industry. Now that I have graduated, I’m moving back to Spain and I’m looking forward to my next adventure! 🙂
I love experimenting with different styles, from stylized PBR to hand-painted cute stuff!
Inspiration
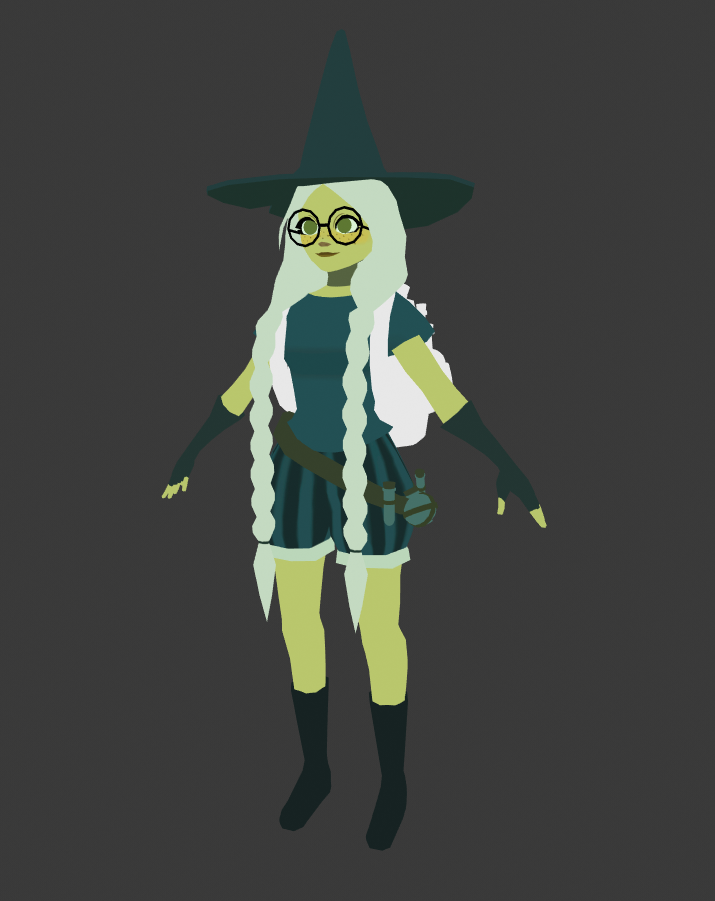
I get inspired daily by the number of amazing artists who are on ArtStation and Twitter. I came across Julia Blattman’s artwork and I instantly fell in love with it! I wanted to recreate her artwork in 3D and make it look like a 2D illustration. This was perfect for me as I wanted to continue to practice hand painted texturing and I loved the colors and composition of this piece.

Process
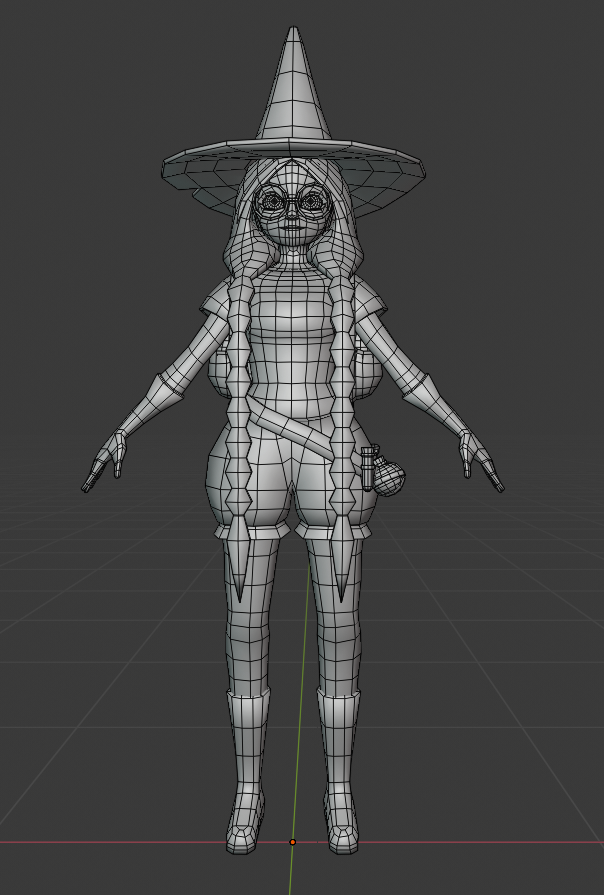
Modeling
The tool that I used to create this project from start to finish was Blender. First, I modeled her in an A-pose as it was easier for me to create half of the model and then have the other side duplicated by using the mirror modifier.
Texturing
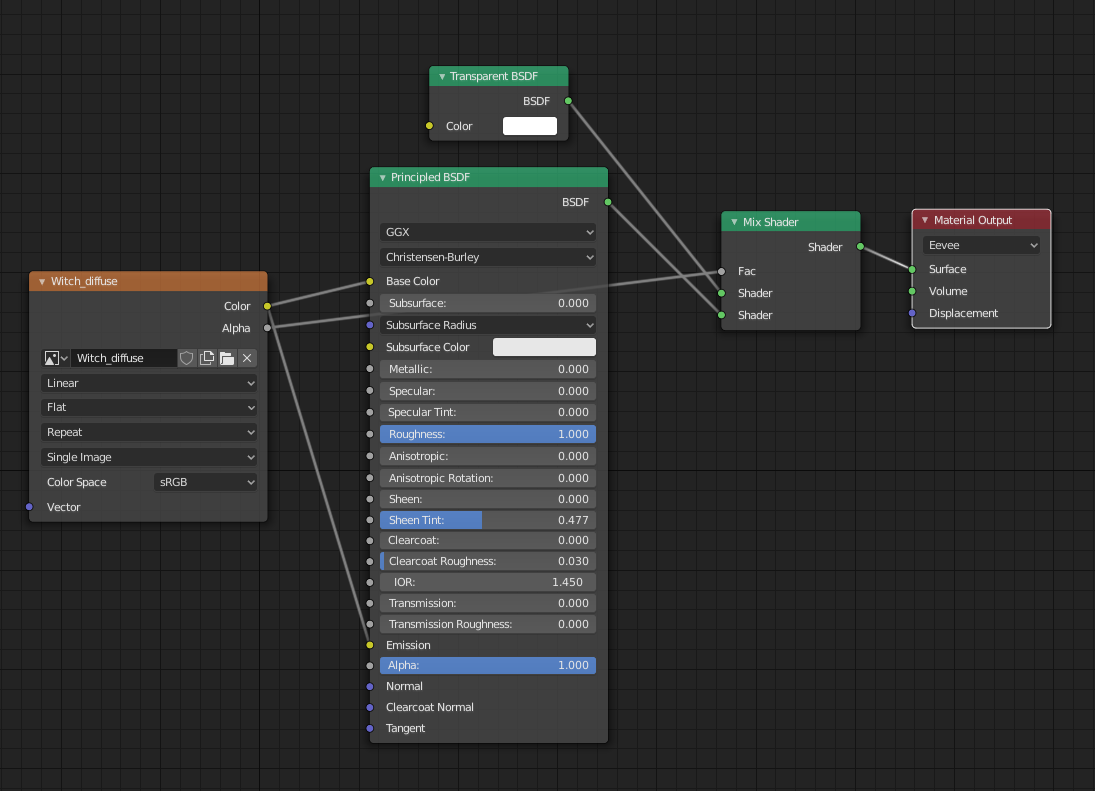
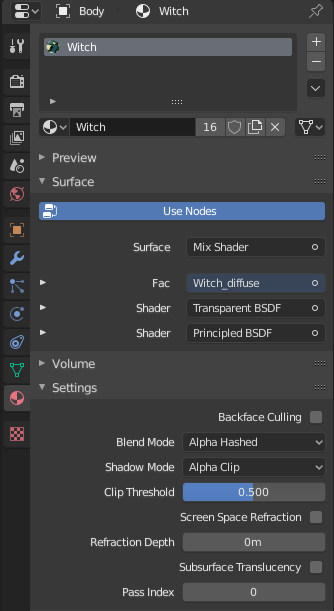
Okay so first, let me show you how I set up Blender to show flat shading textures with transparency in Blender 2.80.
- Open your shader editor and connect your texture map to both the base color input and the emission one. If your model has transparency, you want to add a Transparent BSDF node and plug it in by using a Mix Shader node. And last, plug the shader into the material output and don’t forget to set it to EEVEE!

- For transparency, you want to change some settings in the Materials tab. Just make sure to set your Blend Mode to Alpha Hashed and your Shadow Mode to Alpha Clip.
- Change your viewport shading to Rendered (you can quickly access this menu by holding ‘z’!) and make sure you don’t have any lights on your scene! (You can check this in the Outliner on the right and simply delete the light).
Using masks and the fill tool, I started to select faces and colored them, blocking out the basic colors. After this, I started to hand paint some general light information to add some volume to the model.
In this project, I UV unwrapped the model before applying the mirror modifier. When the model is symmetrical I work with half of the UVs and when it’s ready, I apply the mirror modifier to make the UV islands stack on top of each other. This saves UV space, as both halves would be using the same texture information.
The only object that wasn’t symmetrical was the hat, which I applied the modifiers to before doing the UVs so that I could replicate the cut that the hat has in the illustration. It was a good thing that I didn’t use the same texture information for both sides of the hat, because I was able to paint the light information coming from only one side of the hat.

If I were to redo this project, I wouldn’t stack the UVs as it would have been nice to have the light source painted in to replicate the illustration. The way around this was to paint general light on the model to be able to add volume to it without making it look fake by having too many light sources.
Rigging
Before finishing the texturing stage, I rigged the model and posed it to match the original illustration. I added some bones to the hat and the braid to have better control over them.

Adding the Final Details
Once the character was posed, it was easier to continue painting the details because I could compare the model side-by-side with the original artwork. To make the leaves, I used planes and filled them in with the Erase Alpha blending mode. Then, I set the mode back to Mix and used a normal brush to paint them in.
I used this same technique to paint the leaves and god rays in the environment. The only thing that I modeled was the mushrooms to give the scene more depth.
Using planes and opacity is a great way to control the polycount of your model, as you can get an infinite amount of detail without having to add extra geometry.


Presentation
I felt inspired by other Sketchfab artists that also display their artwork inside a cube. And it’s very easy to make!
First, you create a cube, select one of the faces and create an offset. Keep extruding in and scaling the geometry until you have created the inside of the box. And that’s it!
This works really well with hand-painted artwork as it is very easy to hide the box by setting a flat color that matches one of the backgrounds inside Sketchfab.


Sketchfab
These are the settings that I used inside the model editor:
- General > Shading > Shadeless
- General > Background > Color (I used the same color as that of the box)
- Materials > Opacity > Dithered (Used the same map as the texture one)
- Post Processing Filters >

And ta-dah! 😀
I love using Sketchfab to present my artwork as its super user-friendly and it has so many options to enhance your work! I love playing around with the filters in the post-processing tab—you always get a really cool outcome! I wasn’t planning on using Chromatic Aberrations for this one, but after playing around with it I feel like adding a small amount really adds to my final piece and makes it look even more magical! (It really shows on the butterflies that are flying around her.)

Thank you, Abby, for giving me the opportunity to write this article and everyone for all the likes, comments, and support that you guys give me. You can’t imagine how much I appreciate it!
You can follow me on Twitter and on ArtStation if you want to see my progress! 🙂
About the author
Carolina Padilla Perez
3D Character Artist