About Me
Hey! My name is Bartłomiej Dębiec. I’m a self-taught freelance 3D artist from Poland. I’ve come through several roles as a digital modeler/sculptor for smaller game development studios here and have four years of professional experience working in this sphere.
Inspiration
Inspiration for making my velociraptor model came after reading the story by Cinxin Liu titled “Devourer” in which the dinosaurs play a very specific role. That story is what sparked the idea of sculpting one. I picked the velociraptor because of its amazing anatomical features that would allow me to create a sculpture in a nice, dynamic pose that I knew I was aiming for.
Process
Tools
For this project, I am using Blender to cover the initial modeling stages and unwrapping UVs. I am always running the latest stable release. I use ZBrush for sculpting and Substance Painter for baking and texturing.
Managing UVs in Blender straight out of the box is terrible. I highly recommend getting UV Toolkit, UVPackmaster 2 PRO and Magic UV’s addons as they make these operations easier. As for this model, I ended up using only UVPackmaster.
Modeling
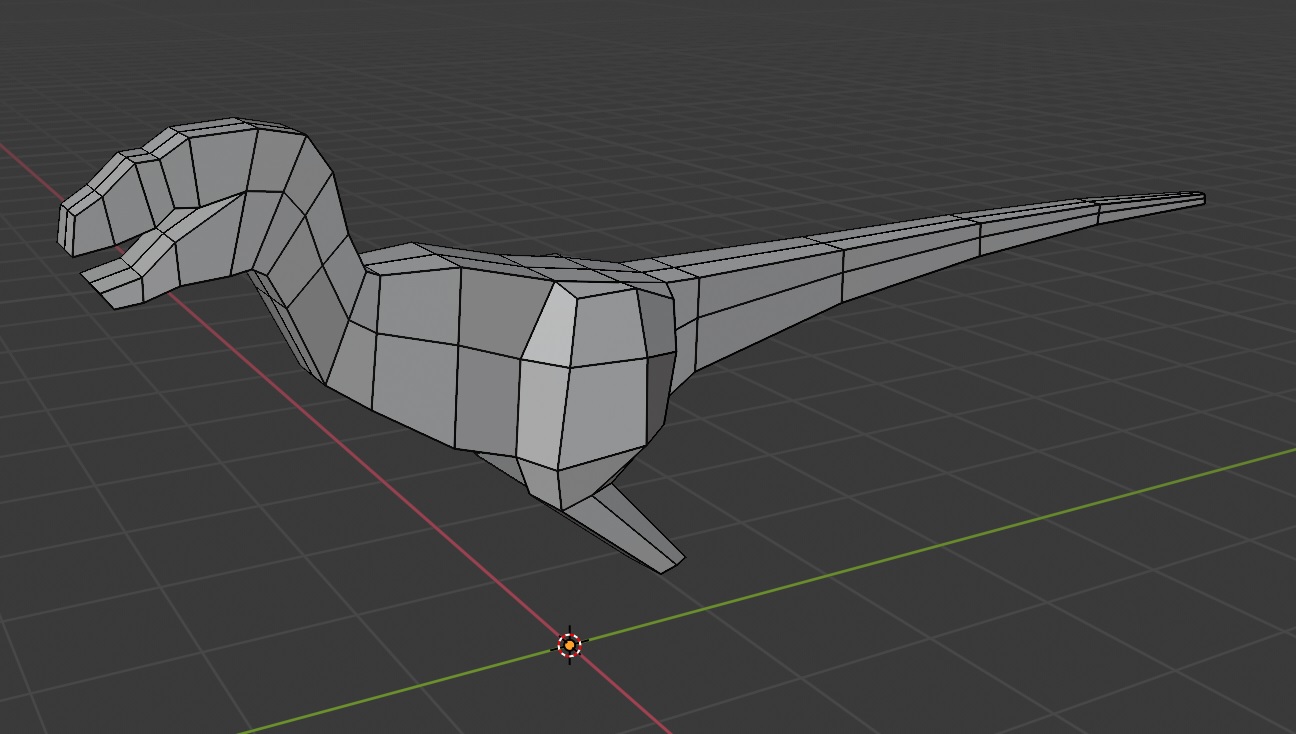
I want to start my model quickly so I begin by extruding a box with some subdivision levels to block out my initial form. I found out that doing so works better for me than manipulating the spheres with the Move brush, as some people tend to do. So I just import a reference picture into the background and then I start adjusting my box to the point that I am satisfied with the initial form. I don’t overdo the details at this stage. The model should have just the basics that will allow me to progress further on to sculpting—enough to dig in with the Move and Clay brushes.
- Model in the initial stage.
- Model that I started sculpting from.
Sculpting
I decide that I just want to make a nice and fast figurine. That means that I didn’t want to go through the retopology process and would take the decimation route instead. Initially, I apply the subdivision modifier and sculpt the raptor in a neutral pose and refine it until I am satisfied enough to break the symmetry.
- Model at the initial stage of sculpting.
- Advanced-stage sculpt (you can see that for my final I decided to tone down the skin detail from the sculpting pass).
To achieve this effect, I usually use the standard set of implemented brushes—move, clay buildup (for this one I prefer round and soft alpha 6 instead of the default square), and dam standard. I tend to turn the intensity of my brushes down to at least half the initial value and build it from there. I recommend restricting yourself to using some kind of flattening brush like trim dynamic instead of the smooth brush. This practice gives you better control over the form and a bunch of details, like introducing some imperfections to the surface to prevent super-smooth surfaces from looking super artificial.
Don’t be too precious with your model. If the requirements of your project don’t require that you have to use a specific base mesh from start to finish, you should retopologize your model whenever needed. In the case of my model, I had a pretty nice starting topology, but whenever I felt that the topology was limiting my possibilities, I duplicated it, remeshed it, and transferred the details. Then I proceeded to sculpt further with this new mesh, disregarding the old one. If you want to have a mesh that works for animation, chances are that you’ll have to retopologize your model manually nevertheless.
Posing
The next thing is a posing pass. I spend some time here just to make sure that everything works as intended. It’s a matter of just checking out which curves are most suitable, and that all losses of volume that may occur during bending of the limbs are accounted for and repaired. I search for something that’s telling a story and would look like a still frame from a movie.
In my opinion, it’s also important to walk that extra mile and take care of such details as placing the posed character on the ground. It just adds that extra effect to the presentation if you manage to provide your viewers with at least a hint of the environment.
Texturing
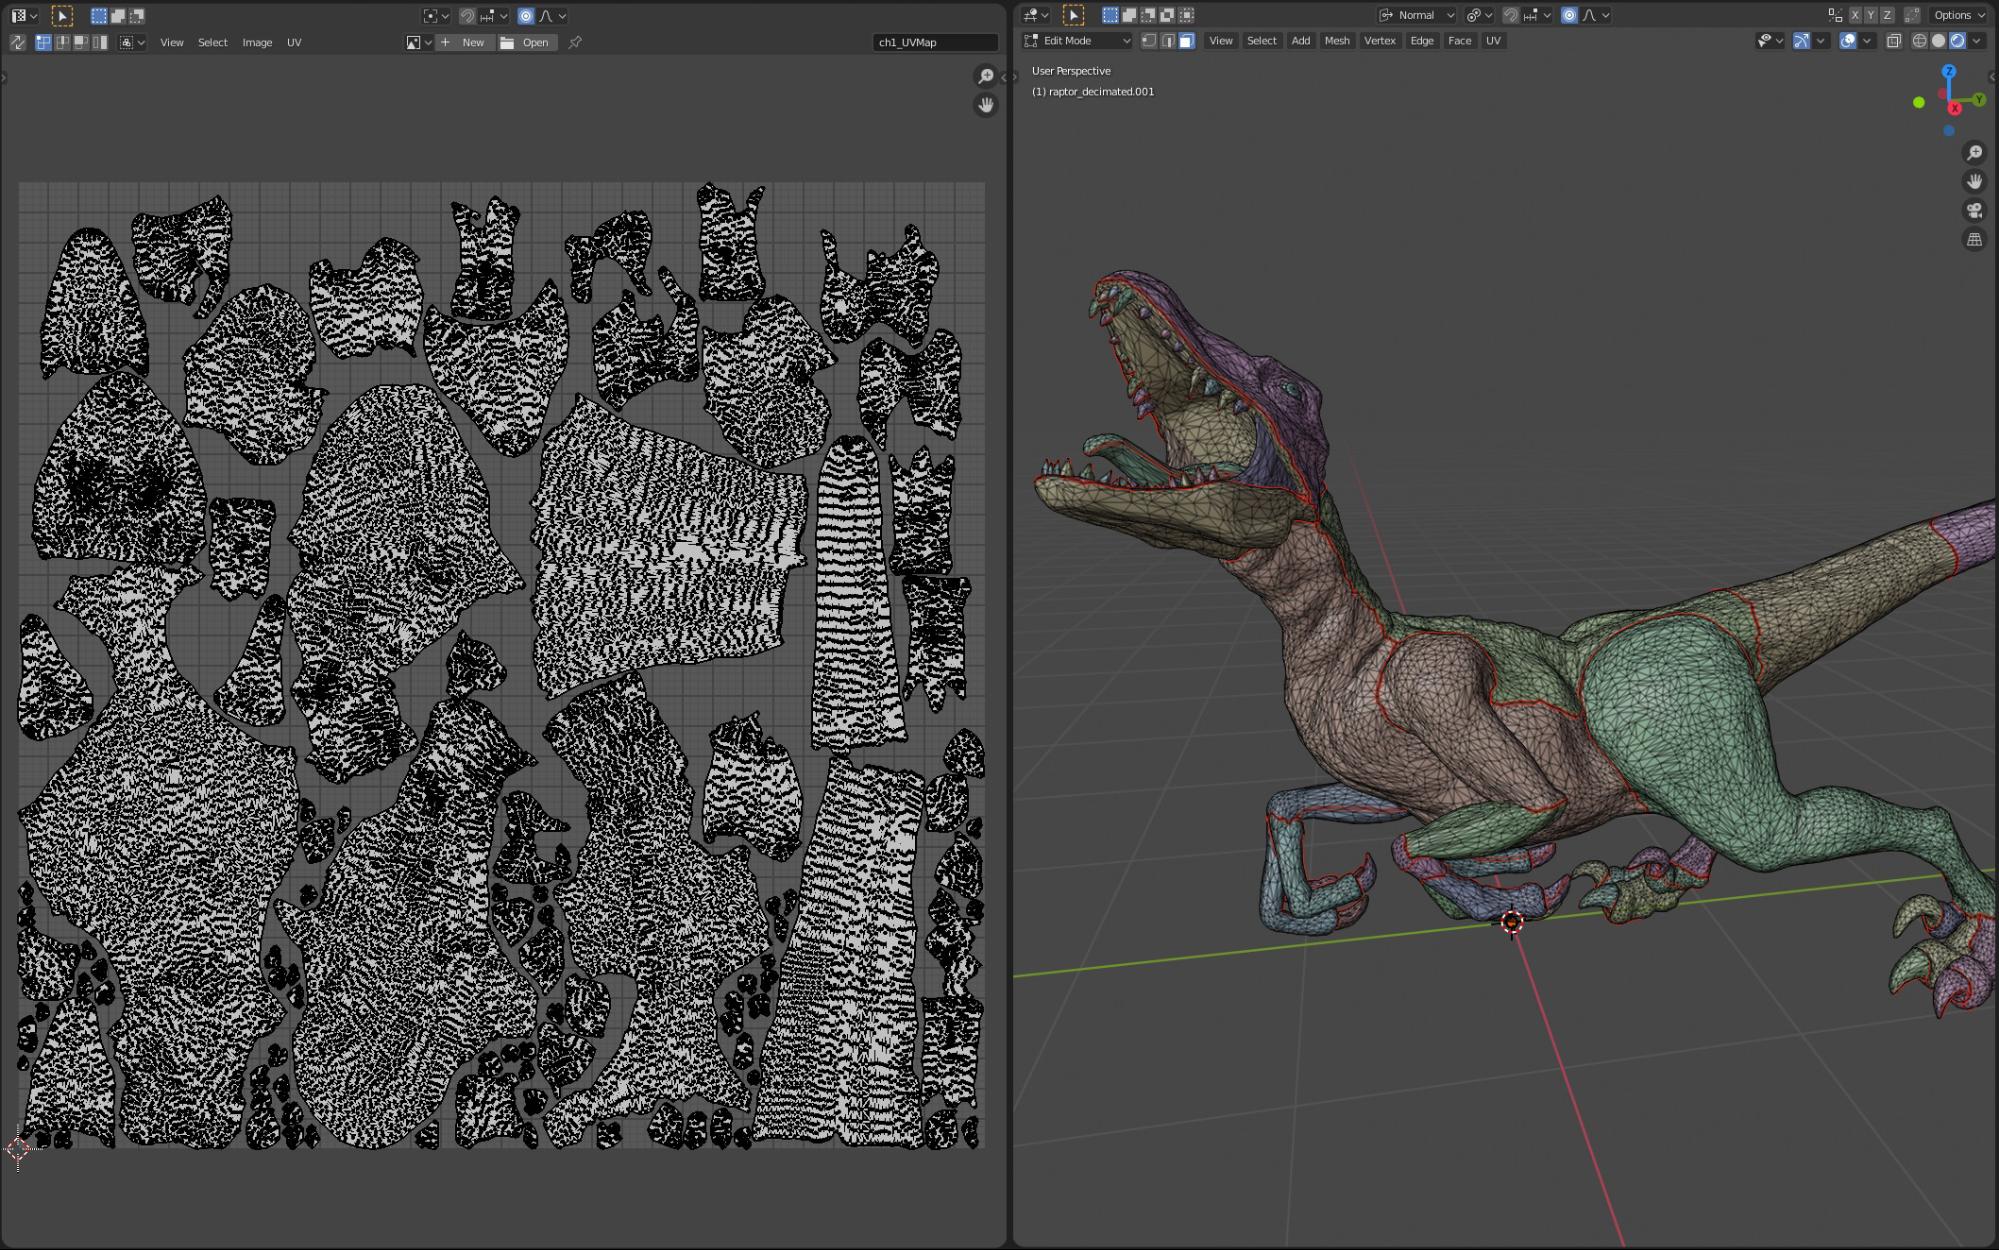
To approach the texturing phase I duplicate and decimate the copy. Then I UV unwrap the decimated version. My focus in this part is on making the cuts in such a way that I end up with a nice unwrap that matches the texture space as well as possible (for example, the tail ended up being cut into three parts).
 View on the UV islands. I didn’t care that much about rotation as much as to fit everything in – all hail the tri-planar projection! 😉
I bake my maps directly in Substance Painter. While texturing I tend to work with raw materials that are limited by the black masks. It is here where I build up the stacks of fill layers and effects. It has the benefit of allowing me to switch certain details on and off as needed. This approach is non-destructive and makes for easier iteration.
I fill in smaller areas like claws, teeth, and mouth first. For the skin I end up blending three different materials, painting in the masks by hand, or modifying the input from curvature map. A nice trick that I tend to use is to bring in the ambient occlusion map from the baking as another layer with multiply. I adjust the intensity of this layer to make the shapes on the model pop up a little bit more.
- An example of a mask arrangement.
- An example of the AO layer: blurred ambient occlusion with some levels adjustment.
Presentation on Sketchfab
For my final presentation, I have a pretty easy setup. I’m a fan of having a grey background, so I set that in. Just to keep things simple, I don’t overdo the lighting either. Then I switch on almost every single post-processing effect available.
I haven’t seen a model yet that doesn’t benefit from screen space reflections or AO. 😉 Remember not to go too crazy with the values here. In this case, for example, I kept the value of chromatic aberrations very low, so that they are barely visible (0.002). And here’s the final model:
If you enjoyed this model and my small set of tips, you might find it interesting to check out my other pieces here at Sketchfab or over at my ArtStation profile.


