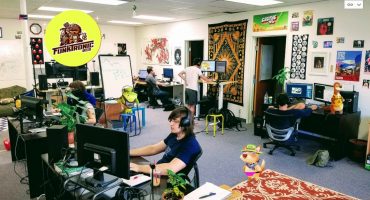
Hello everyone! This is Eric, I’m one of the 3D artists at Kinship Entertainment. We are a game studio located in Brazil and for the past 2 years we have been working on an ambitious PC game titled Skydome.
Skydome
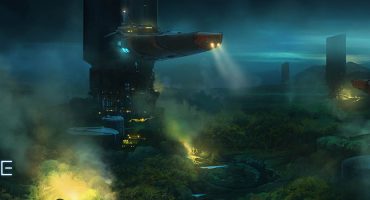
Expanding a little more on it, Skydome is an in-development team based action-tower defense game. Basically, it’s a competitive online multiplayer game which mixes elements of action and tower defense. The Skydome complex is made of two identical, but separate arenas. One for each team of four players that compete in each match. At the end of each arena, there’s an artifact that the team must defend. The team with the last standing artifact wins. To attack the enemy artifact you spawn troops directly into the enemy arena, choosing their kind and the path they will take. You also control a Tribe Champion to defend against the waves of enemy-sent troops. There is no close combat between players, but you can disrupt the enemy defense in a diverse way via interventions, special long range skills that impact directly into the enemy arena. To better understand the game, just hit play below:
There are two very important types of characters battling inside the Skydome, those are the Champions and the Troops, each with its own skills and characteristics. Both Champions and Troops are tribe-based, essentially packs of characters that share a common place and culture, like pre-formed teams. Our first tribe of champions are the Forgeborn. They worship the Black Forge, a giant anvil-like monument surrounded by mystery and magical powers. It takes part in the tribe’s ritual of turning children into warriors while also playing an important role inside the game, being the Forgeborn artifact that must be protected.
Kreg is the Forgeborn character I am going to use as an example of our pipeline, breaking down processes and giving a better idea of how our team works.
Characters Pipeline
First of all, we brainstorm ideas on what we think we need gameplay-wise, what would be an interesting and fun skill to add to the game. After we come up with a ‘seems to be a good’ skill idea, we brainstorm a little more, now about what kind of character could own this skill. What he or she (or even “it”) could look like. Then our concept artists begin sketching. One of the first concepts of Kreg was this one:
We decided that Kreg would be an engineer, he would build multiple turrets to help him. In addition, he would attack with ranged skills. After some iterations on his design, we ended with the current version of Kreg:
Then it was time to introduce him to the 3D artists, first of all the sculpt was made using ZBrush of an “A” shaped Kreg to help later on the RIG part. After some back and forth with it to better define the shapes and silhouette, his high poly version was ready to advance to the next step. Nothing tricky here, it was just pure sculpt between Maya and ZBrush trying to follow the 2D concept as much as possible.
Now, we move to the retopology to drastically reduce the poly count so the engine can read it without a hitch. We use the awesome Maya tool ‘Quad Draw’ to do it, it’s really easy and intuitive to use and gives great results. Our target on characters is about 20-25k triangles per model.
Still in Maya, we did the UV Mapping to bake the textures and to give the low poly model a ‘more detailed and close to high poly’ look. These baked maps can do magic, especially the normal map which tricks the light to bounce in ways that makes it look like the model is ultra high poly to our eyes. Currently, we bake our maps in Substance Painter or Marmoset Toolbag, but we are always trying different tools to better our workflow by making it faster or/and better quality.
At this stage, the pipeline splits in two so work can be done concurrently. The model goes to an animator to RIG and animate, breathing life into it while at the same time it goes back to a 2D artist to paint its textures in Photoshop and 3D Coat.
As our art style uses PBR (Physically Based Rendering), we use other textures in addition to albedo, like normal and metallic/roughness maps. Afterward, the character is ready to be put into Unity (the engine we are using) and to be fully implemented by the programmers.
The Grand Finale
So, to summarize everything, we passed through many different steps like brainstorming, designing, concepting, sculpting, retopologizing, baking, texturing, rigging, animating and implementation. And used many softwares like Photoshop, ZBrush, Maya, Substance Painter, 3D Coat and Unity. It seems like quite a lot of work on a simple character (and we just focused on a single character, imagine the entire game!), but believe me when I say this is worth it at the end. It is so nice to see the character that you imagined and worked so hard on gaining life and ending up playable!
This is the final Kreg, already in-game, with post process applied to the camera to help everything mix up smoothly.
With the game still in development, we needed a way to present the characters to partners and even to our community, so they could see the models in detail and even play a little with it, so Sketchfab was perfect for the job. The models were pretty easy to set up, with intuitive tools and the end result is great. The only real difference is that we have to separate the roughness from the metallic maps because Unity reads both in a single texture with an alpha channel.
That’s all folks, I hope you enjoyed this little breakdown! If you have any questions or feedback, please contact us. For those who want to know more and follow Skydome’s development, you can sign up to our mailing on PlaySkydome.com, and join our growing community on Facebook, Twitter, Sketchfab or on your favorite social channel at /PlaySkydome.
Thanks!


