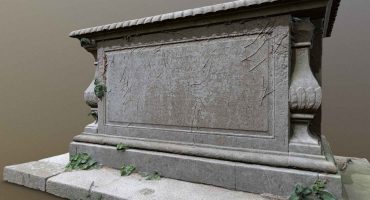
This guest post by the team at Agisoft provides a comprehensive guide to combining the power of PhotoScan with the TensorFlow machine learning network to help you get creative with style transfer for 3D scans! Originally published on the Agisoft blog.
This tutorial introduces the script to perform style transfer for 3D models (original implementation, see also this article) in PhotoScan Pro 1.4 on Linux and Windows platforms. A PhotoScan Pro trial can be requested here.
Prerequisites
You need a decent NVidia GPU (TensorFlow is VRAM-hungry) and either Windows 7 or Windows 10 or Ubuntu 16.04 (the instructions are expected to work on other Linux distributives, but they weren’t tested).
Lower texture detalization leads to lower VRAM consumtion. On GTX 1080ti with 11 Gb VRAM it is possible to process 2048×2048 and even 4096×4096 textures in less than a hour.
Required Installation instructions
The style transfer implementation uses machine learning library TensorFlow, which requires CUDA and cuDNN. Following instructions will guide you through CUDA, cuDNN and python packages installation.
Instructions for Windows 7 and 10
1. Install CUDA 9.0
- 1.1. Download the CUDA 9.0 installer: choose your Windows version -> exe (local) -> Base Installer -> Download (1.4 GB)
- 1.2. Launch the installer
- 1.3. Choose “Custom installation”
- 1.4. You may uncheck NVidia GeForce Experience, Driver components and Other components, but make sure that CUDA is checked:

- 1.5. Follow the installer instructions (click “next” a couple of times and then close the installer)
2. Install cuDNN
- 2.1. Open cuDNN download page
- 2.2. You will need to register for NVidia developer program
- 2.3. Open cuDNN download page again
- 2.4. Tick “I Agree …”
- 2.5. Download cuDNN v7.1.4 (May 16, 2018), for CUDA 9.0 -> cuDNN v7.1.4 Library for Windows 10 (or for Windows 7)
- 2.6. Unpack downloaded cudnn-9.0-windows-x64-v7.1.zip
- 2.7. Copy everything from unpacked cuda directory to C:\Program Files\NVIDIA GPU Computing Toolkit\CUDA\v9.0\
3. Install TensorFlow and other packages
- 3.1. Lunch Command Prompt as administrator
- 3.2. Execute cd “C:\Program Files\Agisoft\PhotoScan Pro\python”
- 3.3. Execute python.exe -m pip install tensorflow-gpu==1.9.0 lucid==0.2.3 numpy==1.15.0 Pillow==5.2.0 matplotlib==2.2.2 ipython==6.5.0 PyOpenGL==3.1.0 jupyter==1.0.0
4. Add script to auto-launch
Download script to C:/Users/<username>/AppData/Local/Agisoft/PhotoScan Pro/scripts/
This script will add the button with style transfer feature. Alternatively you can add the button manually each time with Tools -> Run script….
Instructions for Ubuntu 16.04
1. Install CUDA 9.0
Execute in terminal:
    # https://developer.nvidia.com/cuda-90-download-archive?target_os=Linux&target_arch=x86_64&target_distro=Ubuntu&target_version=1604&target_type=deblocal
    wget https://developer.nvidia.com/compute/cuda/9.0/Prod/local_installers/cuda-repo-ubuntu1604-9-0-local_9.0.176-1_amd64-deb
    sudo apt-key add /var/cuda-repo-9-0-local/7fa2af80.pub
    sudo dpkg -i cuda-repo-ubuntu1604-9-0-local_9.0.176-1_amd64-deb
    sudo apt-get update
    sudo apt-get install cuda
2. Install cuDNN
Download cuDNN (you will need to register for NVidia developer program, then choose Download cuDNN v7.1.4 (May 16, 2018), for CUDA 9.0 -> cuDNN v7.1.4 Library for Linux)
Execute in terminal:
    tar -zxvf cudnn-9.0-linux-x64-v7.1.tgz
    sudo mv cuda/include/* /usr/local/cuda-9.0/include/.
    sudo mv cuda/lib64/* /usr/local/cuda-9.0/lib64/.
3. Install TensorFlow and other packages
Execute in terminal:
    cd ${PATH_TO_PHOTOSCAN_PRO}
    python/bin/python3.5 -m pip install tensorflow-gpu==1.9.0 lucid==0.2.3 numpy==1.15.0 Pillow==5.2.0 matplotlib==2.2.2 ipython==6.5.0 PyOpenGL==3.1.0 jupyter==1.0.0
If you encounter ImportError: cannot import name ‘HTTPSHandler’ you will need to use this workaround and to try again:
    wget http://snapshot.debian.org/archive/debian/20110406T213352Z/pool/main/o/openssl098/libssl0.9.8_0.9.8o-7_amd64.deb
    sudo dpkg -i libssl0.9.8_0.9.8o-7_amd64.deb
If you encounter No matching distribution found for tensorflow-gpu==1.9.0 you will need to use this workaround (because of the bug in Python bundled with PhotoScan 1.4):
    sudo apt install python3.5
    cd ${PATH_TO_PHOTOSCAN_PRO}
    mkdir pip_packages
    cd pip_packages
    python3.5 -m pip download tensorflow-gpu==1.9.0 lucid==0.2.3 numpy==1.15.0 Pillow==5.2.0 matplotlib==2.2.2 ipython==6.5.0 PyOpenGL==3.1.0 jupyter==1.0.0
    cd ..
    LD_LIBRARY_PATH=python/lib/ python/bin/python3.5 -m pip install --upgrade --no-index --find-links=pip_packages tensorflow-gpu==1.9.0 lucid==0.2.3 numpy==1.15.0 Pillow==5.2.0 matplotlib==2.2.2 ipython==6.5.0 PyOpenGL==3.1.0 jupyter==1.0.0
4. Add script to auto-launch
Execute in terminal:
    cd ~/.local/share/Agisoft/PhotoScan\ Pro/scripts
    wget https://raw.githubusercontent.com/agisoft-llc/photoscan-scripts/master/src/model_style_transfer.py
This script will add the button with style transfer feature. Alternatively you can add the button manually each time with Tools -> Run script….
General Installation Instruction
- Install CUDA 9.0 (choose your OS and x86_64 architecture)
- Install cuDNN
(login required, then choose Download cuDNN v7.1.4 (May 16, 2018), for CUDA 9.0 -> cuDNN v7.1.4 Library for your OS) - Install in the Python (bundled with PhotoScan) these packages: tensorflow-gpu==1.9.0 lucid==0.2.3 numpy==1.15.0 Pillow==5.2.0 matplotlib==2.2.2 ipython==6.5.0 PyOpenGL==3.1.0 jupyter==1.0.0
- Add this script to auto-launch in PhotoScan (see article). Alternatively you can run it manually each time with Tools -> Run script….
How to use
- Launch PhotoScan Pro 1.4
- Open project with textured model (algorithm is VRAM-hungry, so the smaller the texture – the better. 2048×2048 is recommended for 8Gb VRAM)
- Click on Custom menu (in top menu, near Help) -> Model style transfer
- Specify style image (URL or path to local file)
- Click Run (please note that processing can be canceled only with PhotoScan shutdown)
- Wait. It can take half an hour on GTX 1080ti for 2048×2048 texture. PhotoScan interface will be freezed, but progress bar will be updated:

- Check new model
- Save the project and restart the PhotoScan (this is required because TensorFlow used all VRAM)
If you want to speed up process you can use 1024×1024 texture and process with: steps number=400, texture size=1024, rendering size=1024. Feel free to discuss new style transfer script and share your results on the Agisoft Forum and Sketchfab Forum!
Some examples


