I’m a palaeontologist based in Liverpool, UK, and for the past decade I’ve been heavily using 3D digitization (both laser scanning and photogrammetry) to document and analyse dinosaur footprints and skeletons. As a Palaeontologist, the rise of photogrammetry over the past decade has genuinely changed the way I approach data collection and analysis. Partly, that’s down to the portability and ease of use of photogrammetry in comparison to laser scanning, but mostly it’s down to the low-cost and availability. In academia, museums, and heritage, funding is always in short supply, and the same often goes for hobbyists who just want to play around with 3D digitization. Buying a multi-thousand pound laser scanner is simply not an option for many. Indeed, even some great photogrammetry solutions available on the market can costs hundreds or even thousands, either outright or as a subscription, which puts them out of the reach of many.
Luckily, there are a number of solutions available that cost literally nothing, and need no more specialised equipment than a camera and moderately powerful desktop or laptop PC.
I first started really getting into the free photogrammetry scene when I published a paper in 2012, titled “Acquisition of high resolution three-dimensional models using free, open-source, photogrammetric software” which used freely available software to digitize fossils. At the time, the software required a bit of tinkering to compile, ran only from the command line (no user interface), and took frankly ages (a couple of days) on a pretty beefy workstation. Today, things are much easier for people – free software is available with a full graphical user interface (GUI), that takes you from photos to 3D model in a matter of hours or even minutes.
I’ve spent the last couple of years updating my blog with test cases of all the free software I can find and use. I try and update my summary periodically, and it’s worth checking there to see what’s currently working best for me.
Here though, I’ve been asked by Sketchfab to give you a walkthrough of the free software I’m using at the moment, specifically so that museums, academics, and anyone else lacking a budget might be able to give digitization a go and get involved in the Sketchfab community.
The Object and Photos
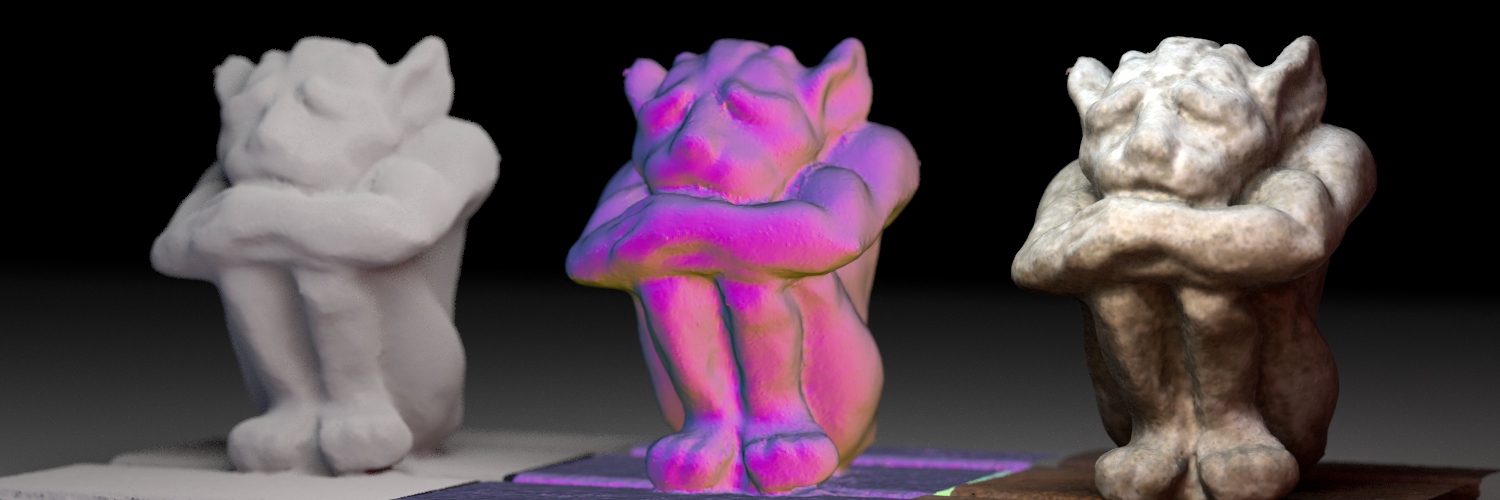
To demonstrate the process, I’ll use a single dataset of this little stone gargoyle:
Images were taken with a Sony Nex-6, and a 35mm prime lens, but from experience you’ll get great models even from just a phone’s camera. For all photos, I got as close as focus would allow me so that the object filled the frame. Lighting was just natural sunlight, though of course you could do this in a well-lit room. I didn’t move the object, instead I moved around it.
The object is great for photogrammetry because it’s full of texture. I won’t go into details of how to take the photos, because there’s loads of resources out there for doing so (such as here, or page 8 here) , but I will include this gif, which shows all 49 images I took, in sequence, to give you an idea of how much coverage you need. I’ve basically made two circles around the object, one at a low level, and one at a high level.
I’ll be taking you through the processing of these photos on my home computer with the following specs:
- Windows 10, 64-bit
- Core i7-4790K CPU (4GHz)
- 16 GB RAM
- Nvidia GeForce GTX 970
Option 1, Using COLMAP and a GUI to process your photos into a 3D model.
(If you don’t care what the software’s doing, skip ahead to Option 2)
We’re going to work through the entire process, just using COLMAP, and using the graphical user interface. Some caveats: For COLMAP’s dense reconstruction portion to work, you need a CUDA compatible graphics card (basically anything by Nvidia from the last few years), and you’ll need to be running windows or compiling the code for linux.
The author of COLMAP, Johannes Schönberger, recommends using the pre-release version, and that’s what I’ll be doing here, but the process is pretty much the same for the last stable version, 3.4.
Download the latest binaries from here, assuming you’ve a windows computer with a CUDA compatible graphics card, select “COLMAP-dev-windows.zip”. Download it and unzip it somewhere.
After unzipping, open the extracted folder and it should look like this:
Double click on COLMAP.bat to start the program. You’ll be met with the following:
First, I’ll talk you through the individual steps so that you know what’s going on. Then I’ll show you a quick way of processing everything in Option 2, below.
First things first, let’s get our project set up. Start by going to File->New Project, or hitting the top left button, at which point this will pop up:
For Database, hit ‘new’ and supply a filename in the file picker that appears. This will create a database file that holds the information on how the photos relate to each other once that gets processed.
Then hit ‘select’ and choose the folder where your images are. Finally, hit ‘save’.
Our project is now set up, and we can start processing.
First, we go to Processing->Feature Extraction. Leave everything on default and click ‘extract’
You’ll see in the log on the right info about each picture.
Then, go to Processing->Feature matching. Again, leave the settings on default and hit ‘run’.
This part will slow down your computer, and take a little time depending on how powerful your computer is.
When that’s done, close the ‘feature matching’ window, and it’s time for [what is to me] the fun part! Either go to Reconstruction->Start Reconstruction, or just hit the little blue arrow at the top. You’ll be able to watch as COLMAP locates the position of each photo relative to the others, until the process is complete and hopefully the number of images stated in the bottom right matches the number of photos you took (implying they all got matched and reconstructed):
Ok, first part done. You’ll see all the camera positions, and in the middle, a ‘sparse’ point cloud of the object (the lower right tells me it’s made up of 28,006 points). You can rotate the view and check everything is covered to the degree you want: if not take more photos in that area and re-run.
That sparse cloud is nice, but it’s not the finished product. First we need to create a dense point cloud, and then subsequently a mesh.
To do so, go to Reconstruction->Dense Reconstruction, and the following window will pop up:
It looks pretty spartan at the moment, but if you press ‘select’ and create a new folder somewhere for the process (I’ve created a folder on my desktop called ‘GargoyleDense’ and selected that), and then click ‘undistortion’, you’ll see a progress bar for a little while and then the window will fill with details about each photo:
What we’ll do now is work our way across the top buttons, starting with ‘Stereo’.
*Warning: This portion of the process will crash if your computer isn’t powerful enough, and requires a CUDA-enabled graphics card. If you do get crashes, check the help pages for COLMAP, particularly regarding GPU freezes.*
This is the most time consuming part of the process, and you’ll probably want to reduce some settings to make it process quicker, the simplest way is to open the options menu and reduce the max_image_size to something around 500 or 1000. Obviously as is always the case, speeding up processing generally results in reduced quality/resolution of the final model, so you’ll need to play around to find what works for you. On standard settings, this stage took about 90 minutes for this dataset on my machine with default settings. For comparison, running on low settings (see option 2 below) took 6 minutes. When it’s done, you’ll see that the buttons for each image stop being greyed out:
Working our way across the top, next we hit ‘Fusion’, which fuses the depth maps and normal maps into a dense point cloud. When that’s done, you can click ‘yes’ to visualize the dense reconstruction (you can just close the Dense reconstruction window):
This is looking a lot more ‘solid’ that our sparse cloud, but it is in fact still just a collection of unconnected points. 1,501,407 points, to be precise. To take it to the final stage, a meshed object, we need to re-open the ‘Dense Reconstruction window’ (Reconstruction->Dense Reconstruction) and choose either ‘Poisson’ or ‘Delaunay’. I happen to like Poisson more, and it produces a coloured mesh, though it does take a bit longer. Press whichever button and wait for the processing to finish. COLMAP can’t view meshes directly, so you’ll need to open the file in something like Meshlab or CloudCompare. You can find it inside the workspace folder you created. In my case, I created GargoyleDense on my desktop, so the model is located in that folder called ‘meshed-poisson.ply’ (or meshed-delaunay.ply if you ran that option).
I present both models for you in Sketchfab (note that I cropped the meshes to remove some of the table):
Option 2: Doing away with all that pesky manual button clicking.
Like any good teacher, I’ve gone through the whole manual process before explaining that COLMAP actually has a pretty neat automatic reconstruction feature!
To use it, start up COLMAP and go to Reconstruction->Automatic reconstruction:
You’ll need to create a new folder for the processing to occur in, I created a folder on my desktop called Gargoyle_WS. Select that for the first option, select the images folder for ‘image folder’ (in my case the folder on my Desktop called “Gargoyle”), and set the quality to what you want, here I’ve gone down to low. You can change data type to video frames if you have that sort of data, but I’ll leave that for another day, for now, just leave it on individual images. Choose your mesher (Poisson or Delaunay), hit ‘Run’, and come back when it’s done. As before, you’ll need to view the mesh in something like meshlab.
I’ve made a video so you can see exactly how it’s done:
And for the sake of completeness, here’s the finished model.
If you want further information, remember to check out my blog posts on photogrammetry, and in particular you might be interested in some scripts I wrote that can automate the whole process for multiple folders of images, so you can reconstruct multiple objects overnight, for instance. The model created by COLMAP will be a *.ply with coloured faces, so you’ll need to use additional software to produce separate texture and mesh. I tend to do this using Meshlab, first with a trivial per-vertex parameterization, then transferring attributes (vertex colour to texture).


