When you ask on the forum “Hey, what is best photogrammetry software to use?” most people are going to say “Use Reality Capture”, “I use Agisoft software”, “Go and try Zephyr” (those are paid solutions), or one of many open source projects or less popular commercial software. The Internet is full of models created by those 3 paid programs, but there is a lack of comparison tests based on the same photo set showing side-by-side final results for easier comparison. Maybe one will give a better mesh? Maybe it’s possible to get better texture by other? What about calculation times?
Hi, my name is Jurand and in this article I would like to share results of my comparison test between the 3 most popular paid photogrammetry solutions I have encountered so far. It is good to review strengths and weaknesses before we buy a product. I hope that this article will provide some answers.
Comparison Parameters
Before we start digging into numbers and photos, I would like inform you about a few things. First, I’m not an option tweaker; I like to use products out of box and then try to change settings if the results are not good enough. Second, people who have worked with photogrammetry longer (more than a year) strongly suggest comparing results only with perfect crisp and beautiful photo sets. Maybe, but I believe that most of us who decide to buy one of those programs (Zephyr, MetaShape or Reality) are just beginning our photogrammetry adventure. Photo sets that we usually use come from phones, family trip grade cameras, drone videos recorded during sunny or rainy days and that’s it – we were there once and it’s not possible to go back and get better images.
In further parts of this article you will see two tests; one with a professional quality photo set of a skull that I took with my work camera (Nikon D610+Tamron 28-75), but taken quickly without earlier planning (I received that epoxy skull for just 5 minutes), and a second where I process photos extracted from somebody’s YouTube video (bad quality of video recording + YouTube compression + photos saved as jpg (extra compression artifacts)). All photo sets are available to download – the links are in the Sketchfab model description.
What I tested: Basically how 3DFlow Zephyr Lite, Agisoft MetaShape standard and Reality Capture work on same photo sets prepared in 3 ways and how that photo preparation effects processing times, quality, and final texture.
Ok, so what are you going to see beyond a few models and photos? Like I mentioned, a very important thing – processing times (for test 2). Those times come from the same or similar stages (for each program) that you need to get through to receive 3D textured objects from 2D images. I can’t say how long it will take to process a garden gnome set on your computer, but for sure you will see processing time-speed ratio between those 3 softwares and that should give you more or less an idea what to expect when it comes to time vs. quality. I attach my workstation specification – no overclocking.
PC configuration
- OS: Windows 10
- CPU: Amd Threadripper 1950x (32 cores)
- GPU: GTX 1080ti
- RAM: 64GB 2400mHz
Test 1: Skull
Objective:
This one was a quick test to check how masking and permanent picture information removal (by deleting them) effects final model quality, and, of course, which program will provide the best quality of mesh itself.
About object and capture session:
The test object was a fair quality epoxy (I believe) skull. Compared to real skulls (I had those in my hands in the past many times) was about 6/10 accuracy – many nice details but far away from being an anatomically believable copy. Photos was taken quickly when I received the skull for a few minutes while I was in the office. Because the opportunity was unexpected I decided that a colored chair would be the best “green screen” to use for future masking. I set the camera up on a tripod and used a remote for the shutter.
- Aperture: 11
- Shutter speed: 1s
- ISO: 100
- Number of photos: Whole head 71, bottom part 46, jaw bone 26

After a basic photography session from 3 different camera heights, I removed the jaw bone to to take photos of the bottom part of the skull and the jawbone itself from various angles to catch parts that were not visible during normal capture session. I used X-Rite passport for future color correction – it’s a very useful tool when you have no control over surrounding light
Methodology:
The goal of these tests was checking how each of those 3 softwares would process (on default medium and high settings) the same photo set with background information removed completely. First, I fixed colors and removed shadows from the RAW images using Rawtherapee software. Photos were saved as PNG files. Then with Affinity Photo I removed all non essential things like background or my hand (in situations when I was holding the skull by hand during rotation). Photos were batch saved as PNG files with alpha channel.
Photogrammetry softwares: Medium / High processing means that all steps are at the same level; medium for example: photo align – medium, dense cloud computing – medium, mesh extraction – medium. No texture extraction at this time.
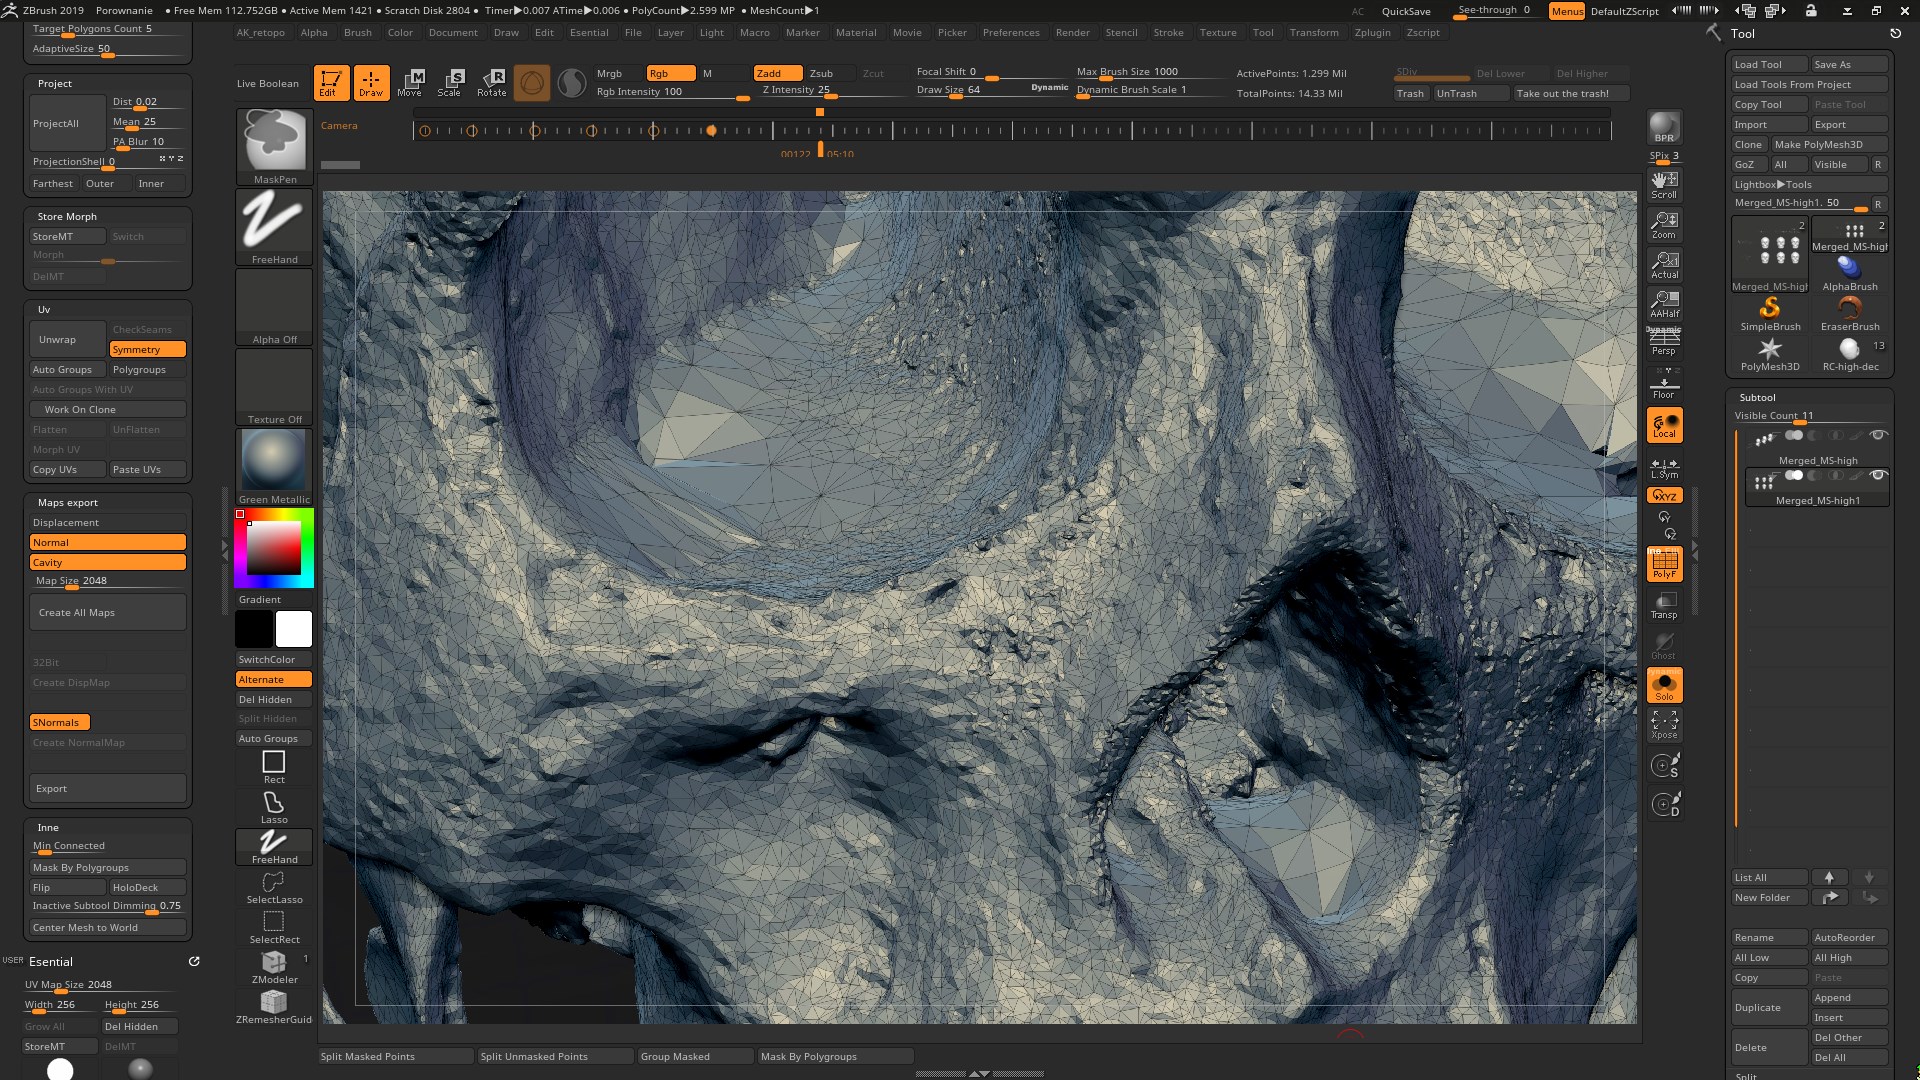
All models have been connected in ZBrush into one mesh scene and decimated from 12,000k points to 1,299k points to fit Sketchfab’s free file upload limit of 50MB.
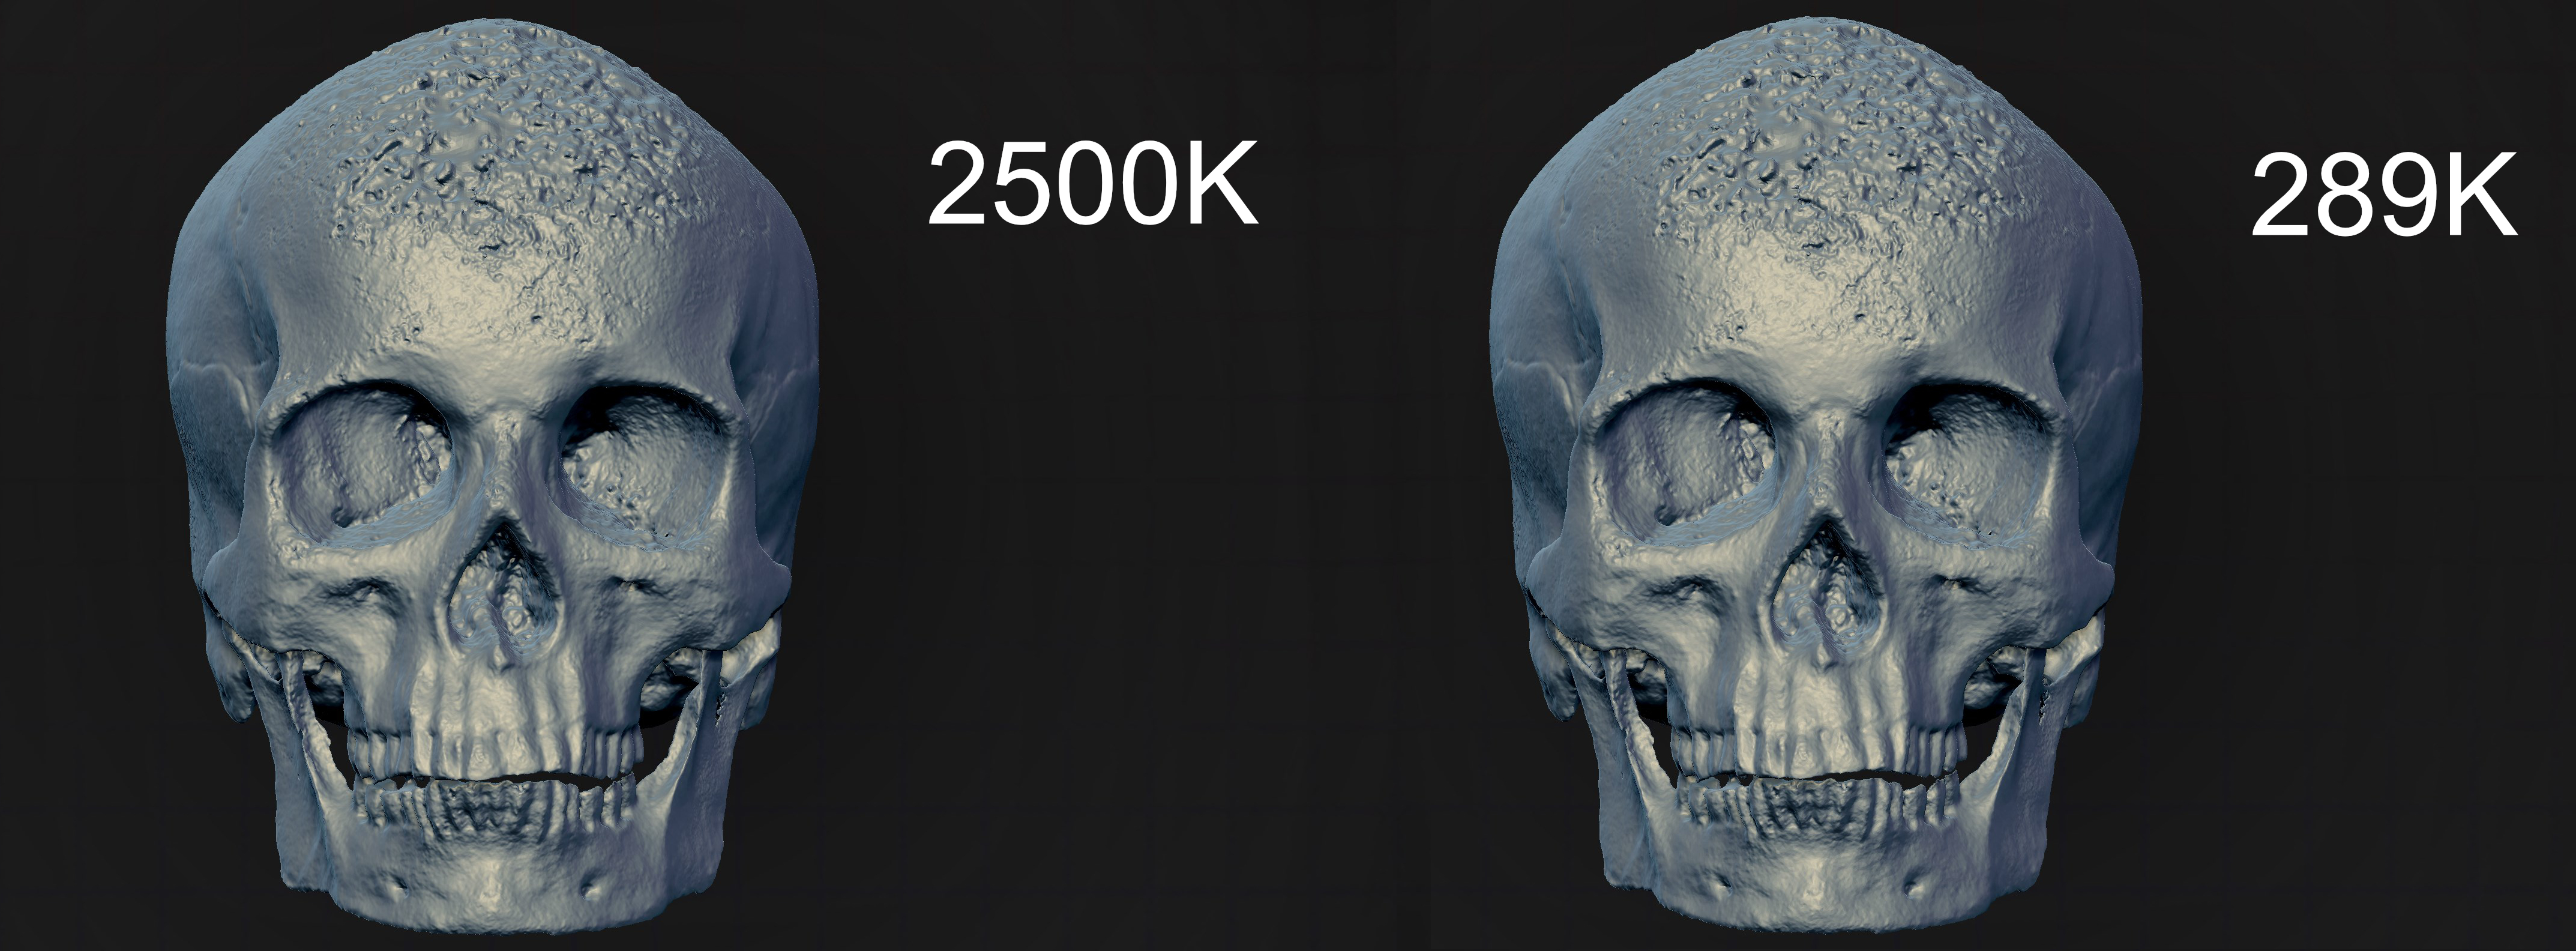
That adjustment was necessary to fit the Sketchfab free account file upload size limitation. ZBrush has the option to decimate a mesh with unevenly sized triangles, which helps reduce polycount in places where information is lacking anyway (for example flat surface) and preserve the max level of details.
Results:
The first important thing to notice is that all programs were able to create a single mesh from 3 data sets (whole skull, bottom part of skull and jaw bone). All photos in all cases aligned during the first attempt.
Second thing worth noting is the mesh quality. I believe that you should decide which model looks best, but please take a look at these mesh parts:
- Jaw bone – especially the top part where it connects with the skull
- Tooth line – remember that original model has a closed jaw but the jaw received a separate session to get some tooth information – in theory there should be a gap between the upper and lower teeth.
- Top part of front skull – apparently the photo set wasn’t perfect and not enough photo information was provided for the forehead.
- Cranial suture quality: depth and quality
Conclusion:
Hard removing information (by delete) and replacing it with alpha channel helps with connecting separate structures. There are visible and important differences between softwares.
Test 2 – Dover castle
Objective:
Ohh my, what was supposed to be a quick model extraction become a really long test. My initial idea was to check which program would be able extract a model from improvised video recording as a proof for a situation like “Hey, I have a drone recording of X thing, could you extract a model from it?” Random quality, not a perfect recording, drone type source material.
The original video can be seen here:
About object and capture session:
The source material produced a set of over 600 photos. All those photos were every 10th frame extracted from 30fps (so 3 photos per 1 sec of) movie recorded by a DJI Phantom 3 Pro drone and uploaded to YouTube as 4k quality video.
The final processing number was reduced to 405 by removing photos without any visible parts of Dover Castle, blurred images, or both.
Methodology:
The extracted final photo set of 405 was copied twice to create a folder of masked photos (non-essential parts have been masked and replaced by pure white color) and a “cut out” set (where instead of white masks, I removed picture information by deleting it and left the empty space as alpha channel). The final photo count of those two sets was further reduced after a I did a more strict inspection during hand masking – for those two sets the final count was 358 photos. For those edits I used Affinity Photo; files were saved as jpg 100% (masked set) and png (cut out set).
The approach to photogrammetry was identical to “test 1” with an additional texture extraction step. All textures were extracted as 8k maps, just in case, and saved as png files. Thanks to process lasso software I was able to set up a permanent limit of 28 cores (from 32 total) for the photogrammetry software and the remaining 4 for all other software on the PC, including Windows system – that allowed me to use my pc without problems and helped avoid random cpu power taken during picture and model processing.
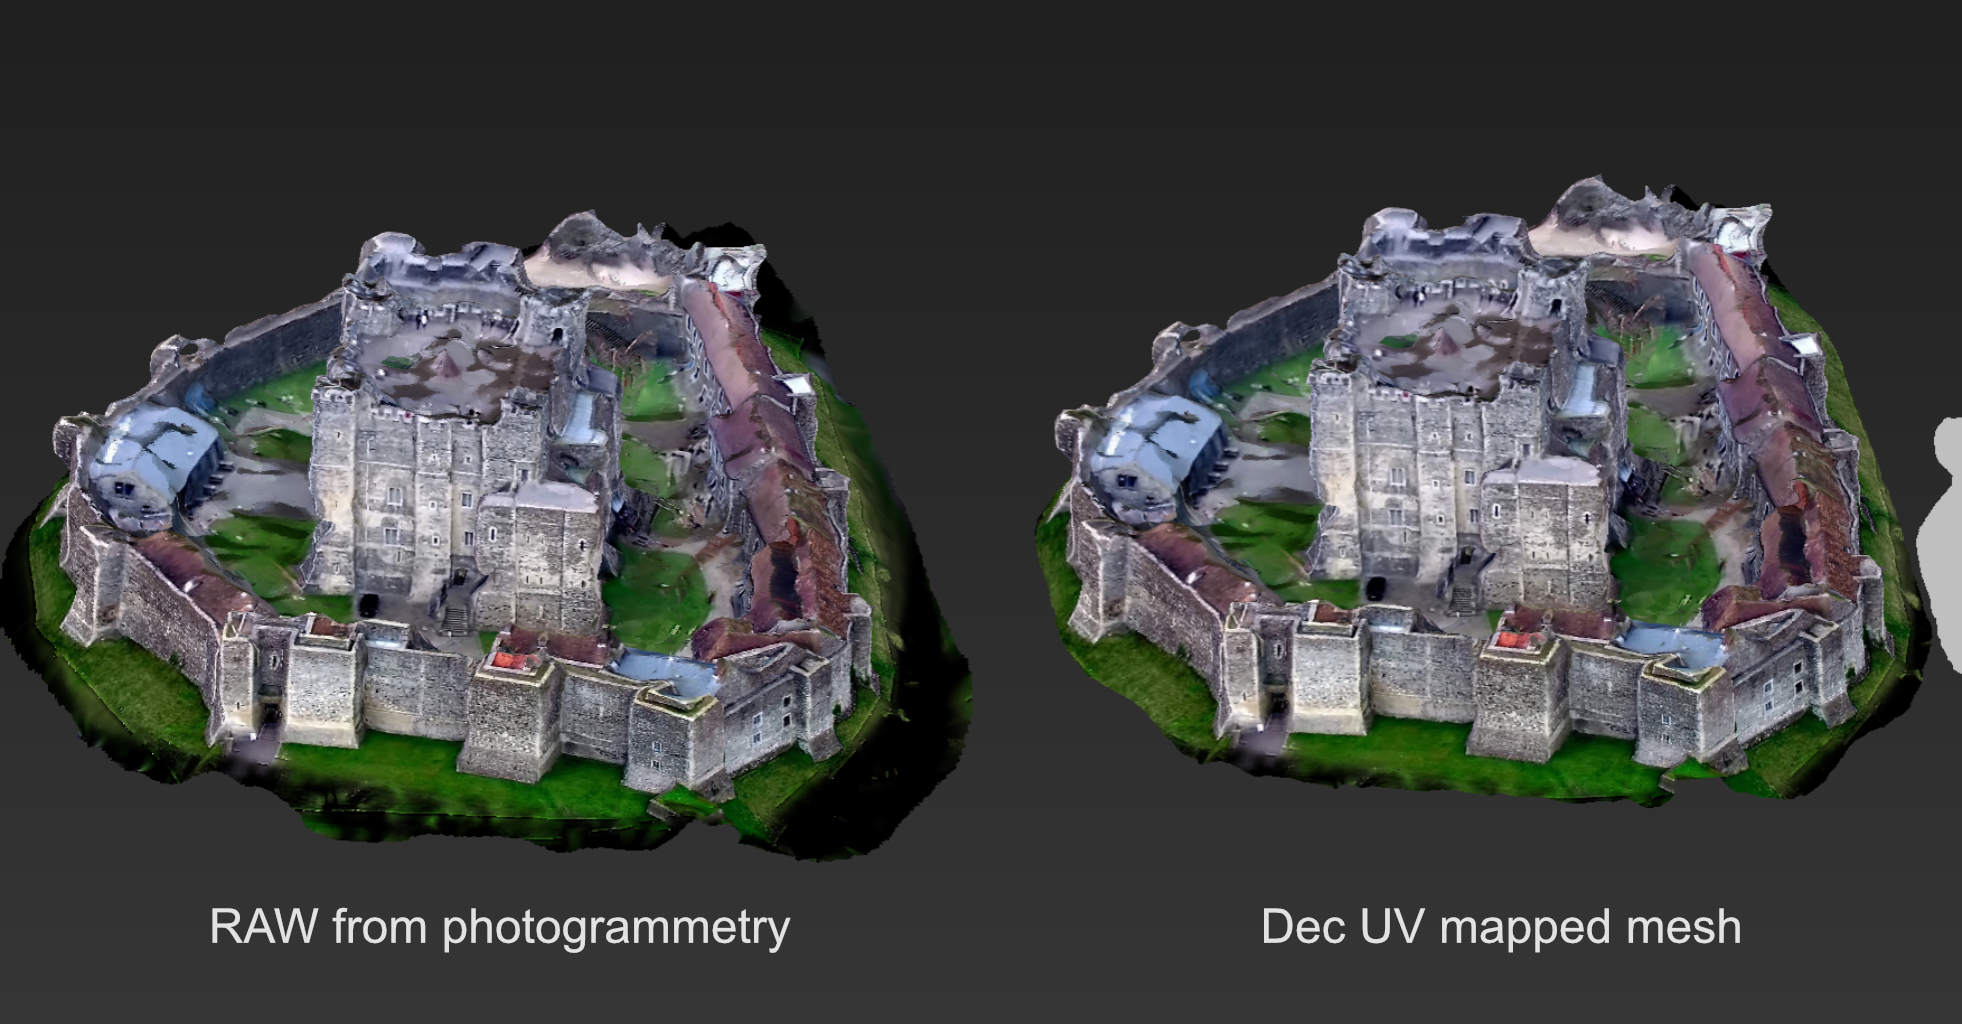
After mesh creation all models were moved to ZBrush for clean up – I removed floating parts (errors) and removed excess captured parts of the area surrounding the castle (like the town, roads, parking lot, etc.). The decimation process aimed to preserve as many details as possible and fit the Sketchfab free account file size limitation. It’s important to turn off the “keep UV” (picture) option box – if you keep the UV, there will be a high possibility of visible texture errors.
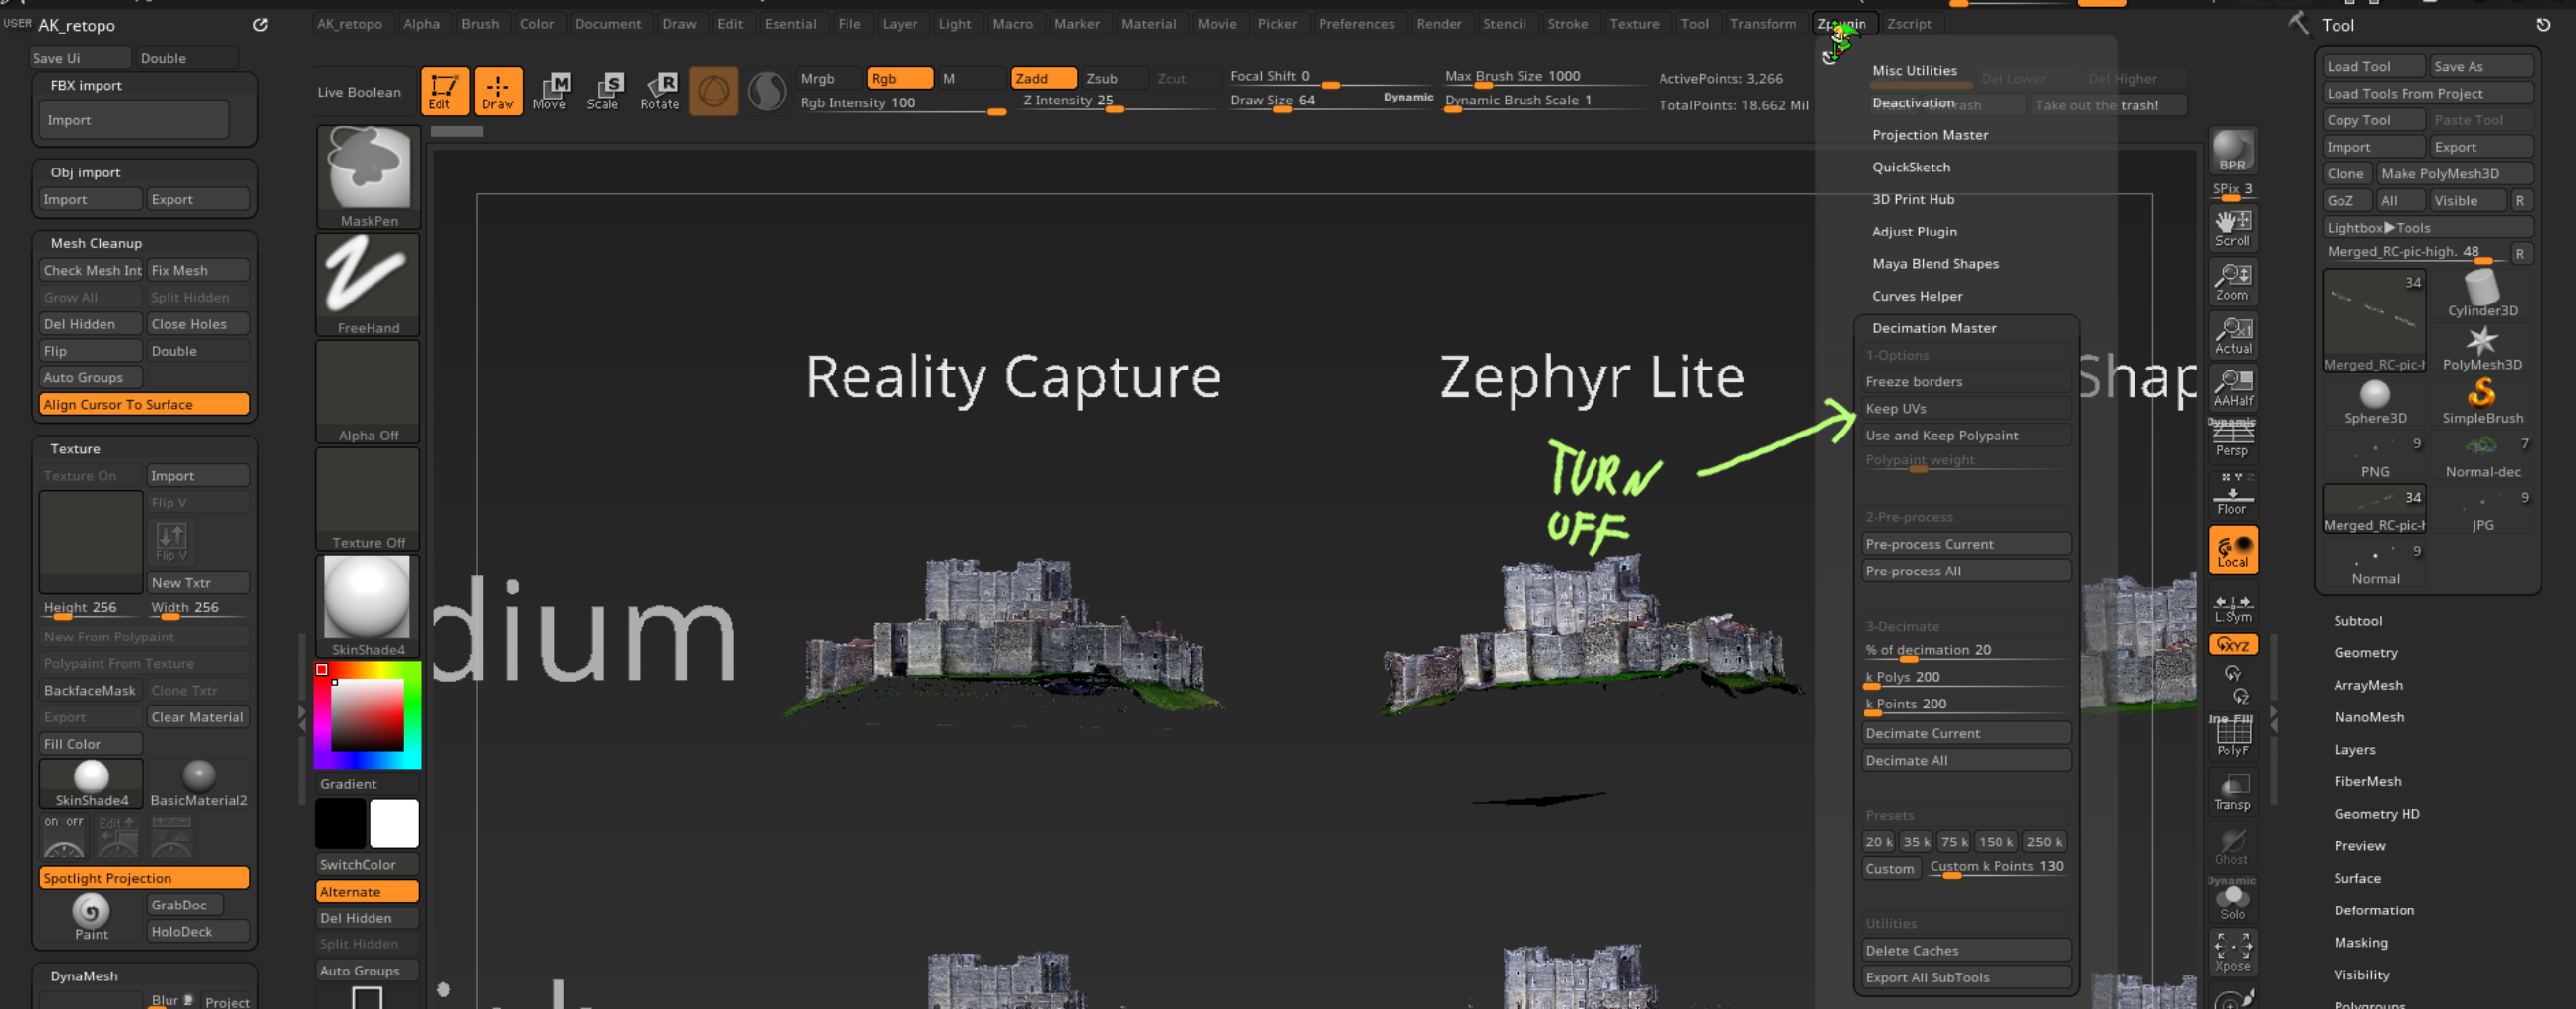
All models were sent to Reality Capture for dirty (but really fast) UV map creation and moved with originally photogrammetry extracted meshes to xNormal for texture map extraction (xNormal will reproject texture map information from the originally extracted mesh on new decimated UV mapped mesh). All models had their own cage model to protect the texture against projection errors.

Finally, I had textured decimated objects ready to combine with others as an upload ready final comparison file. All models went through manual comparison against the high poly textured raw mesh. I exported new textures as 2K quality – a lack of color information allowed for that.
Results:
Agisoft MetaShape had problems with photo alignment in all 3 data sets – both medium and high alignment settings. The only solution to align all photos was to first use the medium alignment profile, then the high without resetting alignment results from the medium part. Thanks to that I had a 100% aligned picture set and processing time was shorter than for “high” profile itself!
Normal set:
- aligned medium 8m 30s (medium failed 65/405)
- aligned high 30m 4s (high failed 94/405)
- aligned medium+high (510s+363s = 14m 33s) 405/405
Masked set:
- aligned medium 3m 2s (medium failed 97/358)
- aligned high 8m 26s (high failed 97/358)
- aligned medium+high (157s+113s = 4m 30s) 358/358
Cut out set:
- aligned medium 2m 56s (medium failed 80/358)
- aligned high 8m 18s (high failed 97/358)
- aligned medium+high (197s+105s = 5m 2s) 358/358
Some meshes look better than others, just like textures – you need a closer look to compare each software. The biggest challenge was the normal photo set on high settings with MetaShape – 15 hours with an average 81% cpu workload (with 32/32 cores average would be higher).
Times are divided into a few groups
- Time required to build a dense cloud – from photo alignment to dense cloud (Reality Capture has no obvious profile to choose for that step – you can find it in settings, but that is not an “out of box” thing so I didn’t change that).
- Mesh creation
- Texturing
Medium (or default) profile is separated by “/” from high profile results

Components usage (RAM, GPU load, CPU load) for normal photo set at high profile:
Reality Capture
- Alignment CPU: total average ~ 84%
- Mesh creation CPU: total average ~ 31%
- RAM: max 6.5-7GB
Zephyr Lite
- Alignment CPU: total average ~ 59%
- Mesh creation CPU: total average ~ 17%
- RAM: max 8GB
Metashape Standard
- Alignment CPU: total average ~ 81%
- Mesh creation CPU: total average ~ missing
- RAM: max 7GB
Conclusion:
Removing additional, but not essential information, by masking and cutting out as alpha channel helps to speed up all mesh recreation steps. This technique works especially well in MetaShape; I was able to reduce times by a third (set normal vs masked) and even further with the alpha set – 6x normal set vs cut. That allows MetaShape to move closer to its competition – sadly it was always the slowest one.
Zephyr looks like it has really big problems with low quality assets – but it, and only it, was able to recreate the chimney that is at center part of the castle roof.
Reality Capture again gave a nice mesh with a good texture but with a large amount of noise that need to be post-processed or at least smoothed.
MetaShape gave pleasant results, and nice mesh and texture from cut (alpha) photos. Processing times are very close to those from Zephyr, so it would be good option for those who are ready to spend extra time preparing and removing not essential information from photos.
If you are looking for a great one click button solution for low quality assets, Reality Capture should be your first pick; if you want to get a good balance between quality and noise, try MetaShape.
Summary
I hope that this article was interesting and gave you some ideas. For me the answer would be “buy all 3 softwares”. Each one has its own set of tools that, combined with the competition, create very powerful and quick tools for photogrammetry. And, of course, please remember: I was using only the default “out of the box,” not tweaked settings. There is a high chance that tweaking can change results (and times) extremely. I didn’t change any values because I can’t say that I know all 3 programs equally – tweaking could break the balance of results.
About the author
Jurand Macioszczyk
3D Artist