About Me
Hello! I’m Josh Hansen and I live in Austin, Texas. I grew up in Hawaii and moved to San Francisco to attend art school in the early 2000s. I’ve been working in the games industry for a little over 14 years and if I’m not modeling, texturing, or implementing art in engine you can probably find me in a meeting.
In my spare time I try to work on personal projects that align with my personal taste, which usually end up being whimsical in some fashion. I generally use Maya, Photoshop, and Substance Painter since I’m familiar with them, but try to learn new processes or software when I can. I’m lucky to work with amazingly talented artists who are willing to show me their secrets for free!
Inspiration
Chingu was the mascot of Fantastic Fest 2018, an annual Austin film festival that I attend with my friends. I thought it was a cute creature and it seemed like it would be fun to build it out in 3D.
Chingu is comprised of fairly simple shapes so the big focus of the character is on its pose and how its limbs are arranged. I wanted to keep the pose close to the original 2D image but also needed to make it feel like it was standing in 3D space.
Modeling
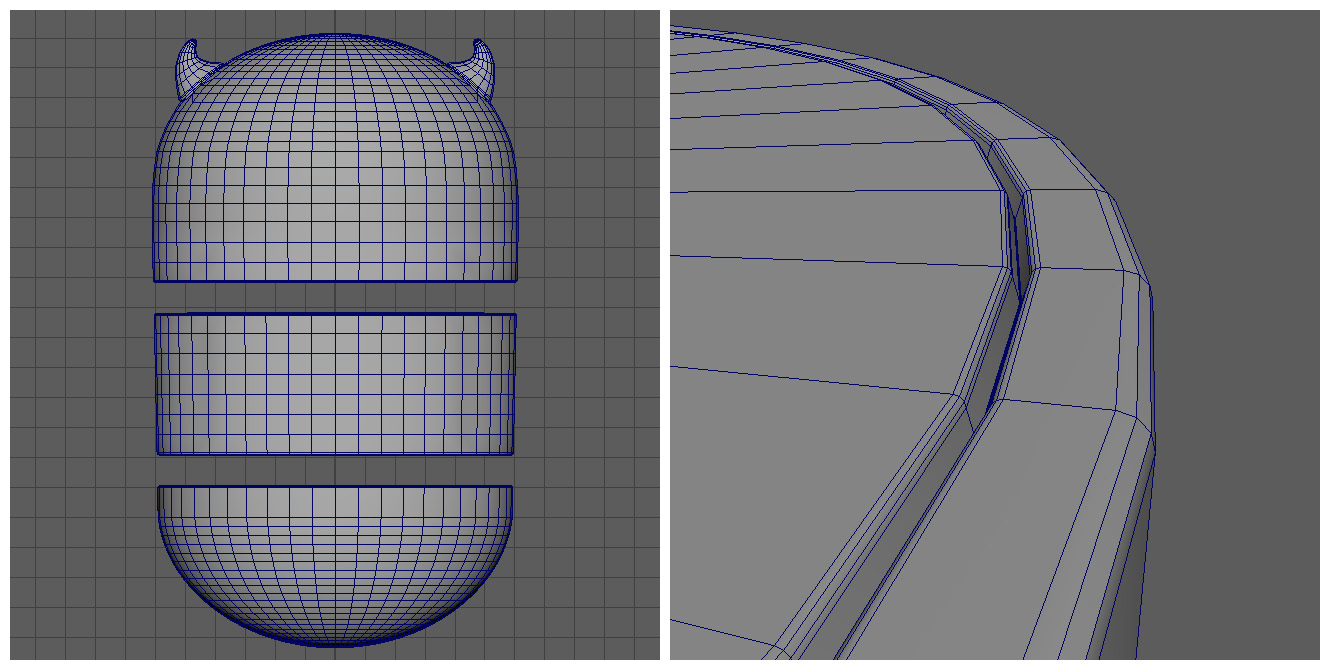
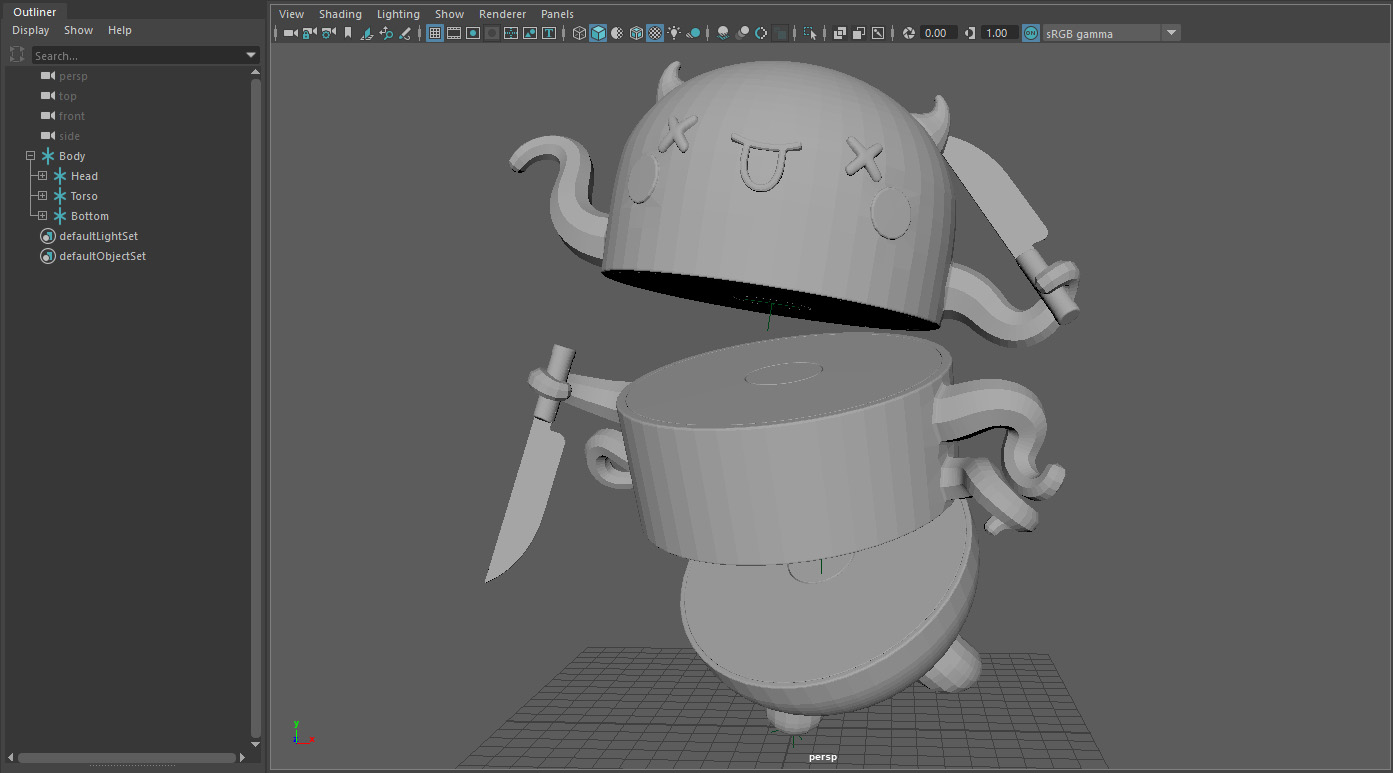
I started by blocking out the basic shape of the character in Maya. I knew I was going to be smoothing everything at the end so that informed most of the decisions I made when I was modeling. Keeping everything low(ish) poly and reinforcing edges with bevels would allow me to keep the specific shapes I wanted once everything was smoothed. I also wasn’t worried about adding fine detail to the mesh since I was planning to add details via texture in Substance Painter.
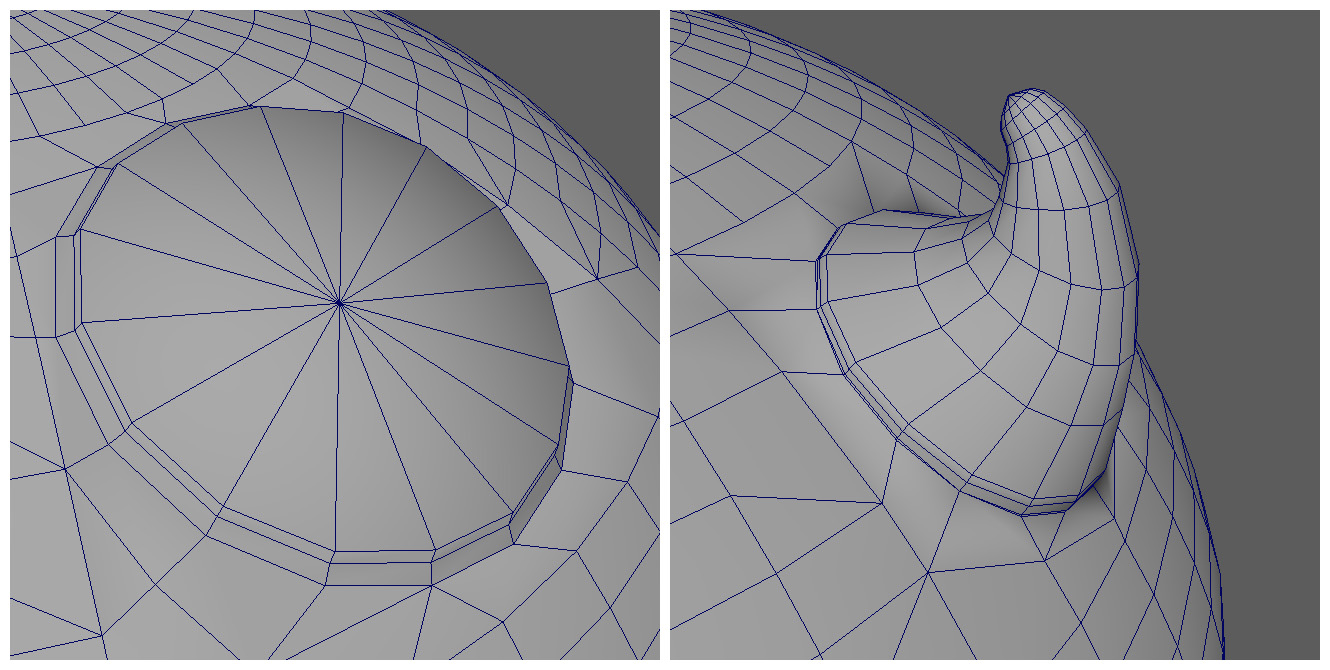
I used the Mesh Blend plugin for Maya to add cylindrical parts to the spherical mesh so that I could extrude them to make horns and limbs. I didn’t worry too much about ngons while building these parts because smoothing the mesh would normalize everything. If it looks good when it’s smoothed, that’s all that matters!
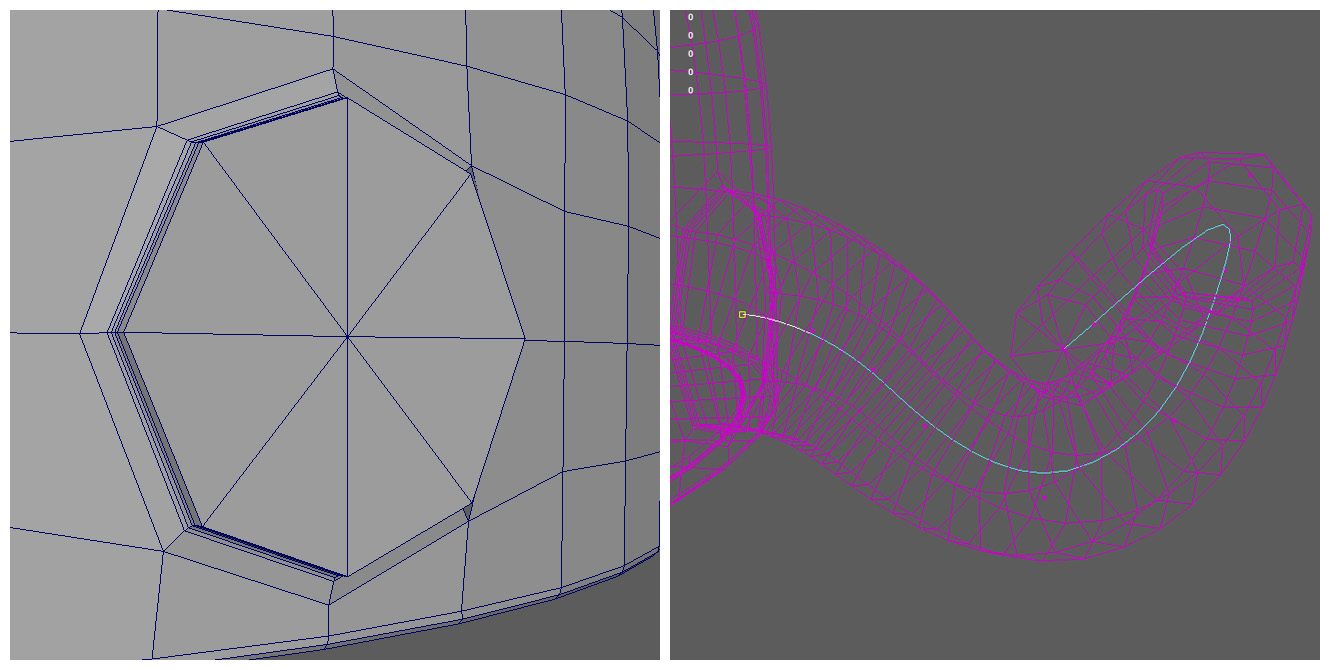
Once those shapes were combined I created a curve which started at the center of the face that was going to be extruded. I extruded the face along the curve and tweaked the extrude settings to taper and twist as desired in order to create a limb.
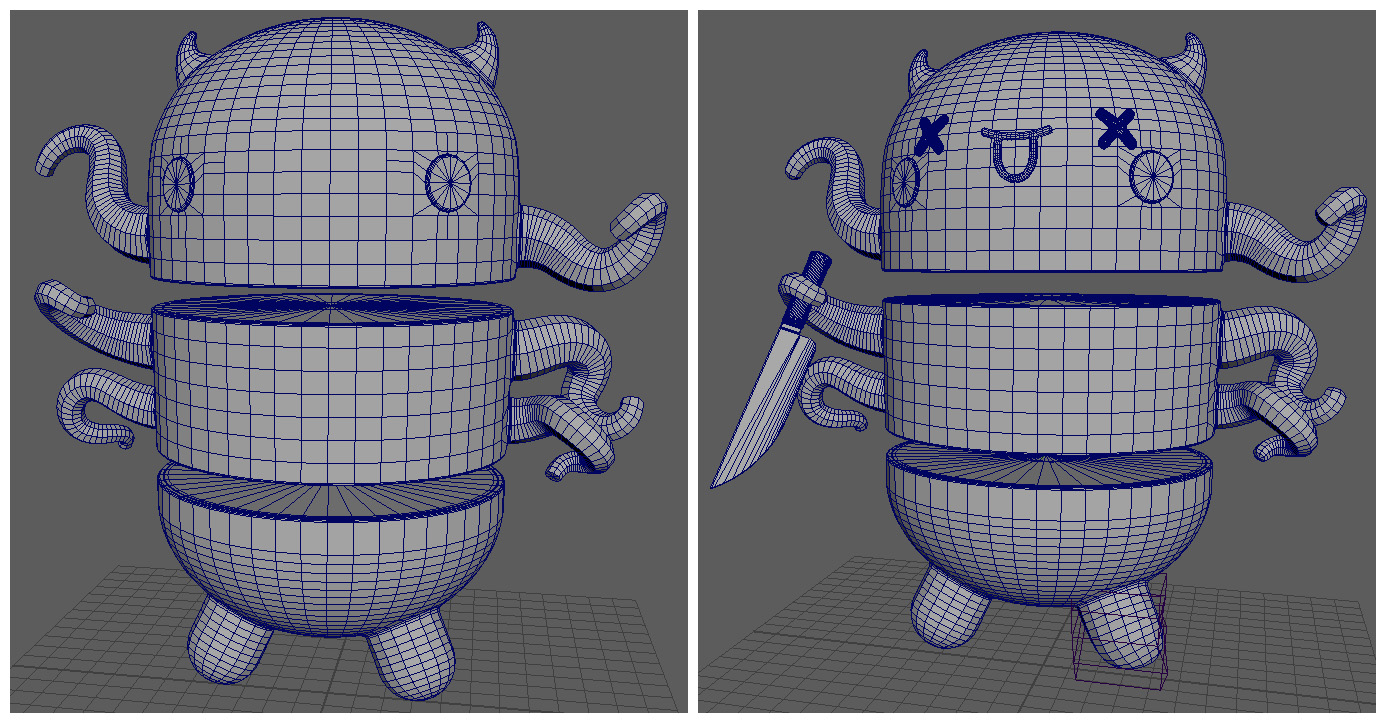
I repeated this process 5 times for the other limbs and used the curves to pose them as desired. One of my favorite things to do in Maya is extruding along curves so this was the fun part. I also added the cheek circles and leg stumps at this point using Mesh Blend, continually checking to make sure that the smoothed mesh looked correct. Next, I created the eye X’s, mouth, and knife objects and used a lattice deformer to pose the leg stumps.
Since this character didn’t need a rig I parented each body segment to a locator and then parented those under another locator in order to pose it.
[If you’ve noticed that the mouth is different from the final model at this point then kudos to you. A friend pointed out to me that what I had seen as an open mouthed smile in the 2D reference was, in fact, a blep so I ended up going back and re-creating the mouth object.]
UV Unwrapping and Texturing
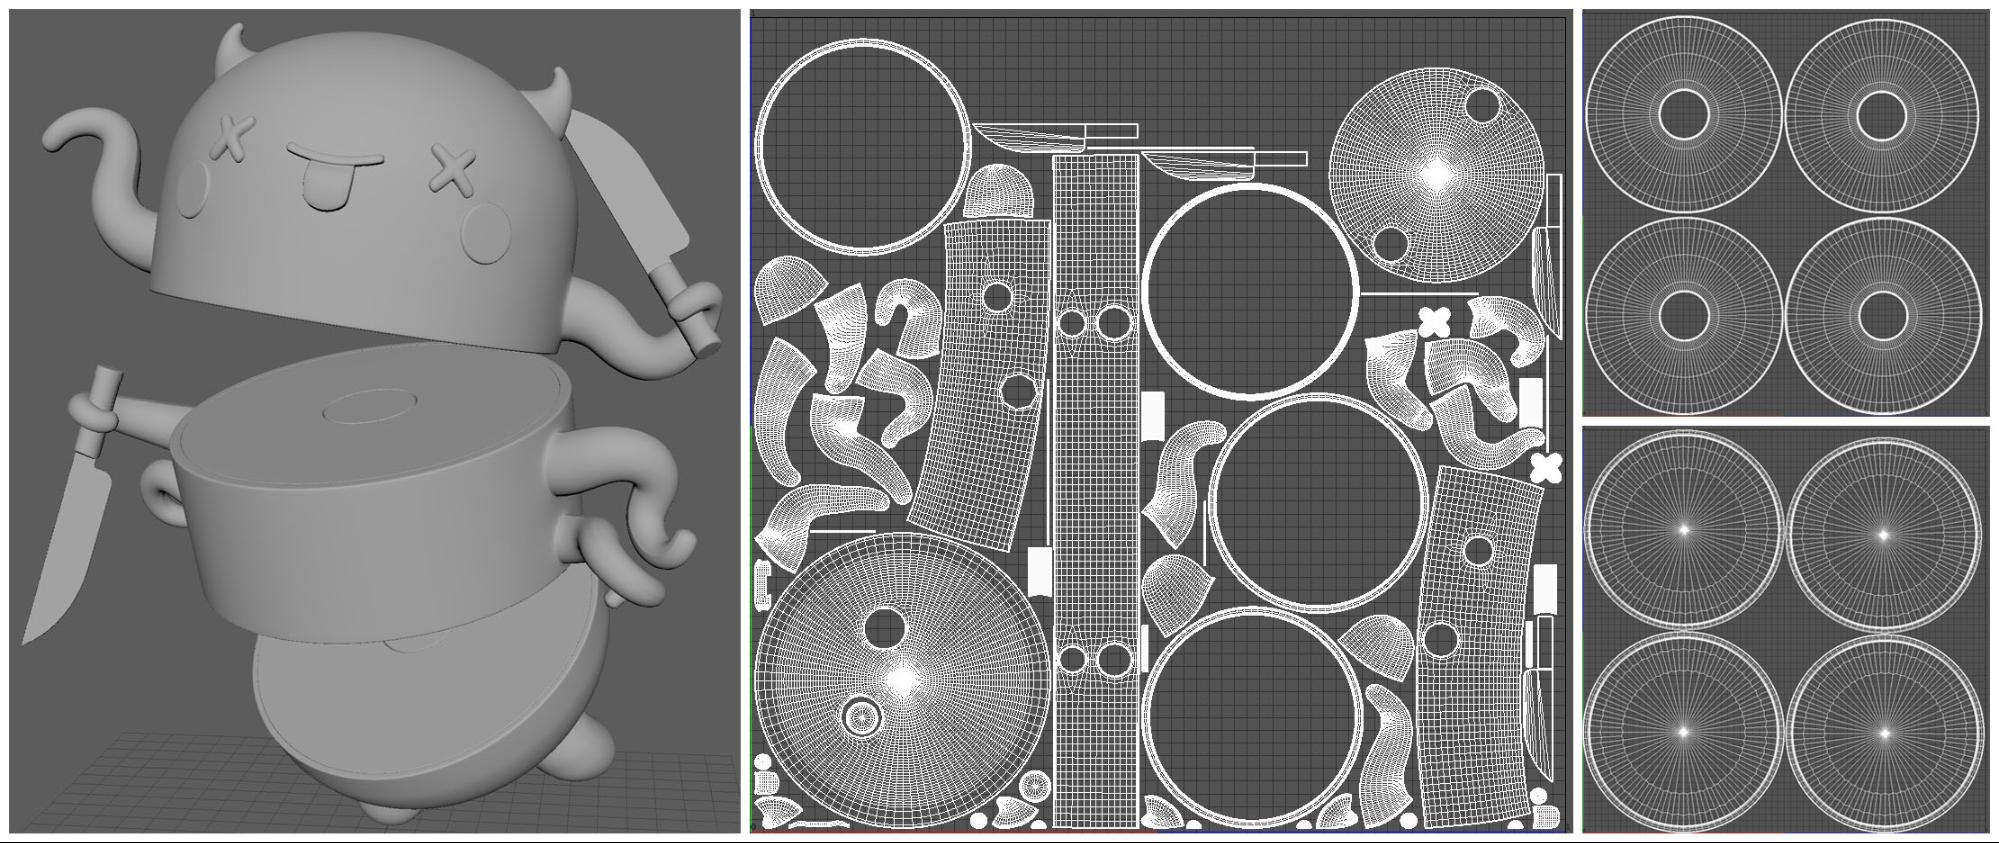
Once the pose was done I unwrapped the model using Maya’s UV editor (which has gotten soooo much better over the years). When my UVs were unwrapped as desired—my general method is: auto unwrap, decide where I want my seams and cut them, sew anything together that needs it, and then using Unfold and Optimize to get the UV shells looking correct—I used the Layout tool to pack everything (I used the preserve 3D ratios option to make sure everything would have the same texel density). I ended up creating separate textures for the inner bone and flesh elements in order to give those parts more resolution and you can see where I was lazy and didn’t re-layout the initial unwrap.
Once unwrapped I set up my shading for MikkTspace so my maps would bake correctly in Substance Painter. Caveat: I don’t fully understand the deeper technical details behind this since I am a simple man, but this process works for getting meshes from Maya into Substance Painter correctly. I softened edges on the entire mesh and then selected the perimeters of all UV shells in the UV editor and hardened these edges. For more info on tangent space normals see here, but be aware that this workflow can change depending on your desired final target program.
Lastly, I duplicated the smoothed mesh, selected every face, and extruded them by a small amount to create a cage for Substance Painter to bake with (saved out as a separate FBX). I exported my mesh from Maya as a FBX with “smoothing groups,” “split per-vertex normals,” “tangents and binormals,” and “triangulate” enabled (these settings export the above mentioned tangent space normals for correct map baking).
I Imported the mesh into Substance Painter and in the baking settings set the high definition mesh and cage file as needed.
From there I baked my maps and got to texturing. Chingu doesn’t have a particularly high detail texture but there is a lot of subtlety in the skin and flesh that Substance Painter made much easier to add.
Once the texture was done I exported my textures using the PBR SpecGloss from MetalRough configuration and brought everything into Sketchfab.
Sketchfab Setup
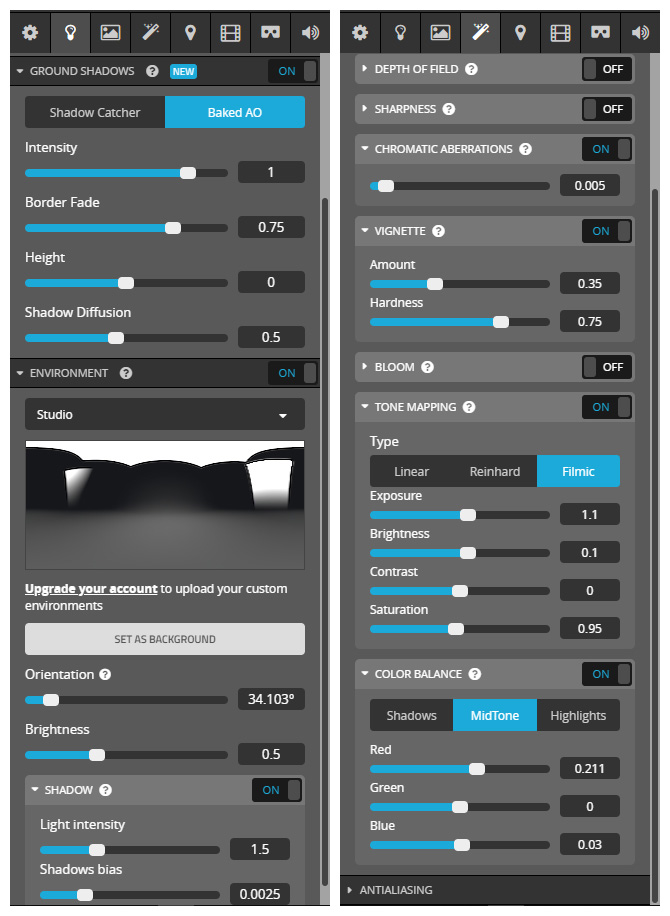
Since this model wasn’t set in an environment, I picked the flatly lit studio environment image. I used a couple directional lights to brighten up the front of the model and gave the scene a solid background color. One of my favorite things about Sketchfab is the post processing, which allows you to add some great finishing touches to your models. For Chingu I did a basic vignette and a little chromatic aberration along with some global color correction.
I love Sketchfab because aside from being a great tool to present and view 3D art, it allows me to peek into other artist’s workflows. I hope that this has been insightful. Thanks for reading!

