About Me
Hello everyone! My name is Samo Batagelj and I’m an animator from Slovenia. I work for a small game developer in the capital Ljubljana. Like most of my colleagues, I turned my hobby and passion into my career. I started as a 3D modeler, but circumstances quickly steered me into animation and I’ve been in the game development industry for the better part of the last 13 years.
I also picked up some modeling tricks from my modeler colleagues at work. When 3D-Coat became popular I decided to make some models with PBR textures.
After seeing tons of incredibly talented character artists on ArtStation, I decided to make all my models game-ready, low poly and mechanically correct. (I also decided not to model any characters.)
Finding Falco
Prior to Falco, I published a couple of airplanes/spaceships on Sketchfab and was very pleased with the result. Creating something truly original, however, is really, really hard (at least for me), so I decided to model an existing design, but add something original to it. The airplane that came into my mind was a strange, bulky yellow airplane that I watched in some cartoon on Italian television as a child.
I remembered only one name from the cartoon: Conan… Luckily, the name of the anime was “Conan the future boy” and I watched the whole series again. (Although the anime is over 40 years old, it’s a great story and I’d recommend it to anyone.) The Falco hydroplane plays a big part in the story and I was able to make tons of screenshots.
In these screenshots I noticed that the Falco details change from episode to episode and even in different shots in the same episode.
After searching the Internet for a while I found additional references and even a blueprint for the plastic model kit of the Falco.
Although the Falco has a very distinct overall shape, it doesn’t have many surface details, so I made a creative decision to add small mechanical details. In the end it still didn’t seem enough to me, so I added the passenger compartment and the engine. The polycount was still under 500K and so I modeled every single rivet and added the final touch…the landing gear.
Considering the little extras I added to the original, I renamed the model “Falco refit” and added a short explanation as to why new details were added.
Modeling
At work and in my free time I use Maya for modeling and animation, so nothing revolutionary there. I mostly use simple box modeling with occasional boolean operations. I made the skeleton while I was still modeling the moving parts, so I could continuously check if they fit properly.
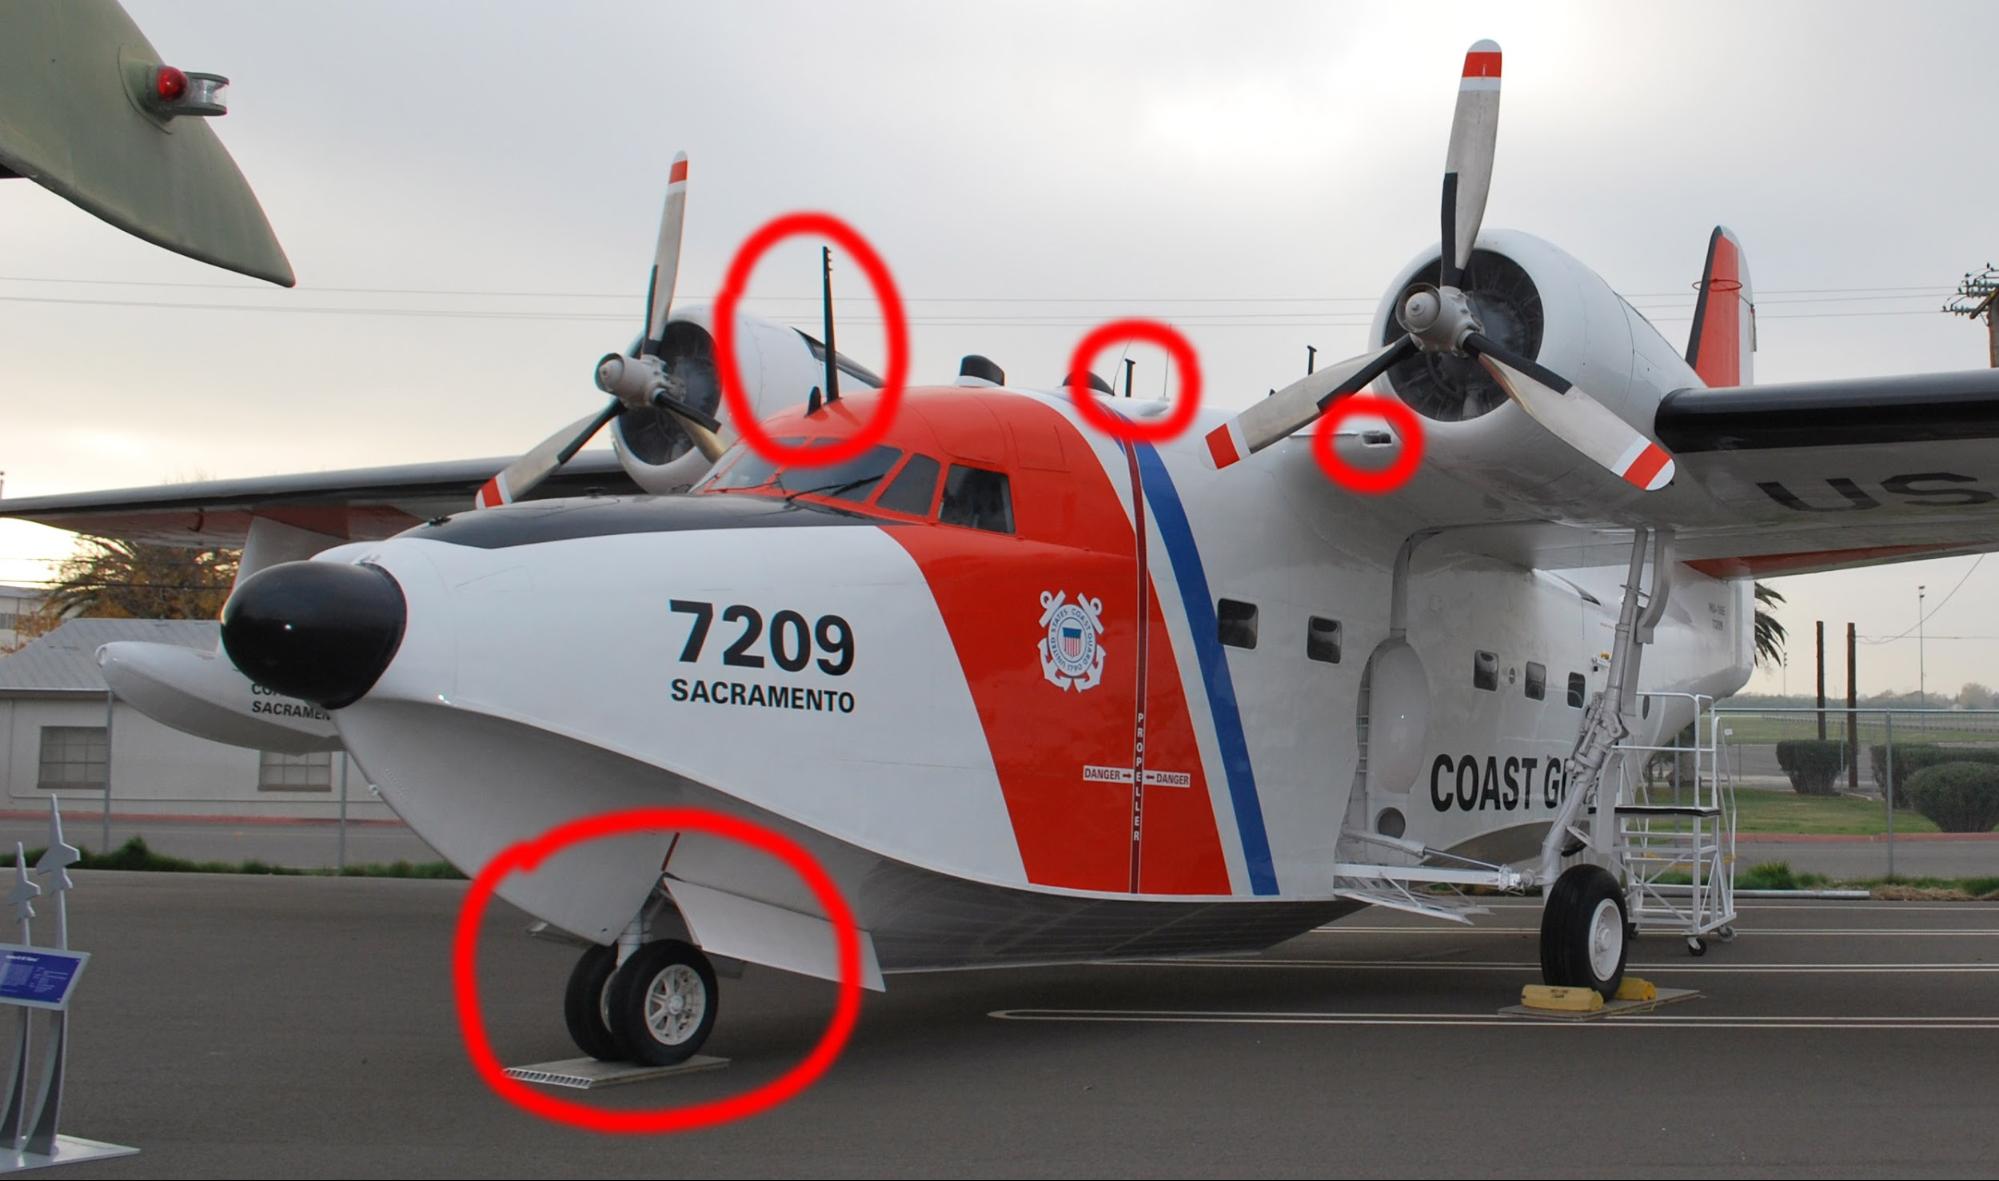
I copied a lot of surface details from real life flying boats like the Grumman Albatross and Martin Mars.
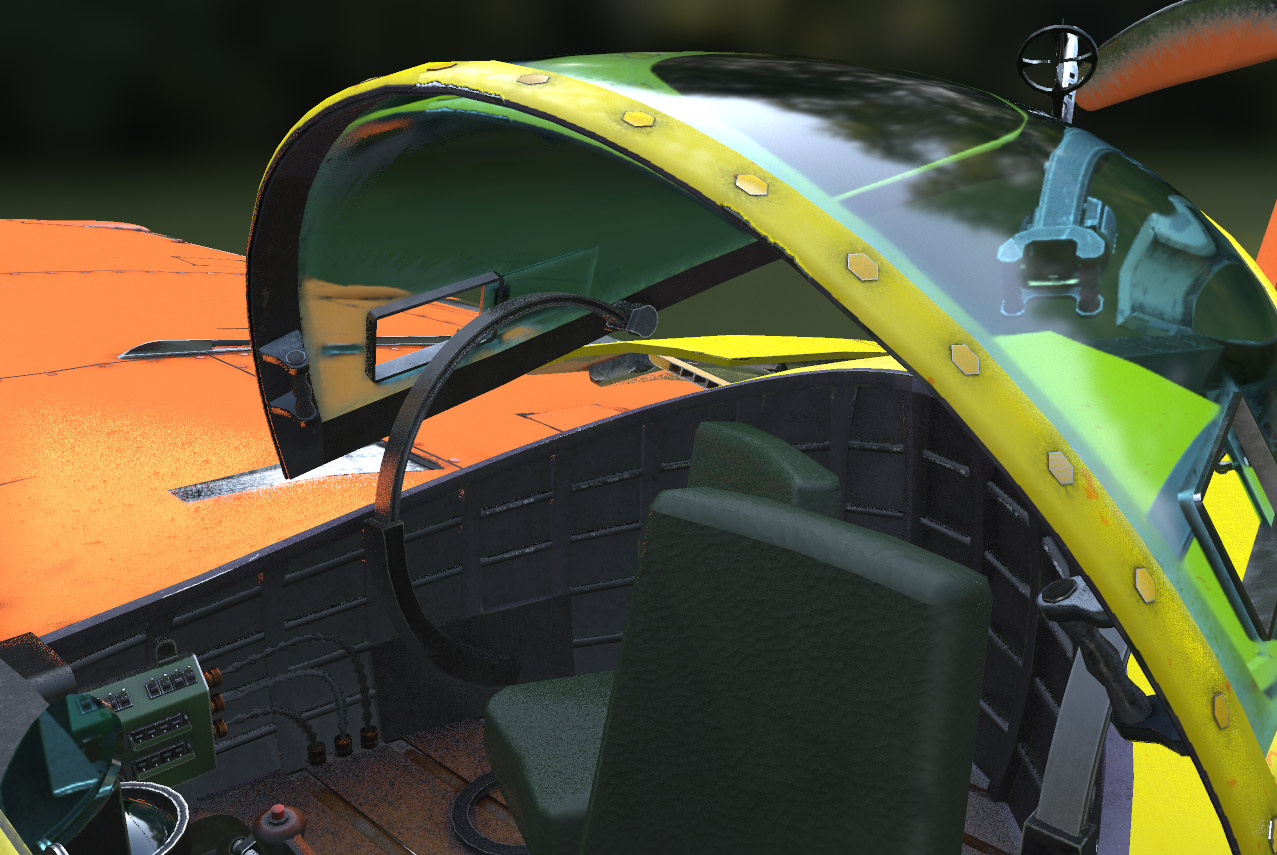
For the cockpit details I used WWII warplane cockpit references. The main reference for the engine was a WWII submarine diesel engine.
After I modeled the engine, I noticed there was still a lot of empty space in the hull of the Falco, so I decided to also model the passenger compartment.
All the other details are more or less true to the anime. For the cockpit cover I had to come up with an opening circular rail mechanism, because the original cockpit cover is actually mechanically impossible.
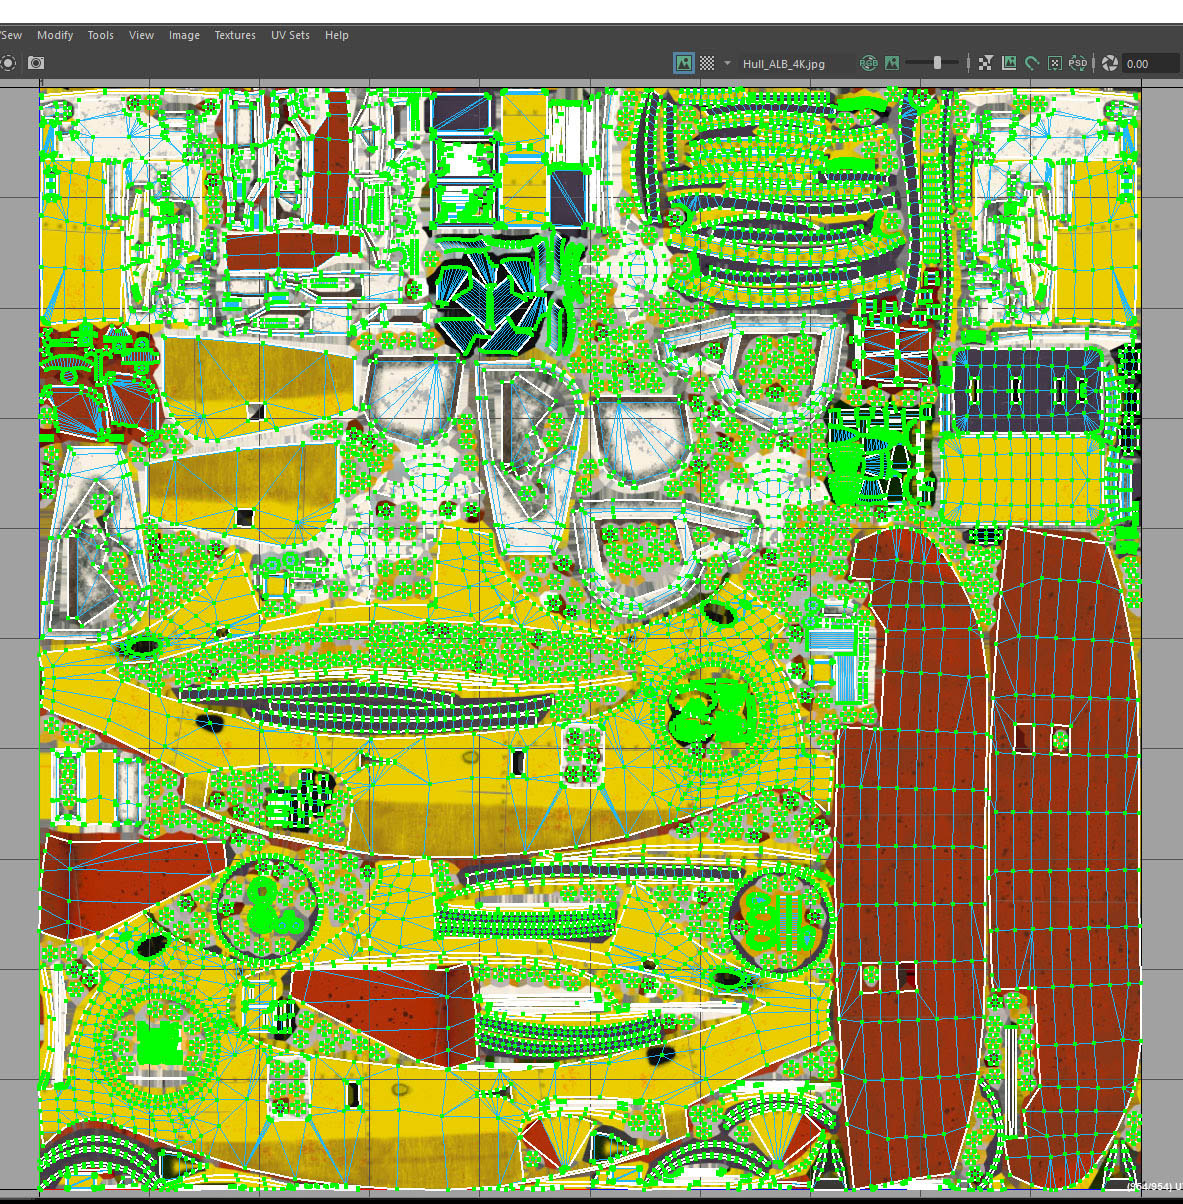
When mapping the UVs I made a heavy use of the auto UV layout tool. It did a great job of packing the UVs really, really tight.
The last step before texturing was baking ambient occlusion. I tried the built-in Maya tool, but after 6 hours of waiting I wasn’t satisfied with the result. A colleague from work suggested I try Substance Painter and it really worked well, and in a fraction of time compared to Maya.
Sculpting
No sculpting. I decided to model all the details bigger than a button and all the small details like rust and scratches could be painted on the texture (including the normal map), using 3D-Coat. Learning ZBrush is still on my to-do list, so maybe I’ll do some sculpting on some future model.
Texturing
Definitely the most fun part of creating the Falco. I created all the textures for the Falco in 3D- Coat. 3D-Coat is very easy to use for people who are not texture and material experts and it uses the same PBR workflow as Unity, Unreal Engine, Sketchfab, etc. A benefit is to be able to observe your model rendered and shaded while you are painting it.
When texturing mechanical models it is sometimes very difficult to reach all the surface areas in 3D view. To solve this I created an “exploded” version of every part of the Falco and imported those meshes into 3D-Coat.
I separated the textures for all parts into 4 layers:
- Undermetal: I used the built-in metal smart materials with only very slight tweaks
- Paint: I started with the built-in paint materials, tweaked edge scattering and added another color layer with noise mask
- Scratches: A mask layer for the Paint layer. I used some noise brushes and a couple of stripe stamps to add long scratches to the paint
- Dirt: Again I used the built-in dirt and dust materials with only slight tweaks
I ignored all the warnings from my colleagues and set all the textures to 8K and experienced a lot of 3D-Coat crashes and hiccups. Nevertheless I finished the textures for all the major parts in 8K.
Rigging and Animation
When animating characters and mechanical models I mostly use skinned meshes. It is the simplest and cleanest way to import an animated model into a game engine. For the Falco I created a skeleton with 57 joints. When creating animated mechanical models it is very important to get initial orientations and joint positions just right. The wing-flap joints were especially hard to pose and orient, because they are actually situated outside the wings of the Falco.
All the animation rigs I create are made out of simple polygon shapes. I assign a simple blinn shader to the rig, so that the rig can be clearly differentiated from the model (I avoid using curves and splines for animation rigs). For the Falco I ended up with a purple animation rig. For most moving parts I use driven keys, some IK handles and for the machine guns I used aim constraints.
Here is a short presentation of the animation rig:
For the presentation in Sketchfab I decided at first to make only a flying loop animation. This animation, however, did not show all the moving parts, so I added another animation of all moving parts simply opening and closing.
Importing to Sketchfab
Luckily for us creators, game engines are becoming unified, at least considering PBR rendering. When I finished the textures for the Falco in 3D-Coat, I checked the model in Marmoset Toolbag and Unreal Engine and it looked pretty much the same both times. You can look at the results here:
In Sketchfab the material workflow is basically the same as Unreal Engine. The only minor tweaks were for the glass material. I made a couple of versions of the glass transparency texture and played a bit with the refraction index. The resulting glass material was stunning, especially the color tinting and the distortion on the edges. (It even distorts all the displays that are covered with glass.)
Although most of the textures are 8K, I only uploaded 4K textures into Sketchfab, to reduce loading time.
Here is the final Sketchfab model (don’t forget to watch both animations clips!):
Conclusion
The days of rendering in Maya are definitely gone for me. Sketchfab is the easiest and fastest way for a 3D artist to showcase his work in the best light possible, to the widest audience possible.
With Sketchfab constantly improving and adding features, who knows what the future will bring. 🙂


