In Art Spotlight, we invite Sketchfab artists to talk about one of their designs.
Hi everyone! My name is Giuseppe Morabito and I was born in LA but have always lived southern Italy. I’m a Computer Engineering student but more importantly a 3D enthusiast, and have been ever since I was 10 years old.
I must be one the few people in the world who didn’t find practical effects in movies that impressive growing up, it was CG characters in movies like Harry Potter, Lord of the rings and Dragonheart that had me so intrigued that I decided I was going to come to a full understanding of the process involved in creating a computer generated character.
I love every aspect of 3D, the artistic as well as the technical side of it.
I’ve always been passionate about movies, games and music, and it’s all reflected in my Sketchfab portfolio, I model mostly fantasy creatures (Pokèmon, Dragons, Aliens etc.) from movies and games as well as of my own design.
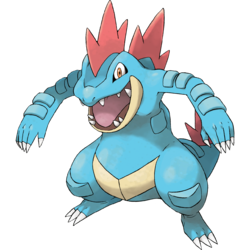
I was invited by the Sketchfab community manager (Thanks Bart!) to showcase my Feraligatr from Pokèmon Sculpt.
It is a part of an ongoing series I started months ago on Pokèmon starters in a semi-realistic style.
I’ve seen all the amazing realistic Pokèmon designs out there and I wanted to do my own take on the idea; in particular I wanted to test out what Pokèmon would look like if they maintained their cartoony shapes and proportions, but were made of actual skin with scales and wrinkles and pores and veins, yeah kinda creepy but nonetheless I went for it.
My first was Charmander, and to date it’s my most popular model on Sketchfab.
The modeling process has changed since then but all other aspects remain the same in every model, so let’s get right into it.
Reference
I referenced mainly the design from the animated series and original artwork by Ken Sugimori.
Modeling
All modeling is done in Zbrush.
I begin with simple Zspheres to get the proportions out of the way and move my way up from there ending up with a fairly high-res sculpt using dynamesh.

I Retopo the model using Zremesher with guide curves before doing any detail sculpting.
I repeat the process or every subtool in the model; in this case the fins, the nails, and the teeth which are all separate subtools.

With the fins I wanted to put an interesting spin on the red blocks of pointy mass the original design has, while they look great for a cartoon, I felt that they could be reimagined as something that allowed more detail so I decided to turn them into fins.


I then used a mix of alpha brushes and manual sculpting to achieve the scales and general detail on the skin.
I looked at reference photos of real alligators in particular regarding the soft area of the mouth and belly.

Once I have the final sculpt, I move into exporting OBJ files for UV creation and Texturing.
UV Mapping
UVs are done in 3D coat, it’s a great tool for quick UV unwrapping.
There is great tutorial on this on the Sketchfab blog.
I split the model down the symmetry line to reserve the possibility to add asymmetrical details, and this something I do for all my models.

Texturing
Texturing is done in Substance Painter and by far it’s the easiest and most comprehensive texturing tool I’ve used.
I bake the Normal and Additional maps and begin the procedural texturing.
Most details like the big scales and wrinkles in the textures come directly from the HD sculpt and the baked maps derived from it while the micro-detail comes from projected texture maps.
I then design all the required PBR maps, base color, metallics, roughnesses, and normals/heights.
And I also design a custom map for the Sub Surface Scattering.
It’s one of my favourite CGI effects, but sadly at the moment it isn’t supported by Sketchfab, I’ve seen mention that it’s in the works though so fingers crossed.

It’s most evident in the fins but it is also used to achieve softness in the belly.
I assigned this map to the emissive channel in the Sketchfab viewer, and it does a pretty good job at simulating SSS; but it works best with SSS shaders in Maya and the subsurface shader in UE4.


Rigging
Once all textures are done and exported, I import everything in Maya and begin the rigging process.
I design my rigs with IK controls for the arms and legs with locked rotation on the hands and feet.
The tail is rigged using a spline IK controller, with a separate joint chain driving the spline.

I fix up any imperfections and errors with the default skinning and move into designing a pose for the Sketchfab viewer.

With this Idle pose, I wanted something simple and natural and what I always loved about this character is “the hunched back, tense shoulders and loose hands” stance he naturally falls into.
And here is my final upload! 🙂
Unreal Engine 4
I import this and all of my models into my personal UE4 viewer, a piece of software I created in Unreal Engine 4 that I use to showcase my models. For each model I design a setting that best represents the character’s “habitat”, I place the character in the scene and loop an idle animation.
The player interacts with the scene by simply rotating the camera and zooming.


Compositing and Photo Series
As you can see I’m passionate about all aspects of 3D but one that also interests me a lot is compositing CG characters into photos, and I recently started a series that I jokingly name:
Pokèmon GO – As it should be!


Full album and more on my facebook page
The Power of Sketchfab
Of course a most special thanks goes to Bart for offering me this space to showcase my work and to the whole development team behind this awesome website.
Ever since I discovered Sketchfab I was amazed by the amazing features, the amazing live viewer, the welcoming community and active response to my work, the praise as well as the criticism.
It’s a powerful tool for the user and an easy and accessible one for the visitor, whether on mobile or PC even people who think 3D is wizardry can have a hands on understanding of what I do.
Thanks!


