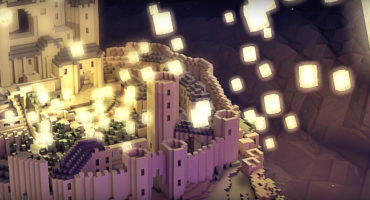
In Art Spotlight, we invite Sketchfab artists to talk about one of their designs.
Hi! I’m Chami Collado, a 3D generalist noob from Valencia, Spain. I just finished my studies on Animation 3D here, and I even worked with a little studio for a augmented reality app. Right now, I’m working on my final work for my master’s, a 3D Short film called Orion with the best partners ever, and it’s almost in post-production. Nowadays, I haven’t decided what I want to specialize in the 3D world, so I just simply keep at a generalist for now because I want to learn everything I can and understand the whole 3D scene.
Like I said when I uploaded the model, my idea came when I was rewatching the original film Ghost in the Shell of Mamoru Oshii, one of my favourites of all time. When I watched this scene again, I thought it would be fun to recreate it on 3D, trying to get the same feeling, working good with lights and shadows. I also wanted to try making baked lighting, a technique that I never tried before and I thought it would be perfect for this. My idea with this kind of work is that I upload to Sketchfab is to learn, train my 3D skills, and enhance my portfolio.

Posing with ZSpheres
First of all, I did some screenshots of the scene to have some good references and to make a good pose of Motoko. I did her with ZBrush, starting from ZSpheres, and then doing little by little all the shapes, trying to get good proportions. I like a realistic anime style but not excessively photorealistic.
Although I studied arts, I’m not the best with anatomy and proportions, but I think I’m getting better with every work. Motoko has a muscled body, so I gathered some body model references and studied a little bit the shapes of the body, it’s important when I’m doing a work like this.

Doing hands with ZSpheres, with a sketchy body
Finished Motoko, I started doing the scenario with Maya, something easy because you can’t almost see details with all the darkness. There is a skyline in the background, so first I thought to make it in 3D, but then I change my mind because that would be too much work, so I simply cropped the original and put it like a texture. The next step was make the baked light, simply putting the lighting in a good place creating a similar high contrast effect like in the movie. With this technique, the light projection on the models is saved like a texture, so with that I have only to export it to Mudbox (my favorite software for texturing) and do the final details on Motoko and the scene. With that, everything is done!

Creating the hair
When I upload it to Sketchfab, I always played with the post-processing effects a little, but in this case I left it shadeless (because the baked lights), and with a little bit of bloom. I love Sketchfab because I like to show my models not only with a 2D render, but in a way that you can see and “explore” the scene in any angle. That’s why I’m always motivated to create new works like this one, and upload it to my account. I have a lot of support of the people here too, and that’s really fantastic! It helps a lot to keep creating and uploading stuff 🙂
Well, I think that’s all. I only want to thanks everyone who supports me in any way: following my account, liking, commenting, or simply watching my models. I’m glad you like it and like I said, it helps me a lot to keep working. By the way, I’m looking for work right now, so if you are interested feel free to contact me. Also, you can follow and talk with me here:
Twitter, Instagram, Artstation, mail, and of course my Sketchfab account.
Thanks for reading! Have a nice day 🙂


