About me
Hi, I am Vasilis Haroupas, a freelance Surveying Engineer, currently located in Athens Greece, specializing in Photogrammetry, Aerial Mapping, and 3D Reconstruction. I’m also an EASA – certified UAS C Pilot.
Although I had learned the basics of photogrammetry back in my University days, it was only in late 2015 when I started incorporating it into my surveying workflow; mainly aerial projects for the production of large-scale models and orthomosaics.
Soon enough, I started combining terrestrial and aerial images for the reconstruction of tall objects and man-made structures and I was blown away, not only by the amount of information one is able to capture with modern photogrammetry, but also by how cost-effective and accurate this method can be. Still, after 5 years and hundreds of projects, I am fascinated by the idea that we can reproduce some amazingly detailed and accurate parts of our world from just a (big) bunch of photographs.
My belief is that 3D reconstruction using photogrammetry, in combination with lidar terrestrial scanning for the creation of virtual reality life-like environments in game engines, is the shape of things to come—not only in gaming but in engineering, too.
The challenge of Manari’s Arched Stone Railway Bridge
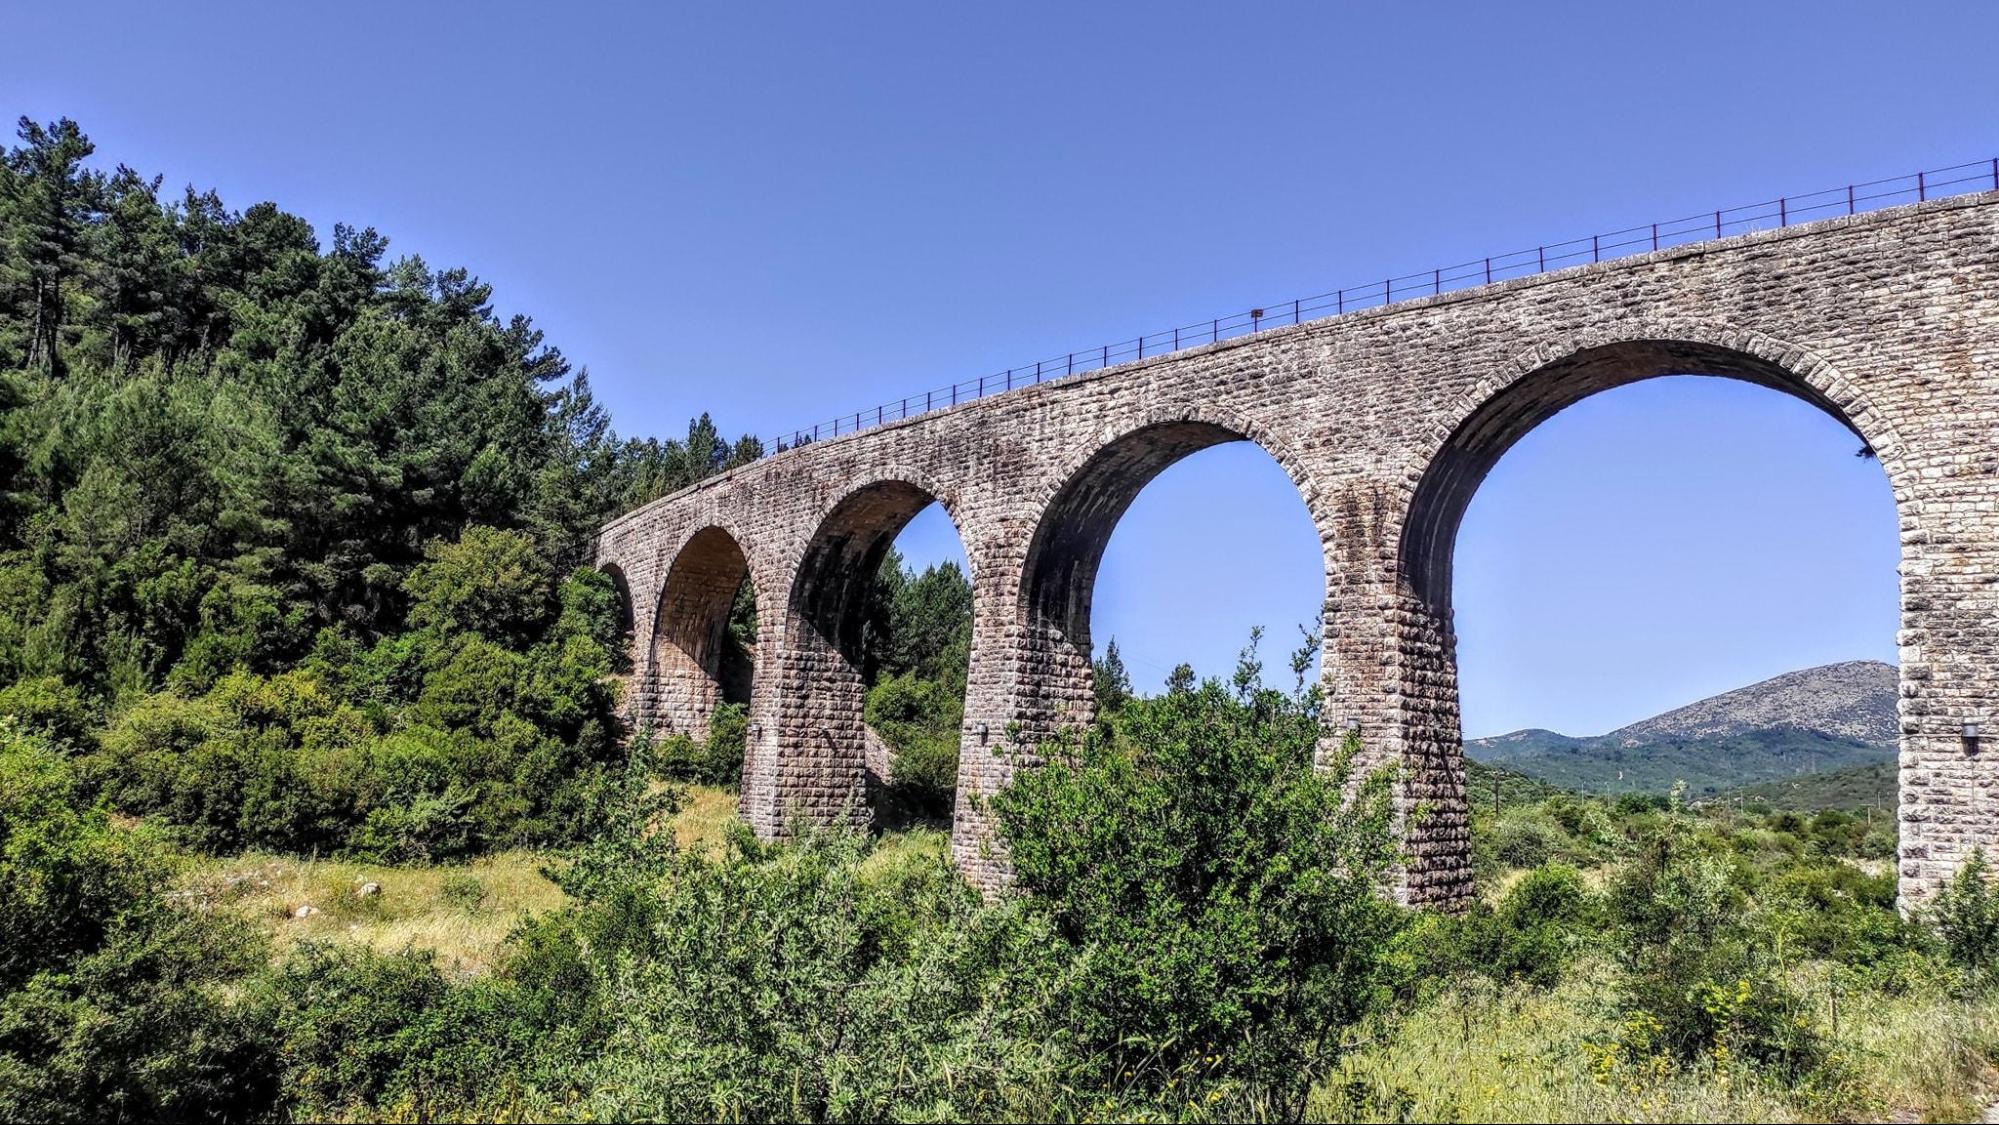
The first time I saw this bridge was while reading an article on the web about the abandoned railway lines of the Peloponnese. It is located some 200km from Athens, close to the village of Manari. Although not that difficult to reach, I have never had a chance to visit the place. Besides its obvious architectural beauty, the article stated that it is the longest arched stoned railway bridge in the Balkans. Standing there for more than 100 years with its 8 arches, a total length of about 115m, and a height of about 20m, it definitely deserved at least a proper 3D documentation. :)
As a one-man army with quite limited resources, I thought that photogrammetric modelling of the bridge would be a cool personal challenge, especially if I had to complete all of the fieldwork in just one day! But before that day, I had to come up with a hopefully adequate photo capturing plan that included one overview automated flight plan and a lot of manually captured aerial and terrestrial photos. Also, due to the almost north to south orientation of the bridge, all of the shooting had to be done ideally between 11:00 a.m – 2:00 p.m. in order to avoid big shadow casts as much as possible. An overcast day would be perfect, but hey, good luck finding one in Greek May, and also with minimal wind!
Capturing day and the tools
So that day came and armed with a Nikon D5300 DSLR camera, a Phantom 4 Pro drone with 7 spare batteries and a Leica TS02 total station, and with the help of a friend, I went on site.
As a surveyor, I wanted the model not only to be nicely textured, but also accurate. So I placed 13 control points on the bridge surface and surveyed them with the Leica total station.
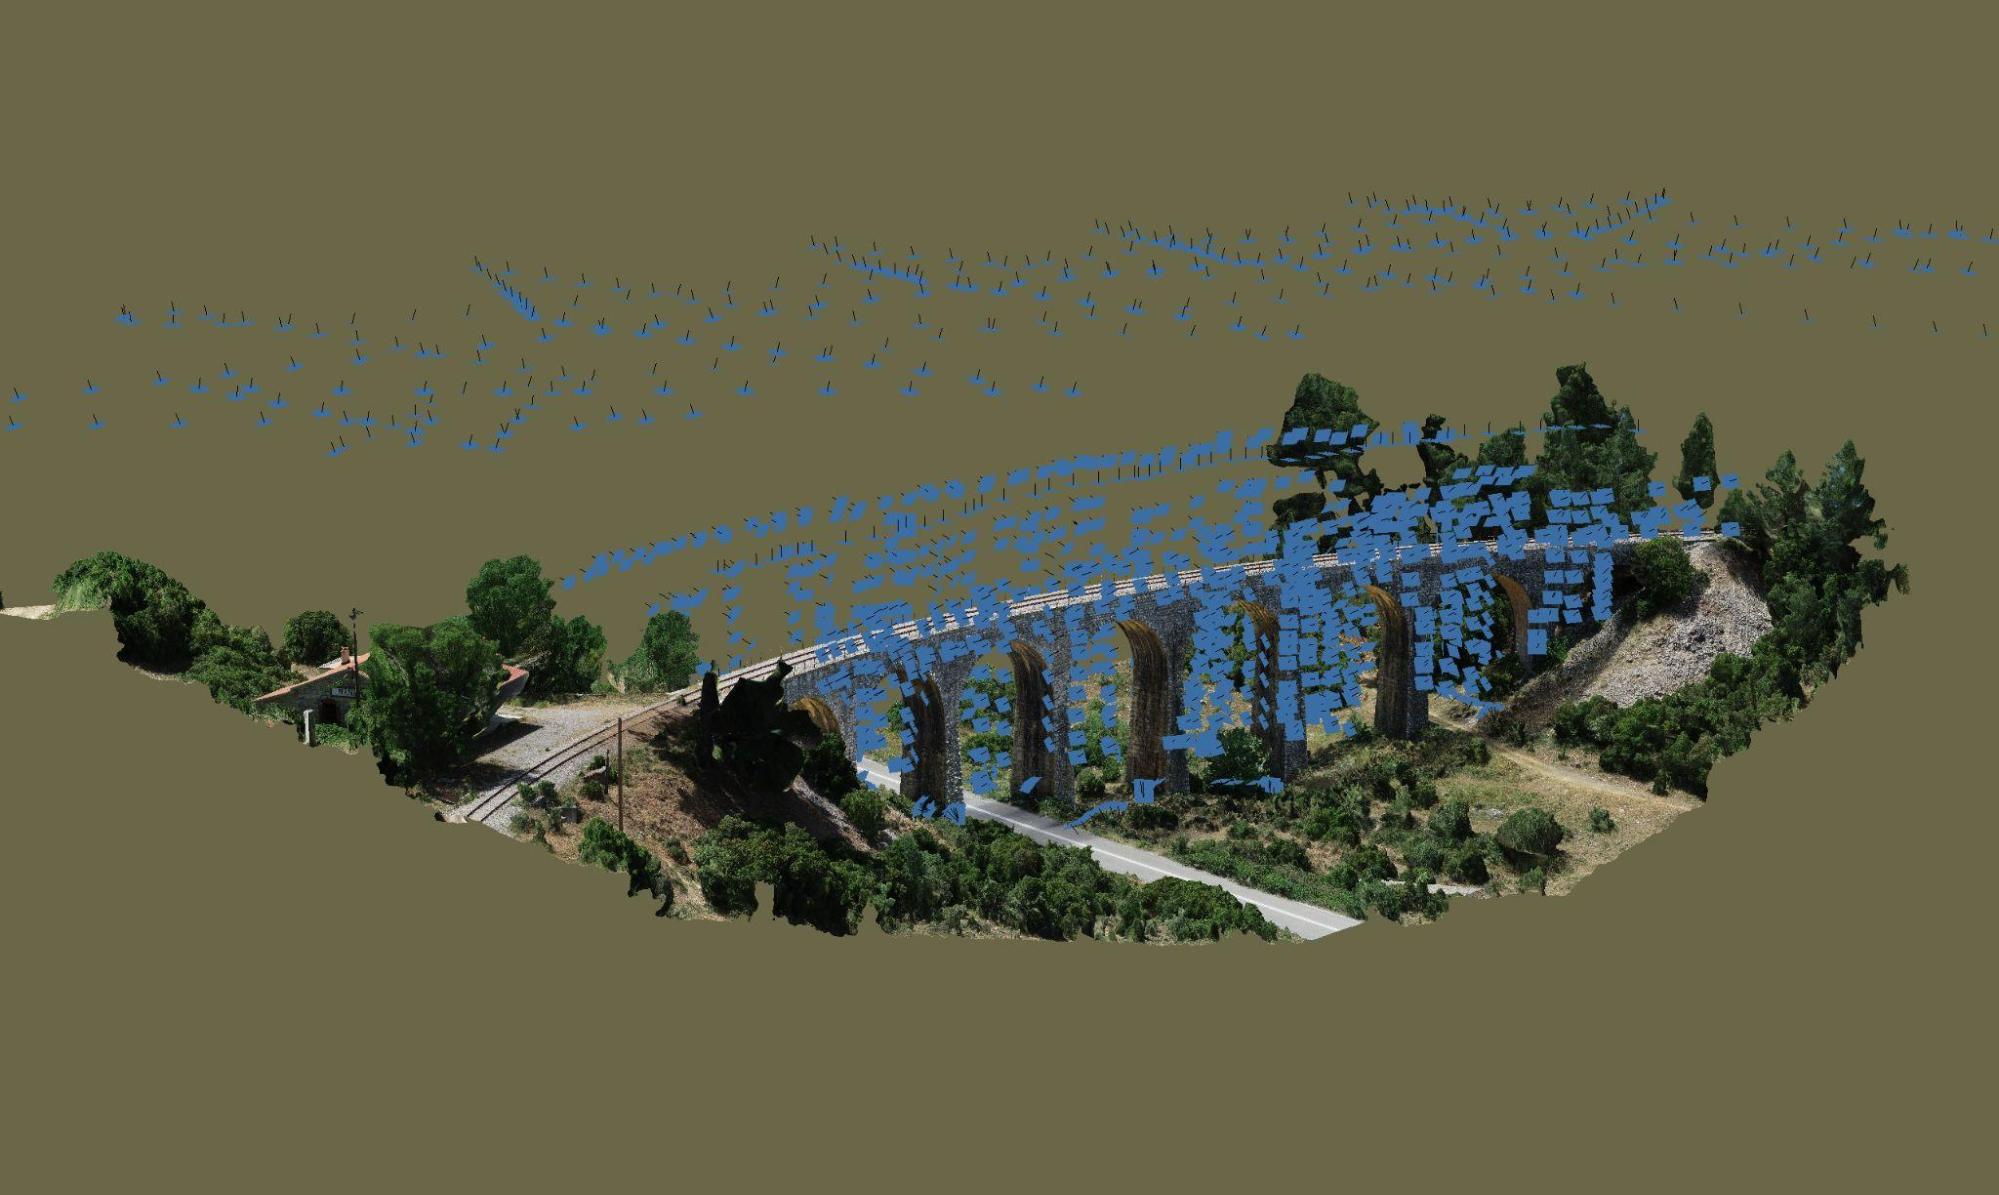
It took me about 4 hours and 1350 photos to scan the whole bridge. 300 drone images captured using the Drone Harmony flight planner app, as an overview of the general bridge area, and almost 200 terrestrial photos with the DSLR camera for the “tricky” parts under the arches. For the rest of the photos, it was all about manual flight in verticals and small orbits, around and under the bridge. The main difficulty we faced was definitely the heat, with temperatures well over 30 degrees Celsius that caused the drone controlling tablet to shut down twice due to overheating.
Back in the office for model reconstruction
Back in the office, I started with a light edit of the raw images in DxO Photolab, mainly reducing highlights, boosting shadows, and some white balance tweaking.
I aligned all photos in one chunk within Agisoft Metashape. I had previously organized the photos in Groups (aerial plan, terrestrial, aerial manual, etc.) and performed a kind of incremental alignment. Metashape did a great job aligning almost all of the images (30 images failed to align but mainly because of bad exposure and bad capturing technique).
After placing control points and performing alignment optimization, I came up with a surprisingly accurate model, with checkpoints of 4mm RMS error!
1,350 photos are a lot of work for my 16GB i7 laptop, so I opted for the mesh reconstruction from Depth Maps method, avoiding the memory-consuming part of Dense Cloud computation.
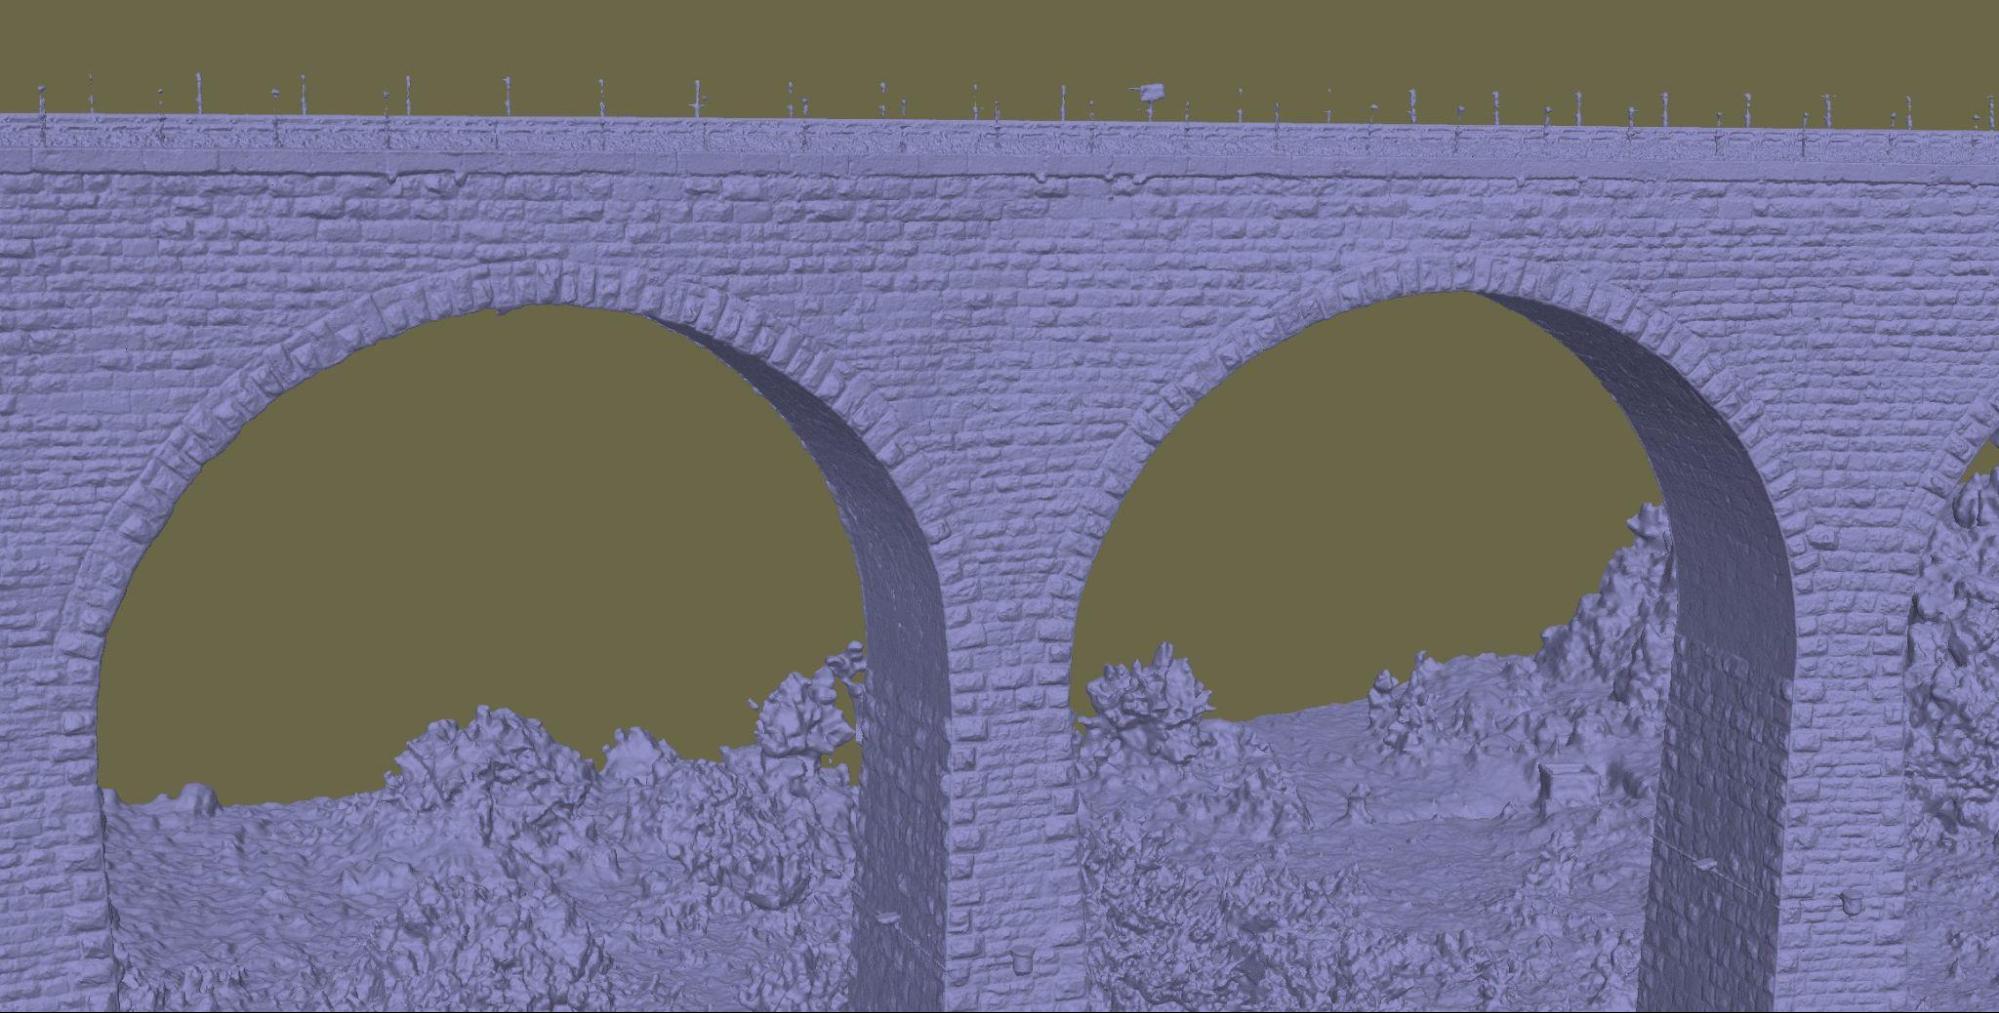
After 8 hours in High-quality mode, I got a quite crispy 57M poly mesh that required minimal editing, all within Metashape.
The mesh could have been even better, (especially under the arches and close to edges), with some masking of the terrestrial photos, but frankly, I was a bit lazy to do so and rerun the whole meshing step.
After all, my main challenge was all about the actual scanning part.
Texturing
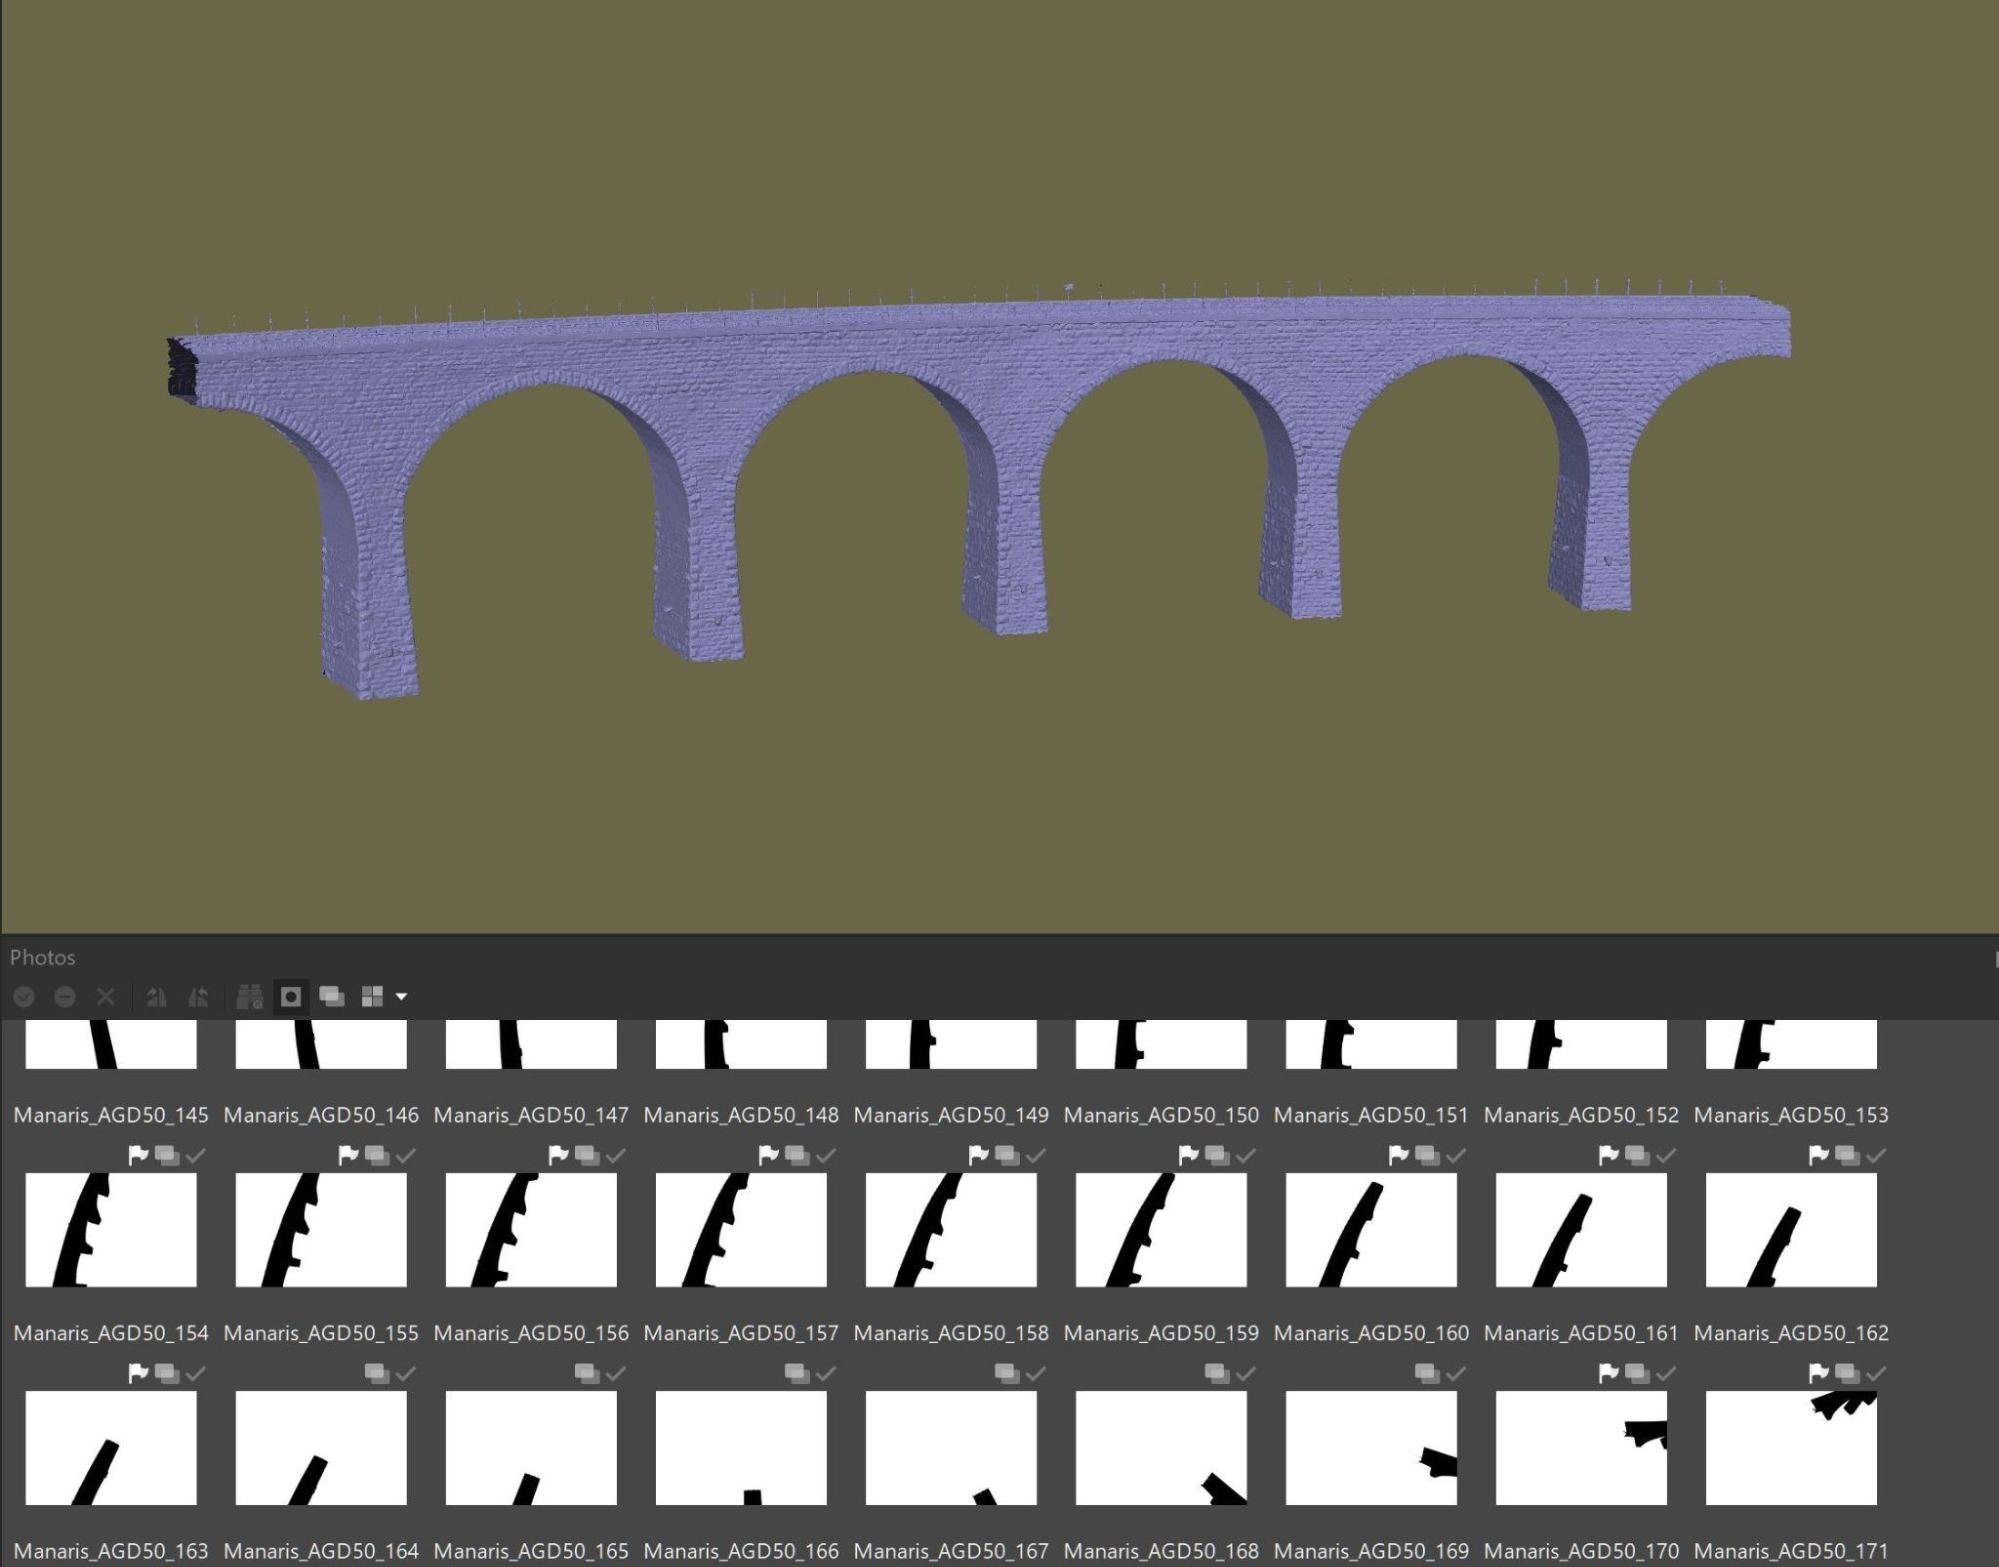
Good texturing is important. Not only can hide most of the small mesh artifacts, but also accounts for the model’s overall realistic impression. Again inside Metashape, I decimated the 57M poly model to 15M polys, in order to keep that as my reference high poly. I didn’t want the drone images that were taken from high up and viewed the sides of the bridge at sharp angles to be part of the texture. So I created a copy of the mesh and kept only the actual bridge structure by removing the surrounding area.
Then I automatically imported masks from model, and only for the drone photos of the overview flight plan.
With those photos masked, I built 4x8K texture maps for the 15M poly model. It turned out nicely but was still quite big—not only for my Sketchfab Plus account with a 100MB upload limit, but for viewing outside Metashape in general. I had to decimate the mesh down to 1M polys while preserving most of the details. The best way to preserve details is to build normal maps for the low poly model using the high-poly model as a source. With normal maps built, I only had to build diffuse texture maps for the low poly mesh. I did that by keeping the UV’s and transferring the textures already created for the high-poly model. All of the above were done within Metashape.
Apart from some thin metallic parts missing from the decimated low poly model, the difference in quality between the two textured models was quite minor.
- 15M poly model with 4 x 8K textures.
- 1M poly model with 4 x 8K textures.
Upload to Sketchfab and some post-processing
After exporting the final low poly model with textures, it was a straightforward process to upload the 87MB zip file to Sketchfab. I leveled the scene and used shadeless mode in the PBR renderer.
I find shadeless to be the most appropriate look for photogrammetric models that have been scanned outdoors, under natural light. I prefer monochrome backgrounds, light-colored or gray, with some vignetting to keep the focus on the actual model.
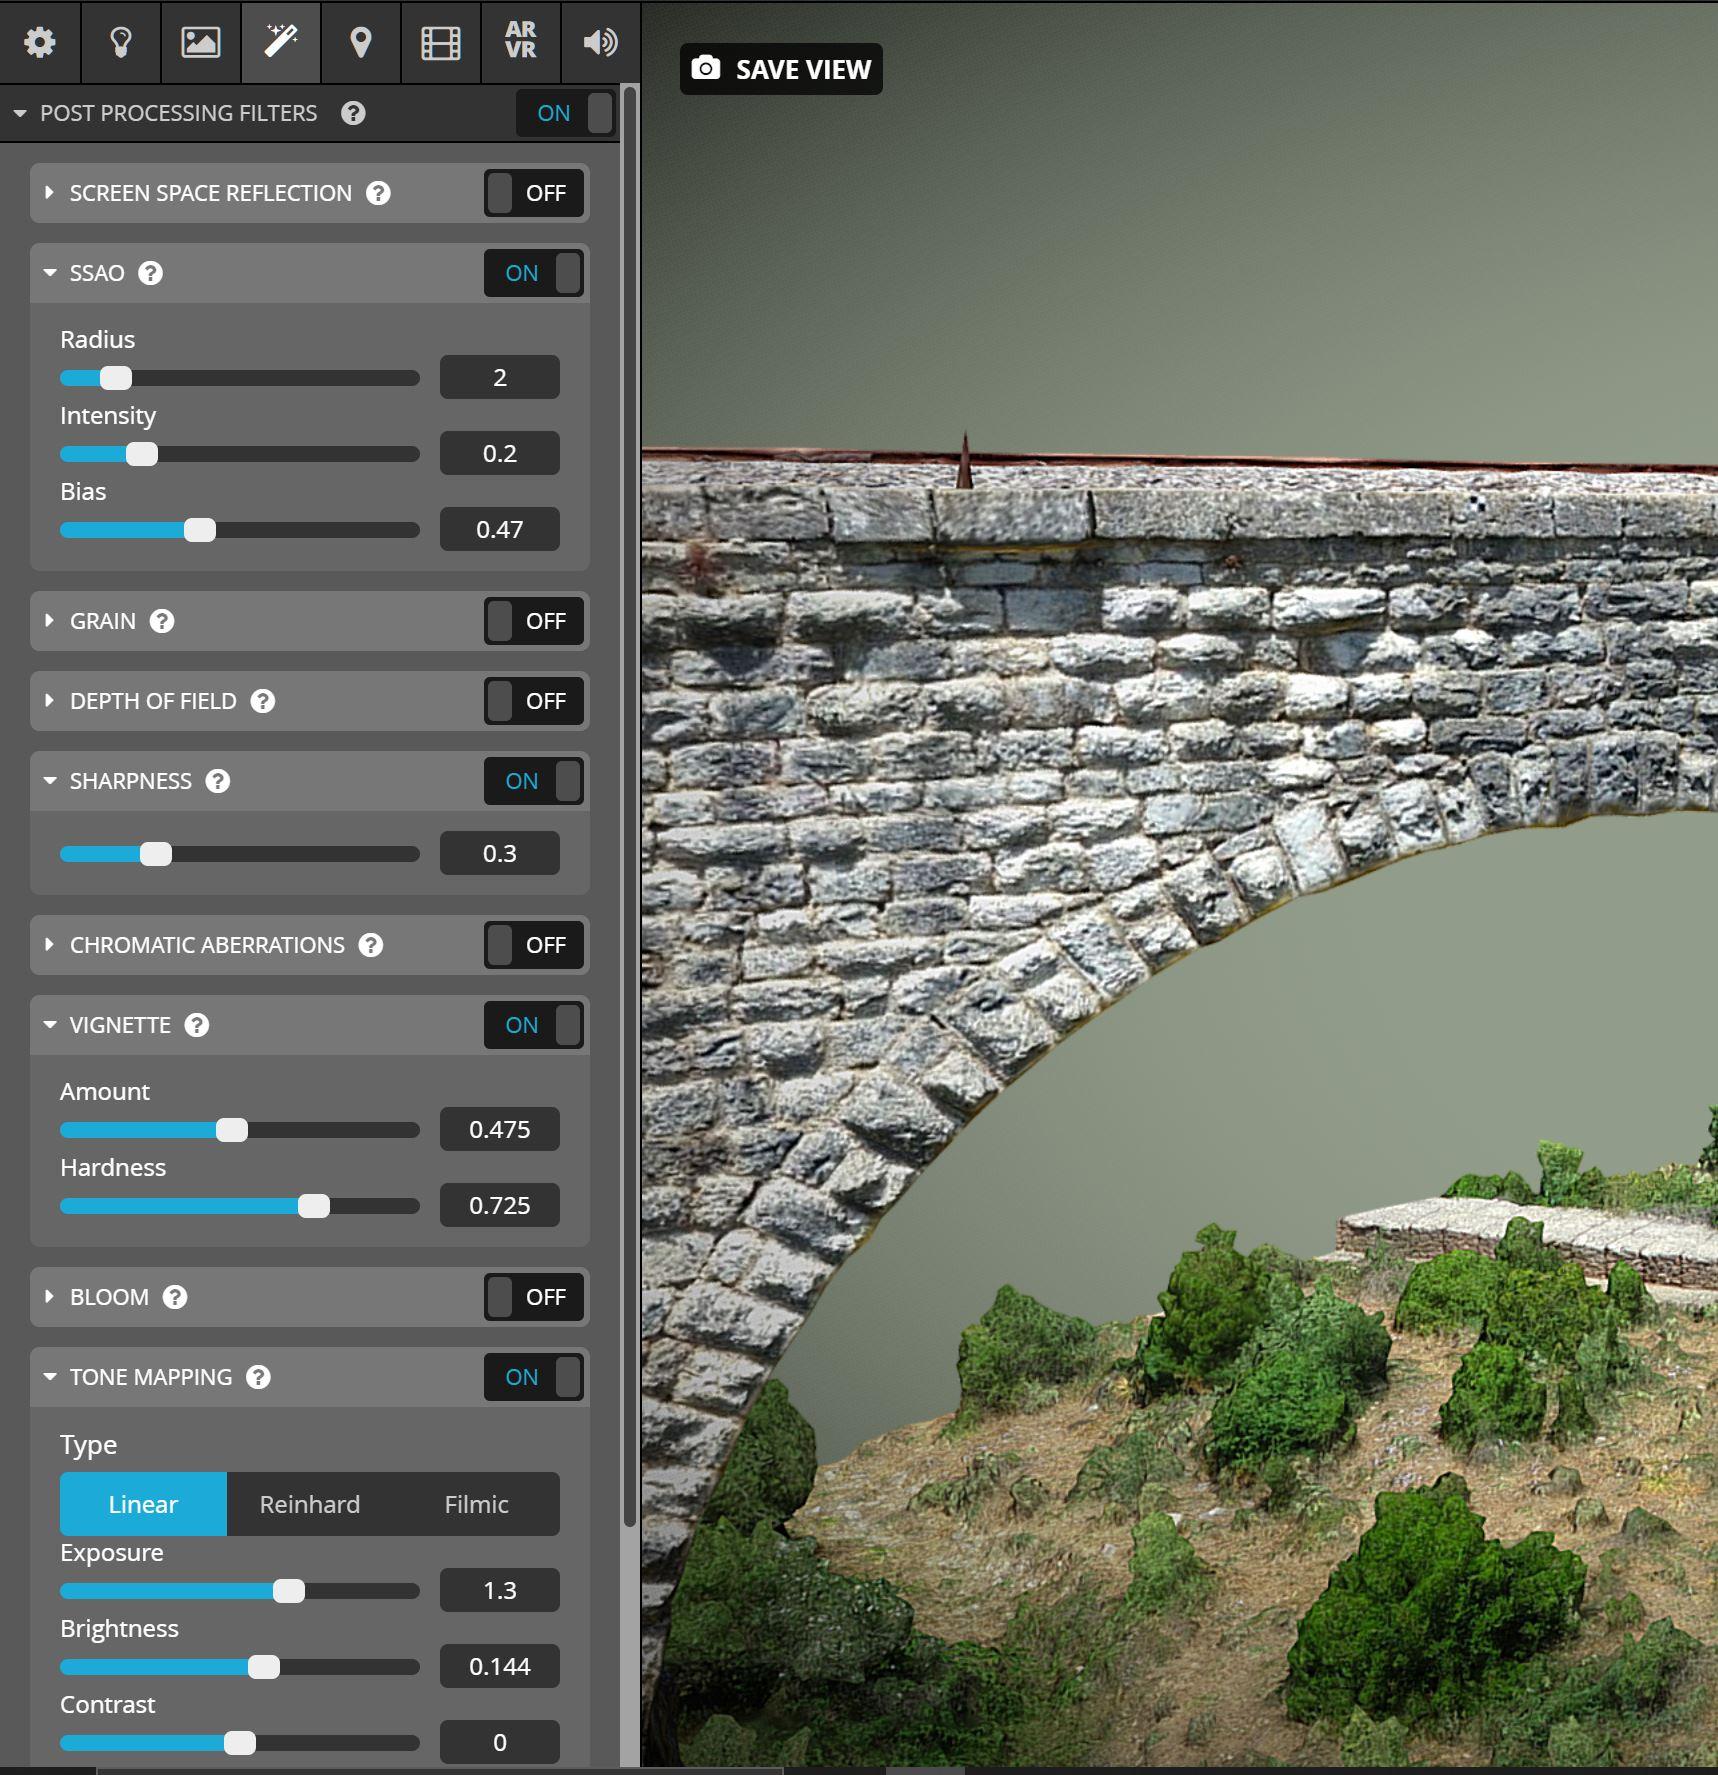
Post-processing filters in Sketchfab are great. Subtle changes can sometimes transform the look of the model. For this particular model, I used some Sharpening, SSAO, Vignette, and finally, Tone Mapping filters until I was happy with the result.
Apart from the filters, what I also find really useful with Sketchfab is how easy model navigation is. As an engineer, I wish I could also have some scaling and measuring tools to play with. :)
And that’s all about it. Big thanks to the Sketchfab team for giving me the opportunity to present my work. I hope it will be interesting and helpful to some people. :)

