About me
Hello people, my name is Henrique Guimarães (nicknamed gmao, which is an abbreviation of my surname “guima” joined with “guimão”). I am Brazilian and I live in a small town in the interior of Minas Gerais.
How did I start?
The reason I’m doing 3D today is exclusively because of this site, Sketchfab. I know the exact date because of my account registration (Member since March 16th 2016). On that date I spent hours and hours looking at and running dioramas, enchanted with technology and instant rendering. For someone who had only seen drawings and paintings on the internet, it was an explosion inside my head. I fell in love with it in the first minute and began looking for 3D programs to make my own art, but it was very slow.
My studies in 3D only really started in 2020. With the beginning of the pandemic, not knowing what was happening to the world, I had to go back to my parents’ house. I ended up having a lot of free time, and I spent all day modeling random things and watching many videos on the internet about Blender. The community is huge and shares a lot of knowledge.
Before that, in 2018/2019 I had lived in São Paulo, worked with graphic design, and was migrating to the world of children’s book illustration. I had the enormous pleasure of being able to study watercolor techniques with Sidney Meireles. This experience was a very important milestone in my life because it made me clearly see that being a designer made me sad and really wasn’t a good job for me, and illustrating books made me extremely happy with what I was doing.
Creating this model, part 1: Motivation and inspiration
Coincidentally, the time period that Sketchfab was running the children’s book challenge was exactly when I was trying to put together what I had learned in 3D with what I knew about illustration for children’s books. Everything was already inside my head and it fit perfectly.
I chose to pay tribute to my teacher and friend who inspired me so much by working from a book he had illustrated that deals with very important subjects for children.
With everything already in mind of what I wanted to do, I just had to choose which of this book’s illustrations to use. I was debating between these two: image 1 and image 2.
Both have a very strong power to guide the eye, and both would look great in 3D, but I decided to use the one with the elephant because it includes all the characters in one composition.
Creating this model, part 2: Tools and process
Everything was done in Blender and 3D-Coat.
I’ll make a simple breakdown and point out some things that I feel are most important in a piece like this. The camera setup is with you from the beginning to the end of the piece, so it’s really important that you set it up in a practical and efficient way. Designing the floor under the illustration at the beginning helps a lot.
It was important to me that the silhouette of the characters be very faithful to the illustration. The best tip I can give at this stage is to look and study your reference well; understanding the perspective and the “three-dimensionalized” form of the piece is very important, finding the lines that can guide you in modeling.
Model using two windows, one fixed to the camera and the other free-moving, so you can follow the reference and be creative with the shapes at the same time.
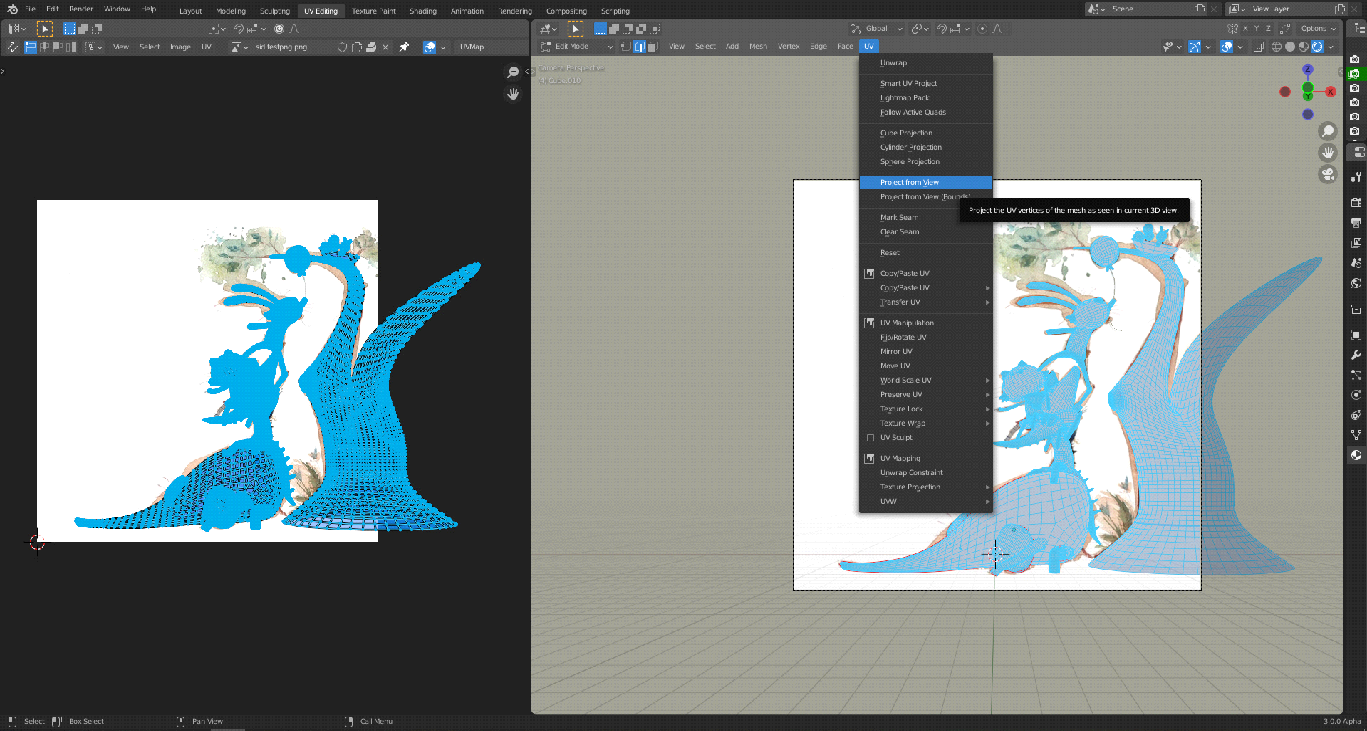
With the modeling done and the silhouette fitting over the reference, it’s time to use a UV unwrap trick: project from view. When hand-painting, this method will allow you to know exactly the right place to paint each detail.
By applying the same texture used in the reference, the result will look something like this:
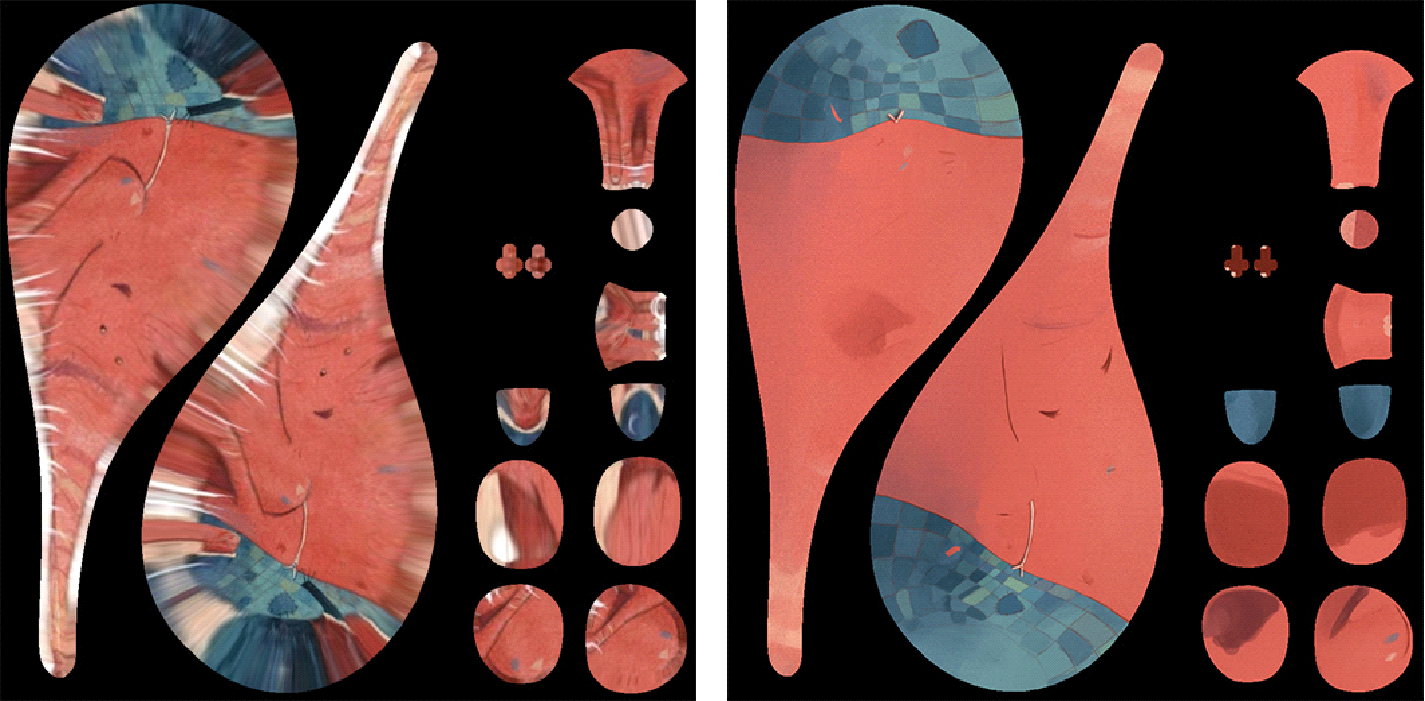
With this step done, now is the time to manually unwrap a new UV for each character, and bake that same texture over the new UV, and then go paint in 3D-Coat.
After finishing the elephant I did the exact same process with the other characters and that’s it.
Setup on Sketchfab
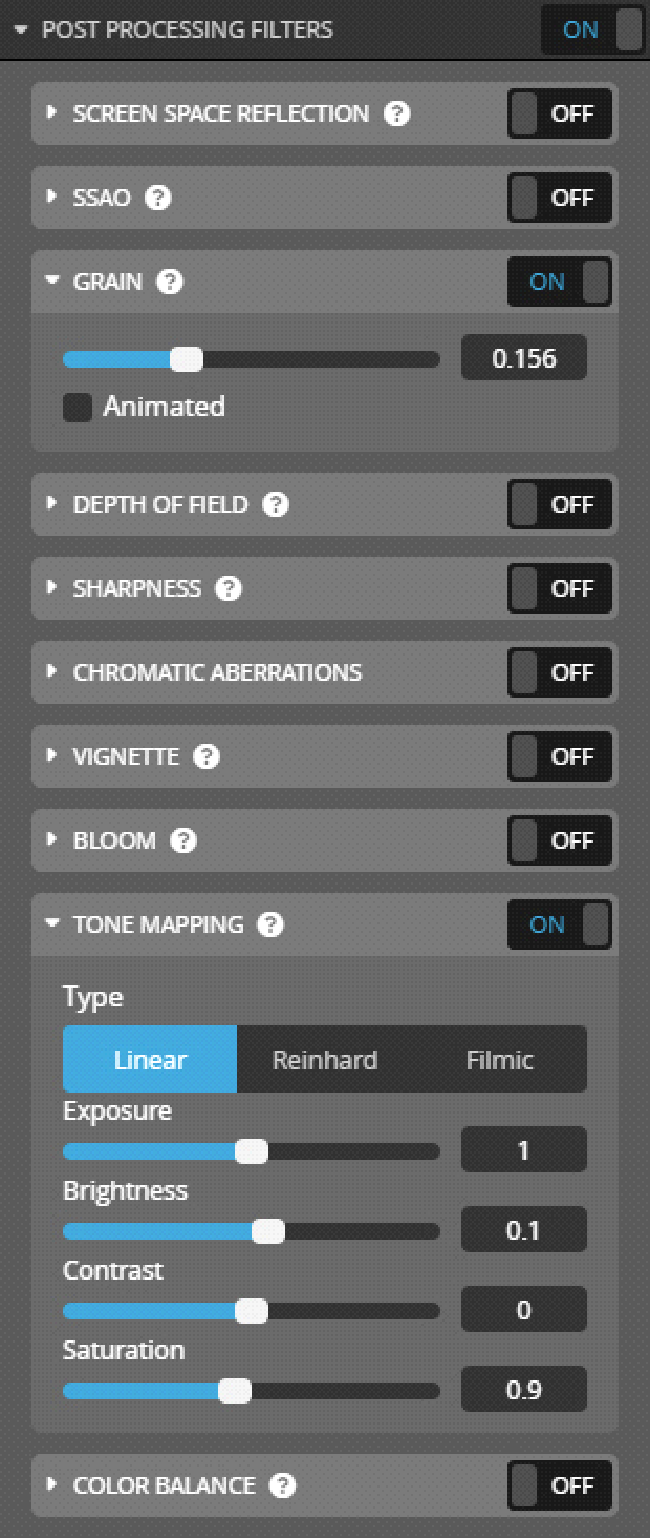
Doing the setup here on the site was extremely simple. I left the field of view at 50°, the same as what I had used during modeling, and set the shading to shadeless mode. In the post processing tab, I used a little grain to complement and mix with the grain already used in the texture and slightly adjusted the colors in the tone mapping to make the colors more vibrant.


