About Me
Hi, my name is Guillaume Bolis. I’m a 19-year-old French student from “Objectif 3D,” a 3D-oriented school in Montpellier (France).
I spent most of my life abroad and recently started studying at this school, but I’ve been doing 3D art for around three years now. I’ve learned everything from YouTube tutorials and figuring out stuff by myself. I studied engineering for two years before leaving for Objectif 3D, but now I can finally work full-time on what I love!
I like working on a lot of different projects at the same time. I try doing commission work, but I spend most of my time helping small game developers making their projects’ 3D work. More often than not, what I do for those devs end up available for free on my itch.io account.
Once a project is finished, I like giving those assets away instead of deleting them, to let everyone use them!
I mainly use Blender for modeling and rendering, but I also use Substance Painter for texturing and Photoshop for post-processing.
If you want to see more of my work, you can check out my ArtStation. I’ve even posted more renders of the pirate ship on there! You can also follow me on Twitter, where I post my latest works in progress.
I’m always working on something! Here is what I’ve been doing over the last few weeks:
The Artwork
The origin of this project was in a small contest I made with a couple of friends. The goal was to each make one big monthly project out of a theme. For this one, we decided to pick “pirates”! Since I don’t know how to draw, my first step was to look online for references.
Steampunk is a really interesting art style, and I had always wanted to give it a shot, so here was my opportunity. The base idea was: “make a flying pirate ship.” Creating crew members or small props was optional, and only if I had some extra time.
After some searches here’s the art I wanted to use as a reference:
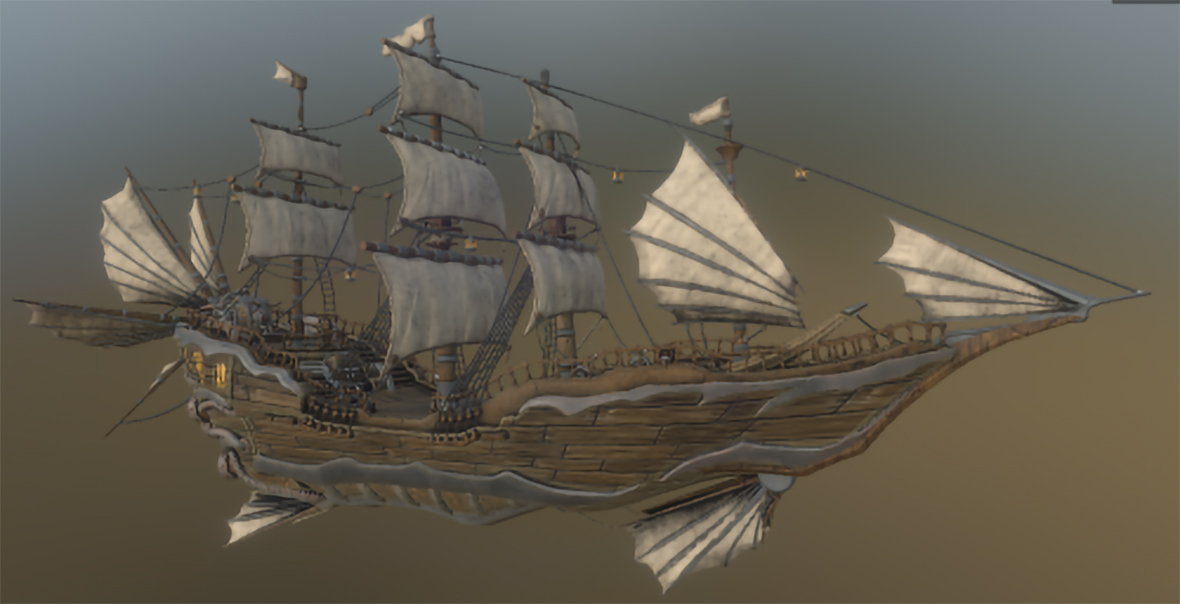
I liked the concept and art style of this ship, so I started modeling it from this single image. The problem with this approach was that this art wasn’t built to be a 3D reference image, so I ended up changing a lot of details from the original. However, we can still clearly see the resemblance between my final project and this image.
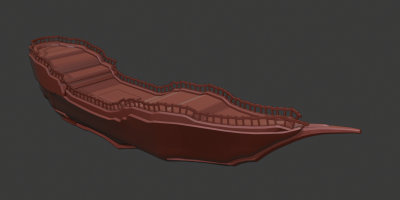
After a day of modeling, here was the first result:
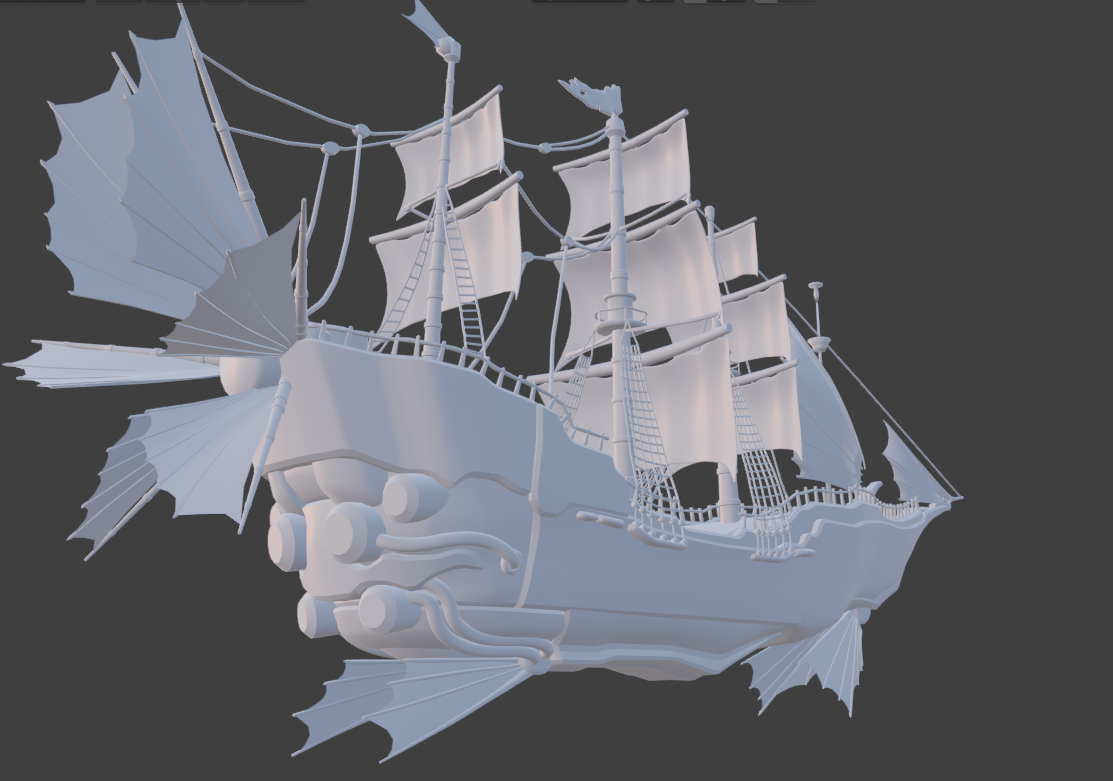
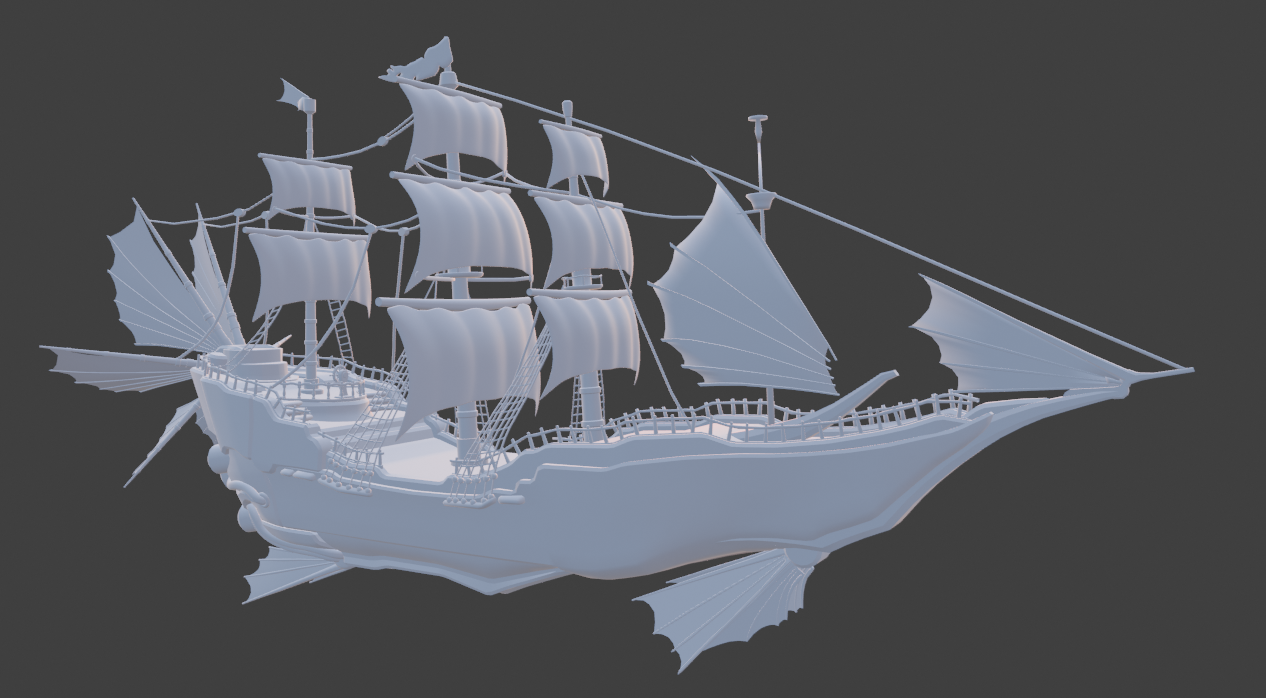
Then, add a free weekend, a lot of hard work, and you’ll get this:
Modeling the Ship
To model the sails, I started with a plane and added the combination of two very useful modifiers: solidify and subdivisions (in that order). The goal was to get a good-looking volume that was easy to manipulate out of a simple plane.
With this setup, you can easily make cloth out of a really small amount of faces in edit mode. If you try to use the split edge tool with the shortcut V, it makes for some really interesting results. I often use it for hard surface, too, and you can replace the subdivision modifier with a bevel modifier if you want the overall shape to be less affected.
I mainly used simple editing tools with a mirror and bevel modifier for the rest of the ship. The ramps and pipes used arrays and curve modifiers to avoid wasting time—it’s a lot better than modeling them one after another for hours by hand. I only needed to model one, and it duplicated itself along a curve I had created that followed the borders of the entire ship.
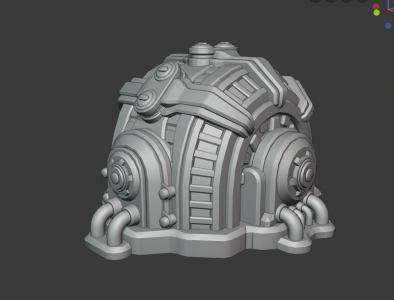
After some time, I wanted to make a generator on the back of the ship to power the engines. I used a lot of references from Warhammer 40k for this one and managed to find some neat sci-fi reactors there.
After that, I needed to add all the ropes and smaller details of the ship.
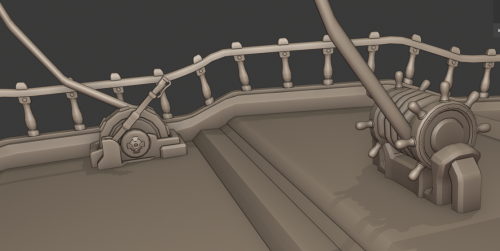
To make the ropes, I used the same technique as for the sails, but this time on a thin rectangle that would turn into a rope thanks to the solidify modifier. All of that would go across the boat and go around some anchor points with levers and other mechanisms. I had to look at a ton of online references for this one to know where to place them to make the mechanisms look as realistic as possible.
Modeling the Characters
At this point, I was two weeks into the project. I had spent a lot of time polishing the ship, and it was now ready to texture. However, I wanted something more; the main deck felt a bit empty. Since I was barely halfway through the contest, I knew there was something more that could be done here, so I started experimenting with some characters.
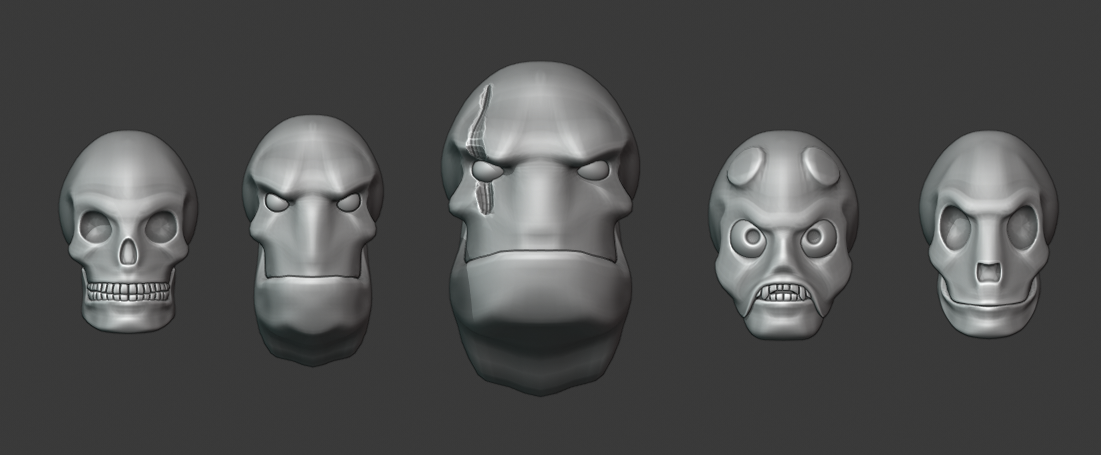
Modeling those characters started with aliens/monster’s heads. I always have a hard time making organic meshes, so I wanted to make sure this part was done right. This time around, I started on an anatomically accurate skull I had made a few weeks earlier for a different project and decided to mess around with its proportions, adding some thickness and turning it into a full head. Here are the results I ended up with after a few days:
The two faces on the right are some tests I ended up not using, either because they wouldn’t fit well with the rest of the characters or because they were too disturbing or creepy.
To create the scar on the middle face, I used a boolean modifier on the face. Then I made a small mesh to cover where the scar would be and used it on the modifier to alter the face like this.
Now, it was time to make the bodies. To get proper human proportions and simple clothing fast, I used the Adobe Fuse software. It’s a simple app that allows you to create characters the same way as at the beginning of those big RPGs (like Skyrim or Fallout) with presets and simple shapes—but the software produces an .obj file at the end. I just picked the default human shape and then added simple jeans and a jacket. In a few clicks, I had this good looking base model to use. I proceeded to remove the heads and to change most of the clothing to fit the steampunk pirates theme better. To model the clothing, I used the same technique as I did for the sails. My goal is always to have as few vertices as possible and to create a ton of details at the end!
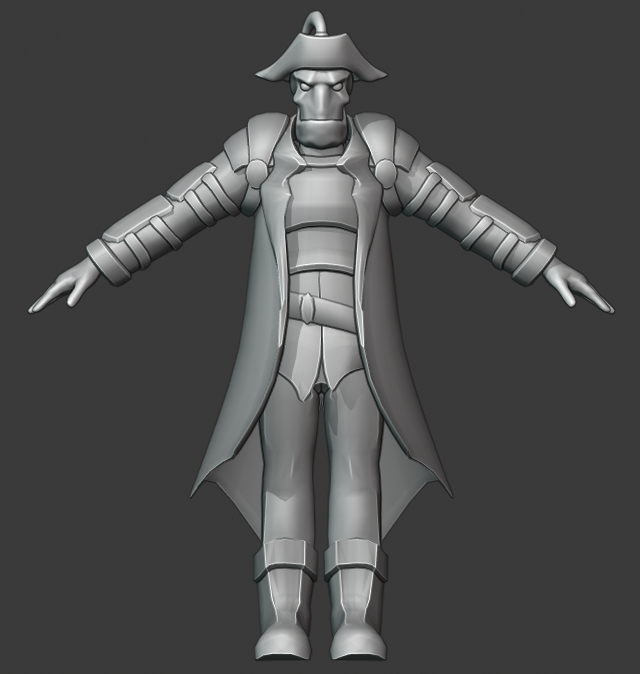
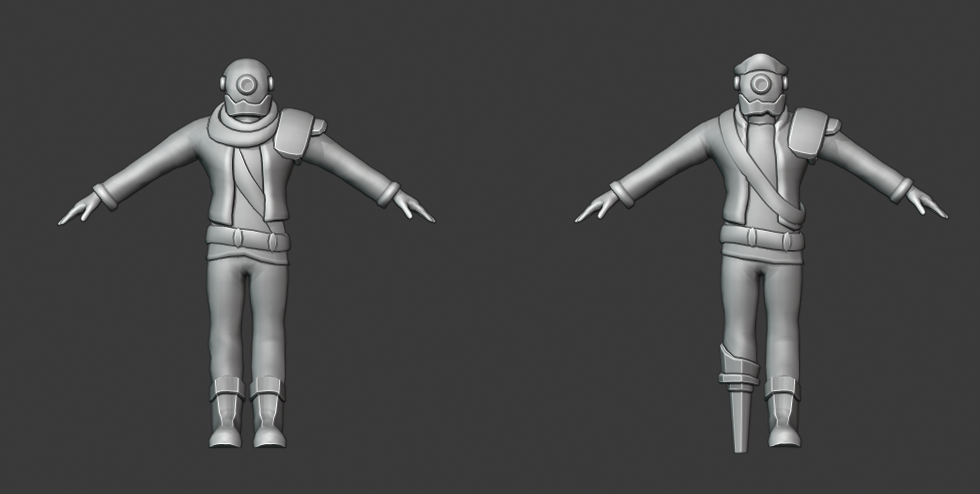
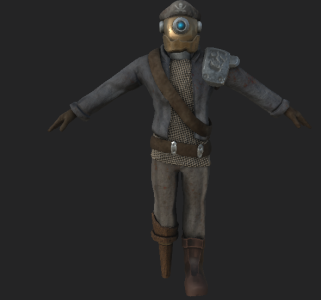
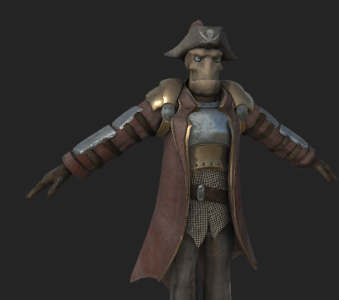
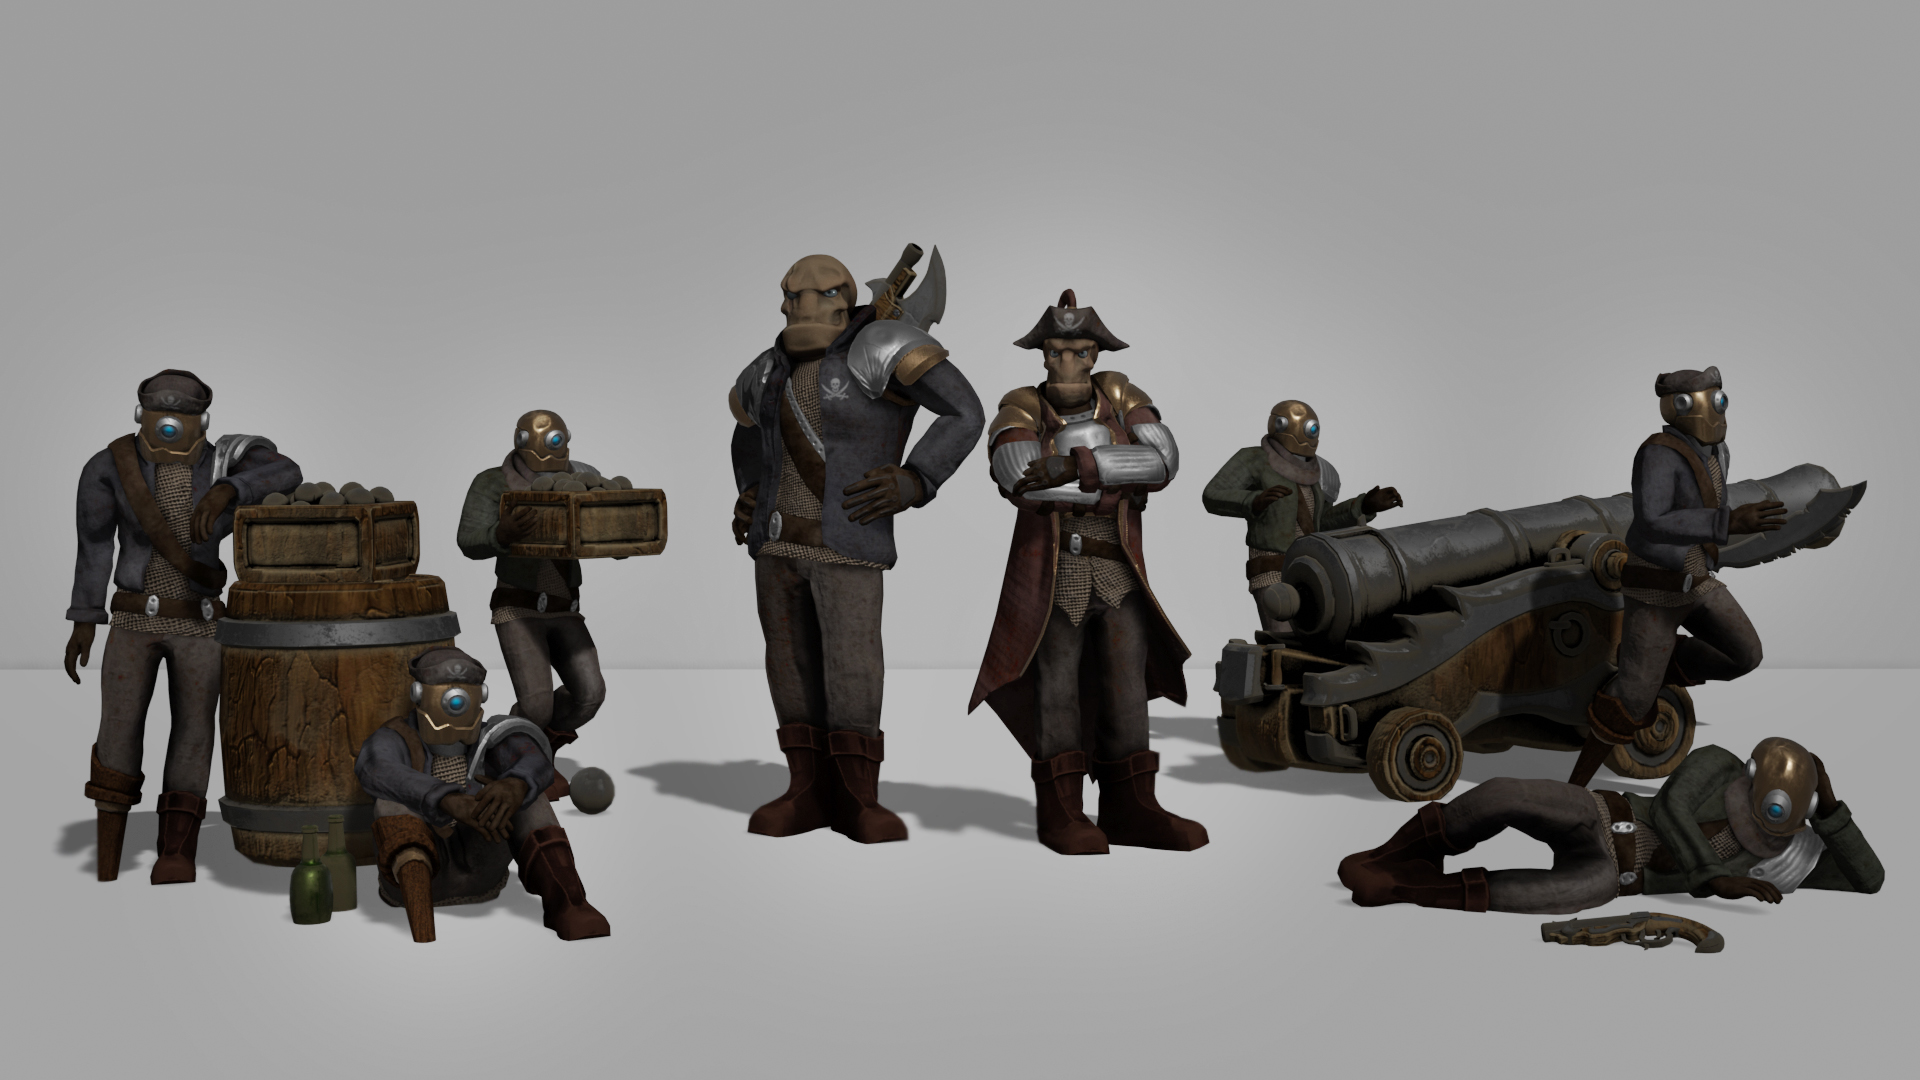
It took a few more days for me to make a total of 4 characters:
- The Captain of the ship. I used a lot of online references to get his clothing right. The goal was to make him stand out from the rest of the crew.

- The Quartermaster. I changed some proportions to make him look stronger and taller than other characters. He’s the one that keeps the crew in line and executes the Captain’s orders, after all!

- Two different robot models. They represent the rest of the crew; I simply duplicated them across the ship to create a large enough group to occupy the whole ship!

Modeling the Props
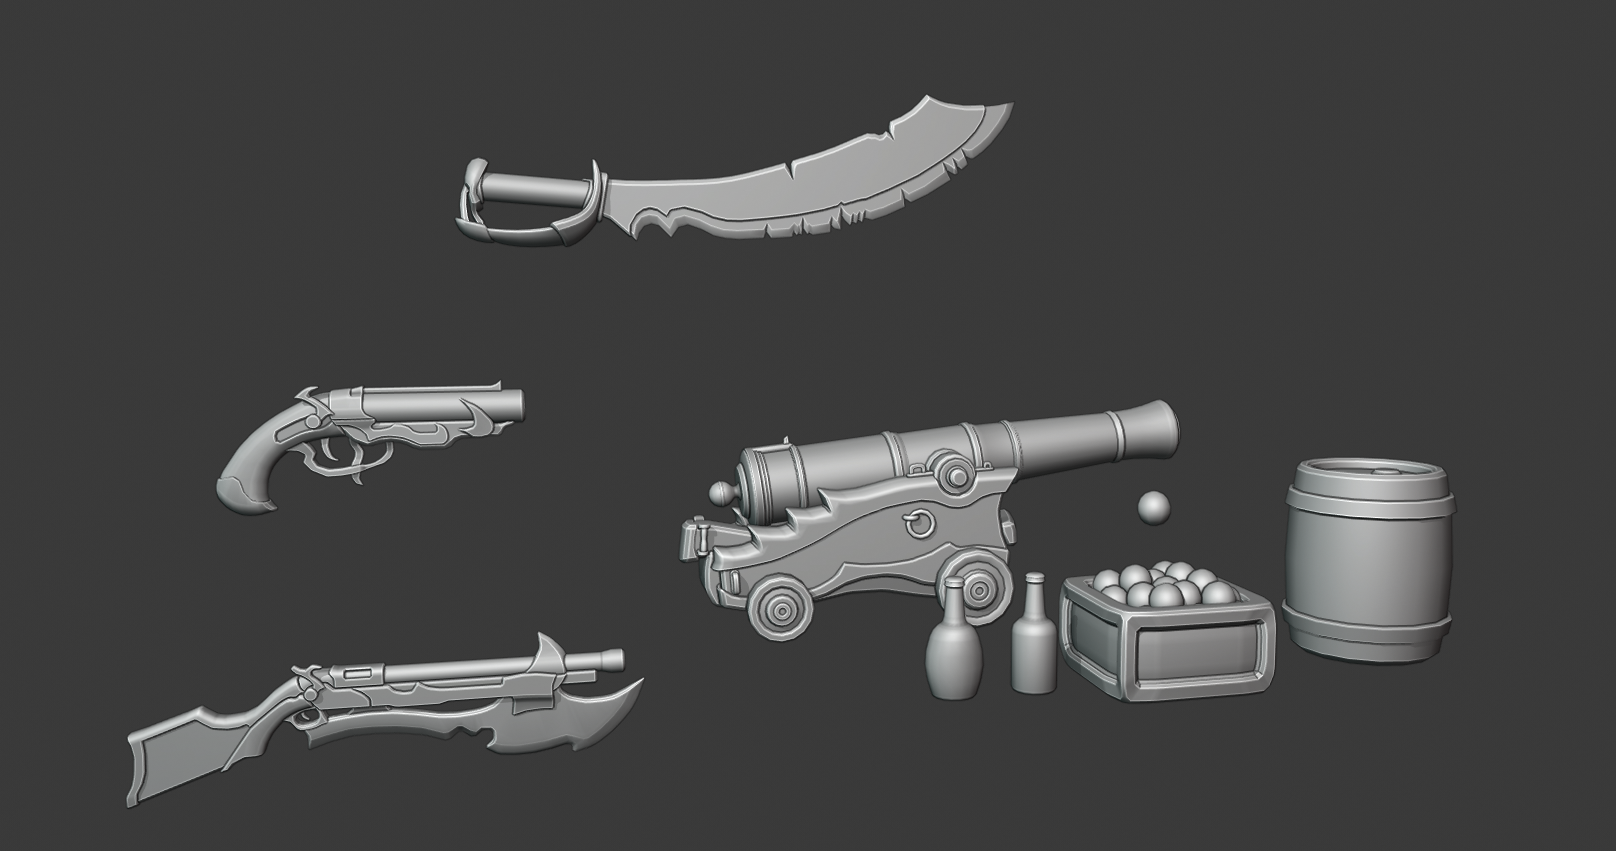
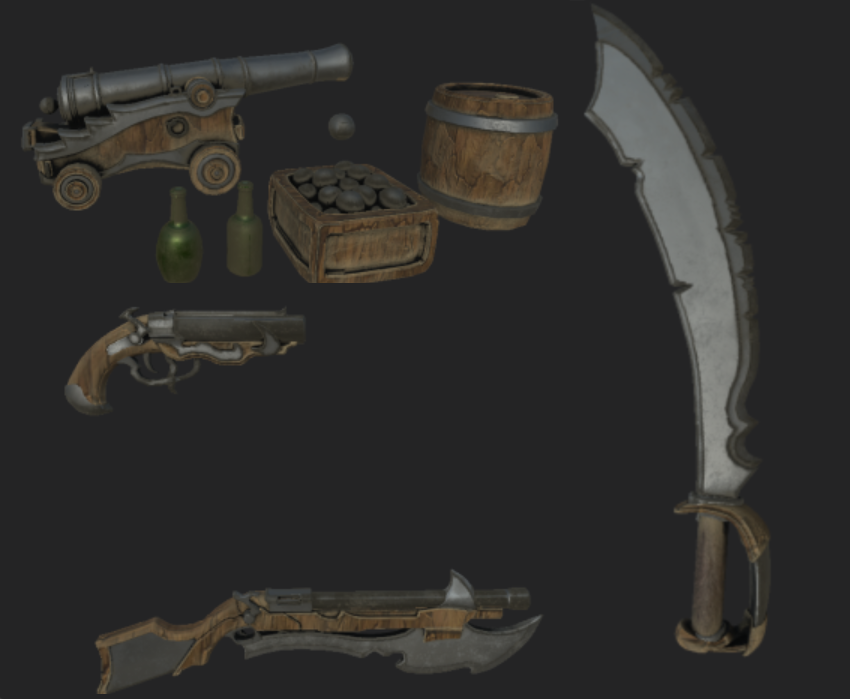
Now the crew needed some weapons, and the ship would need some cannons and decorations, so I started making some props! Most references and concept art used were from some simple Google Images searches—nothing too hard to find.
I managed to finish those pretty quickly. Compared to making the characters and the whole boat, this was the easiest part. Here are the results of a few days spent working on the props:
If you’re interested in seeing my modeling workflow in action, I made a timelapse when working on the cutlass for the crew; it’s available on YouTube here:
Texturing
I had around a week left at this point to finish the project. I am still a bit new to Substance Painter, but I am starting to know my way around the app. I still use the default PBR format so that when exporting I get the following maps: Normal, metalness, roughness, color, and AO. Those are the ones I imported to Sketchfab in the end!
UVs were handmade for the boat and the characters since they were the ones with the largest textures. It’s a very long and boring process, but it had to be done to keep the texture’s resolution as low as possible.
For the dirt and overall shadows, here’s what I did:
- For simple shadows, I added a black colored layer with 100% roughness, gave it a black mask, then added a “dirt” generator to it. I turned on the “tri-planar projection” for textures where the UVs were not handmade or well placed.
- Then for additional dust, I added the “plastic dusty” smart material, then removed the main color layer from the folder to keep only the dust effects on. I made sure this layer was under the first dust texture, or it might give out some weird results.
I often ended up reducing the second dust layer’s effect. To do that easily, I either reduced the color map opacity over the whole layer, or I added a paint effect on the mask (just above the dust generator). I then set the brush to have a black color and a low opacity to paint out the parts where I wanted less dust.
For the wood and iron materials, I found some free materials on the Substance Painter website that helped a lot. I then hand-painted some rust on the edges of the metal to make it look less shiny. It was important, at this point, that all the colors matched with one another. I always try to add more details like more rust on parts that would be hard for the crew to clean or some screws and bolts holding the metal sheets together. I also like adding a black material with 100% roughness and a negative height to add crevasse around parts of the model I want to highlight. One thing to keep in mind is that you have to be well organised, and sometimes you’ve got to start from scratch to make sure you’re using the right method.
Rigging
Now for rigging! I’m a lazy guy and, since the characters all have human proportions and I wasn’t planning on making a full animated short film, I decided to use Mixamo. I would have to edit some parts of the rig (e.g., the heads or the shoulders) later on, but it still saved me a ton of time. Here is what they all looked like after a couple of hours of importing/exporting from everywhere:
Procedural rigs feel good to use but are often pretty buggy, depending on the characters. I ended up applying some poses and rearranging the topology and pieces of the models.
I started placing them on board the ship. This step was one of the best times I had while making this project. All the pieces came together nicely and it felt like placing small toys or figurines on a playground to create your own story! I managed to finish this part with a few days left on the clock! Now, it was time to render and upload this to Sketchfab.
Using Sketchfab
The biggest problem when making a project this big is choosing which parts to render. I used to have a lot of my work not being shown on my renders when turning 3D models into 2D images. This is where Sketchfab makes my day! Not only can I get all the details I want to show to other people, but the visuals are awesome for real-time rendering!
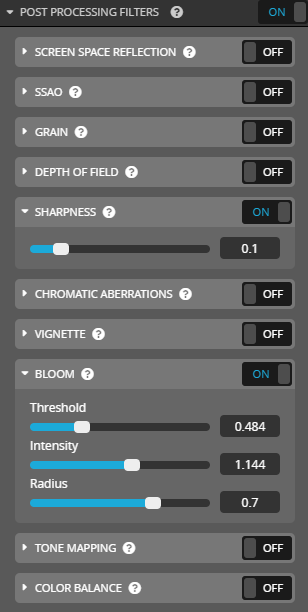
It is very simple to upload my projects, too. Since I use PBR materials, I just have to assign the textures in the right places and then figure out which HDRI to use. I like adding some bloom and a sharpen effect for post-processing and sometimes screen space reflections for specific cases like glass or mirrors.
For lighting, here are the HDRIs I use the most:
- Treasure Island and Road in Dordogne are the ones I use the most on my projects. They rarely ever hide small details and the colors feel good.
- Pine Tree Arch and Queen Mary Chimney are both really good choices, too. I love the different colors they give to each part of the model. I often only use them for screenshots or previews, as they tend to hide small parts of the model and even more so if there’s a bloom effect in action.
On some of my projects, I’d rather take screenshots on Sketchfab using the Sketchfab screenshot tool. It fells a lot better than making full Blender renders that require a lot more work for similar results.
Since this project was pretty large and I didn’t want people to miss the crew or some of the props in the scene, I added annotations all around the ship. It was my first time using them and they’re really useful and simple to place—I will definitely use them more in future projects!


