Introduction
Hello! My name is Ellie DB! I have been studying video game design at Albert-Jacquard in Belgium and, after graduation, moved to Japan for work (and to live my dream). I have now been working for over two years as a 3DCG Designer at Nitroplus in Tokyo and I absolutely love my job!!!
I started using Sketchfab during my studies and quickly fell in love, so I made a few models during my free time, trying new techniques, having fun creating little scenes, making cute models, and improving myself.
I have been quite busy with work lately and haven’t posted much…that is until I suddenly got the idea for a new model and I simply had to do it.
So here we go, I hope you like it!
Inspiration
Finding new inspirations is really important when working as an artist. This is why I am always trying all kinds of games, visual novels, series, books, and movies in order to broaden my horizons (and it is totally not an excuse to play a lot ;) ).
Lately, I discovered the visual novel Hashihime of the Old Book Town by Adelta, which I really recommend, not only for its amazing storyline but also for the beautiful graphics!
CG events are turning reality into a world of imagination, of hallucination made with explosions of colors and patterns. What if…what if we could really enter that world? It would be such a unique experience.
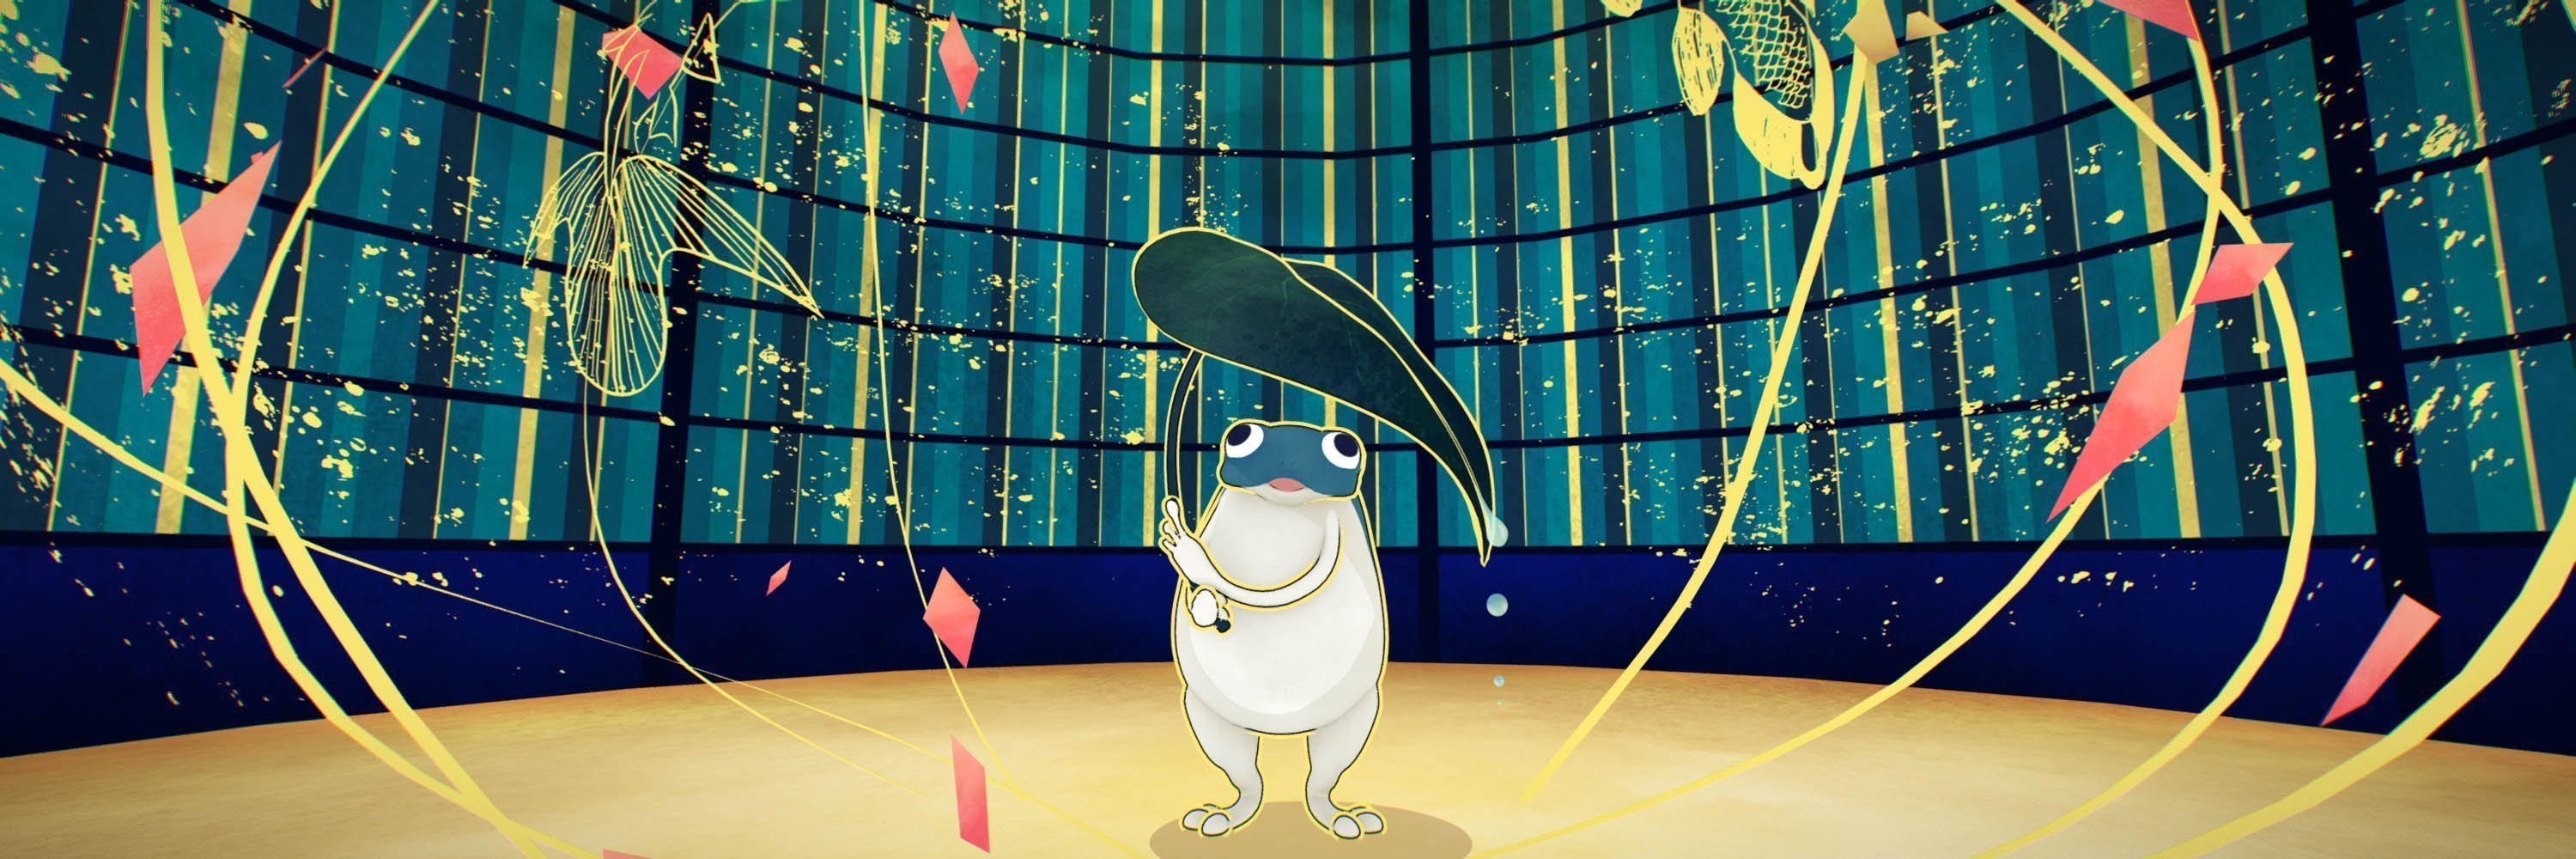
Sketchfab was in fact the best way to do that. Anyone could see it and “enter” a little part of that world. As for which model to do, I naturally chose to make the scene of the first appearance of the cute little Frogman in the game.
Modeling
Now to give shape to our frog…
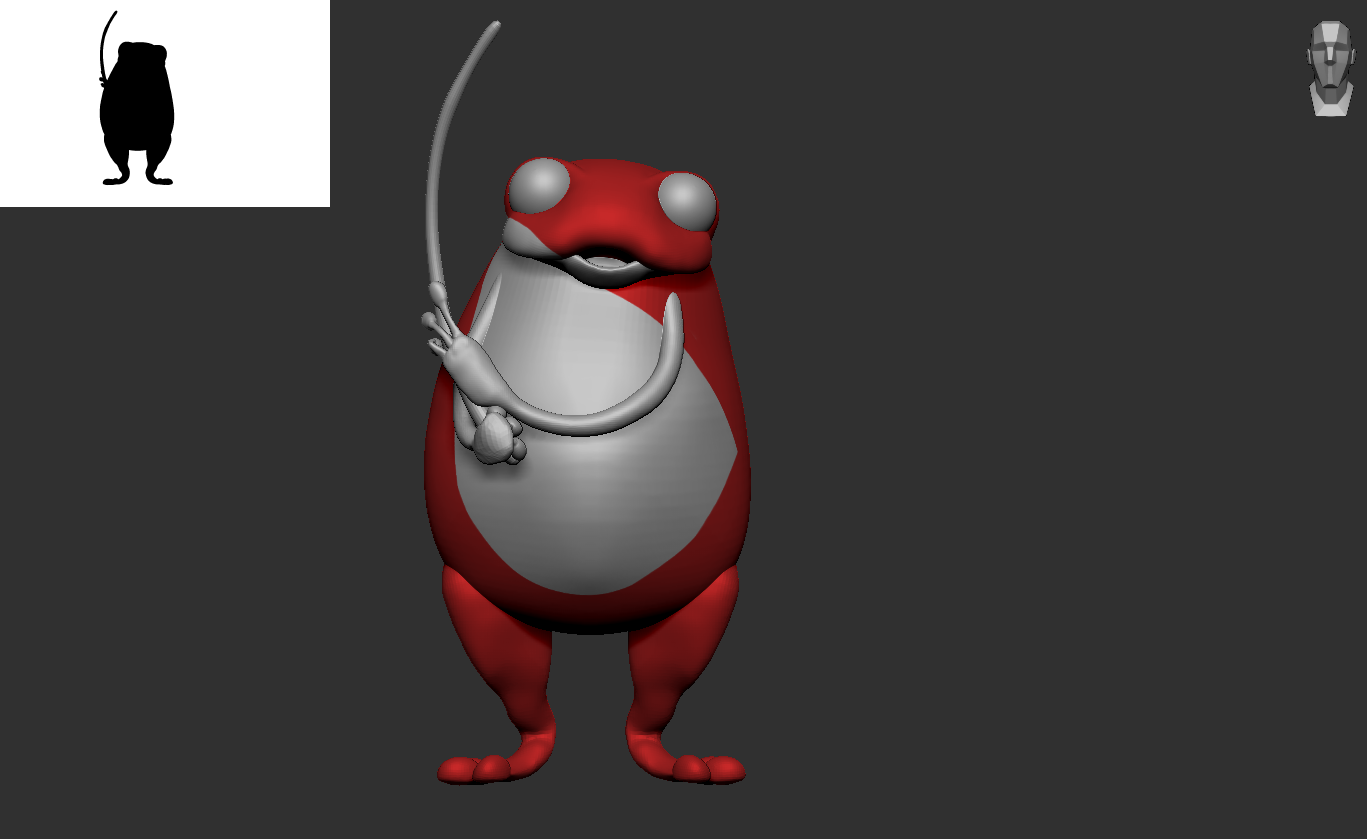
Being a round, cute little creature, I decided to head to ZBrush first (here version 2021.1.2), which seems to me to be the best choice in order to quickly get soft shapes.
Starting from spheres and using the Move brush, it only took a few minutes to get the basic form of the frog. I personally find it easier to first start mostly by feeling, then to correct the proportions based on the references.
The shape, the proportions and, of course, the silhouettes need to look good from any angle (the silhouette thumbnail is really handy!).
I like using some vertex color to easily see the different meshes. It doesn’t have to be the right colors for now, it is just to have a better idea of the end result.
I mainly use the basic brushes: Move, Smooth, ClayTubes, Inflate, InsertSpheres for the eyes, CurveTube for the arms, etc. The model is quite simple so it doesn’t need much more.
First, I do everything possible in symmetry, then break it by posing the model a little in order to add some dynamism to make it more interesting to the eyes.
While I planned to do the big leaf later in Maya, I made the rod in ZBrush as a reference to see where the hands would go and to create a more natural position for the fingers.
While working in ZBrush, I took the opportunity to draw some 2D shadows to use later on as a reference while making the texture. I used xNormal to bake the color into a texture file.
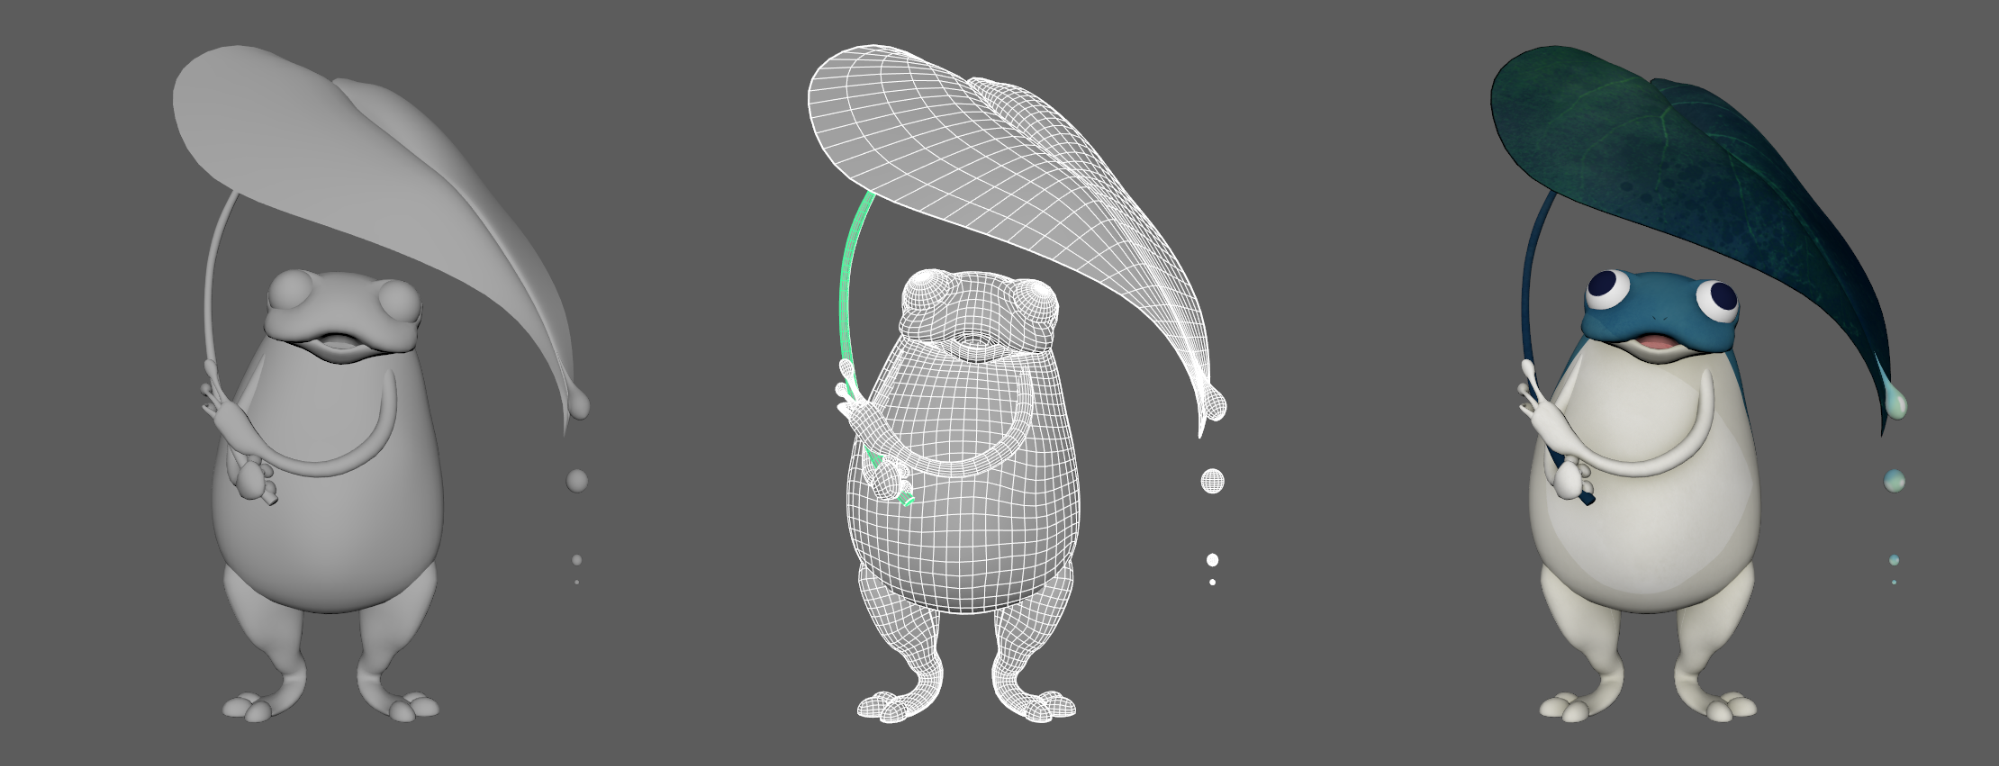
Once happy with the results, I used ZRemesher to get a low-poly version of the model.
I am usually working with video game models that need a clean wireframe; however, this model won’t be animated or used in a game, which means ZRemesher is more than enough in this case.
If needed, the wireframe can always be corrected later in Maya, the next step. I really like using ZRemesher for these kinds of models because it is fast and quite clean.
Time to export everything to Maya (working with Maya 2018)!
Once the mesh is imported into Maya, I start by smoothing the edges and making it all nice and clean.
Note: I have the habit of always creating layers with names and colors while working in Maya. While it is not necessary, it helps me a lot when working with big scenes with a lot of items, or here, with a model with different parts I would like to work on separately or select more easily.
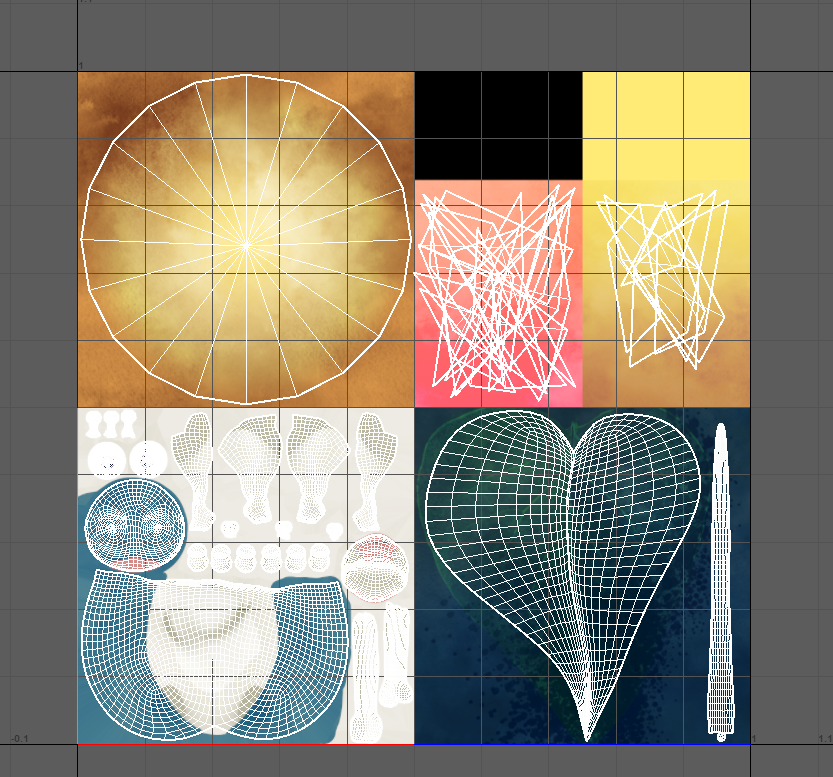
First step in Maya: creating UVs
The best way of doing so is by making the seams in the less visible parts of the model, which isn’t really easy on a round model. :3
Once the UVs are done, I took the UVs Snapshot and the vertex color maps that I had baked in xNormal to Photoshop and started drawing the textures.
Textures
I decided to go for an unlit scene to have a more 2D drawing style rather than a 3D one.
The textures are all made by using a base color, some light shadowing, and finally adding some details in the form of light variations and patterns. I tried to respect the original design as much as possible while translating the drawing style into my texture.
I usually always go back and forth a lot between Maya and Photoshop to check the texture.
Note: I first did many textures+materials for all the different meshes but, before exporting into Sketchfab, I decided to merge some of them to reduce their number and make things easier. In the end, it looks like some kind of atlas textures. I left the texture for the water droplets separate since I was planning on using a different translucent material for it.
Now for the outline!
There are a few ways of doing an outline for a model. Since I didn’t have much time, I opted for the fastest one (not the cleanest, though).
I exported my model once again into ZBrush, duplicated it, then, using the ghost transparency mode, I inflated the copy of the model, not too much, but enough to see a nice outline around the original one.
Deformation → Inflate
Back in Maya with my inflated model, I did a Mesh Display → Reverse in order to change the directions of the normals and make them face the inside of the model, and then used Backface Culling to hide the back sides (now facing out) and only see the model from the “inside”.
Display → Polygons → Backface Culling
Time to do the background!
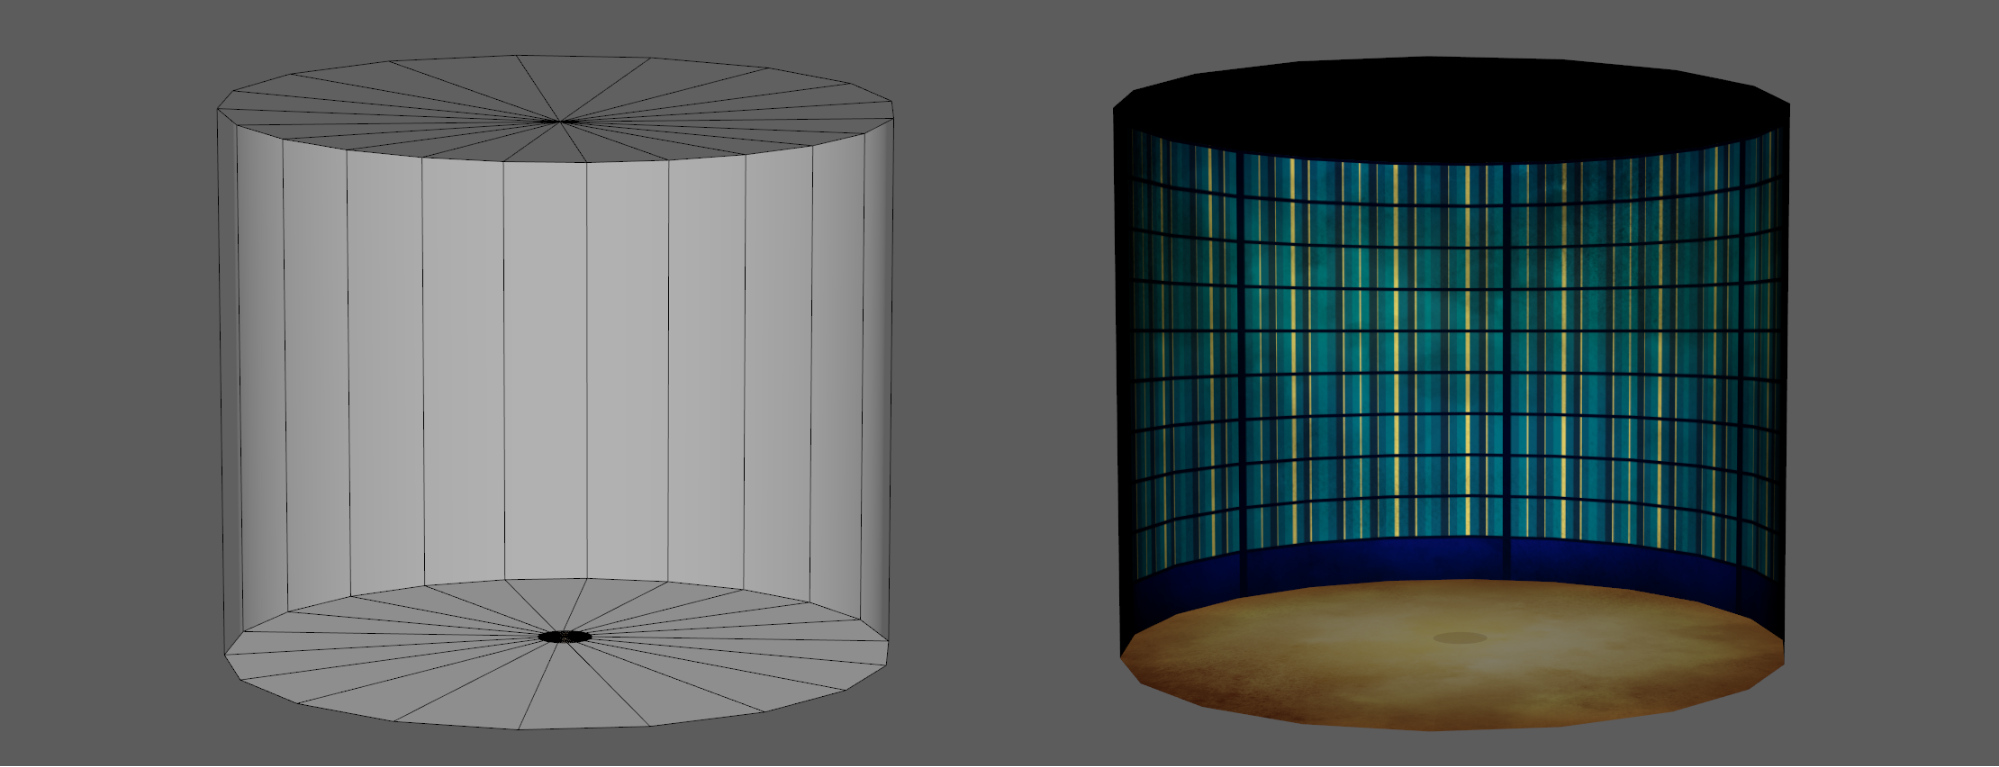
I wanted to create a little scene to have the background turn with the model so I decided to put it in a box, or, more exactly, a cylinder in order to not have any visible angles. I used the same technique as the outline.
I drew the texture based on the original illustration while making it seamless and adapting the UVs of the mesh to have the correct scale compared to the frog. I also used a little round plane with a translucent material to create a fixed shadow for the character.
Finally, to add life and details to the scene!
One of the visual aspects of the original illustration is the explosion of colors and details, and this scene wouldn’t be complete without it.
I wanted to add some particles on a 3D level, so that when you turn around the scene it wouldn’t just be flat but would have a more immersive dimension:
- I first created a sphere with a texture composed of paint spots like particles to go all around the frog.
- Then I added those long curved line meshes with a small opacity gradient at the upper end to make them softly fade away.
- Next I followed those up with little diamond shapes of varying sizes and orientations.
- And finally, I created some planes with the fish patterns that I re-drew based on the illustration.
All of these were made with subtle variations of colors in the texture to make the scene feel less flat.
Put it all together, and the scene is starting to slowly come to life!
Sketchfab
Now all that is left to do is import everything into Sketchfab and create the final scene with the right settings!
Since it is an unlit scene there is, obviously, no lighting needed:
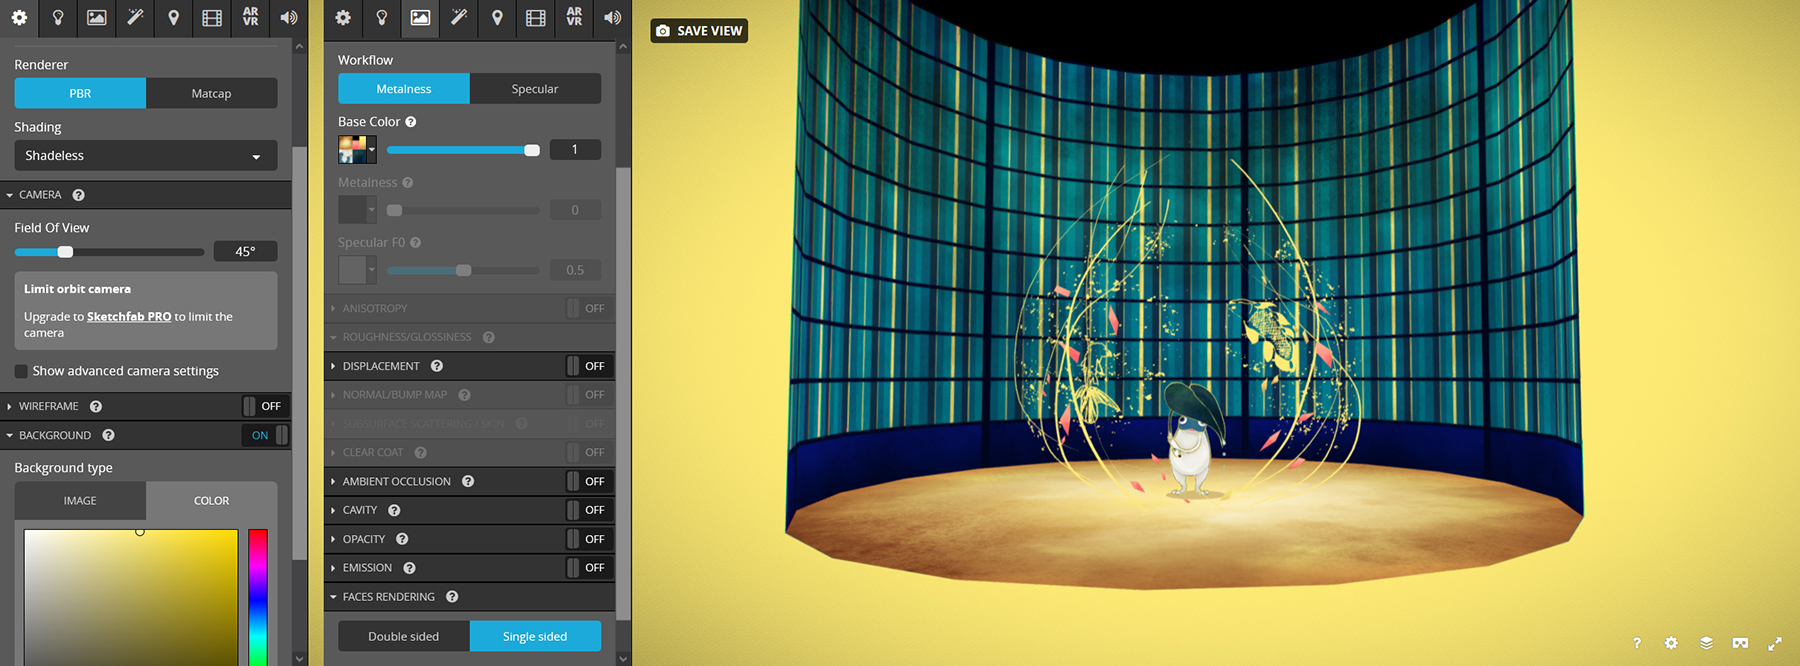
- Scene: The Renderer is set as PBR and the Shading as shadeless, to get that unlit setting. For the background, I took a color, the same yellow as the outline of the frog to keep the same color code for the entire scene.
The background can be customized entirely and adds even more dimension to the scene itself, which is a very useful feature. - Lighting: In the lighting tab, everything is disabled! We don’t need lighting this time.
- Materials: Now this one is really important! All the materials have, of course, the Base Color textures. Some, like the fish patterns, use the opacity with masks while others, like the water droplets falling from the leaf, have a translucent opacity.
And last but not least, the Faces Rendering settings! This is the one that makes the right meshes look good. The main meshes like the frog and the leaf, and the particles around them, are Double sided. However, the outline (and in this case the background) needs to be Single sided otherwise the frog mesh will not appear correctly and will be hidden by it.
Double/Single sided materials + shadeless shading is a winning combo to create nice-looking scenes and environments in Sketchfab, it gives a nice atmosphere and I really love the way it renders!
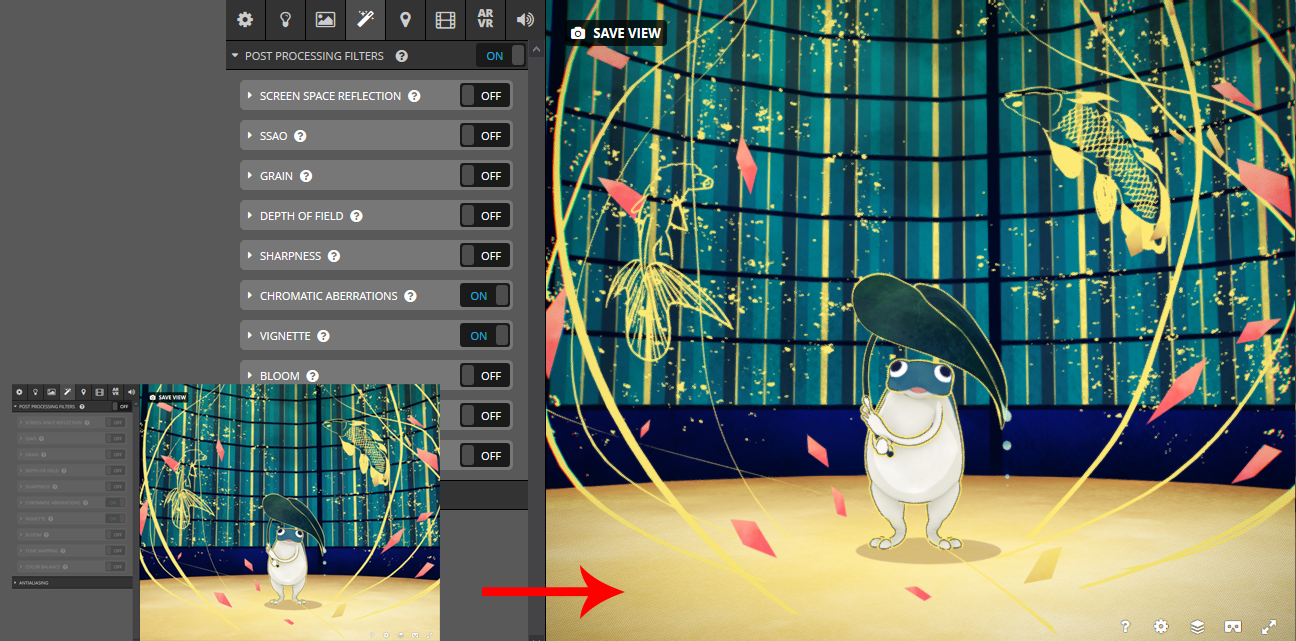
- Post Processing Filters: there are a lot of options to improve the final rendering of the scene. The best way is to play with them all and see which looks the best. I really like the vignette and bloom settings, and always try to improve the color and feel of the scene by changing the Tone Mapping. In this model, I use a little touch of Chromatic Aberrations, which has a very nice effect!
And voilà! Our little frog is ready to take on the world!
Conclusion
I had so much fun making this project! I haven’t done any personal models for quite a while, and I was really surprised to see how much I had improved since my first uploads on Sketchfab!
It really only took me a few hours over the course of two days to make, but I am glad I did. To be honest, I have plenty of other ideas I want to give shape to, but it will be for some other time (soon I hope^^).
What made me really really happy, and made it all worthwhile, was to be able to share this with everyone! I got some nice feedback and, even though it is not perfect, knowing that I made some people smile, made them happy to see it…it means the world to me!
Thank you so much.
