I invited Justin T Philips to explain his technique for creating cartoon outlines on Sketchfab.
This tutorial is a simple explanation for how to achieve the outline effect seen in my series of Skyrace models.
I personally first saw it used by XkungWork, but I have also seen it used in the very popular Barbarian model and many of Tsan38’s models.
The short explanation is this:
EXTRUDE > SEPARATE > FLIP NORMALS > MOVE UVs TO A SOLID COLOR
The long version is as follows:
I work in Maya, but the principle technique should translate to any program.
Before we start, be sure to enable BACKFACE CULLING:
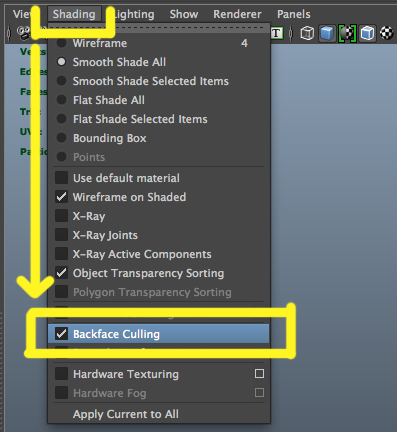
Enable Backface Culling
Here is the model I will be demonstrating on:
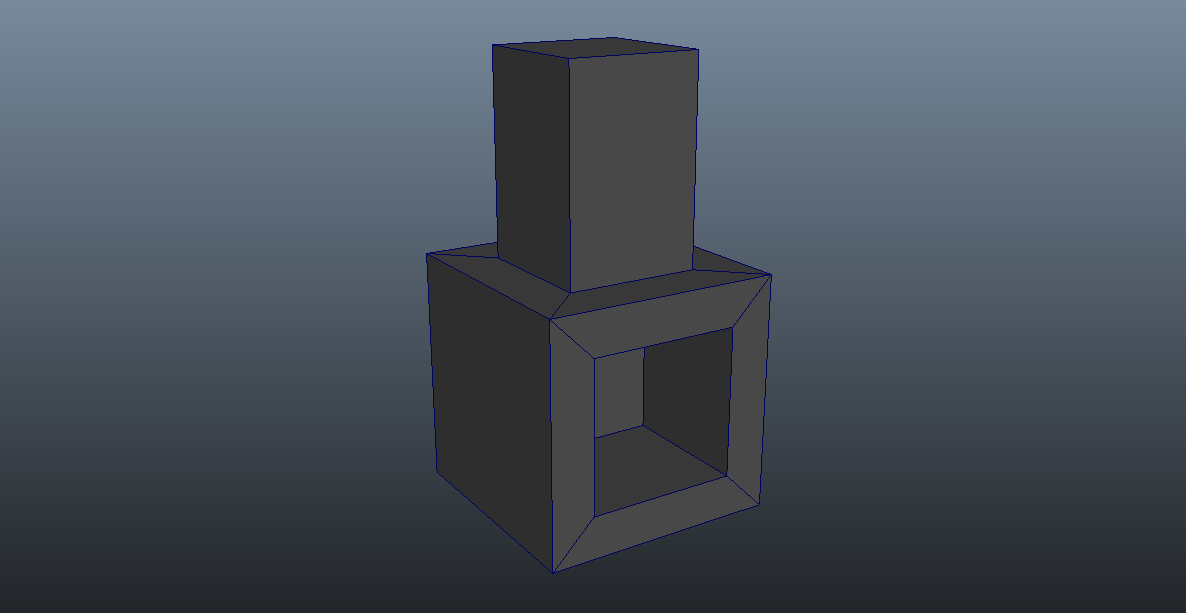
Demo model
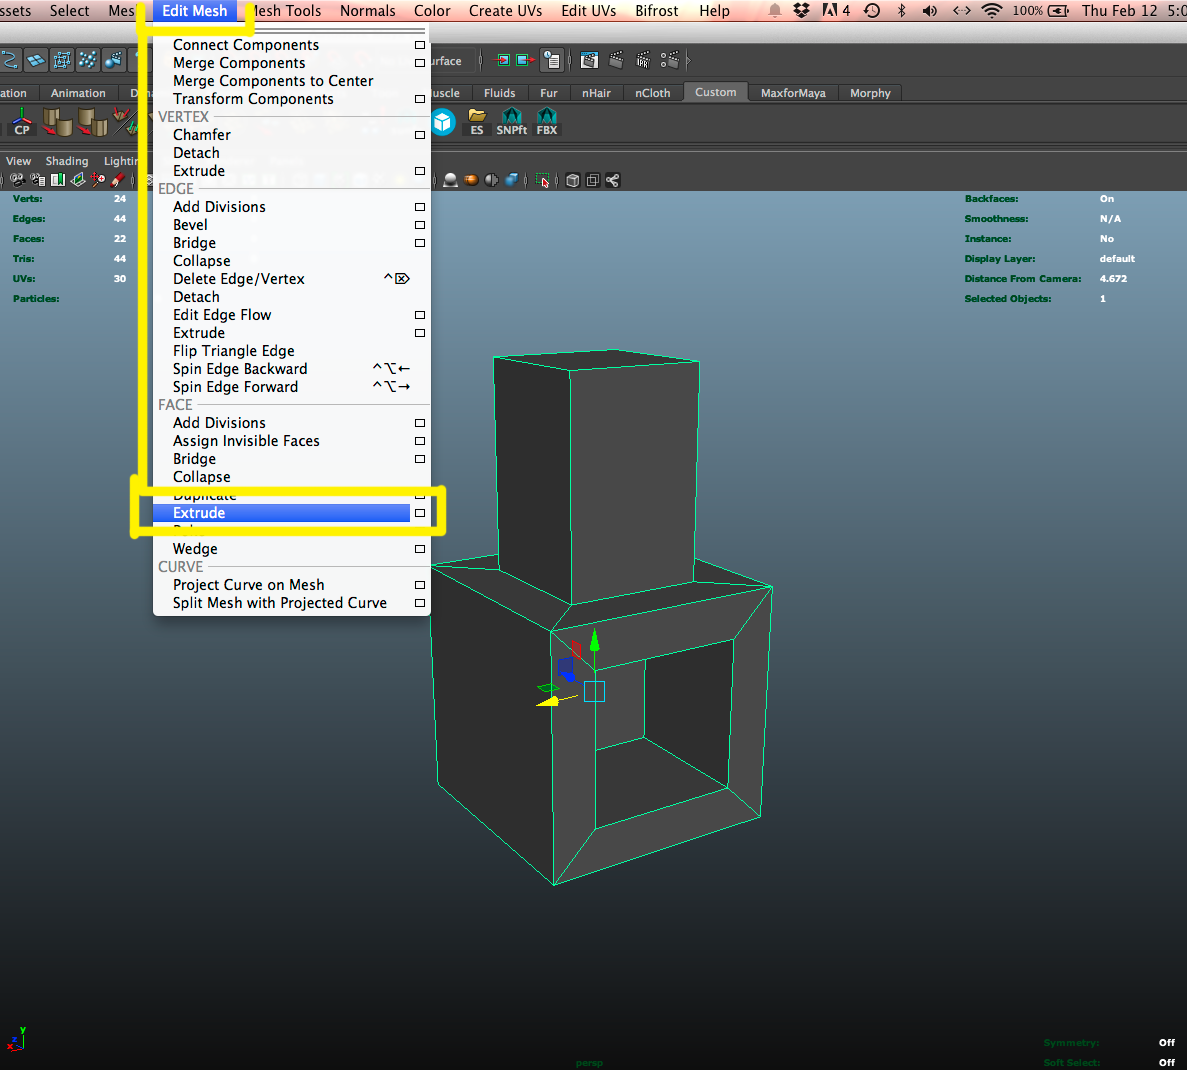
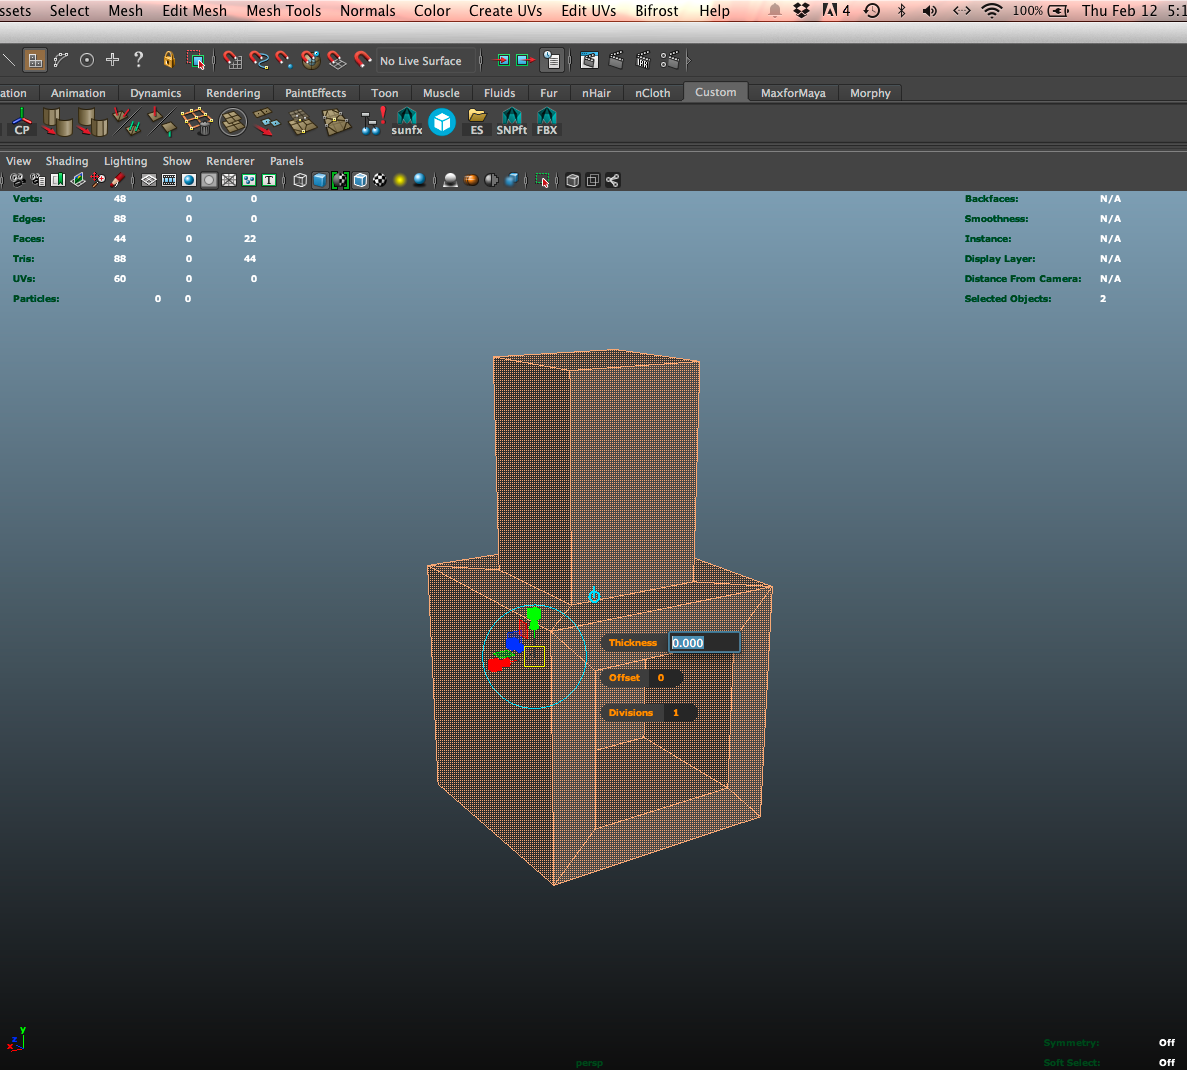
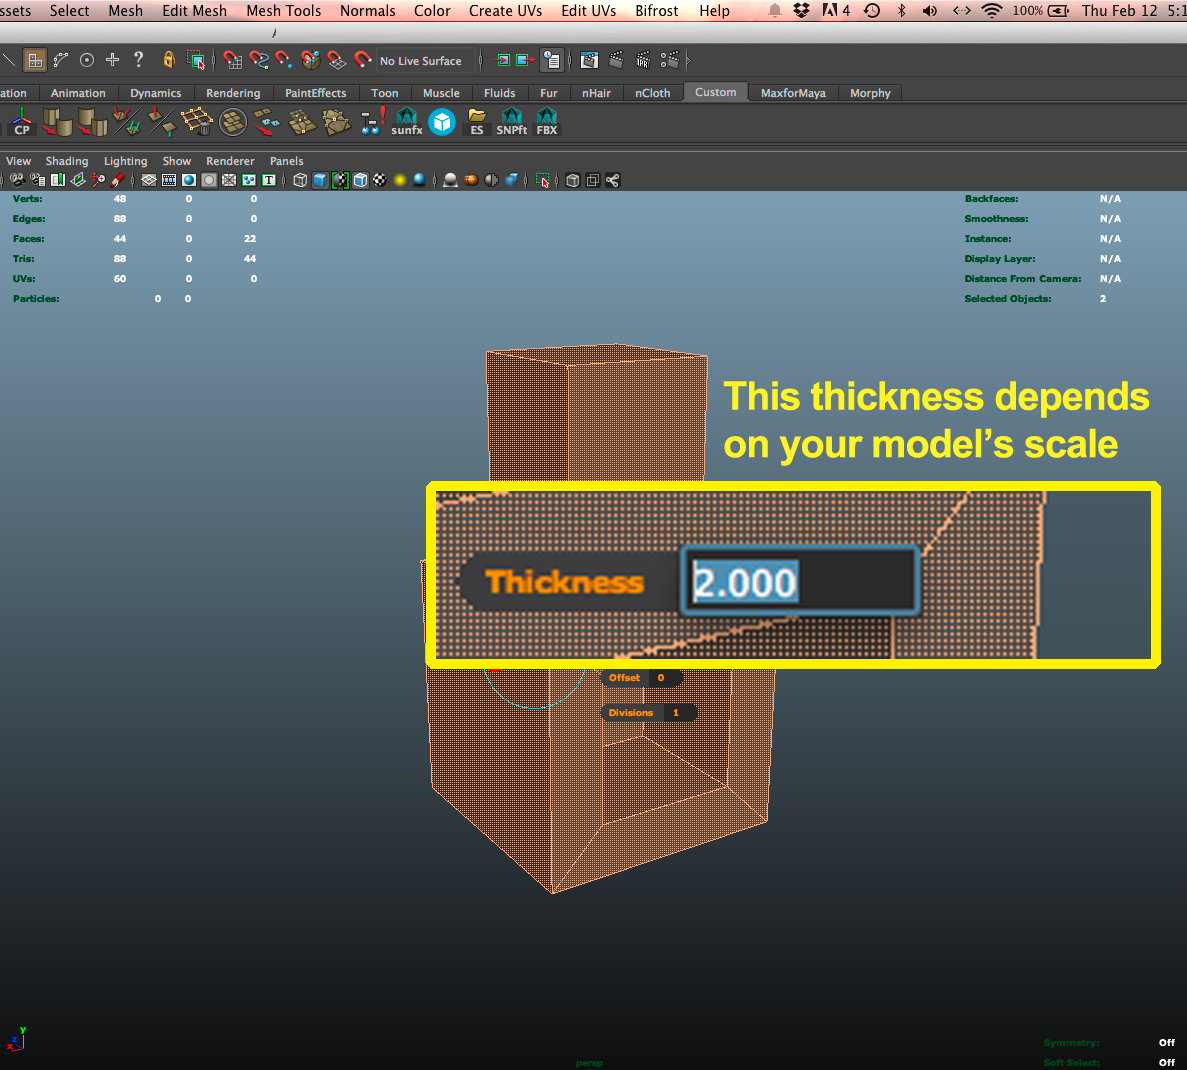
Step 1: Extrude
We’ll extrude the model to slightly enlarge it:
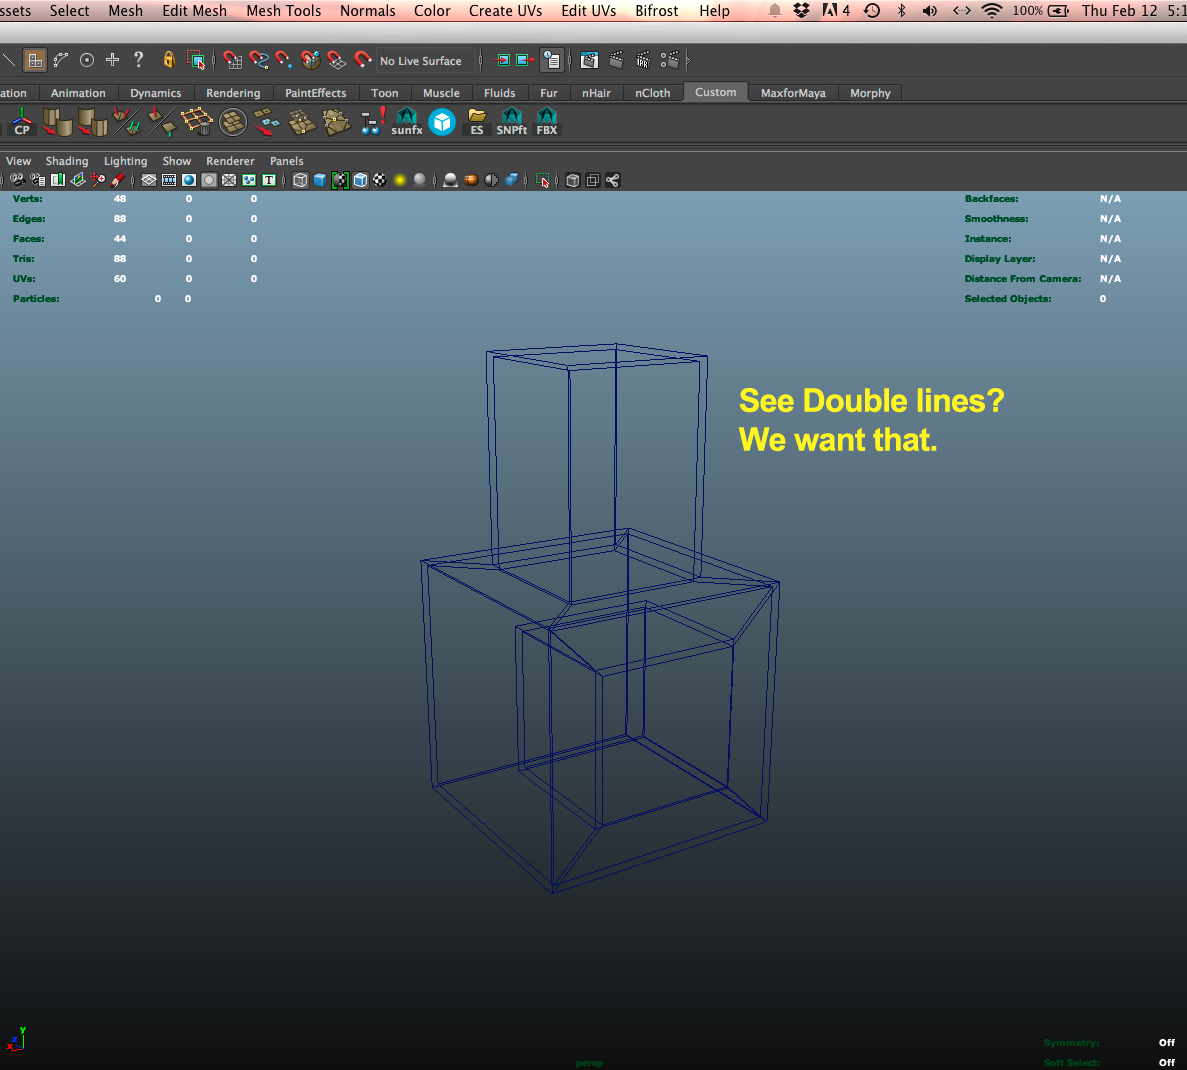
Now we have 2 sets of surfaces, but the model is still one “object” so we need to separate the shells. But first, lets flip the face normals so that we can see the original and the outline meshes.
Step 2: Flip Normals
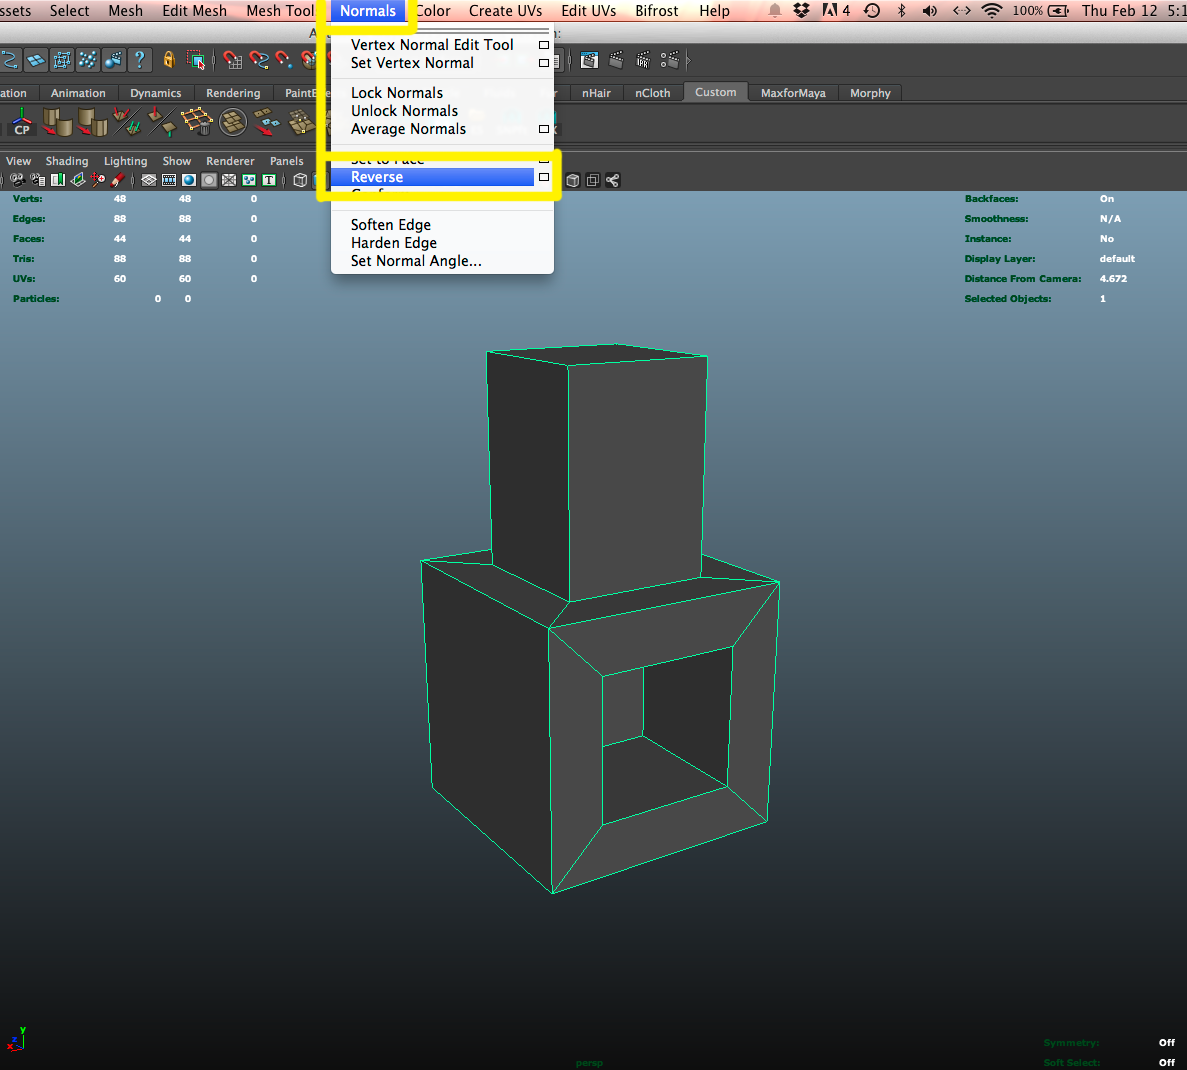
Now you can already see the effect.
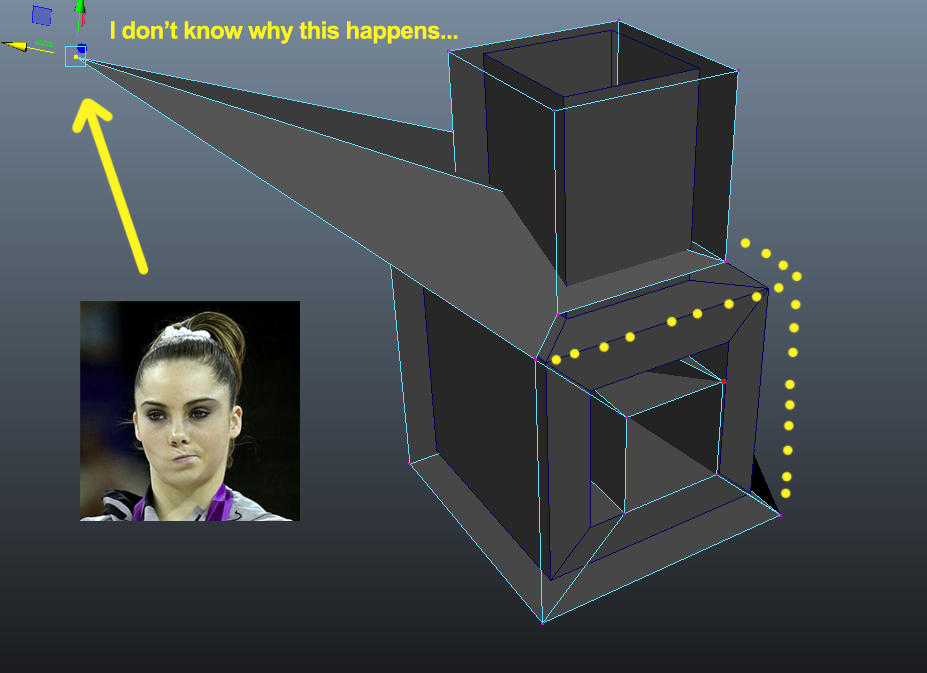
NOTE:Extruding some meshes may result in vertices flying off and making the model look like it’s exploding. When this happens you will need to clean them up manually. I like to grab each renegade vert individually and use Mesh > Average Verts
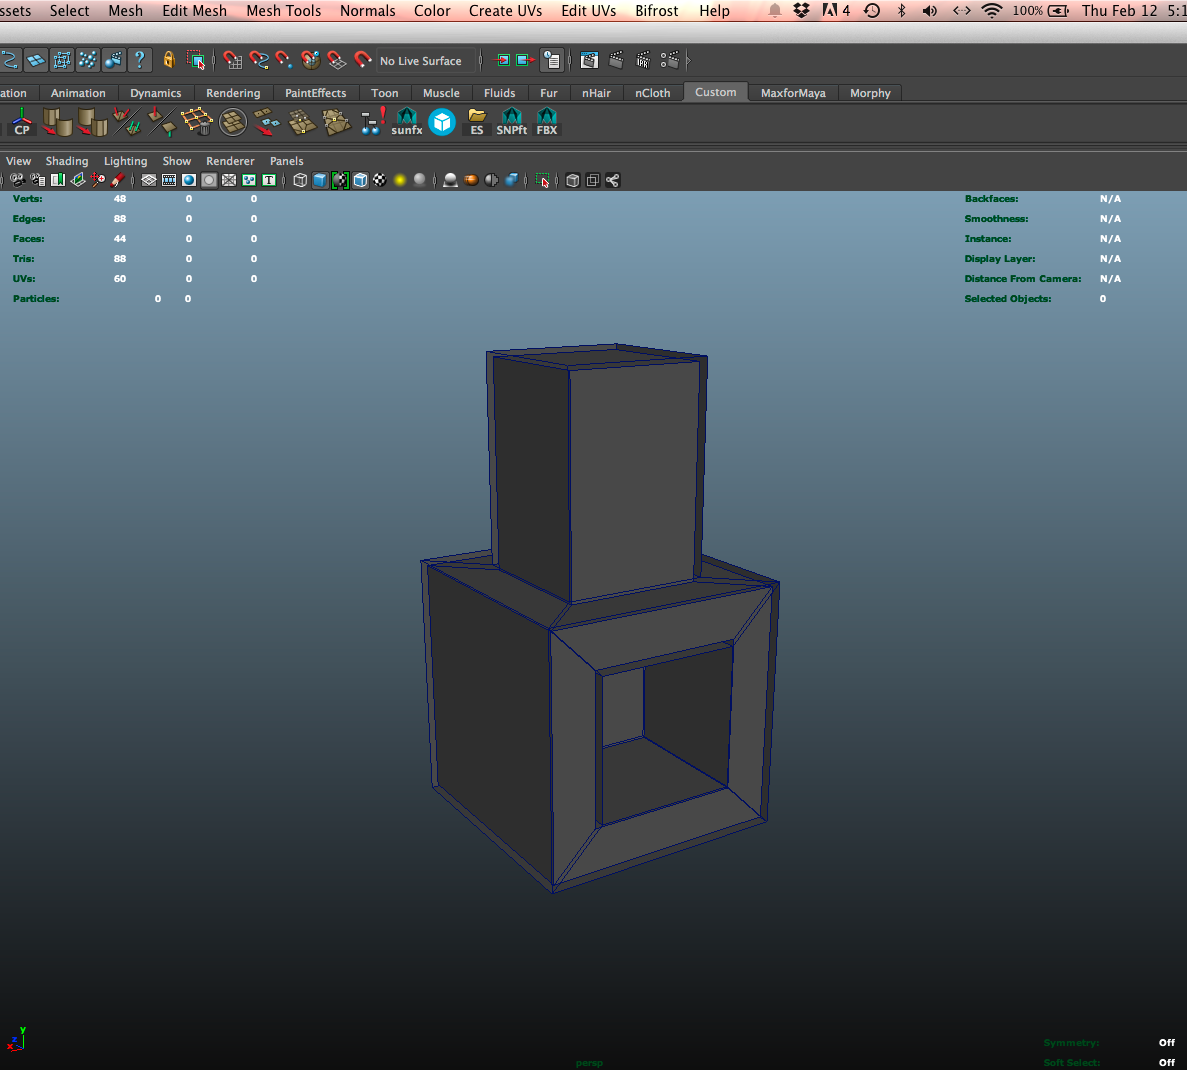
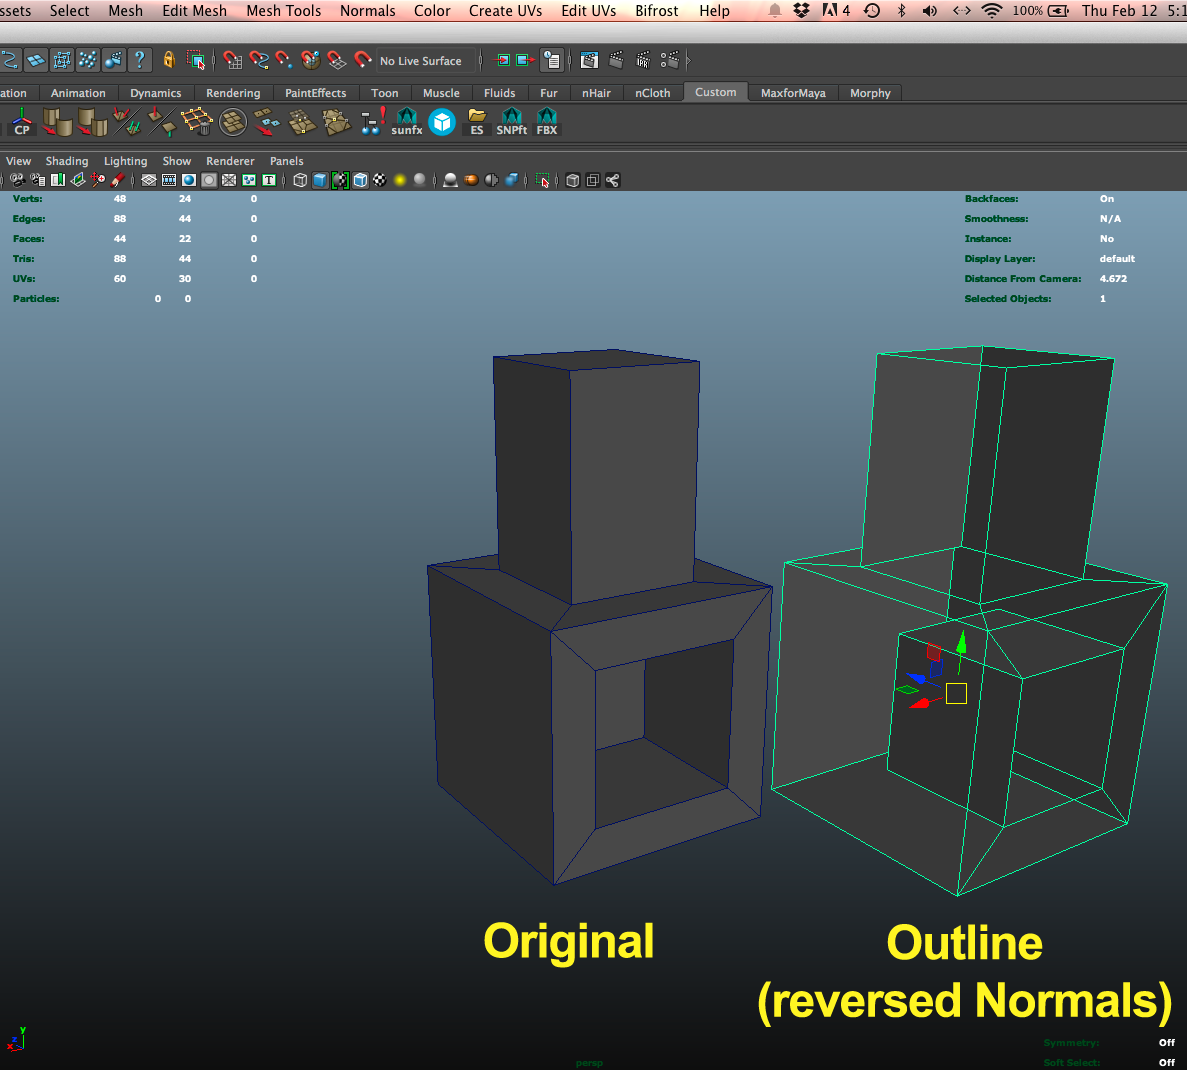
Step 3: Separate Objects
After flipping, I like to split the base and outline into separate objects. This makes it easier to texture them later.

Below you can see the two objects next to each other for clarity sake.
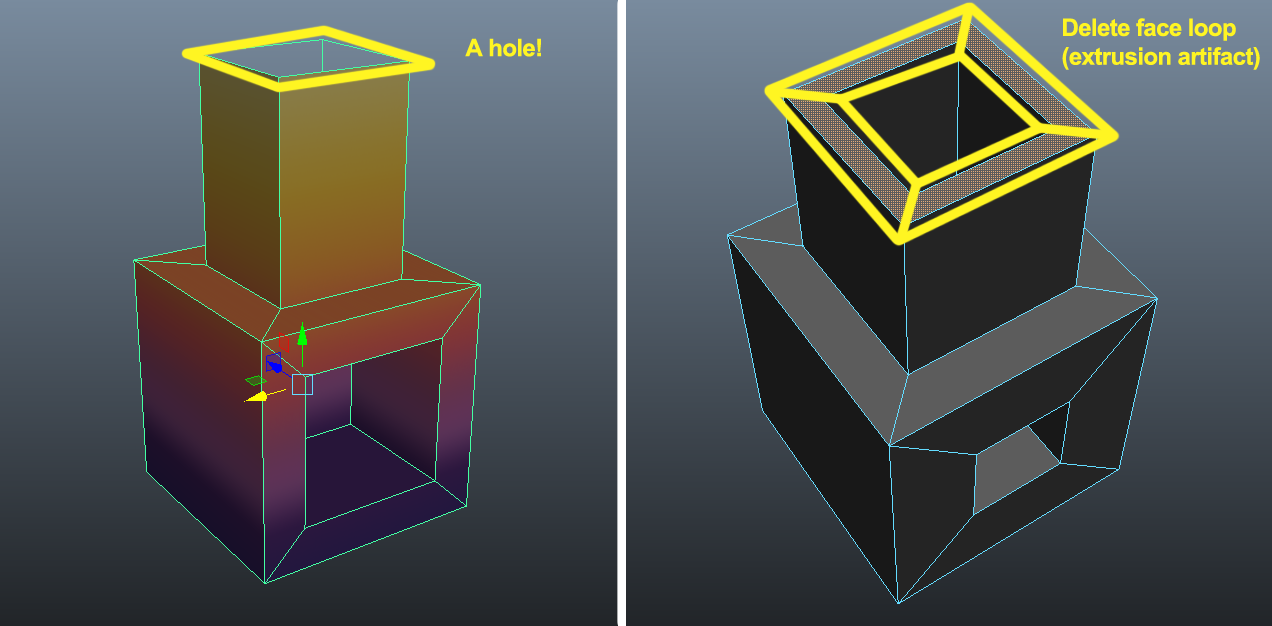
NOTE 2: If your base mesh has a hole in it, the extrude will have left a ring of faces between the original and the outline. You need to delete these faces before separation, or you will have to separate by more complicated means
Step 4: Texturing
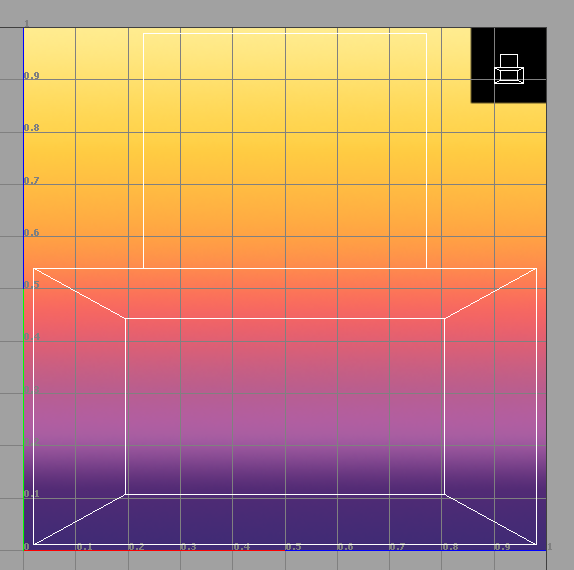
This tutorial isn’t about how to paint your models, more about how to UV your outline mesh. You want to make the outline after you layout your primary UV’s.
I set aside a small area of my texture map for the outline color. Here I have the UV’s for the base taking up most of the sheet, and you can see the outline UV’s shrunk down in the top corner. Since it’s a solid color, you could really go very small with this square.

Step 5: Sketchfab Setup
I use Sketchfab’s export script to upload models. It sends everything in your scene, so be aware of that.
Once it is online, go to your 3D settings and set these parameters to achieve a cell shaded look:
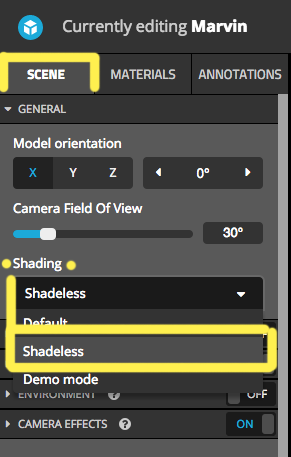
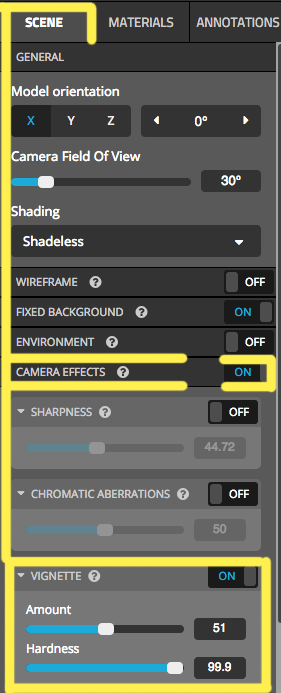
I also apply a fully hard vignette to my models, but that is really just something I’m doing to unify the Skyrace Series. I also set the FoV (Feild of View) down to 30º. This flattens the model, making it look more 2D. You can think of FoV as a “Perspective-ness Slider”.
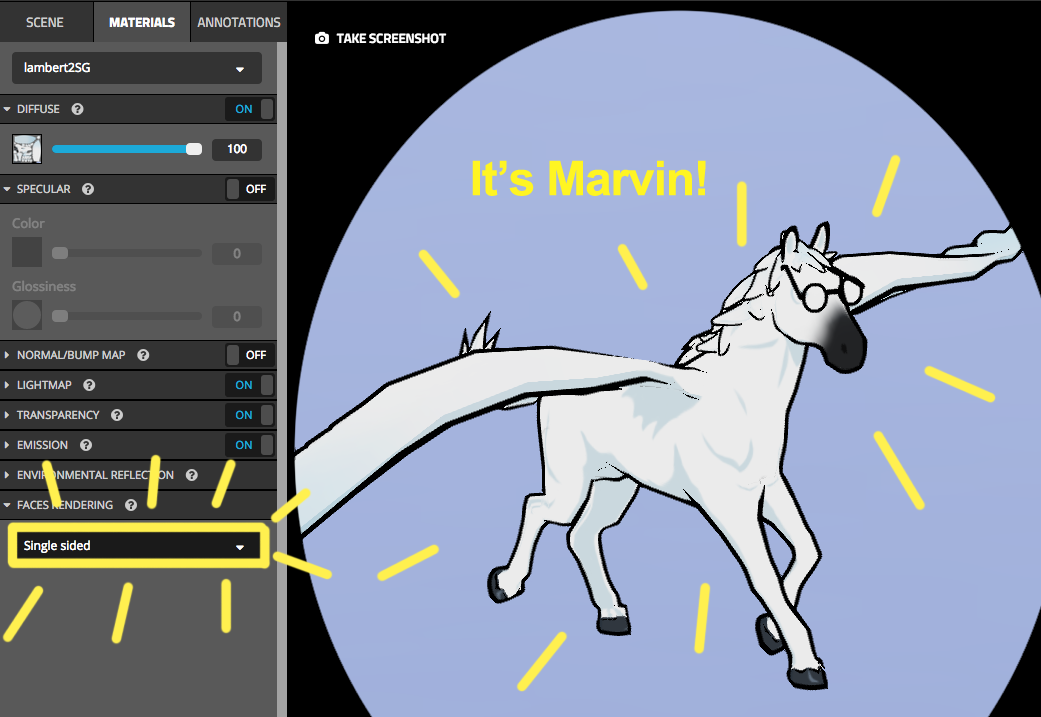
In order to get the meshes to display properly, you must set the FACE RENDERING to SINGLE SIDED:

That’s it. Hope you learned something.
Thanks Justin!
Check out Justin’s Portfolio on Sketchfab and especially his Skyrace series. You can also follow him on his website, digitalthornhill.com.
About the author
Bart Veldhuizen
Community Lead at Sketchfab. 3D Scanning enthusiast and Blenderhead.