Sketchfab models can be embedded anywhere on the web, and now it’s easier than ever to customize the look of your embedded models. We’ve updated the embed interface with new features, improved its look, and added helpful tips to clarify what different settings do.
Even more options for customization
Our updated embed pop-up includes new features and improvements on old features, as well as a more user-friendly way to add effects that could previously only be achieved by adjusting URL parameters manually in the HTML code.
The embed above has a gold color theme, the new dark mode enabled, and we’ve removed the watermark link (bottom left) and several UI & info elements for a cleaner look.
Appearance
- Fixed size: If you know exactly what size you want your embed to be, you can set the height and width of the iframe in pixels. If you do not set a value, the embed size will respond to the size of the window that it’s in.
- Description: You can easily show or hide the embed caption that appears just below the viewer.
- Theme: The new dark theme feature allows you to put a dark background behind the viewer’s buttons, making it easier for viewers to see the buttons on light-colored backgrounds.
- Brand customizations: Enterprise customers have the option to remove the Sketchfab branding in the bottom left corner of the viewer, while customers with Business subscriptions and above can remove the watermark’s hyperlink.
- UI color: Enterprise customers can now customize the color of the play button and other visual accents in the viewer.
Content
- Autostart: If you want your model to load immediately without the visitor needing to press play, select Autostart.
- Animated entrance: When selected, this setting adds a little spin-and-settle effect to your model upon loading.
- Turntable animation: Previously only available using manual URL parameters (“autospin”), you can now set an embedded model to automatically rotate after loading. No need to upload turntable animations—just select autospin to show off your model in 360°. The default value is 1, but you can also adjust the number manually in the code. Smaller numbers (e.g., autospin=0.2) make the model spin more slowly, and larger numbers (e.g., autospin=10) make the model spin faster. You can even set a negative number to reverse the direction (e.g., autospin=-1).
- Preload textures: This is useful if you want to prevent your viewers from seeing low-resolution or missing textures during the model load time. Some devices struggle to load high-res textures at the same time as the model, so preloading textures is generally not recommended, especially if you’re targeting iOS devices.
- Transparent background: You can use a transparent background if you want your model to blend into the background of any webpage. This is not recommended unless you really need it because it can slightly hurt viewer performance and prevents anti-aliasing, causing jagged edges around the model. It can also cause problems when trying to use some post-processing filters such as Depth of Field. Typically, setting a solid color background in 3D Settings is sufficient.
- Navigation hint: Now you can adjust how often you want the “click & hold to rotate” navigation hint to appear on a model—always, never, or once per session.
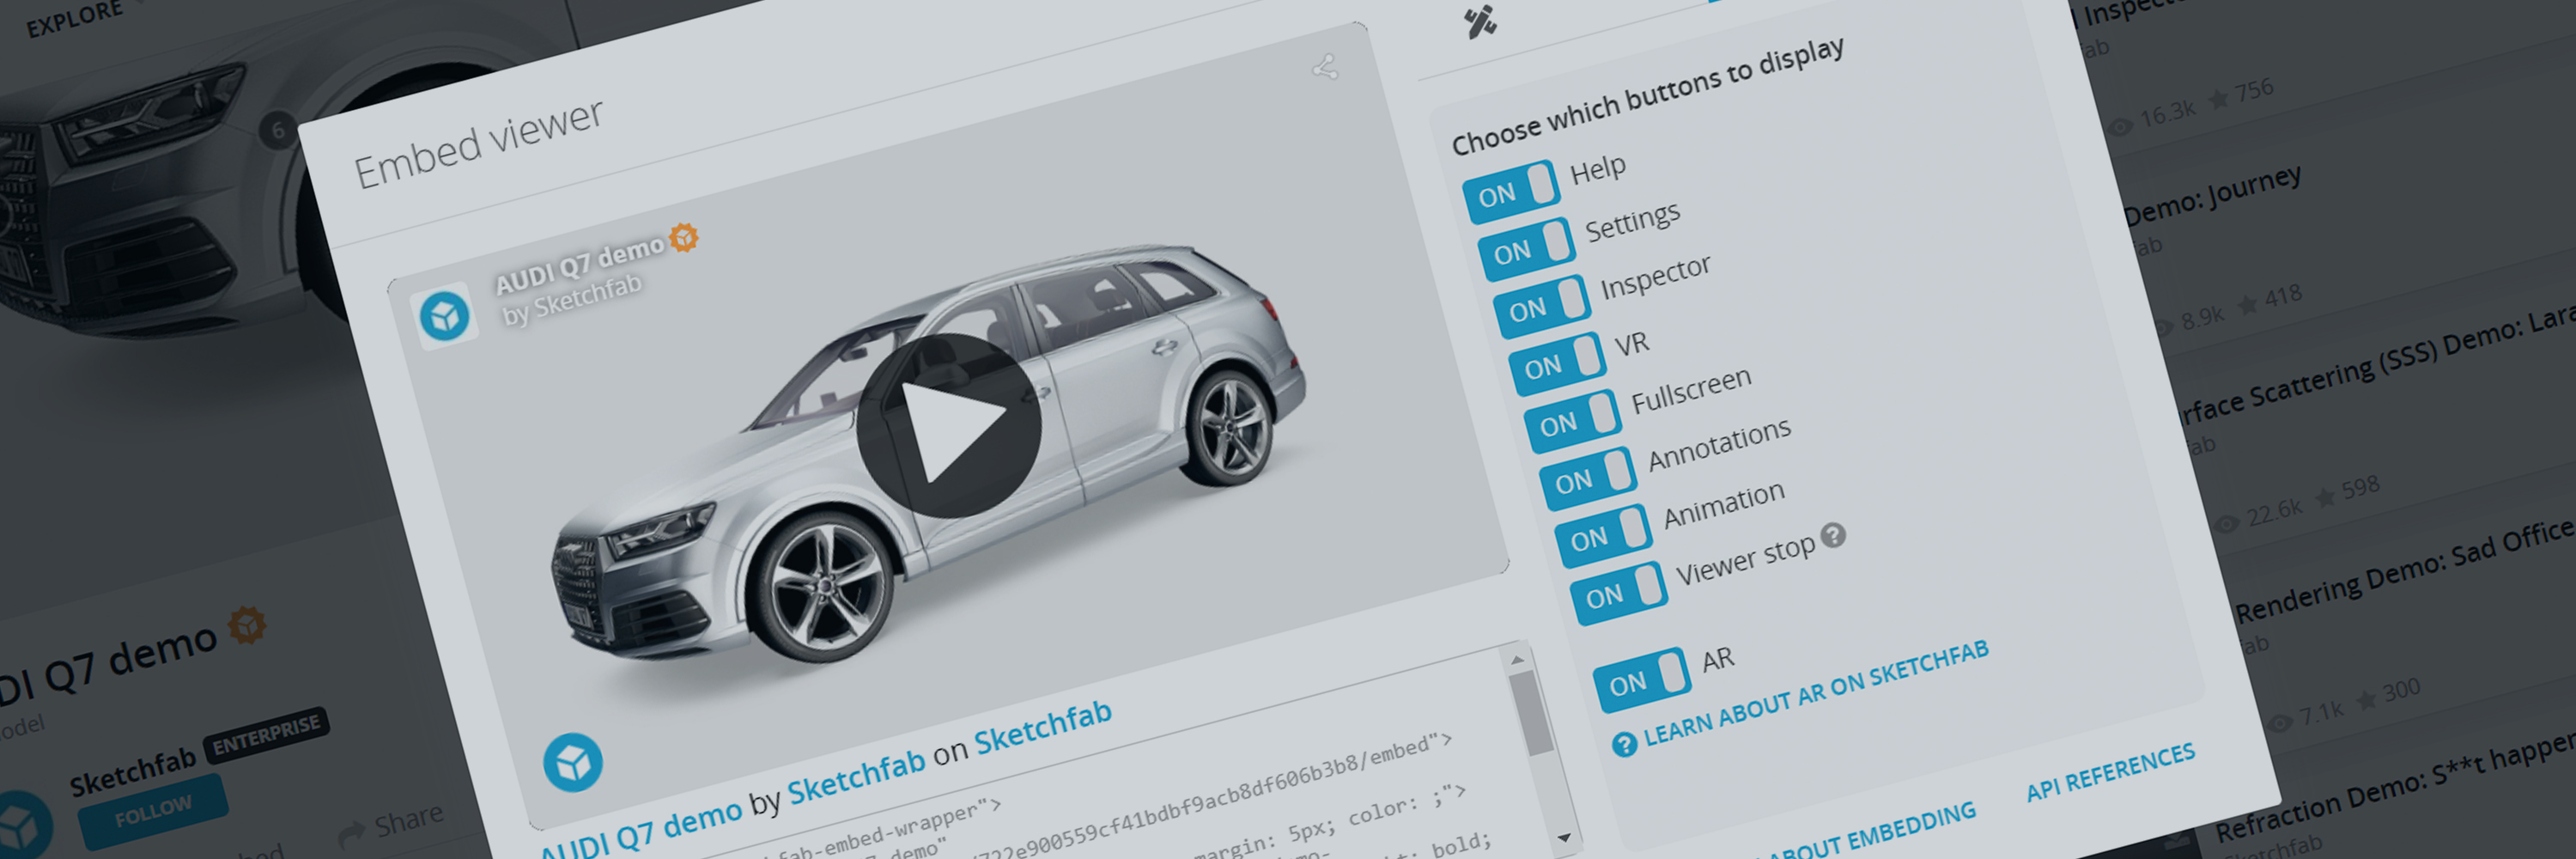
Control Options
Customization of buttons in the viewer is limited to community members with a Premium subscription or above. These settings allow you to show or hide buttons that let the model’s viewers view or interact with the model in different ways.
Enterprise customers are able to toggle app-free AR on or off.
Annotations
- Choose how to display annotations: You can use this setting to make your annotations visible upon loading the model. If you opt to hide the annotations, viewers can toggle through them using the annotations bar, but the numbered annotations themselves will not appear on the model.
- Preselect annotation: It’s now possible to select an annotation to start on when the model loads. Just select your starting annotation from the dropdown menu that appears when you toggle the feature on.
- Autopilot: Use this feature to automatically and seamlessly guide the viewer through your annotations. You can also choose how many seconds to pause on each annotation.
Customize your embed
To generate an embed code for your model, just click the </>Embed link below your model’s name. The pop-up will appear and you can begin adjusting the parameters—once you’ve made all of your selections, just copy the embed code and paste it into the site where you want to embed the model.
Yamaha leveraged a white label embed to develop this 3D Configurator that lets you customize your own Yamaha Tenere 700 motorcycle.
About the author
Abby Crawford
Helping share community stories on Sketchfab.


