Sketchfab Team Member Christian teaches us how to create realistic transparency in your models and how to use Sketchfab to its fullest potential in order to bring out the complexities of translucent materials.
Introduction
When displaying real-time 3D graphics, we use many optimizations to increase the performance of our viewer. For example, we save time by not drawing triangles that are obscured by other ones closer to the camera. Once you turn on transparency however, we need to revert to other techniques. Several methods exist and each has its own pros and cons – some may result in a higher quality at the cost of slower rendering, while others will perform much better but may suffer in terms of image quality.
In order to help you decide which option is most suitable for each scene, let’s take a look at our transparency modes.
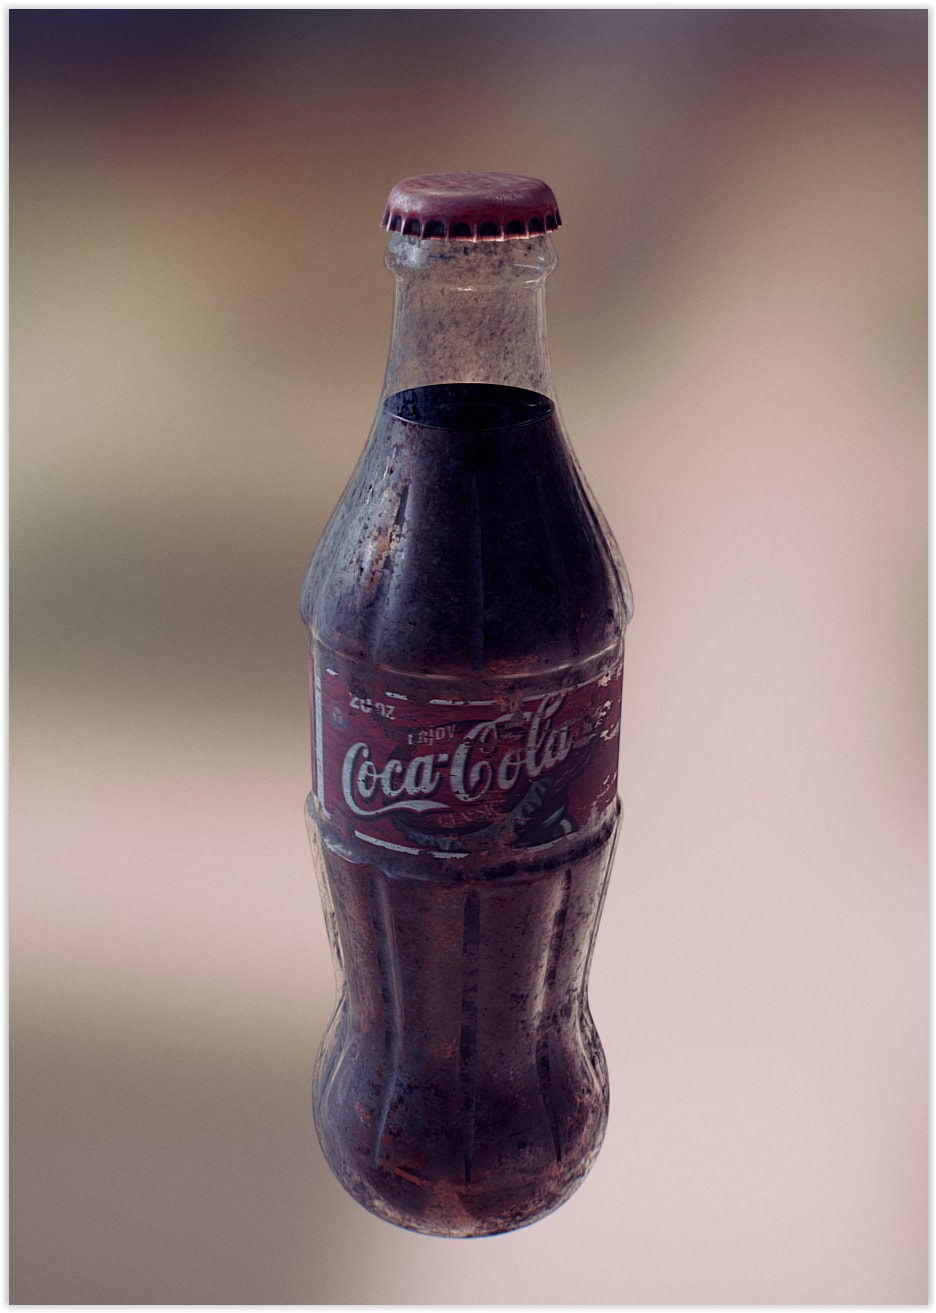
We will be illustrating the modes by creating a Coca Cola bottle – each layer in this model will use a different transparency mode:

Layers of mesh used for rendering : “Sticker_01a” for the Coca-Cola label
“Bottle_01a” for the outer-layer of the bottle — “Bottle_01b” for the inner-layer of the bottle
“Cola_01a” for the Coca-Cola liquid — “Capsule_01a”… for the capsule!
Transparency mode: Blending
This is the most ‘expensive’ or slow method. As always, we first sort geometries (separate objects in your scene) back to front. With standard rendering, we can skip surfaces that are obscured by other opaque surfaces. However, with the Blending mode, we cannot skip geometries that are obscured by transparent objects – we have to render ALL objects that are visible and ‘merge’ them into the final image, which is an ‘expensive’ calculation. An inherent limitation of real-time graphics though is that we can only sort meshes and not individual triangles. Because of this, complex or intersecting shapes can display incorrectly or ‘flicker’ when navigating.
The Blending mode is slow, but robust.
The only exception to this rule is when you are using textured objects that are largely opaque: only the transparent pixels will be involved in the transparency calculations. So less transparent parts in your textures will lead to less of a ‘performance penalty’.
Note: In the Blend and Additive mode, all geometries that have blend or additive materials will be excluded from casting shadows.

For example, I have chosen to make a dirty bottle, cool material to see the level of transparency.
“Bottle_01a” is my outer bottle geometry, it will serve me to make my first layer, which will be dirty. I will create a second layer that will serve me to add a transparency effect, in this example, add the “glass” effect.
Transparency mode: Additive
This mode is nearly as slow as Blending. It’s more of a visual variation of blending, useful for emissive materials that are used for effects like sparkles, particles, X-ray/blueprint rendering, etc.
Note: In the Blend and Additive mode, all geometries that have blend or additive materials will be excluded from casting shadows.

This layer “Bottle_01b”, will then be used to “Add” the desired transparency effect for the upper layer, in this case, glass.
Transparency mode: Dithered
The Dithered mode is a faster way to achieve Blending, but it comes at a price: the model will become more ‘noisy’ during navigation. Similar to our shadows and depth of field, the view will improve when the camera is static.
This method is most useful for models that have complex geometries with partial transparency, like fur or hair.

For this example, I think the little transparency be disabled in the liquid.
But if we had a clear liquid, we could use for example Dithered (to avoid problems of sorting) or other mode of transparency as required.
One good example for Dithered effect:

For change coca cola to water for example, I can enable the transparency and use Dithered mode.
Transparency mode: Mask
This is the fastest method that you can use whenever you want cutout meshes without changing your geometry. By adding an alpha channel to your textures and setting an alpha threshold you can create the appearance of a very detailed mesh, while still rendering very fast.
This type of texturing is almost mandatory on scenes with many grass blades, leaves of trees, etc. as otherwise the rendering cost would be way too high.

The sticker / label will be above all, it is glued over the bottle.
I’ll add a texture in grayscale for damaging/dirt effect and managed the intensity.
The “Mask” mode is usually the most suitable for the sticker.
Limitations of transparency on Sketchfab
It’s important to realise some effects are very hard (read: slow) to achieve in a real-time renderer. Here’s a list of effects that we currently do not support:
- Refraction
- Colored shadows
- Shadows where light passes multiple transparent objects
- For Blending mode: Accurately rendering complex models that self-intersect or that have complex shapes. As we cannot not depth-sort triangles within a single geometry in real-time, complex shapes can lead to unexpected results or ‘flickering’ when navigating a model. You can avoid this by breaking up your geometry into separate parts.
Best practices for using transparency on Sketchfab
To wrap up, here are some tips on how to get the best results for transparency:
- Use it wisely. If possible, limit the size of your transparent objects and break large, complex objects into smaller geometries.
- Don’t join transparent and opaque meshes into one geometry, but leave them as separate meshes in your model. This will allow far faster sorting and rendering.
- Start testing with the least ‘expensive’ mode (‘Mask’) and switch to more expensive modes as needed.
- When relying on alpha masks, it can help performance to add a little bit of geometry. An example: when rendering leaves, don’t use a square for each leaf but a (very!) low poly shape that roughly matches the leaf’s shape. This will minimize the amount of sorting and testing we need to do. Again, this will only increase performance if you use very few (like less than 10) polygons.
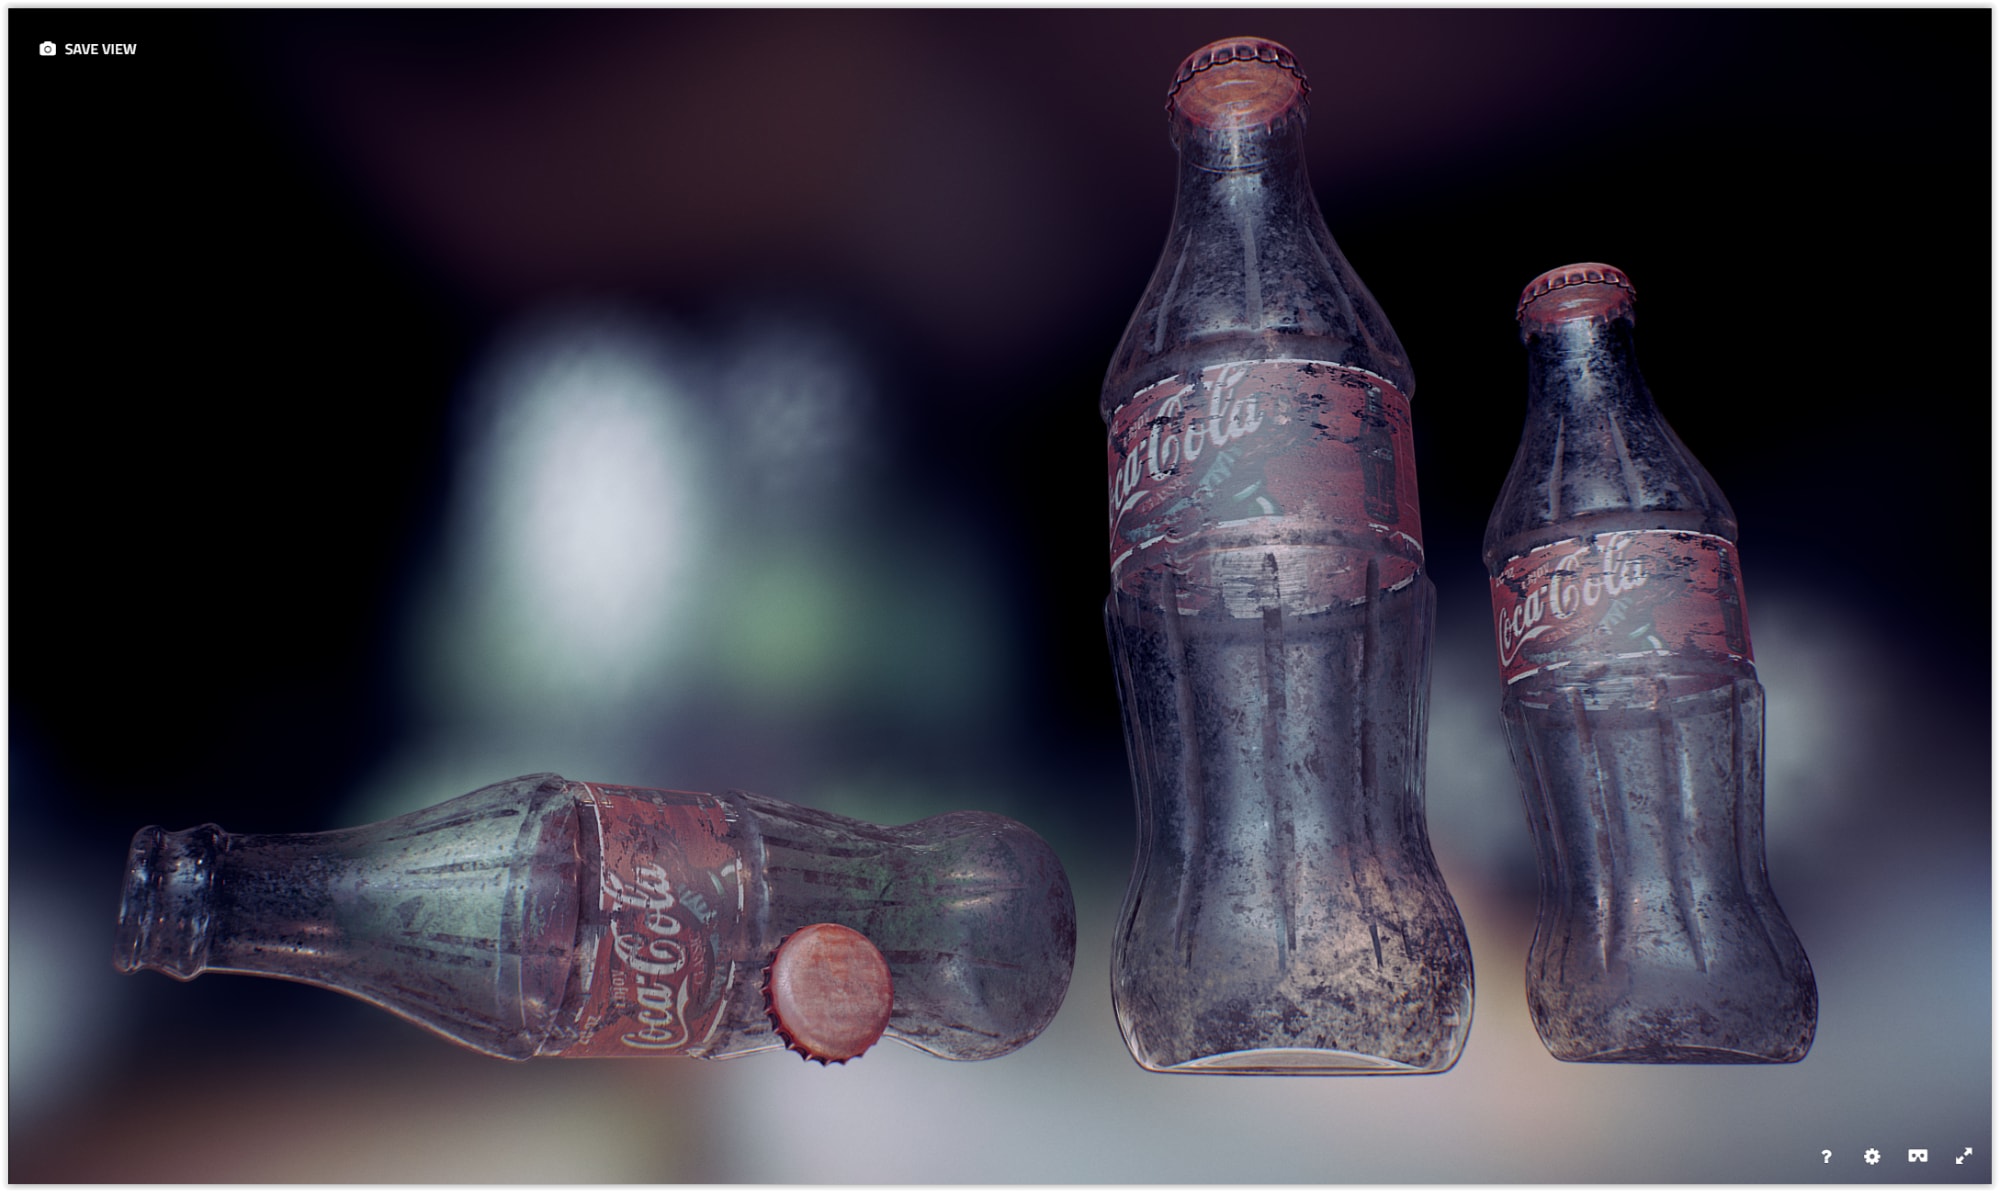
Examples:


About the author
Bart Veldhuizen
Community Lead at Sketchfab. 3D Scanning enthusiast and Blenderhead.