Gabriel de Laubier is a young freelance 3D digital designer from Paris, France. One of his strong skills is voxel design and today he shares his trade secrets with us.
I’ve been using Blender for several years personally and professionally, and I’ve been playing a lot with Voxels and Sketchfab lately. So today, I’d like to share my method for importing baked and optimised voxel scenes in sketchfab using MagicaVoxel, Blender, and additionally VoxelShop.
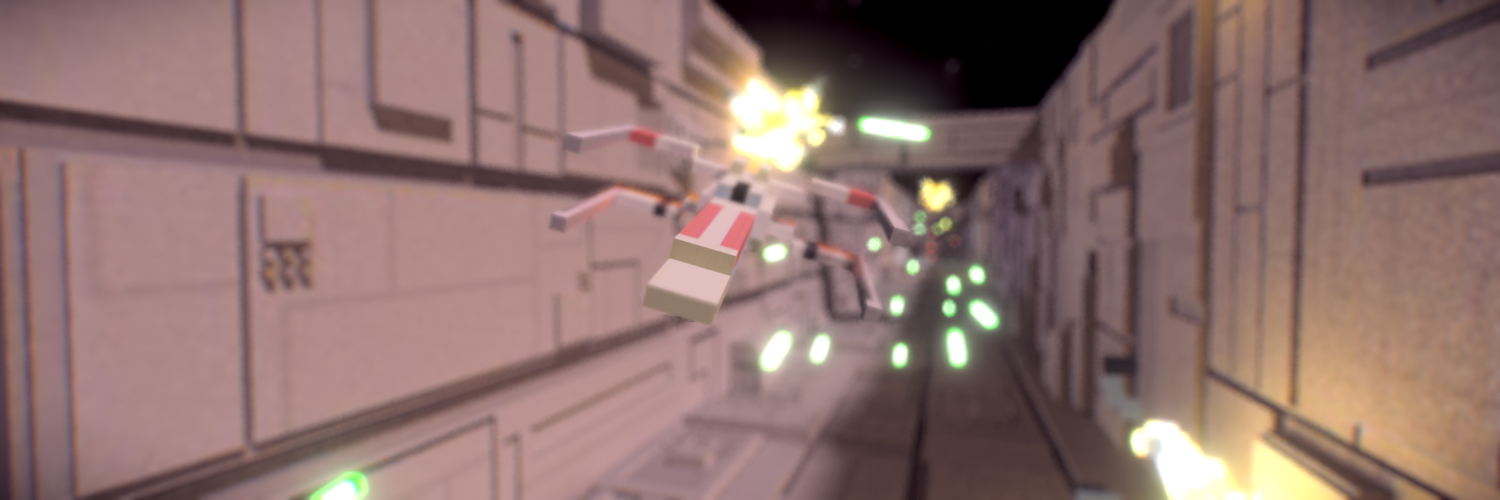
As an example we’ll see how to set up a simplified version of this scene i made for the Sketchfab 2015 Star Wars contest:
For this tutorial you will need to know the basics of Blender: Minimal knowledge of the interface, moving, scaling, rotating and editing meshes, setting a simple lighting (cycles), and using the node editor. However, you don’t need any modelling, texturing or any advanced skills. This should be great for beginners who want to try something simple using blender.
My workflow looks like this:
- Getting the proper software
- Making our voxels in MagicaVoxel
- Turning our voxels into textured meshes
- Setting up the scene in Blender
- Sketchfab settings
Our final result (available for download):
You can also download the pre-made VOX models here.
Let’s get started!
Getting the proper software
You will need to download and install the following apps:
Tip: Software is sometimes free to use, but always hard to make. If you like one, consider donating!
Making our voxels in MagicaVoxel
Our first step is to create the models we need for our scene.
For this simplified version, we need 4 models:
- A trench set piece
- An X-wing
- A Tie fighter
- An explosion
Here’s an overview of MagicaVoxel’s interface:

Don’t confuse tools and modes: Attach (“T”), Erase (“R”) and Paint (“G”) are tools, and L, C, P, V, F and B are drawing modes that apply to these tools.
For our Tie Fighter we’ll create a new scene (CTRL+N), set the size to 20x20x20 in the top right hand corner, then hit “Zero” just below to empty the scene. We’ll also set the palette to a default gradient for now. (“2” at the top of the palette)
The first step is to create our shape. We’ll be adding voxels with the “T” tool and deleting with the “R” tool.

- A: Hit “T” to select the “Attach” tool, and “B” to set the drawing mode to rectangle. Then draw a 6×7 rectangle on your floor.
- B: Hit “F” to change the drawing mode to “Fill” and Extrude the rectangle to a 6x7x7 cube. Then with CTRL+drag (left mouse button), move your cube to the center of your scene.
- C: switch back to “rectangle” mode (“B”) and add the front cockpit and the wings supports.

- D, E: Using the rectangle (“B”) mode and Fill (“F”) mode, extrude the wings to be 15 voxels high and 12 voxels wide.
- F: Finish by adding the rear cockpit with the “B” mode, and giving their final shape to the wings.
Now we will color our model.
In the color palette, create three colors: a dark bluish gray, a medium gray, and a light gray.

- H: Switch to paint tool (“G”) to draw colors instead of voxels. Select the Fill mode (“F”) and paint the wings and cockpit with dark bluish gray, the wings supports with medium gray, and the rest with light gray.
- I: Switch to rectangle (“B”) mode to add more colors to the rear and top. We added a fourth color, a slightly darker gray.
- J: Switch to Line (“L”) drawing mode to paint the wings and cockpit more easily. We’re done! Don’t forget to save. MagicaVoxel saves to a .vox format by default.
Follow the same process for the other models.Don’t worry about the explosion material for now. Just use regular colors.
For more information on using MagicaVoxel, see these tutorials:
You can also download the VOX models for this scene.
Turning our voxels into textured meshes
Note that MagicaVoxel allows the export of .obj meshes, but VoxelShop will give us cleaner, optimised meshes, with a reduced polycount, and correct orientation and scale. While I personally recommend using VoxelShop, both methods can work!
Open voxelshop. File > Import your first .vox model. It should appear like this:

Select everything with CTRL+A (you should see a white outline) and mirror your model on X axis with the red double-arrow on the far right. Note that with large models the software can get slow – just be patient.
Hit file > export and select the following settings if they are not default:

Create a new file (CTRL+N) and repeat for each .vox model. Now you should have your models saved in collada format and ready to import into Blender.
Setting up the scene in Blender
Importing your model
Open an empty scene in Blender. Hit “File > Import > Collada(default)” and look for your first model. It should import correctly as shown below. If the scale isn’t right, scale it with a value you can remember (e.g 0.1), so you can keep the scale consistent between your models.

Open the material tab of the object. Click “use nodes”.

Then click the dot on the right of the “color” tab, choose “image texture” and select your model’s texture (it should already be imported into blender – just select it in the dropdown menu).

The texture might seem buggy in the viewport. That is due to texture interpolation. Do not forget to set your texture interpolation type to: “closest”. This won’t fix it in the viewport, but render view should display correctly (shift +Z).
Import the explosion the same way, but this time choose an emission material. A value of 5 works well here.

Import the spaceships the same way and place them the way you want.

Lighting, preparing and baking
Adjust the lighting to your needs. Here, we just add a sunlamp.

Once it’s ready, time prepare the models for baking. Select your first model and hit “/” on the numpad (or “view > local/global”) to enter local view. Tab into edit mode and open both a node editor window and an image editor window. Select your model’s texture in the Image Editor. You can see your UVs are really messy, and this won’t do for baking.

Start with deleting unwanted geometry, here those big faces that will just take room on the texture for nothing. And also because we will set our model as single-sided faces in sketchfab, so we can see through the panels.

Add a UV map to your model.

Create a new texture for the bake. The bigger the texture, the heavier the file in sketchfab, but the better the quality. 1024×1024 works here (work with powers of 2, preferably). Find the compromises between quality and fluidity.

Unwrap the model with “smart UV unwrap” and enter the values as shown. Don’t forget the island margin!

Setup the nodes as shown. Blender will bake onto the texture selected in the node editor – be careful not to select the wrong texture. Also make sure you have the right UV map selected on the right.


Exit local mode (“/”) and hit “bake” in the render tab, with “combined” selected. The render occurs. Increase the samples in the “sampling” tab if it’s too noisy. (but the original starwars films had some film noise, so noise can be actually a good thing here).

After a while, the texture should appear baked. Save it with F3 to a jpeg format.
Repeat for all models. If you imported the explosion from voxelshop, bake it with “diffuse color” instead of “combined”. If you imported it in .obj from magicavoxel, leave it unbaked.

Making the lasers
Go to a new layer and add a cube. Scale it on the X axis (S, X) to give him a long shape. This will be our outer laser.

In wireframe mode (Z) duplicate the cube (SHIFT+D) and scale it to be inside the first rectangle. This will be our inner laser.

We want our inner laser to show through the outer laser. For that, tab into edit mode for the outer laser, hit CTRL+N to invert normals, and check “inside” on the left panel (T)

Back into object mode, set and emissive green material to our outer laser, and an emissive white to our inner laser.

Place the lasers where you want in your scene.

Saving for sketchfab
Once everything is baked and checked, make a backup save of your file. Delete the first UV maps as they are not needed. Clean node tree to keep only the baked textures.


Tip: Closing and re-opening blender will clear the unused textures from the blend file.
Hit file > external data > “pack all into .blend”. This will save the textures inside your .blend file.
Just in case, check that none of your objects have a negative scale (in the right panel (N), under “transform”). If it is the case, apply the scale with CTRL+A.
Don’t forget to turn on the layers you want in your scene. The hidden layers won’t show up in sketchfab! Save and close blender.
Now it’s time to upload our blend file to sketchfab and setup the materials.
Sketchfab settings
You could use the great exporter addon made by Bart Crouch, but we have some settings to change, so with the “upload” button on sketchfab we can benefit from the “draft” mode, before making the model public. Just drag and drop your blend file in Sketchfab.
If you see the textures haven’t been uploaded in sketchfab, just re-import them, or check that you have your textures packed in your .blend file.
Materials
Here’s the settings we use for the default material (the trench is set as single-sided face rendering, so we can see through it from the outside)

The outer lasers are also set as single-sided to let the inner lasers show through.

The inner lasers:

The explosion (don’t forget that in this case the emission has a color texture). The bloom effect we’ll add later will improve what you can see now.

For the lighting we keep it simple as it’s all baked already, although you can add dynamic lights if you wish. We use the milkyway environment, and we set the background brightness to minimum.

Post-processing
Now the final touch: post-processing filters. Chromatic aberration and vignette are optional, but in any case, keep them subtle!
The bloom however is essential to the laser effect and explosion. We want it only on our emissive materials, so keep the threshold low. Keep the radius low as well and play with intensity to get the desired effect.

To get our scene to look similar to the original star wars film, we use tone mapping and color balance.
For tone mapping, you could use “Filmic”, which looks better, but doesn’t work well with the explosion here. Instead we use “Linear”, increasing exposition and contrast, subtly adjusting saturation till explosion and lasers look perfect, and finally adjusting the whole with the brightness balance.
For color balance, we want darker, and somewhat purplish shadows. Values shown work well:

Toggle the post-processing filters on and off to see if they make things better or worse.
Final touch and publishing
Finally, you can set your annotations. Don’t forget to set your pivot point by double clicking in your scene while in the general settings tab, and only then adding the annotation.
A nice thing is to have the next annotation directly visible from the previous one, so your viewers won’t have to look for them in your scene.

Save a default view, save the settings. Your model is ready to be published, embedded and shared!
I hope you enjoyed this tutorial, feel free to ask any questions!
G.
Thanks Gabriel!
You can see more of Gabriel’s work here on Sketchfab and on his website, Twitter, Facebook, LinkedIn and ArtStation.


