Recently Simon Verstraete experimented with uploading Houdini particles and simulations to Sketchfab.
Here is the result:
The result is a full particle animation and looks similar to what you would see in Houdini. Now how is it possible to get this simulation in Sketchfab? It is done by using Alembic files.
What is an Alembic File?
Alembic is an open interchange format for geometry and animation. It was initially developed by teams from Sony Pictures Imageworks and Industrial Light & Magic.
It is like a flipbook, but with 3D meshes.
This means that for every frame, a new 3D mesh is shown. This also means that if your simulation is 60 frames long, it will store 60 different meshes in the alembic file.
The pro is that you can do cool animation in real-time, but the downside, or con, is that file sizes can be large.
The Houdini Setup
In this step, we are going to take an animation/simulation and prepare the file for export. This involves making a good structure in the node network, preparing the geometry and exporting the result to alembic files.
For this, you will need an animation or simulation in Houdini. If you are new to Houdini or looking for a good example, I can recommend this video.
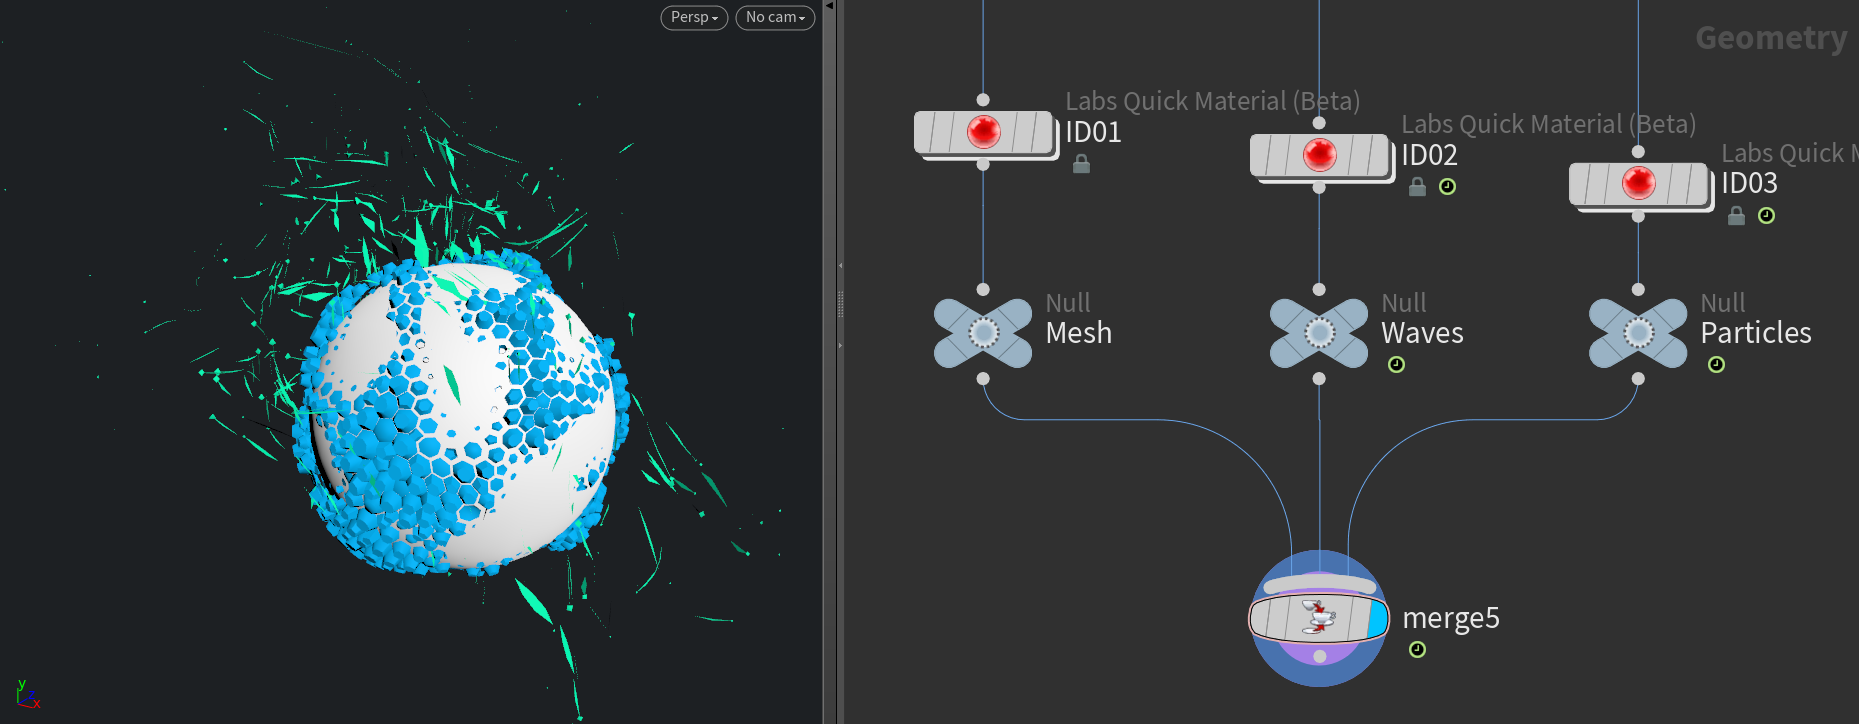
When you have created the simulation, it should look like this, with all the meshes and particles coming together in a merge. Be sure to use Null nodes for the different parts that you want different materials on.
Creating Geometry Nodes
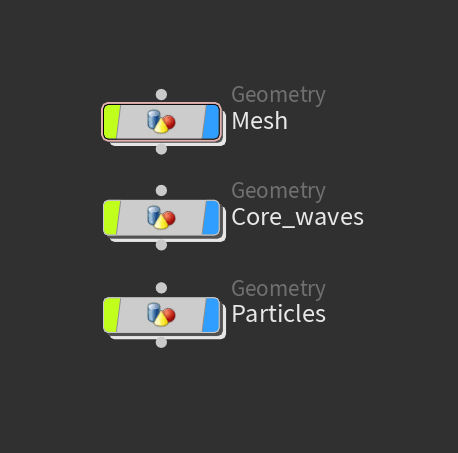
Now each of these Null nodes will get split into new object nodes, like this:
In the image above, geometry nodes are used to split the different parts. Each node contains a reference to the corresponding null node. The full simulation exists in the Mesh node and the other nodes contain a reference to the Mesh node.
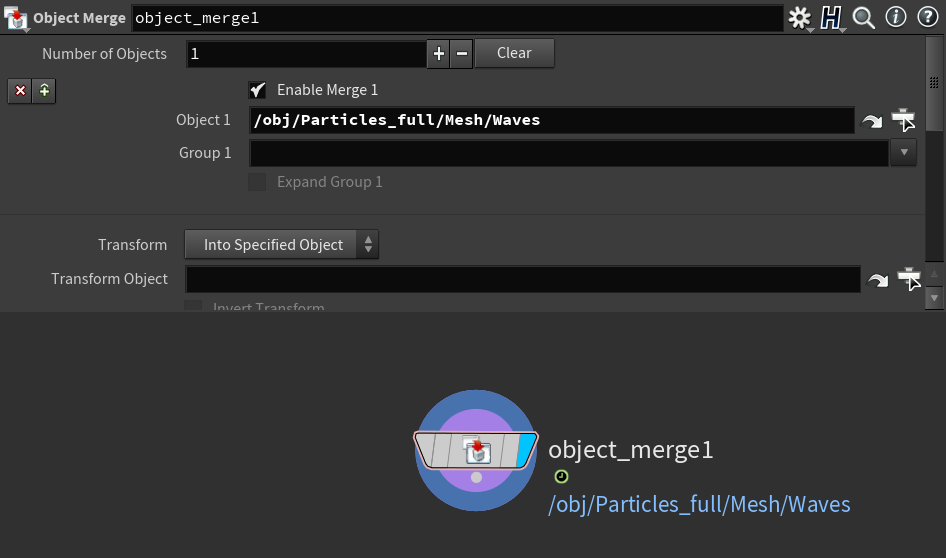
Here is an example of one geometry node with a reference to one of the null nodes. An object merge node is used to get references for another node network.
This would be the final node structure. The Particles_full node contains all the animations.
In the Particles_full network are 3 geometry nodes; it is also possible to assign different materials to each of these geometry nodes in Sketchfab.
Preparing Geometry
Something important to know is that Sketchfab only supports geometry, so if you were to create a simulation with particles, clouds, volume, etc., there would be no geometry. In cases like these, be sure to convert everything to geometry.
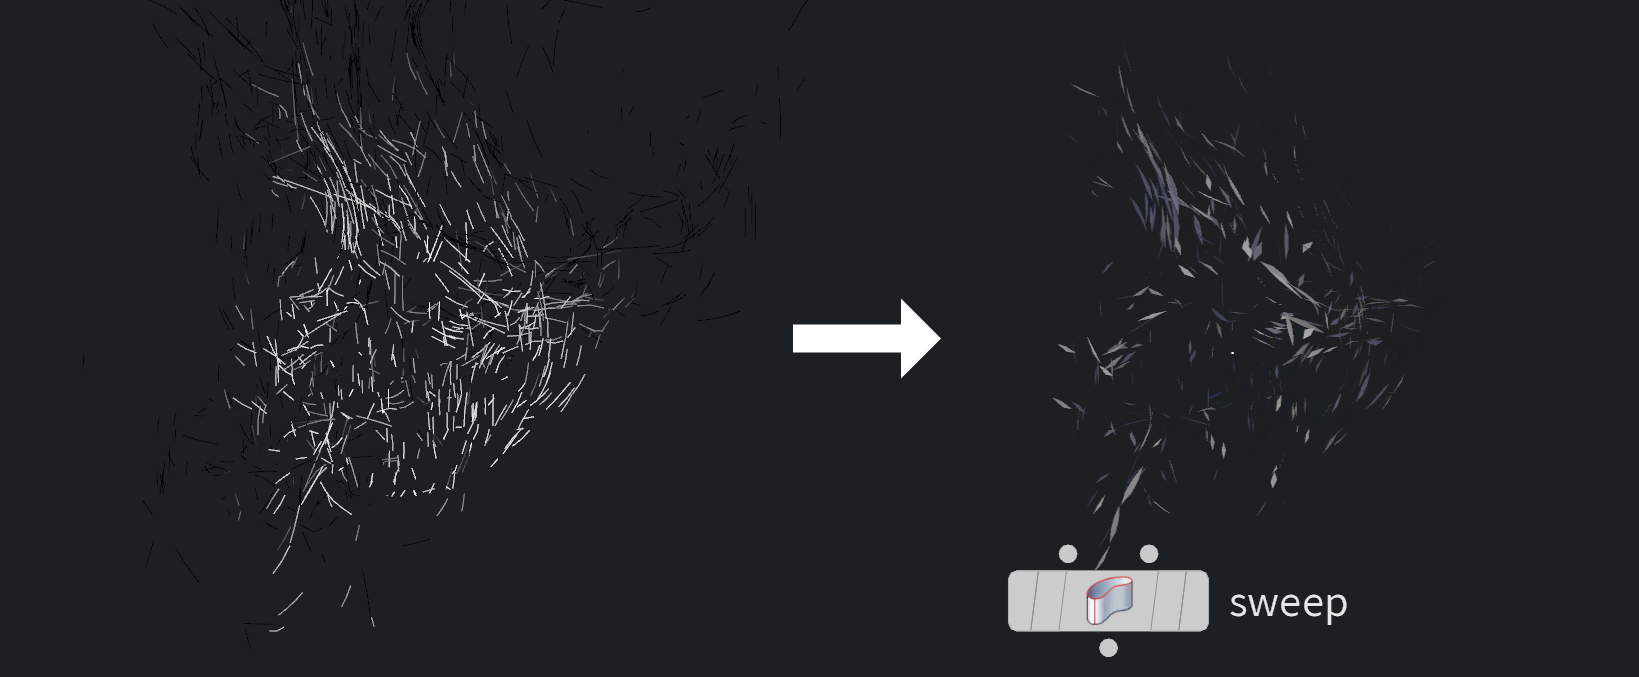
For example, here a bunch of lines have been converted to geometry with the sweep node. Make sure to keep your geometry low poly to reduce file size.
To further clean up or control the result, you could also use a Divide node, which triangulates the model. Using a normal node can help to apply correct normals.
Then everything is set up for exporting.
Exporting
In this step, we will export our Alembic file for export. To get started, there are a few settings you need to change.
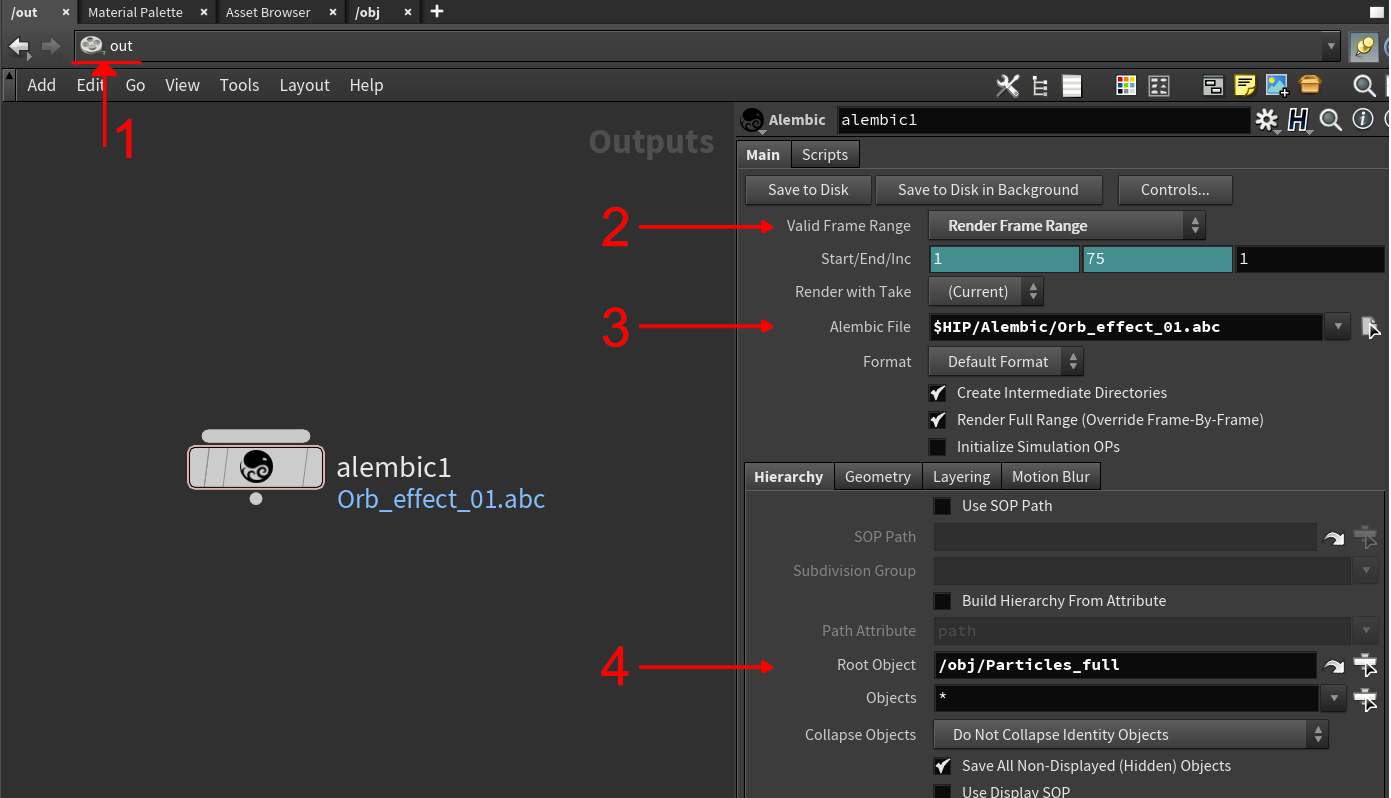
- Go to the Out level and create an Alembic node.
- Set the Valid Frame Range to Render Frame Range, which will ensure that you export the full animation in between the chosen frames.
- Under Alembic File, fill in the location for the Alembic file to be saved.
- For the Root Object, fill in which object you are going to export. You can select the object by clicking on the icon on the right side.

Then press Save to Disk to export the file. Alembic files can get large in size, so make sure that the resulting file does not exceed the file size limit of your Sketchfab plan.
When you are ready, upload your file to Sketchfab by dragging and dropping it into the site’s Upload box. After you have uploaded your Alembic file to Sketchfab, the animations should work by default.

