About Me
Hi! My name is Anders Hedström and I’m a game artist based in the Åland Islands, Finland, but I’m originally from Sweden.
As a kid, I was always doodling away on pretty much any scrap of paper I could find, but never had any real career aspirations when it came to art. It wasn’t until my last year of gymnasiet (Swedish equivalent to high school) when my friend told me about a university program called Game Design & Graphics that I seriously started to consider it. I decided to apply only to that one university, and luckily I got in!
I later learned that “game design” doesn’t actually refer to the visual design of games as I initially thought, and the education ended up focusing a lot more on game mechanics, level design and narrative design than the art side of things. As a result, I have learned most of my modeling and texturing skills on my own time.
So far I have only worked on one released 3D game. It’s called Defunct and actually started as a school project between me and six friends. We managed to secure a distribution deal and it was released on Steam in January 2016, almost a year after school.
Right now I work on 2D slot games, but I have done some 3D freelance on the side and would love to work on more 3D games in the future.
Concept & Inspo
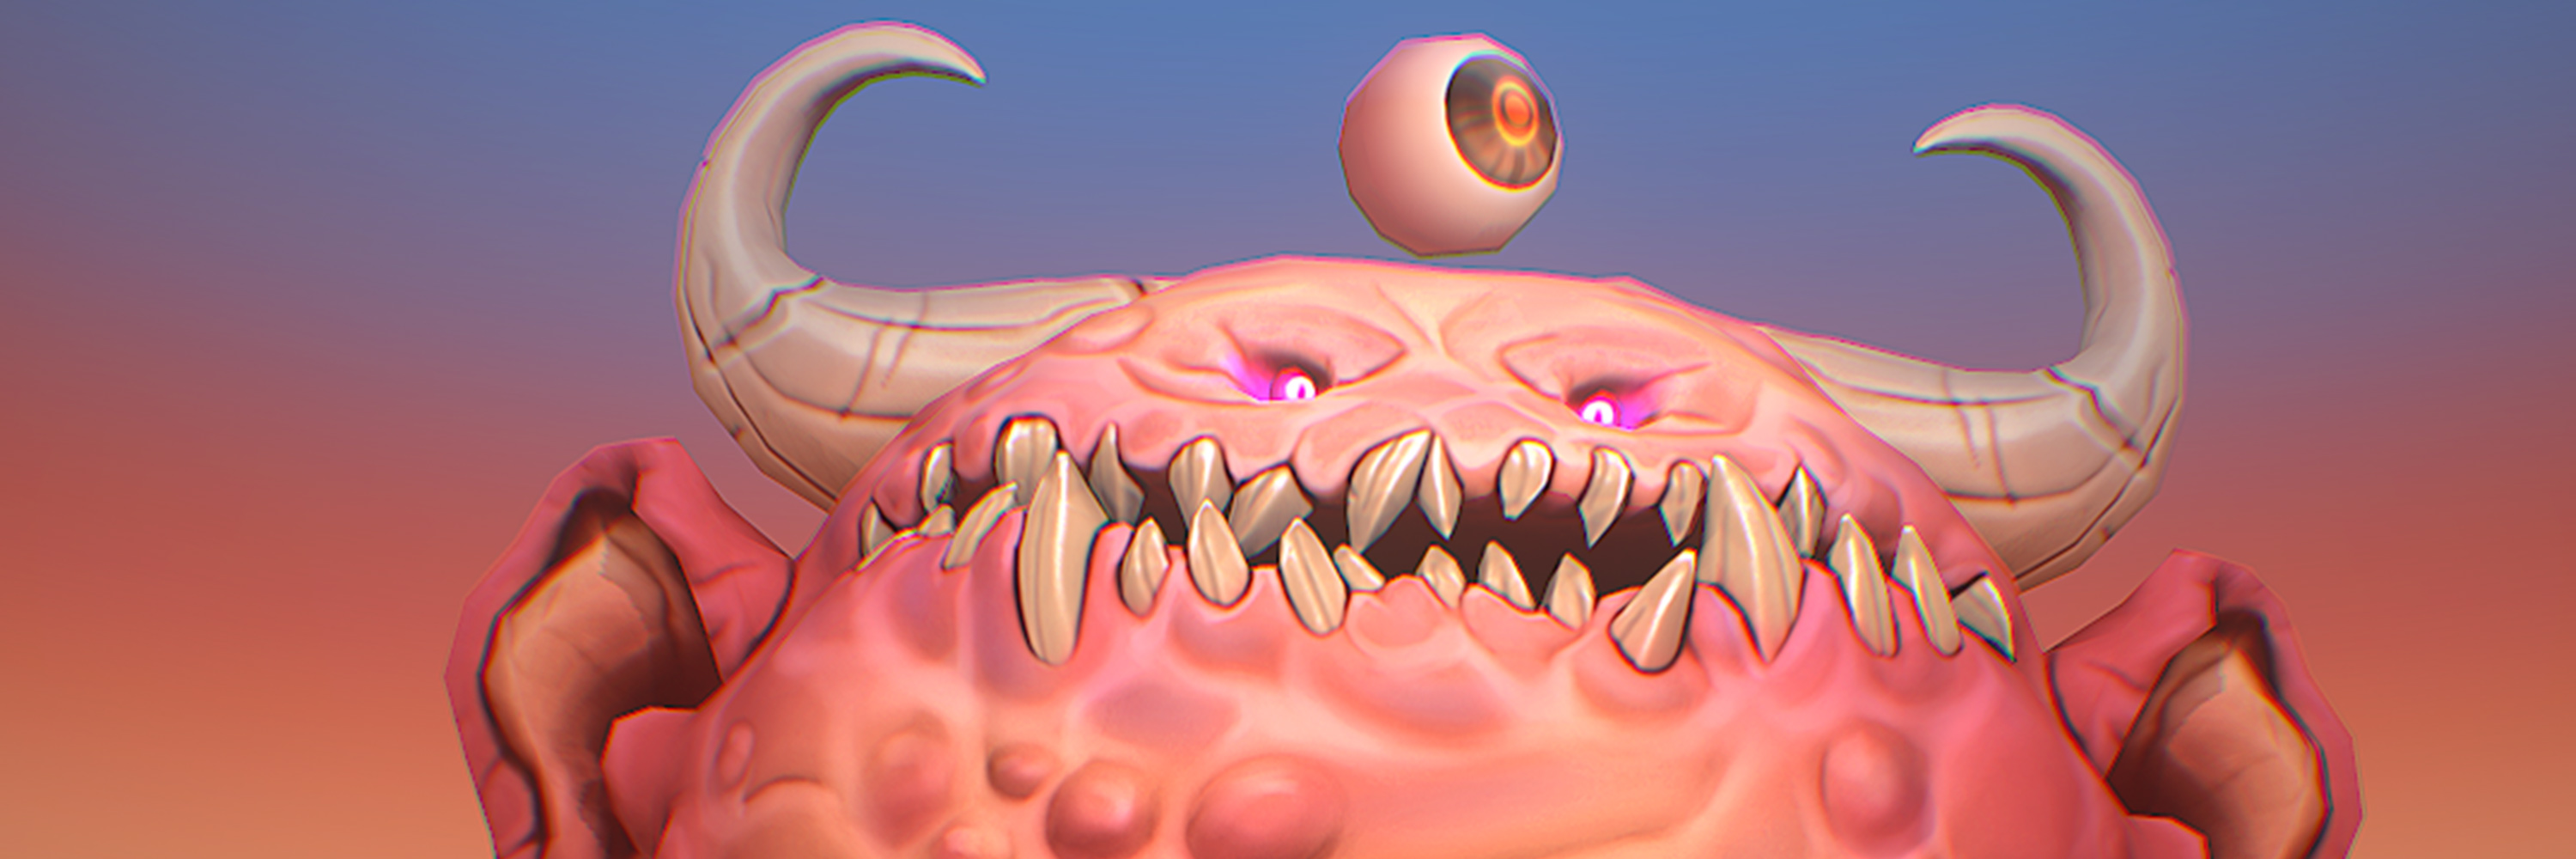
My good friend Henrik Rosenborg is constantly posting new character and creature concepts for his RPG universe “Ö”. We’ve talked about doing some kind of collab for a long time now, and since I needed to update my 3D portfolio I decided to try to make a low-poly game character out of one of his concepts.
Henrik’s ArtStation profile is filled to the brim with creatures and characters, each more magical and interesting than the next, so it was hard to just choose one! I ended up picking the creature Grimmblar because, compared to some of the others, it’s relatively simple and wouldn’t take forever for me to do.
I set out with the goal of trying to stay as true to Henrik’s concept as possible, while also going for a style more akin to games like World of Warcraft and Heroes of the Storm. I also drew heavily from my favorite 3D artist Michael Vicente, more commonly known as Orb. I often use his work as a benchmark to strive towards whenever I’m sculpting or modeling.
Workflow
When I worked on this character I had no idea I would be making a blog post explaining my process—if I did I would have taken more WIP shots!
Sculpting
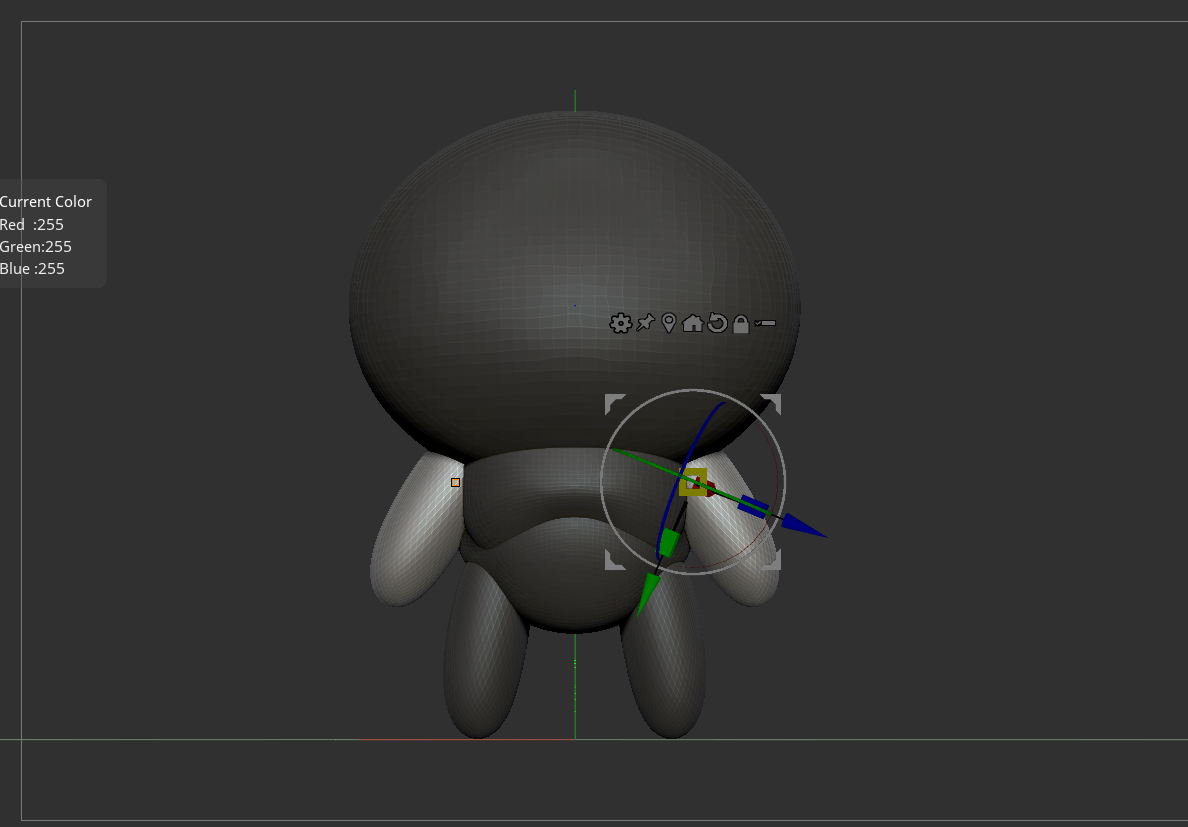
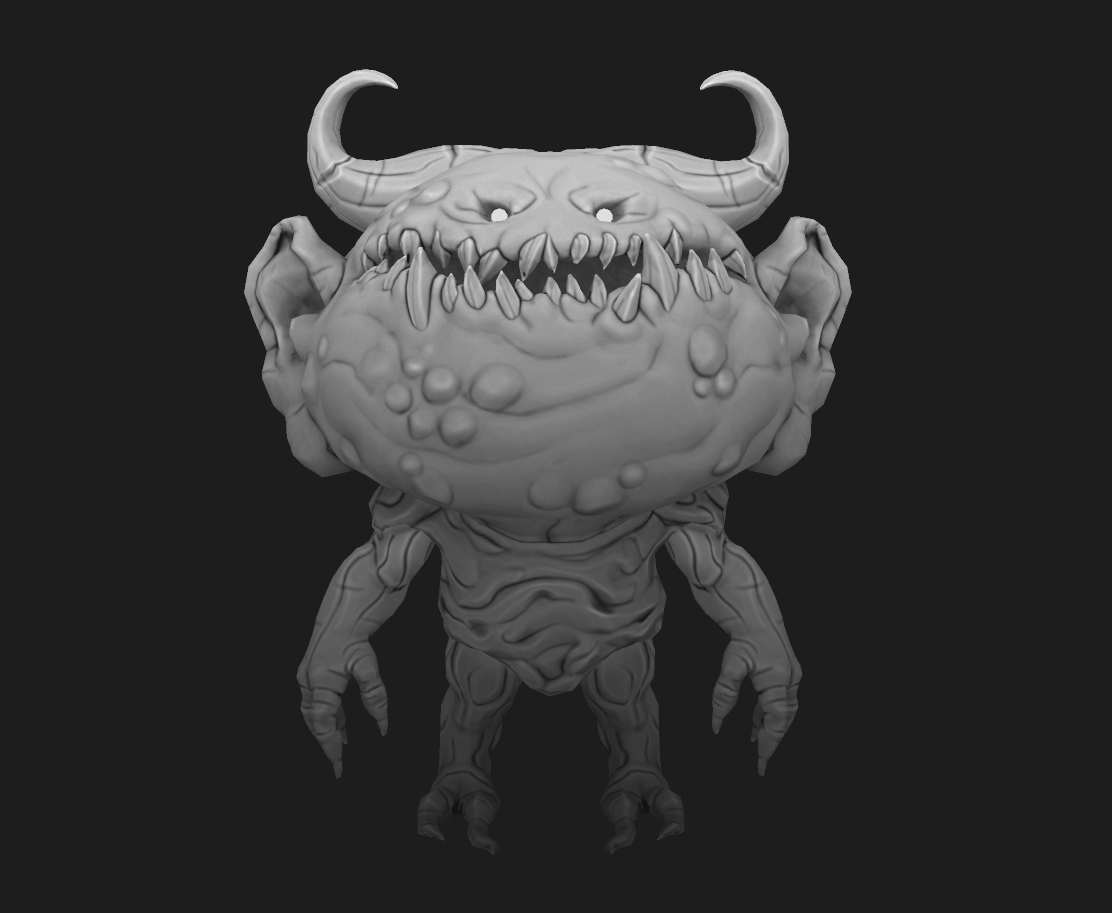
I always start by blocking in my character using spheres to try to get a rough sense of the proportions. I start by opening the default Dynamesh sphere and start adding more spheres from there using the Primitives brush, which is under B, I and then T.
ZBrush has a nifty feature where you can easily set the opacity level of the whole window, which makes it easy to put a reference image underneath and just place your base shapes right on top of it.
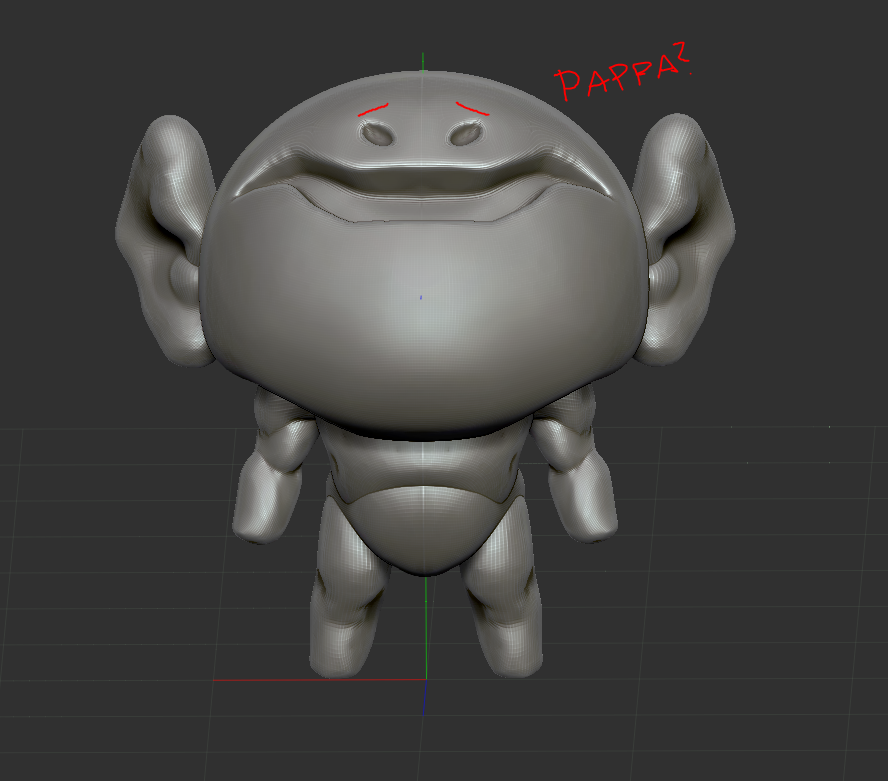
What I strive to do here is refine these blobby shapes until I have a base for the character’s proportions that I’m happy with. What usually ends up happening is that I can’t keep myself from starting early on the more fun parts like the character’s face, before I have even blocked out the hands or feet…oh well!
I regularly re-dynamesh the shapes as I work on them. Dynamesh is one of my favorite features in ZBrush; it enables me to generate new topology by the click of a button, which is super handy. This allows me to always have a nice evenly divided surface to work on, no matter how much I mess with the form.
Retopology
With my high-resolution sculpt done, it’s time to create the low-poly version. My favorite way to do this is using TopoGun! TopoGun is a neat tool that allows you to import your high-res sculpt and place new topology directly on top of it in an intuitive way.
While retopologizing I look at a lot of reference models online, mainly on Pinterest. Trying to get a proper edge flow going while trying to be frugal with polygons kind of makes my head spin sometimes, so references are especially helpful at this stage.
UV Mapping
Once I’m happy with my new topology, it’s time to move on to UV mapping in 3ds Max. This is the most tedious part of the process in my opinion, but once I put on some music and get started I really get into the zone. At this stage I’m a bit sick of all the technical stuff and just want to start making the texture already!
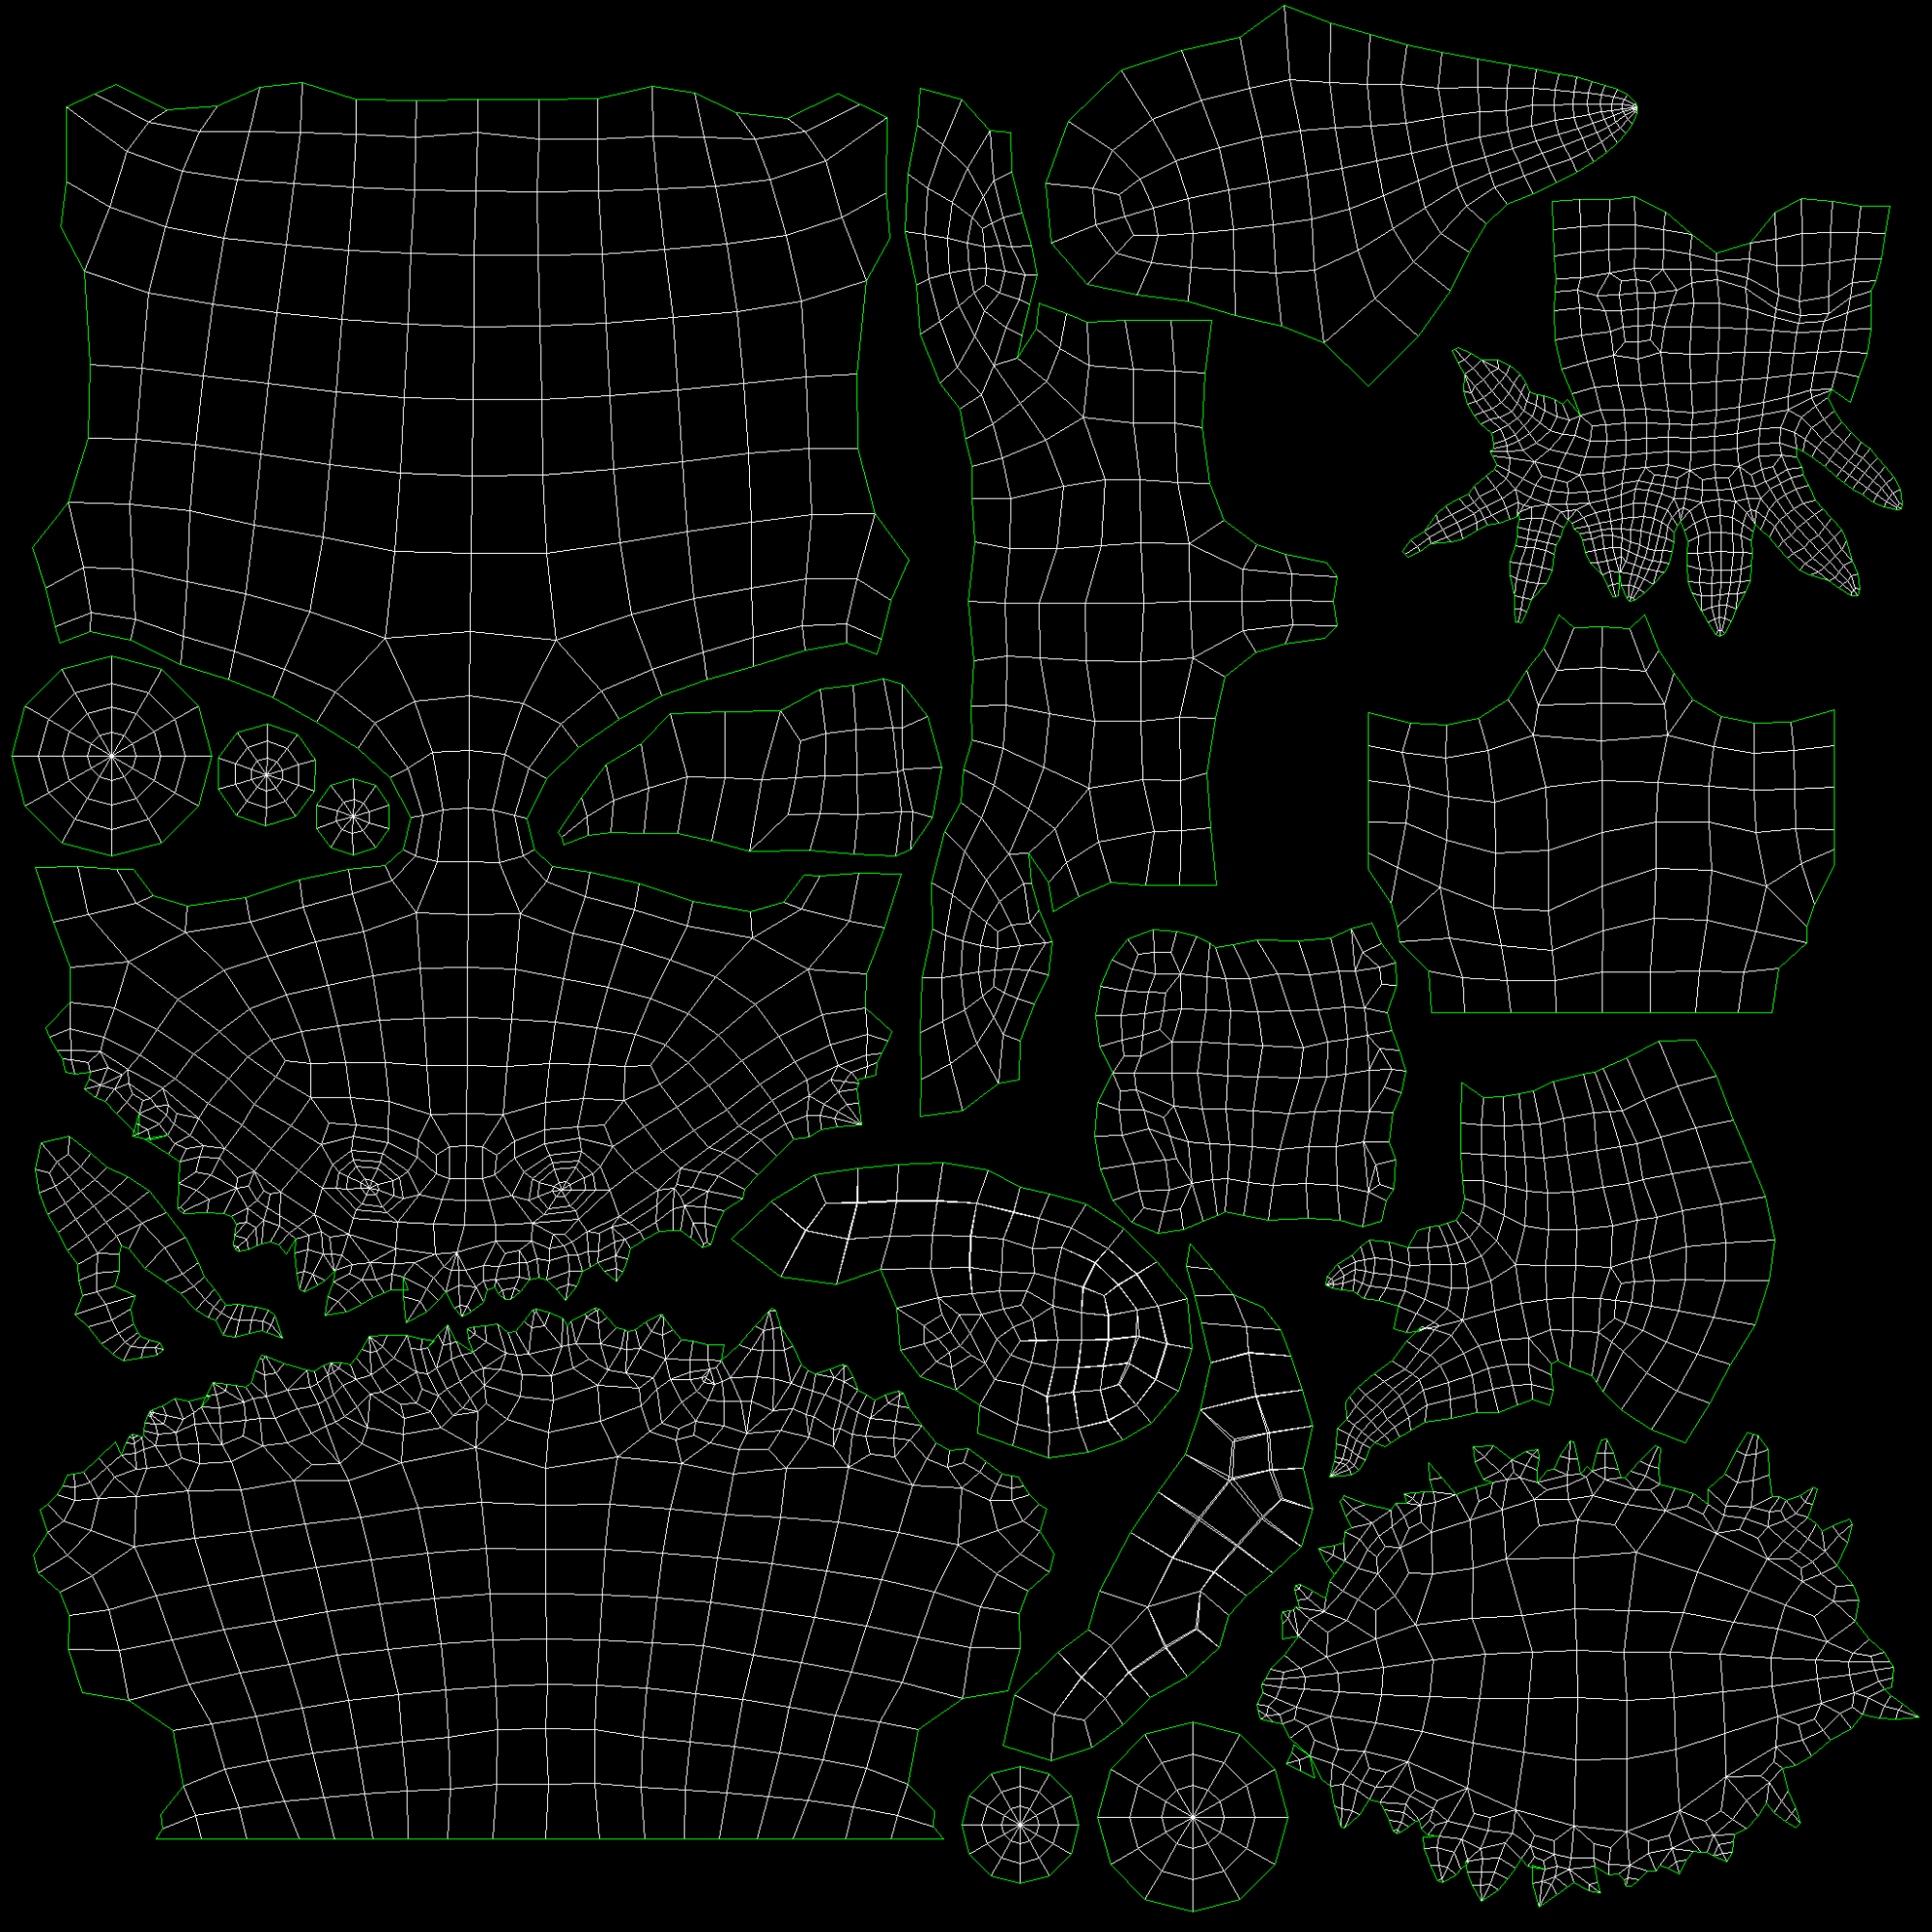
Using the UVW Unwrap modifier in Max, I start by separating the model into UV islands by making an edge selection where I want the seams to go and clicking the Split button. I try to put the seams in discreet places such as the insides of the arms and legs so they’re not too visible.
Once a piece is split off from the rest of the UVs, I use the Quick Peel feature to quickly unwrap it. It usually needs a bit more tweaking after that, so I alternate between using the Relax feature on certain vertices, putting “Pins” in some of them and repeating the Quick Peel operation until I have eliminated as much of the texture stretching as I can.
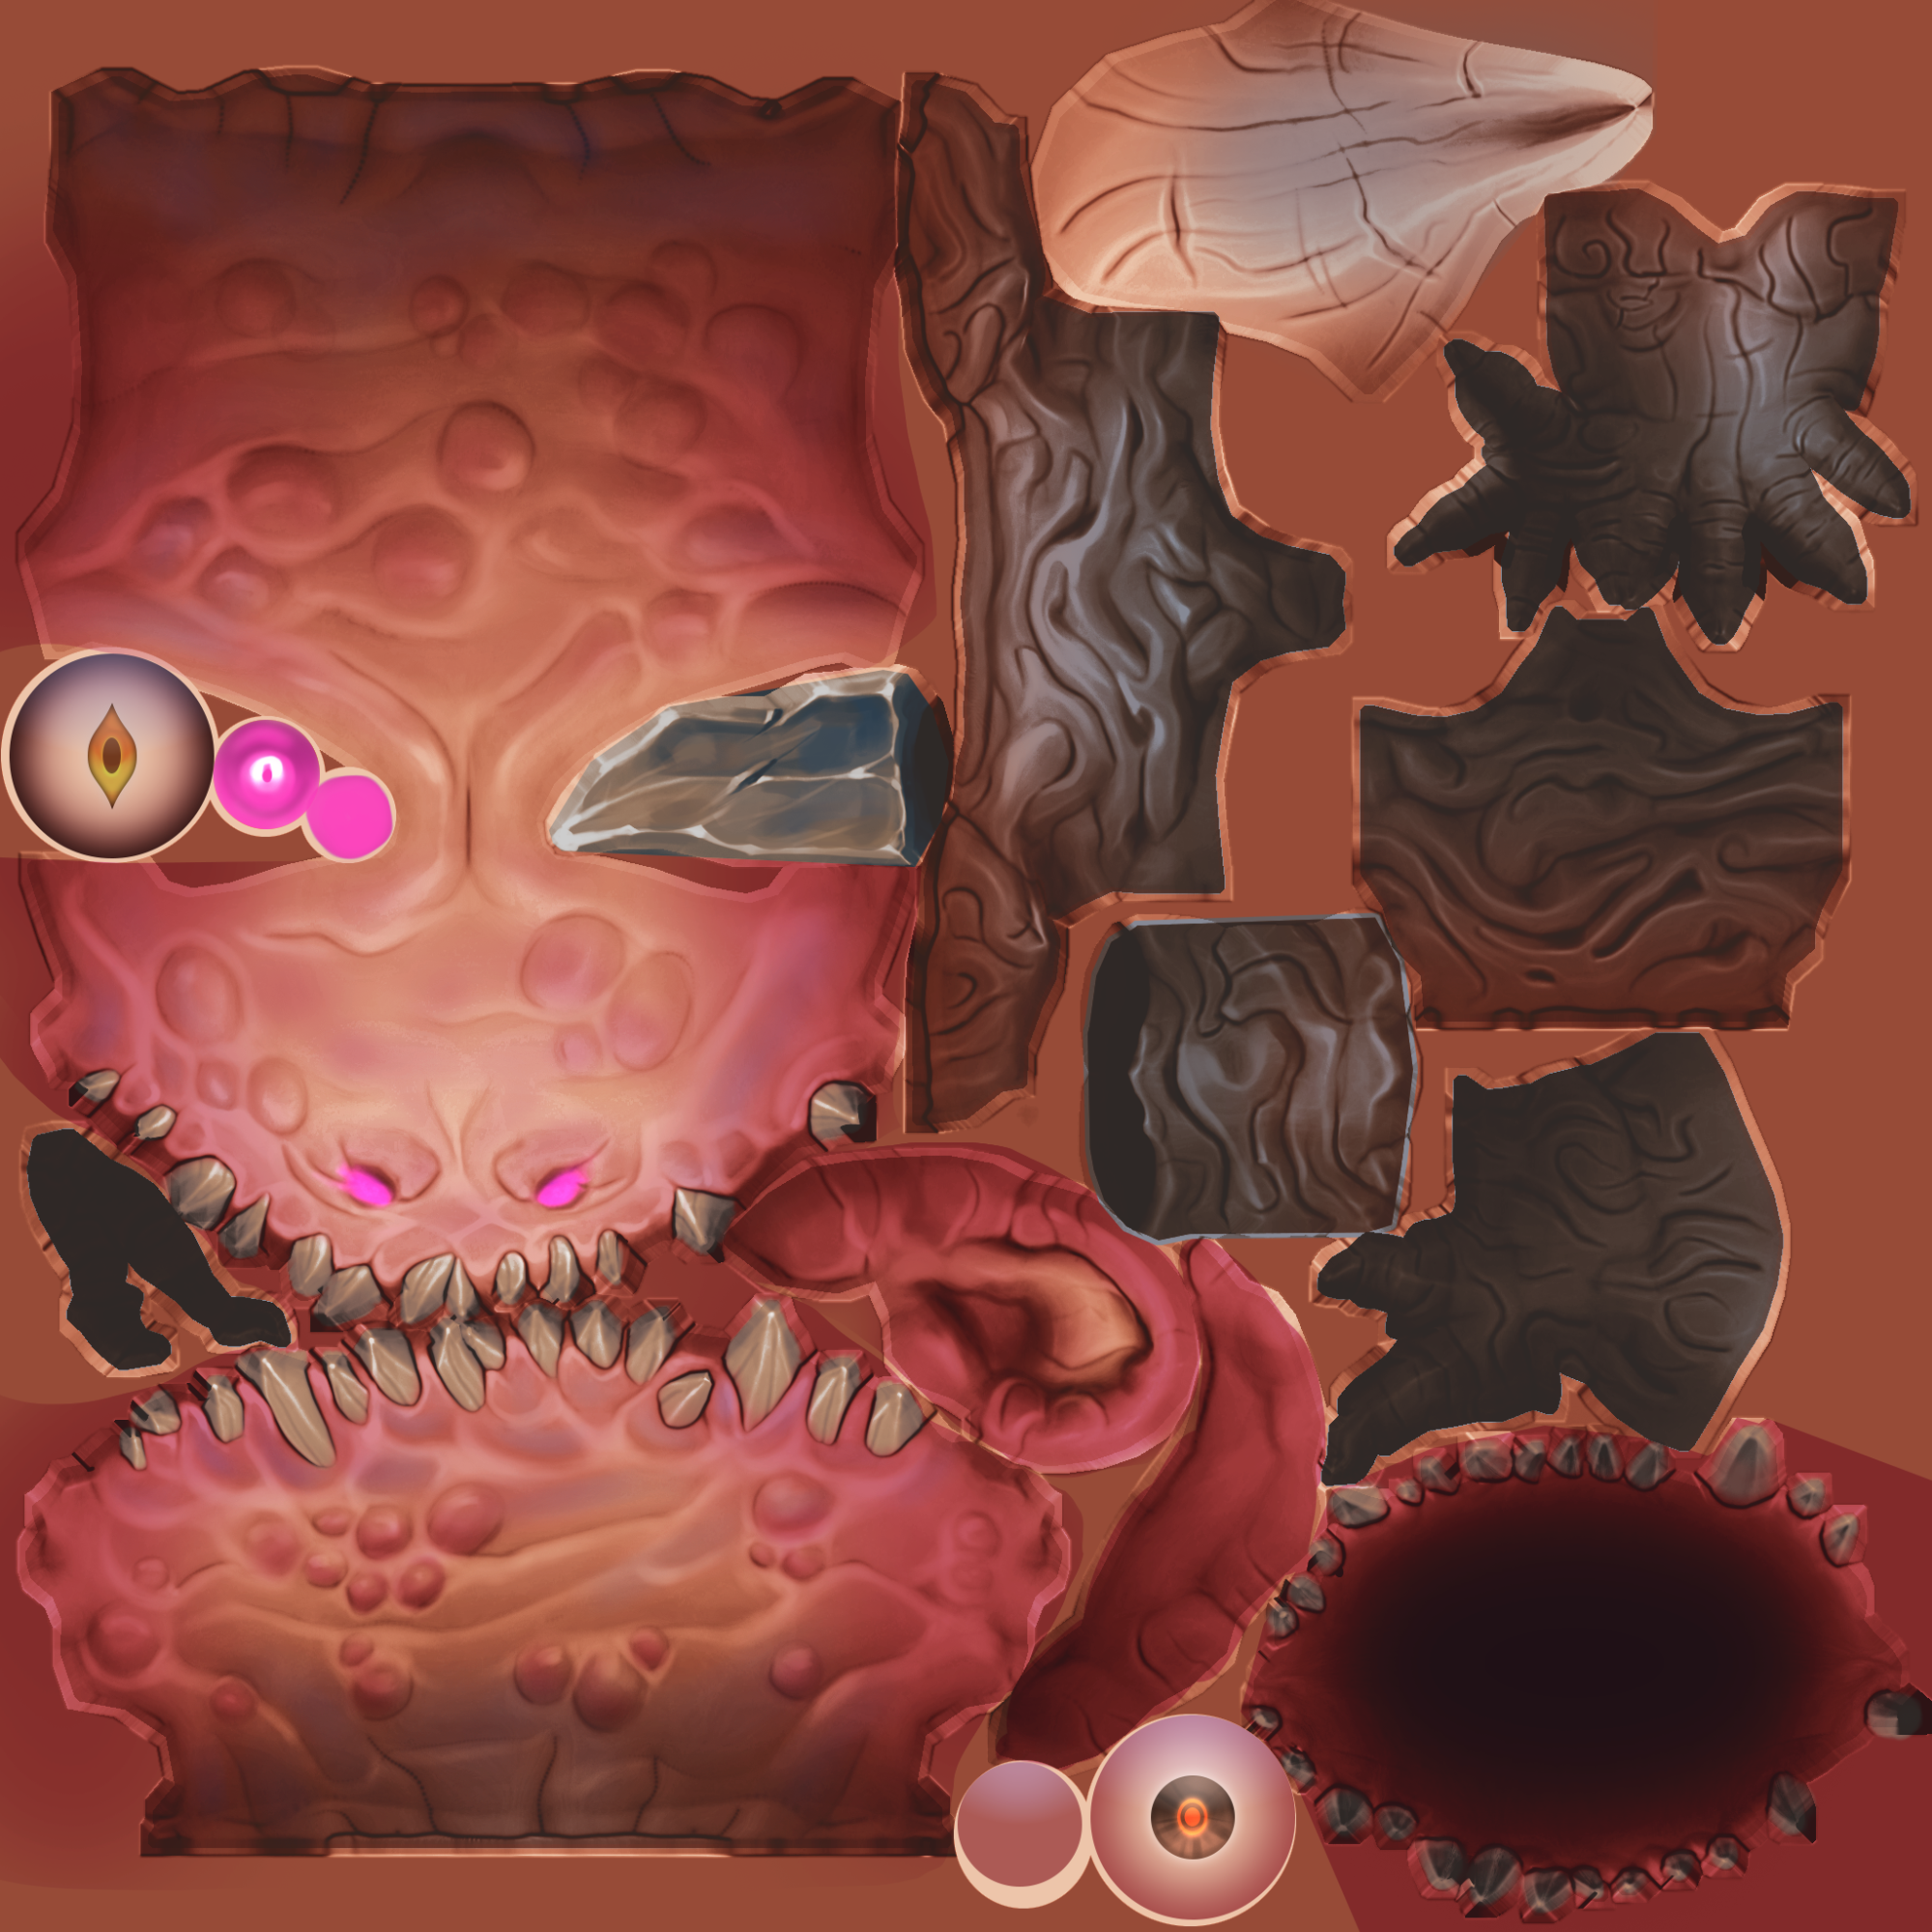
I also try to conserve texture space by overlapping pieces that are going to be identical, such as the arms, legs, horns, and ears.
Texturing
Finally I get to see some of the fruits of my labor!
I start by baking out some maps using xNormal, namely two different normal maps (tangent-space and world-space), ambient occlusion, cavity and convexity. I then bring all of them into Photoshop and merge them together to create a grayscale base texture.
I also use the Render to Texture feature in 3ds Max to create a black and white gradient texture that I then add into the grayscale texture in Multiply mode. This is a common technique used by character artists to enhance the readability of the character, by drawing the eye towards the upper body and head.
When I have my base grayscale texture, it’s time to start adding color using Gradient Maps.
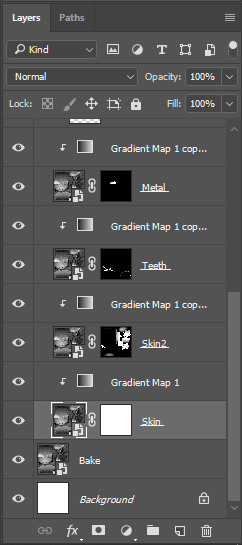
I start by combining my grayscale layers into a single Smart Object. I then make a new copy of that Smart Object with an empty mask on it. I then create the Gradient Map layer itself and parent that to the copied smart object. I then use the mask to paint out my gradient map.
There are two reasons I use the smart object method; the first is that each new gradient map masks out the one below it so there’s no interference, and the second is that I can easily make changes to the grayscale and every smart object will change with it. It also makes it super easy to blend between two gradient maps, like I’ve done on the torso.
Eventually I start painting in details on top of my gradients. I paint in some soft reds around the face, paint the different eyes and fix up the knife blade a bit. Eventually I have something that looks like this:
Rigging
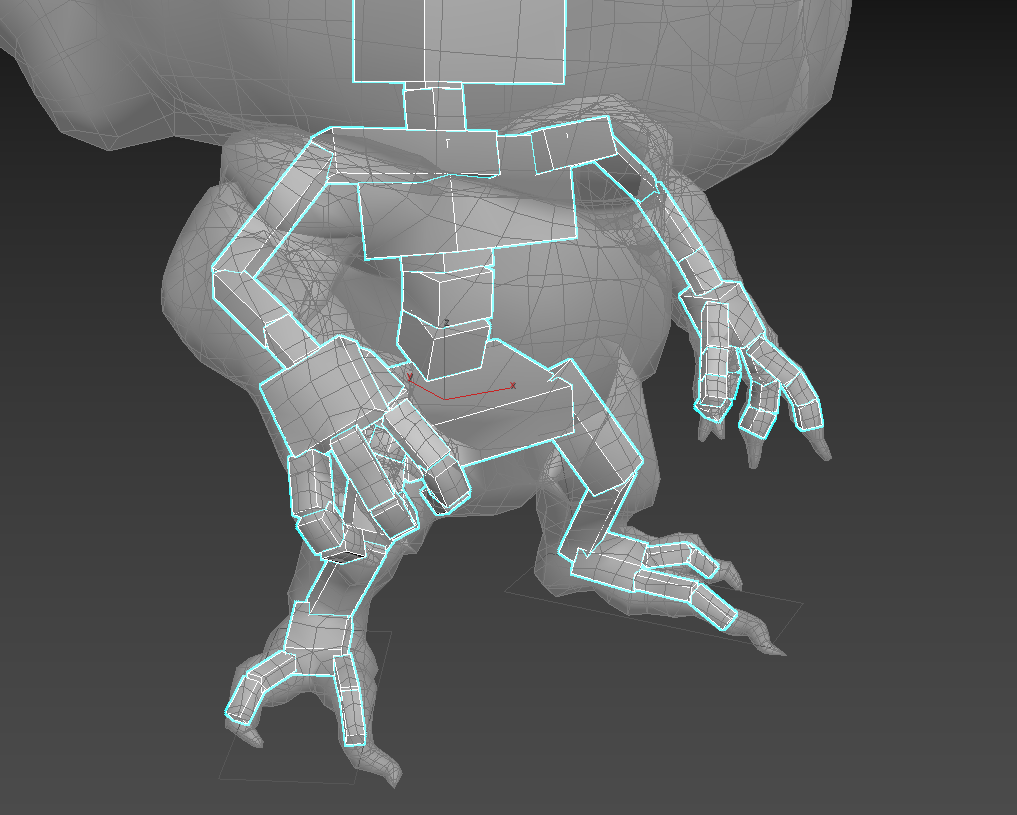
I knew I had to put the character in some kind of pose because this was mainly a portfolio piece and just having a T-posed character looks a bit dull. I used a simple CAT rig in 3ds Max and skinned it using the Skin modifier.
One thing I had learned since my last character was to split the forearm into two pieces. Before, I would get crazy deformation when twisting the wrist, but with this method I can get the forearm to twist much more realistically.
Sketchfab
I went with a really simple Sketchfab setup but in hindsight a diorama would have been really cool, so I might add something like that in the future! The only trick I did was add a bit of a cartoony outline to the model to make it a bit more MOBA-esque, kind of League of Legends-inspired.
I did this in 3ds Max by duplicating the model, inverting all its faces, and making sure to turn on backface culling under Object Properties before applying a Push modifier to it. This inflates the geometry along its surface normals, and with a solid color material applied it looks like an ink outline.
I also used some post-processing effects to add some extra juice to the presentation. Some light sharpening, a subtle vignette and just the right amount of bloom makes it look a bit more pleasing!
And that’s it, I hope you guys enjoyed reading this breakdown. See ya!
