About me
Hi! I am Nika Tendetnik, a self-taught videographer, video editor from Russia and a newbie at 3D art. I started about a year ago from a few free lessons on YouTube and then signed up for courses on 3D modeling as I did not want to waste time collecting information from various sources. The courses gave me a solid foundation, after which I have developed my skills through self-studying and practice. In 3D modeling I found what was lacking in video shooting—the ability to create almost anything—here I’m limited only by my own imagination.
Why this model?
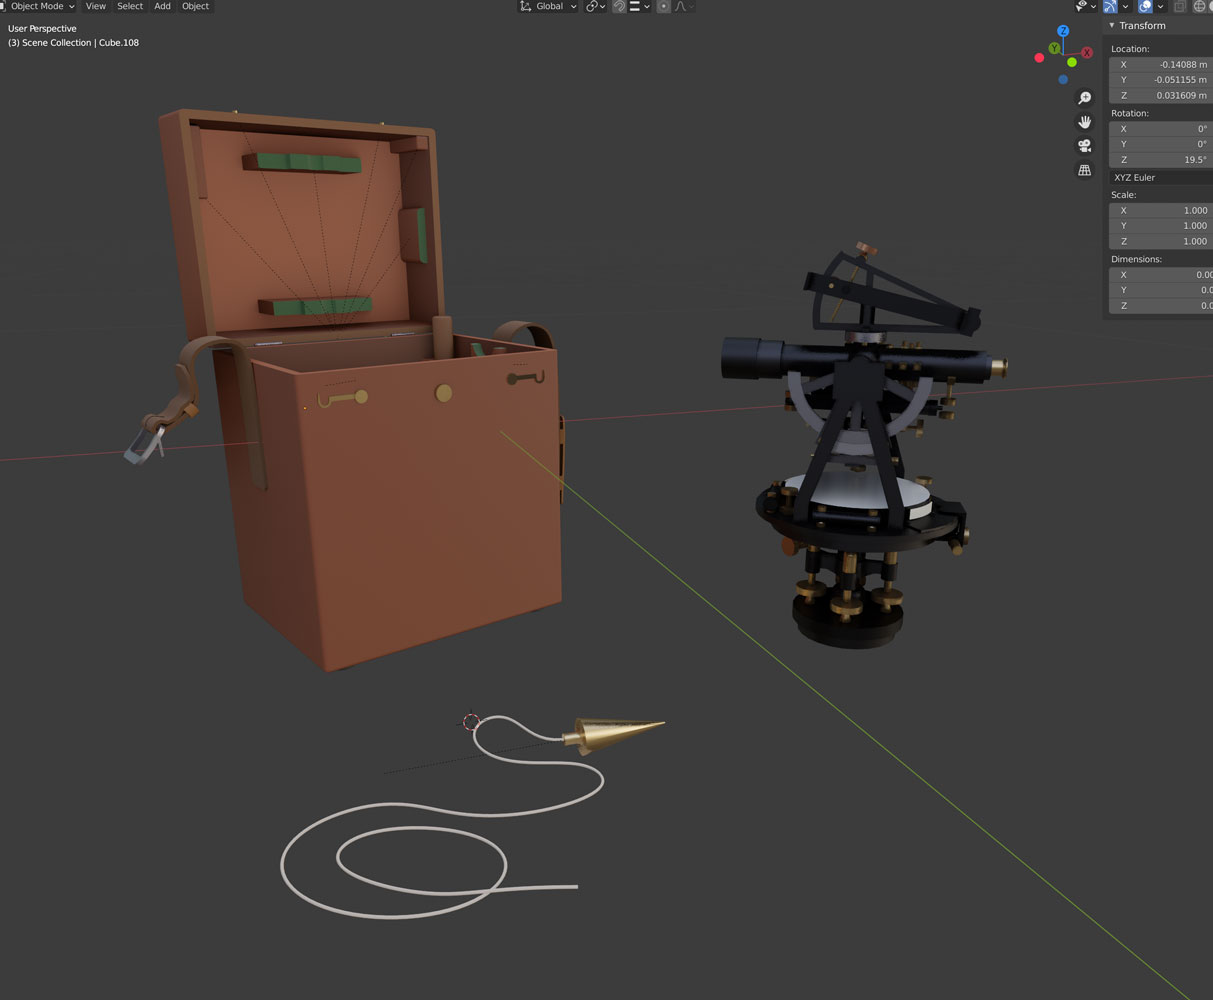
After finishing my coursework, I had to create a game-ready model of my own choosing. At first, I thought of creating a truck using concepts from an anime movie. But my dad threw a monkey wrench into my plans by offering to show me photos of a theodolite (aka Solar Transit). I fell in love with the photos and the idea as I love old things. When I saw the theodolite, I realized that I wanted to create a model of it; however, the theodolite would not be enough, so I added a box and a plummet.
Software
The modeling (low-poly, high-poly) and UVs were created in Blender 2.8. Some damage on the box is sculpted in ZBrush. Baking and rendering was done in Marmoset toolbag, texturing in Substance Painter. Also, I used Photoshop and Corel Draw for creating alphas and masks.
Creation Process
Base references were found here. Although at first glance it looks like the images were adequate, there were a lot of details that I couldn’t see in these photos. Therefore, I searched for them on Internet flea markets.
Modeling
I started with blocking (draft) and it helped me considerably to figure out basic shapes, proportions, and colors. Creating a high-poly took most of the time because of the minute details, especially in the theodolite. Also, some parts had shapes that I had never done before and it took some time to figure out how to make them.
To mimic weathering on the box and on a couple of the theodolite’s elements, I used ZBrush. I knew that it would be possible to make them at the texturing stage, but sculpting produced better results. To reduce the number of polygons on the parts made in ZBrush, I used ZRemesher, which is a very useful feature that helps reduce polygons without losing detail. After the high-poly model was completed, I copied it to make a low poly version. I deleted all supports, and removed the subdivision modifiers that I had used while creating the high-poly. This approach helped to make the low-poly faster, but did not work every time, especially if one is creating it for a game—some parts had too many polygons to begin with and it was necessary to delete them or just create a new part of the model with better optimization. Furthermore, I removed the bottom of the box and a couple of its parts and the theodolite’s bottom because according to my vision, models should stand on the surface, so the places where the parts were removed would not be visible. Doing this allows me to get more texel density on the UVs.
UVs
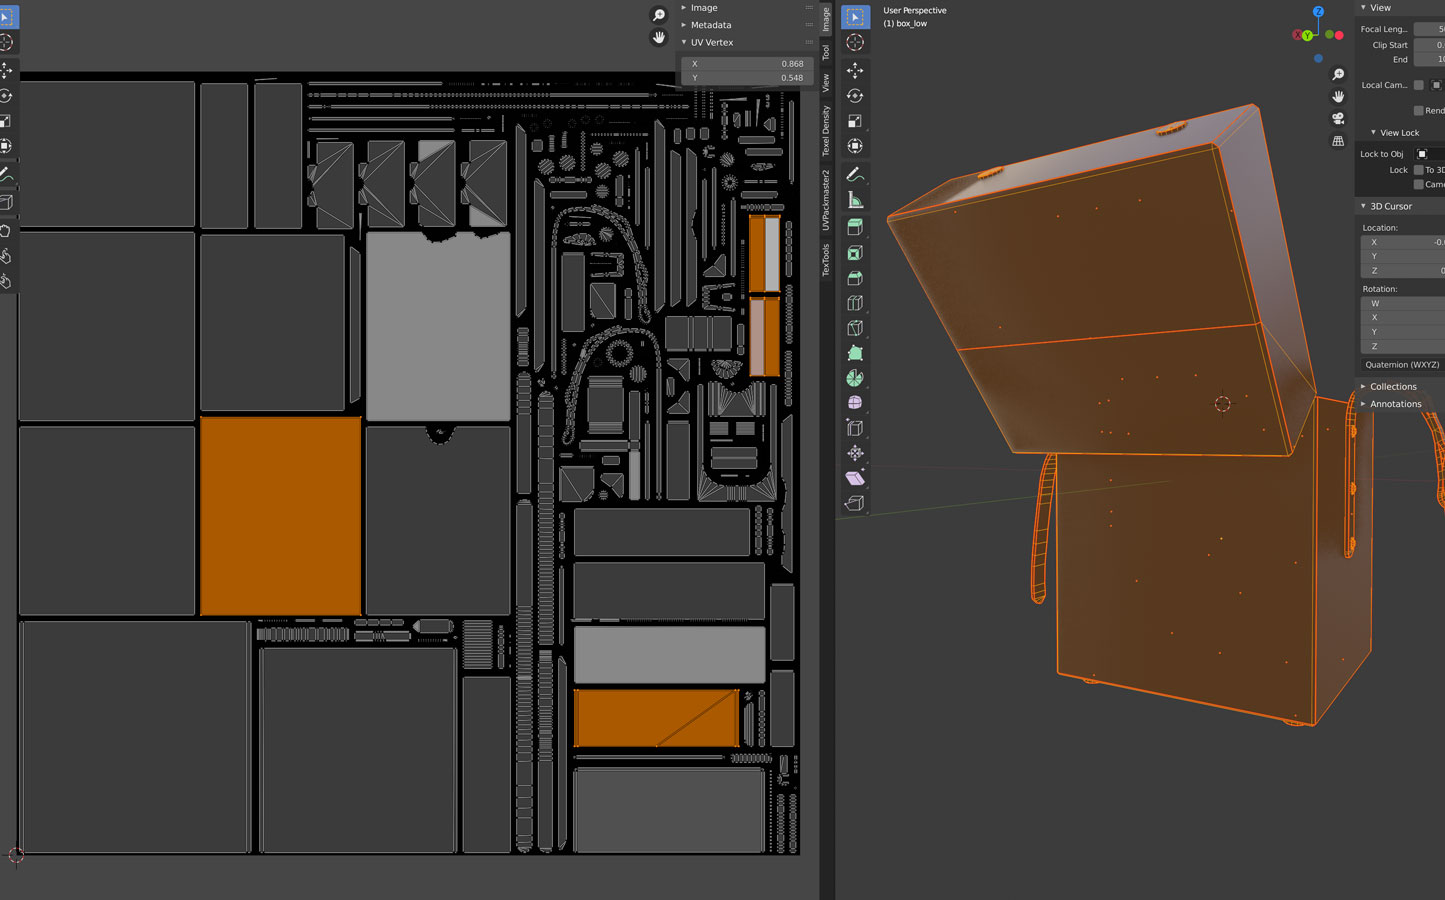
In order not to get confused about which parts I had already unwrapped and which I had not, I created a separate collection to which I sent each unwrapped detail. I used Blender with TexTools, Texel Density, and UVPackmaster add-ons for UV unwrapping. I tried Rizom UV and, while it’s a great program, I always had problems with missing seams and hard edges when I exported the model while using a bridge. Therefore, I returned to Blender, installed UVPackmaster and all my problems were gone.
My personal goal was to create two 4K UV-sets: one for the solar transit with plummet and the other for the box, and one 2K UV for glass. I could have made more UV sets for more detail, but I opted not to. The main idea was to create a model that would look good in overall view. And the assigned texel density should be appropriate to take a closer look at some details. To check if the texel density was adequate, I made the necessary quick unwrapping with Texel, loaded the model into Substance Painter and placed the material on it. If the result looked okay to me, then I started unwrapping.
During my courses, we were given good advice: first you pack large shells, then medium and lastly small. I did everything manually, which gave me more control and makes texturing go faster because I know where everything is on the screen. But, to be honest, I use automatic packing for very small details.
When I finished unwrapping the theodolite and the plummet, I proceeded to the box and faced a problem—with the available texels, not all parts of the box model fit into one UV square. Overlaps helped me here. I overlapped one side wall of the box on the other, and since the belts are at the same height and they are the same width, there would be no problems with the baking of ambient occlusion. I did the same thing with the sidewalls of the box lid. The only difficulty was: I had to divide the upper part of the lid in half and overlap the halves. So one part was a mirror image of the second and you have to be careful with this on textures.
Baking
While I learned from lessons on YouTube, I tried to bake in Blender and can’t say that I liked it. But then I learned how to bake in Marmoset and it is the best software for baking! I really enjoy this process (of course if you do everything right during modeling and unwrapping).
Texturing
Another great part! You can tell a story with a texture. I started with assigning base colors and materials for all parts. Then I began working with each material in more detail. Smart masks help to save time, but still then you have to bring everything to mind with paint layers to make texture less procedural. Corel Draw helped me to create a sign for the theodolite similar to what the original has. I had a similar font, but it needed some work. I converted the font to curves and brought it to the desired form. A theodolite is a fragile thing so there was no reason to create severe damage on it. So all the blows went to the box because this is its purpose—to protect the theodolite from damage. When I created a texture for the box, I used several photos with different boxes. From each, I took the elements I liked and mixed them.
Sketchfab
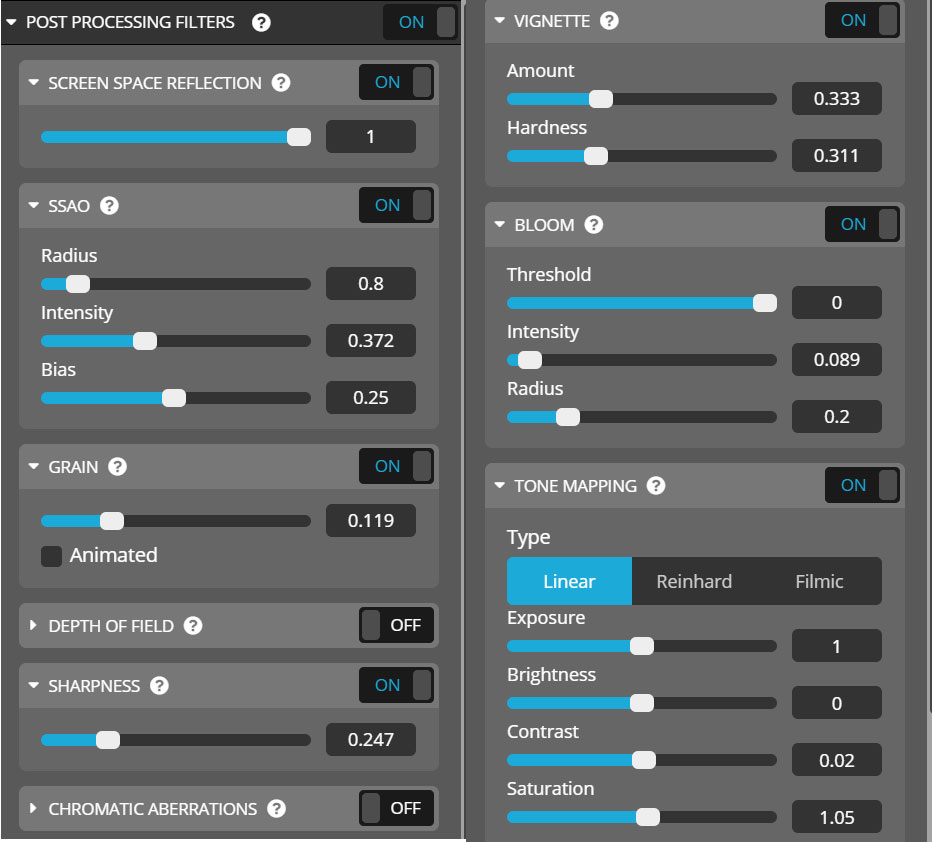
Here are the settings I used.
The value is very low for every effect. I always add a little sharpness and a little contrast. And the rest of the settings depend on the model. I wanted to make it look as much like a Marmoset rendered picture as possible. It seems that it turned out.
This is my first big project and I’m happy with it. While I was creating it, I learned a lot and there are a lot of things to learn.
Thank you for reading!
Here’s my ArtStation.


