In Art Spotlight, we invite Sketchfab artists to talk about one of their designs.
Hey everyone! My name is Ryan Pocock, I usually go by “AutumnPioneer” online. I’m currently applying to university to study Game Arts in Cologne, Germany, though I am originally from England.
Before only recently deciding on a big career change into hopefully becoming an environment artist, I had studied 3 and a half years to become a graphic designer, but I wasn’t feeling quite as inspired as I did when I played video games each and every day, so I made the change.
I’ve been using Blender on and off for a few years now, but only recently began using it every day to practice and build my skills up for my portfolio. I’ve never really modeled anything intricate as most of my work and style is low poly. It’s interesting to push yourself and lower the polycount before you lose what the shape really is.
But why did you want to make a Kitchen?
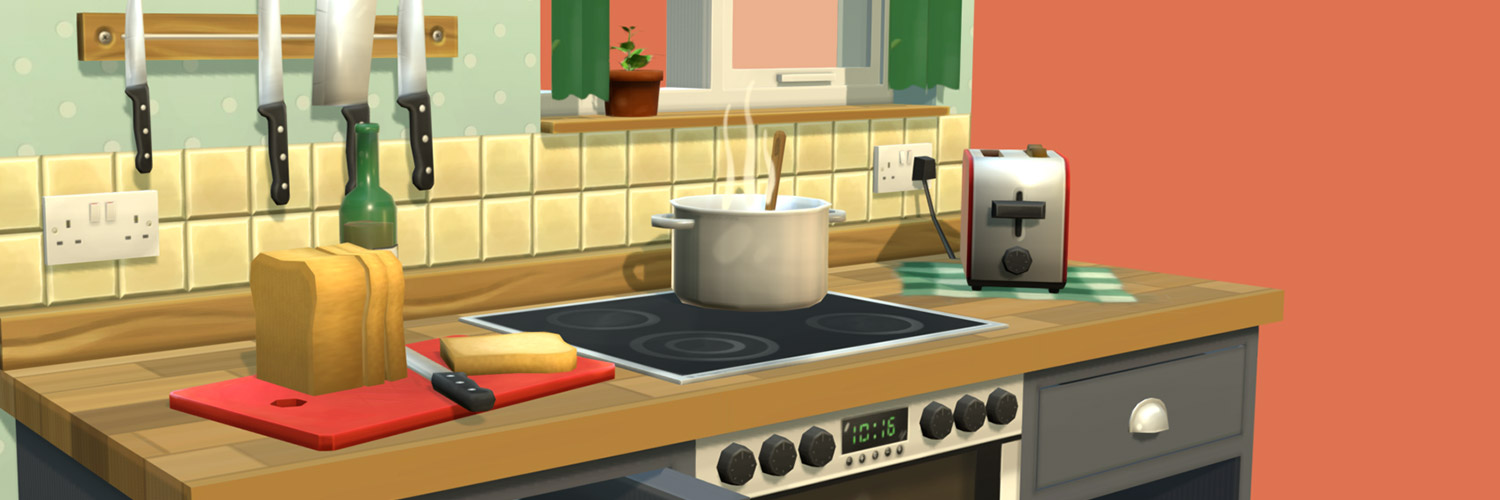
The diorama was a personal project of mine so that I could build up my portfolio and really focus on creating a cutout scene rather than single assets. With hand painted textures, a lot of what you normally see is art for mobile or online fantasy games. I wanted to create something a little more relatable and ‘everyday’ so I began working on a.. Well you guessed it. Kitchen! I had also just moved home to another country and of course, love food, so these were also some of my inspirations.
I had worked on several small assets which would definitely fit into this scene, so I also recycled a few of these and used some of them in this project. I can also say my workflow for this project definitely wasn’t great, but I have learned a lot from this and will take my knowledge onto the next one.
Ideas!
I think in order to create a detailed environment it’s really important to just begin by brainstorming ideas of what you might find in such a place. For a kitchen, it’s pretty simple, we all have one, and we all know what we would find in one. Sometimes I use Trello boards to keep track of my first ideas, then follow them through the stages of modelling them, texturing them and when they are finished.
Pinterest has been a great tool for this project, as it allowed me to gather together lots of images that I could use for references. This really helped because I wouldn’t consider myself much of an interior designer at this point!

Blockout and Composition
After I had all of my ideas ready, I went into the next stage which was blocking out the scene and modelling objects in Blender. I originally wanted to create a full kitchen which you can see from this screenshot, but I eventually changed my mind. Maybe I’ll do this in the future!
Some of the objects in the final model, like the small grains of rice, cloths and curtains are all made as single planes. This is a really efficient way for modelling less detailed objects, because Sketchfab allows us to use the alpha channel of our .pngs to make the rest of the plane invisible.

Getting the right colours
So the next step was blocking out the colours. I think this is the part where I had lots of trouble getting a nice feel to the entire scene, the tiles never seemed to match, and the curtains always looked a wrong colour. Like I said, I’m no expert!
Most of the colours at this stage are close to the final ones that you can see in the Sketchfab model. Here, most of the models were lazily unwrapped, some of which I placed on a Photoshop file made up of coloured square swatches.

Hand painting the textures
I then had to go through the incredibly fun process of UV unwrapping, and trying to get as much use out of the space on each texture file as I possibly could. I cannot stress enough how much you should use a graphics tablet for the next step, I think it would be almost impossible (or very slow) to paint with a mouse.
The best thing about Adobe Photoshop or Krita (a free alternative to Photoshop) is that you can use as many layers as you like to really keep your work organised. From what I’m aware of, this isn’t possible when painting inside Blender, though it does have its own advantages like painting straight onto the model.
When painting the textures, I, and most other ‘hand painters’ keep a light source of the top left in mind, this way we can keep the lighting style coherent across all textures and models. The style of my hand painted textures here were very simple with low amounts of detail, primarily focusing on painting in the light values. I only ever use a default hard and soft round brush. I think this is VERY important because too many beginner artists rely and focus too much on different brushes, when in reality, it is your own skill and practice that makes your artwork better!
I painted several different texture maps in Photoshop using my Wacom Intuos tablet, with the following image being 2048 x 2048.

Hand Painting Tips!
If you’re working in Photoshop, you can set your layer mode to ‘Overlay’ for when you are painting in light and highlights, and then on another layer, paint in your shadows with the layer mode set to ‘Multiply’.
Using this method is quite beneficial if you are new to painting, as painting with a white brush on a layer set to Overlay can give your lighting more interesting colours, rather than washing out the colours when painting with the layer mode set to ‘Normal’. If you look at the texture of the toaster on the above image, you will see the impact it has on the bright red sides. Once you become better at painting, this may not be necessary anymore.
Here is a rough step by step of how I painted the clock in the final model. The process isn’t perfect, but this is how I created it layer by layer.

After I had textured all of the small details that were going to go into the scene, I actually came back to the composition stage and reworked how I wanted the diorama to look. This is when I finally came up with the following composition. You can see the wireframe and final shadeless views.

Importing to Sketchfab
I exported my model from Blender as an .obj file with the paired .mtl file, and zipped them all into one file along with the final textures as .png format. Using Sketchfab is incredibly easy, and if you assign your objects with materials in Blender then the good news is that Sketchfab will automatically assign all of the same textures to the correct objects! The important part here is that your objects in Blender will need to have the final .pngs attached to the materials, as .psd files are currently not supported I believe.
In Sketchfab’s 3D Settings I used the PBR setup so that I could alter my materials and give them even greater depth, mostly just simple things like altering the metallicness of the cupboard handles and pot, and making sure the glass jars are affected by lighting with a strong shine.
Sketchfab is going to help me massively with collecting my portfolio pieces together and I love the fact that I can share my models with the fantastic community and anyone else on so many platforms, browsers and devices.
So… This was my first of many scenes to come, and I hope you enjoyed reading the behind the scenes about how it was created. I’ve had lots of great feedback from friends, family, and members of the community. I love hearing what you all think and feedback is always great for improving. Perhaps next time I will have my workflow fully figured out and implemented, so be sure to follow me to see my future projects! No pressure on them, right?
If you have any questions, you can email me and I’ll try my best to respond as soon as possible! I’d like to thank the Sketchfab team for giving me this opportunity, and for letting everyone share their art together on such a wonderful platform!
Thanks, Ryan! What are your favorite lowpoly dioramas on Sketchfab? Do you have any of your own? Post them below!


