About Me
Hi all! I’m Yuichiro Fujita, character artist at CAPCOM. I have 7 years experience at cinematic and game studios. My passion is creating characters in any style, R&D workflows for team, and exploring new softwares.
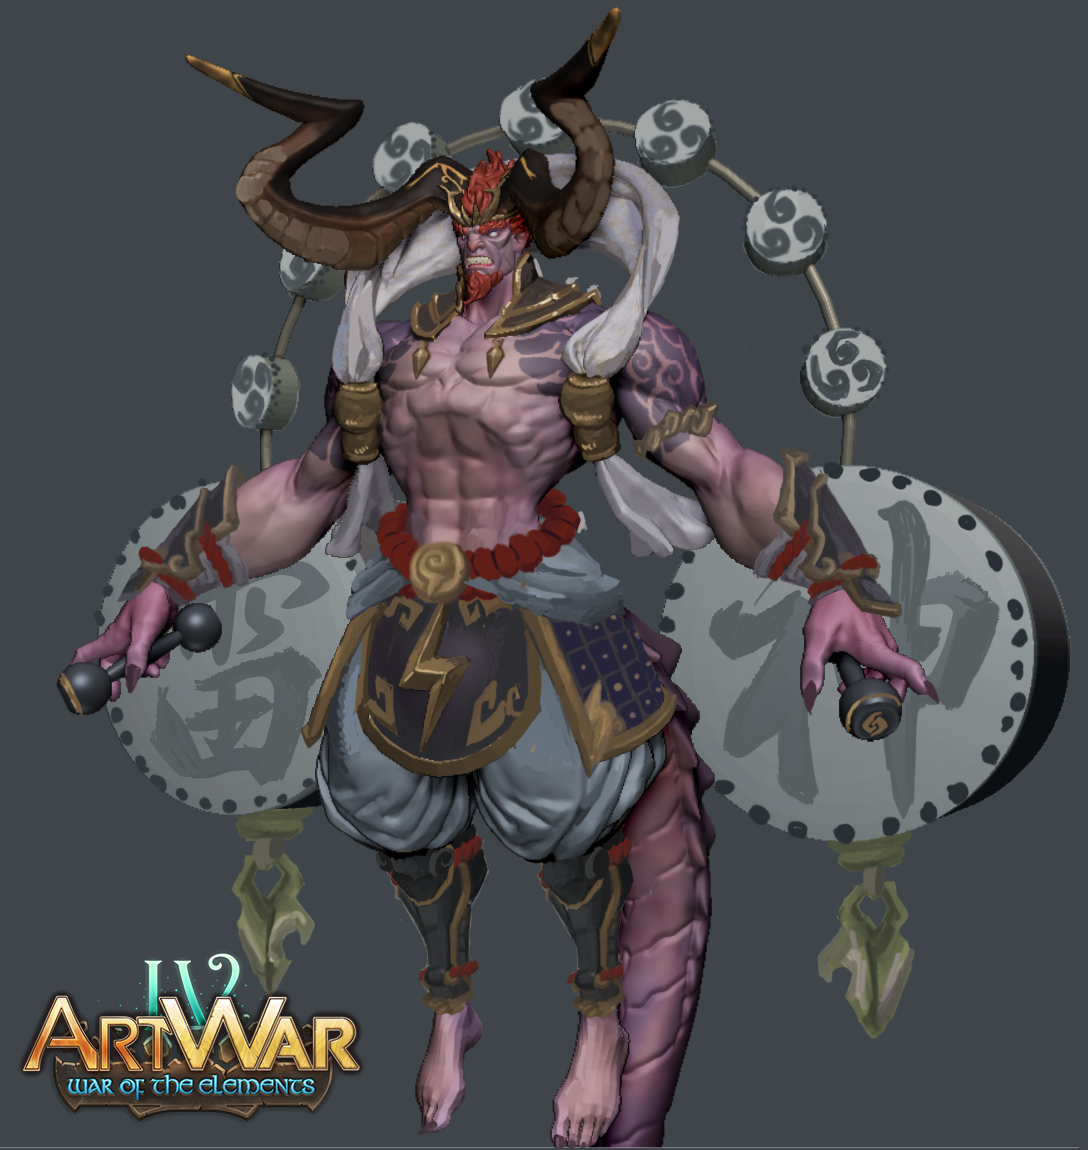
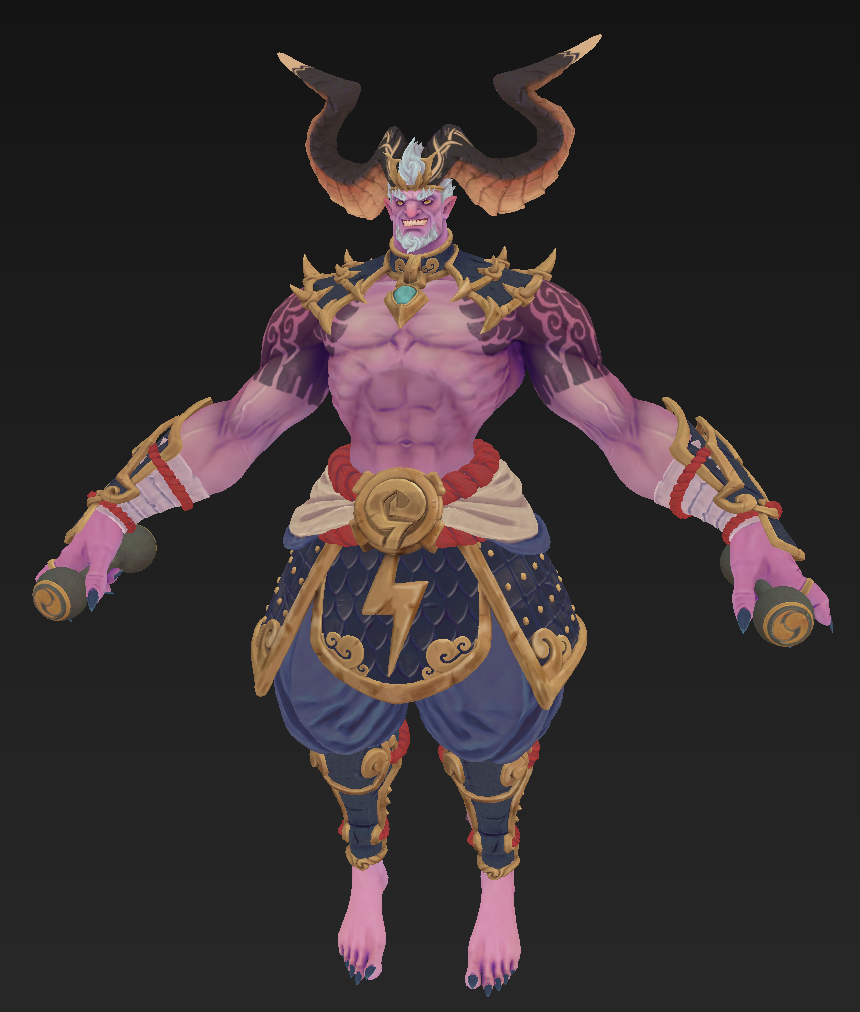
Here I will share how I took one month to work on and complete my featured model, 雷神 RAIJIN:The Thunder Caller.
Thank you, Sketchfab, for giving me such an exciting opportunity!!
Goal
In any personal work, I set goals for myself.
For this model, my goals were:
- Finish work for the Cubebrush Challenge on time.
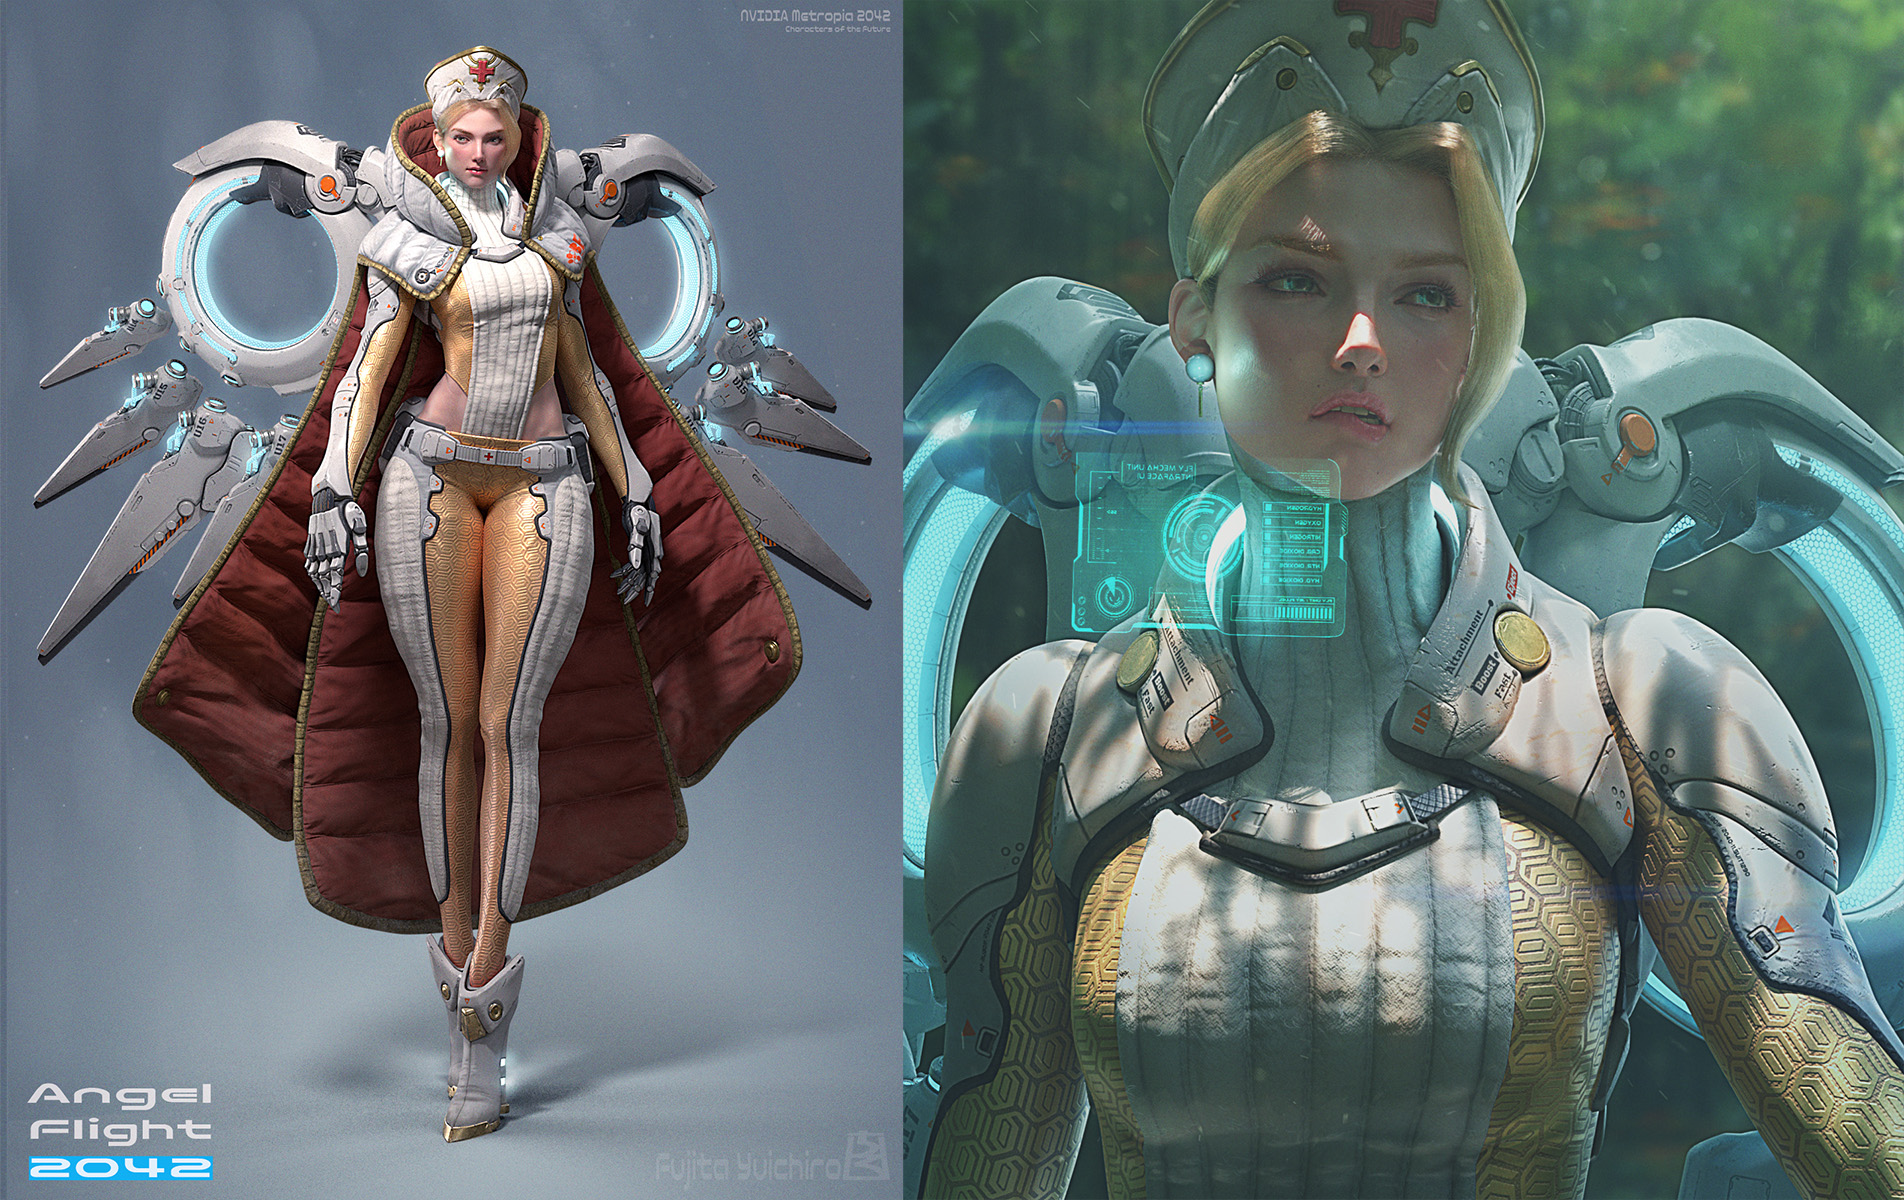
My previous personal work, Angel Flight 2042, was started for an Artstation challenge.It took me over 3 months because I didn’t compromise on quality (even about mesh topology!), which meant that I couldn’t submit it. :(
When I noticed the Cubebrush Challenge “Artwar4”, it had already opened and there was only one month until the deadline. I made up my mind to complete and submit an entry anyway.
You can see the whole process here. - Try an art style that I hadn’t tried before.
I wanted to try one of my favorite art styles, but I hadn’t made anything in that style before.
I mean, it involves stylized shapes with hand-painted textures with a fantasy feeling…
…Okay, yes, it’s Blizzard style!
It was a challenge for me to learn Blizzard’s style more and explore the workflow for achieving the style.
Inspiration and Sketch
Choosing one of the four elements—Fire, Water, Earth, Lightning—was the first step to join Artwar4. I quickly decided to create a character based on the inspiration of Raijin, who is the Japanese thunder god. Raijin beats the drums to call lightning and thunder.
Then I sketched.
I knew it was not enough as a design, but I started sculpting with only this image. One of my mistakes in Angel Flight 2042 was taking too much time in the 2D process.
The only thing I checked in this sketch was the silhouette. If the silhouette is impressive, the finished character will be impressive.
Quick Sculpt + Over Paint
Mixed process of 2D and 3D to speed up design completion.
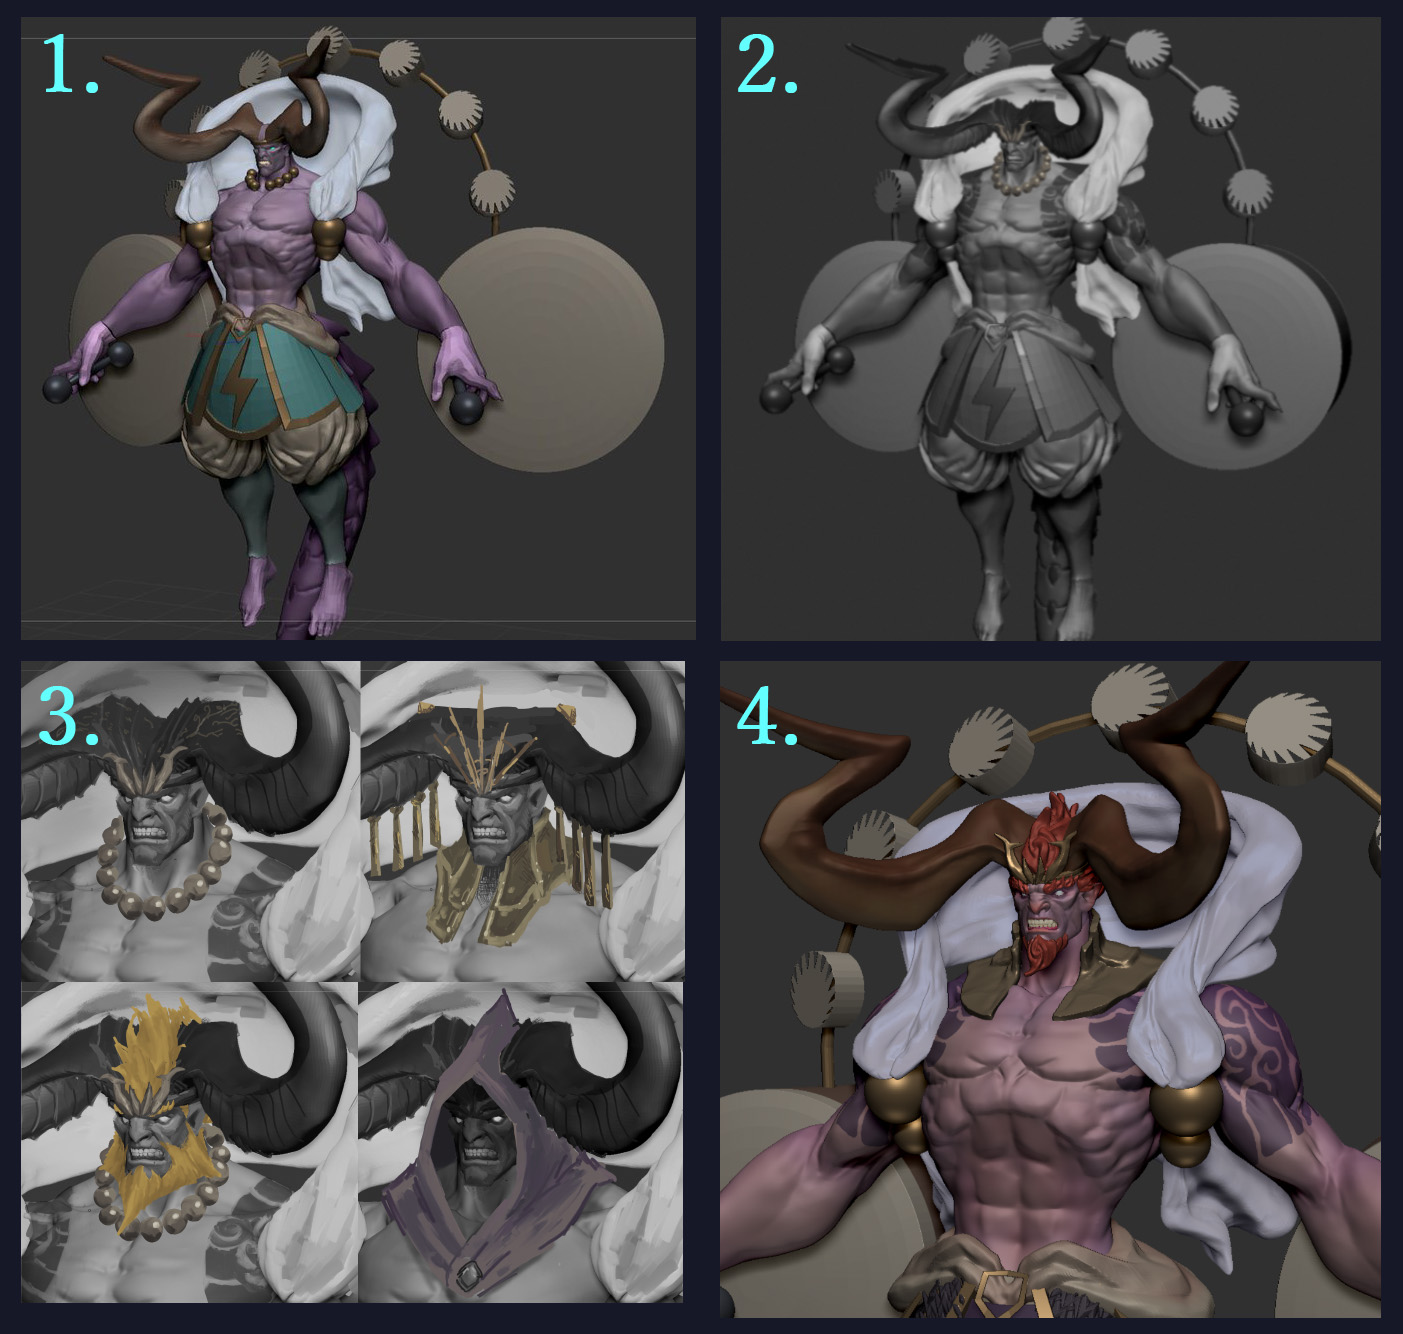
1.quick sculpt in ZBrush
2.overpaint on whole body
3.and face in several patterns
4.sculpt and Polypaint in ZBrush
After sculpting, I re-overpainted the sculpt to finalize the design. Here is the final Raijin design.
Then I started sculpting from this design.
Sculpt
Here are some sculpting tips.
Sculpting the armor frames
Needless to say, Orb-brushes Pack by Michael Vicente is awesome!
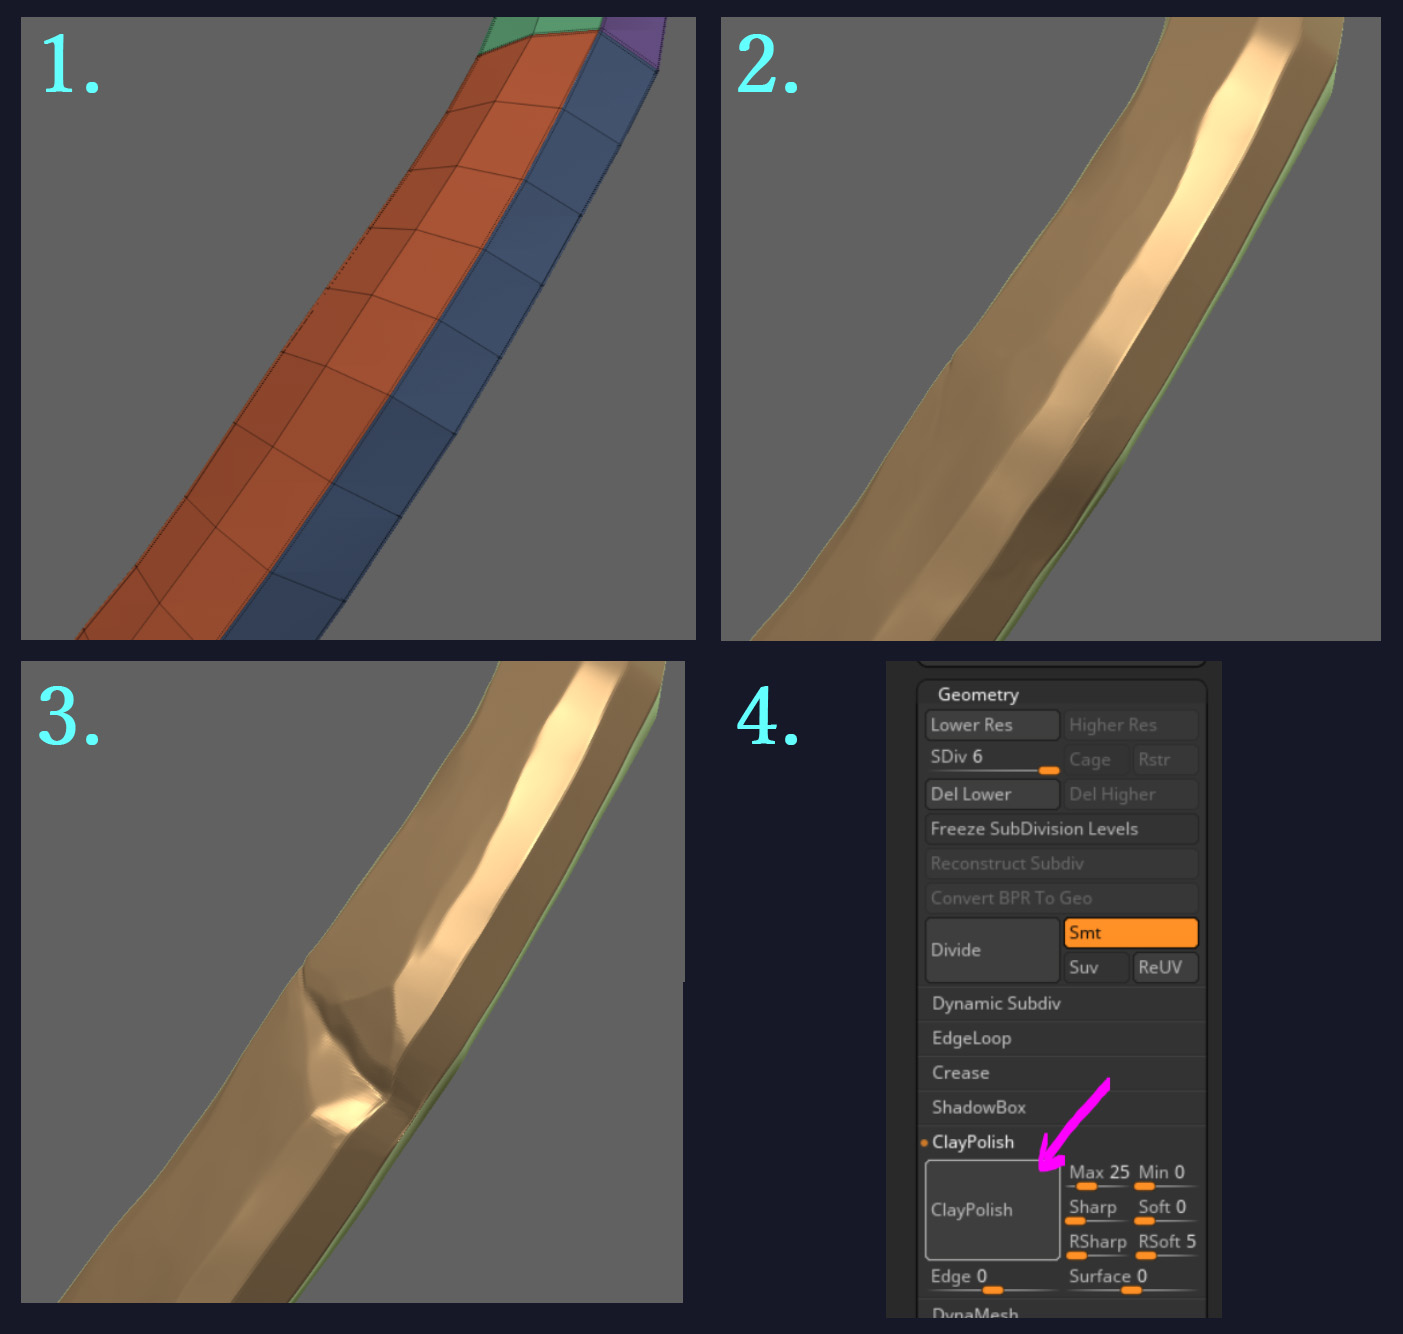
1.Simple poly modeling using ZModeler and set crease LV3
2.Bevel Trim Dynamic brush and HPolish brush
3.add details using stylized Orb-brushes
4.Clay polish to emphasize edges
Sculpting with Polypaint
During the sculpting process, I used Polypaint to get the final image.
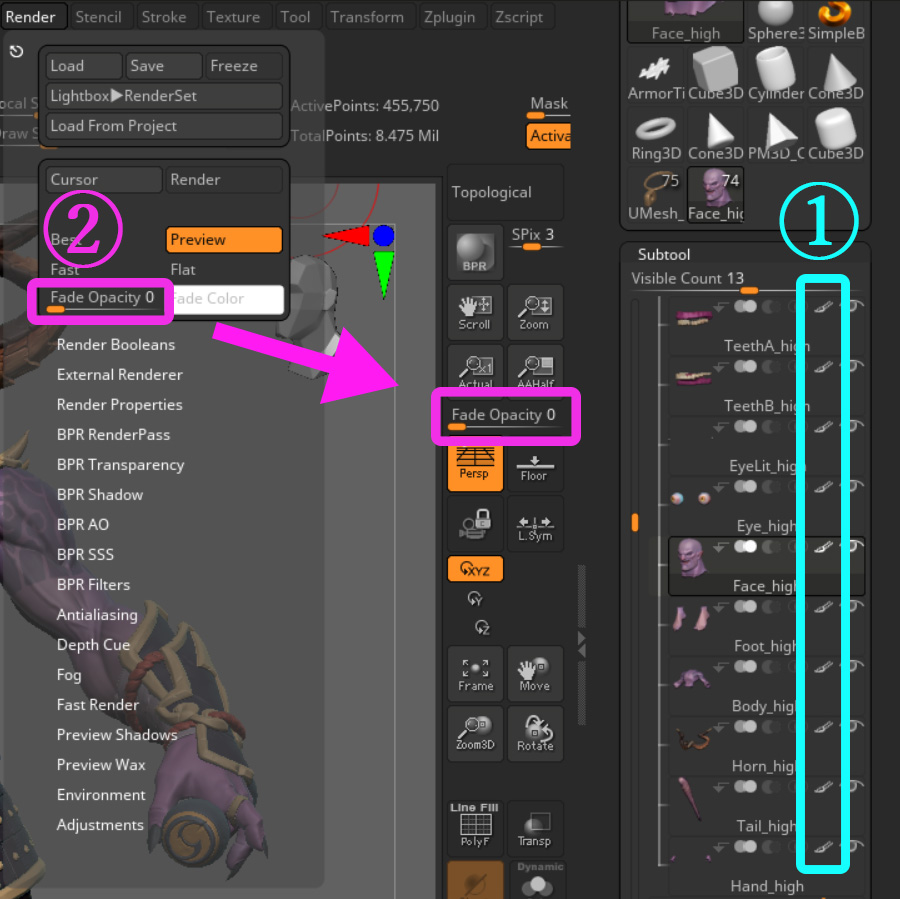
When you want to see the whole model without Polypaint, there are several ways to hide color.
- In the Subtool panel, shift+click on the ①paintbrush icons allows you to toggle all subtools hide / unhide.
- If you set ②Fade Opacity to 100 in the Render panel, Polypaint, masks and polygroups are no longer visible. In this way, you don’t need to change the status of ①paintbrush icons.
You don’t need sculpt all details in ZBrush.
It’s always a good idea to keep in mind that you can add details with Substance Painter instead of sculpting in ZBrush. If you do not need to change the shape, it is basically more convenient to work with Substance Painter.
I decided not to work with ZBrush on the details of the leather and pants for this character.
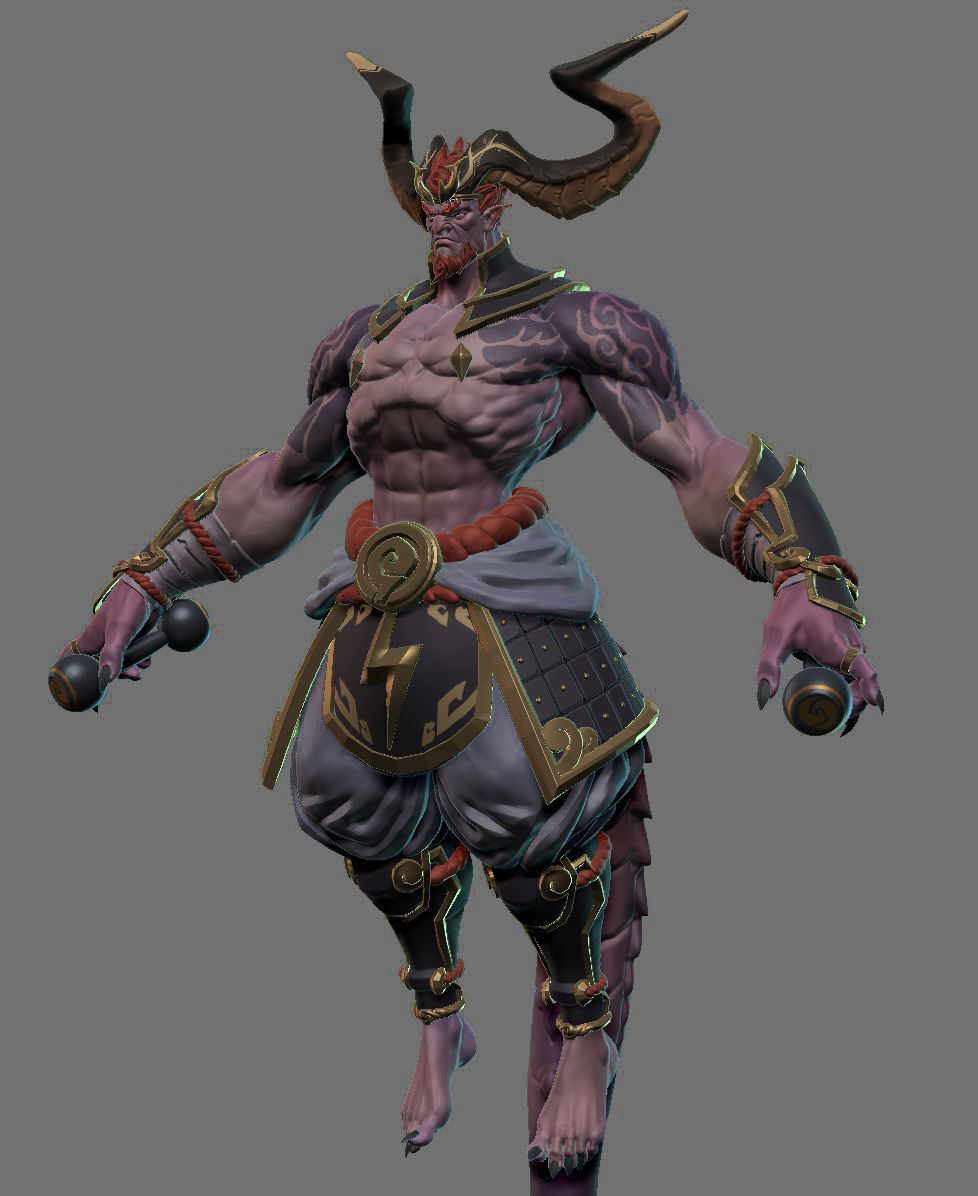
Here is the result of sculpting. The drums had been removed at this point because there wasn’t enough time until the deadline.
Retopology & UV
In this challenge, topology was not considered in the evaluation process. So I used 2 quick retopology methods in ZBrush:
- Decimation Master for hard surface (non deformation) objects, and
- ZRemesher for deformable objects like body, pants, and head.
The retopology process of the whole body only took me a day off.
I also unwrapped UVs quickly in ZBrush with UV Master, then exported to Blender. These days, my main 3D tool for personal work is Blender.
Using two add-ons has greatly increased the efficiency of UV layout in Blender: UVPackmaster 2 PRO and Texel Density Checker 2.
Baking and Texturing
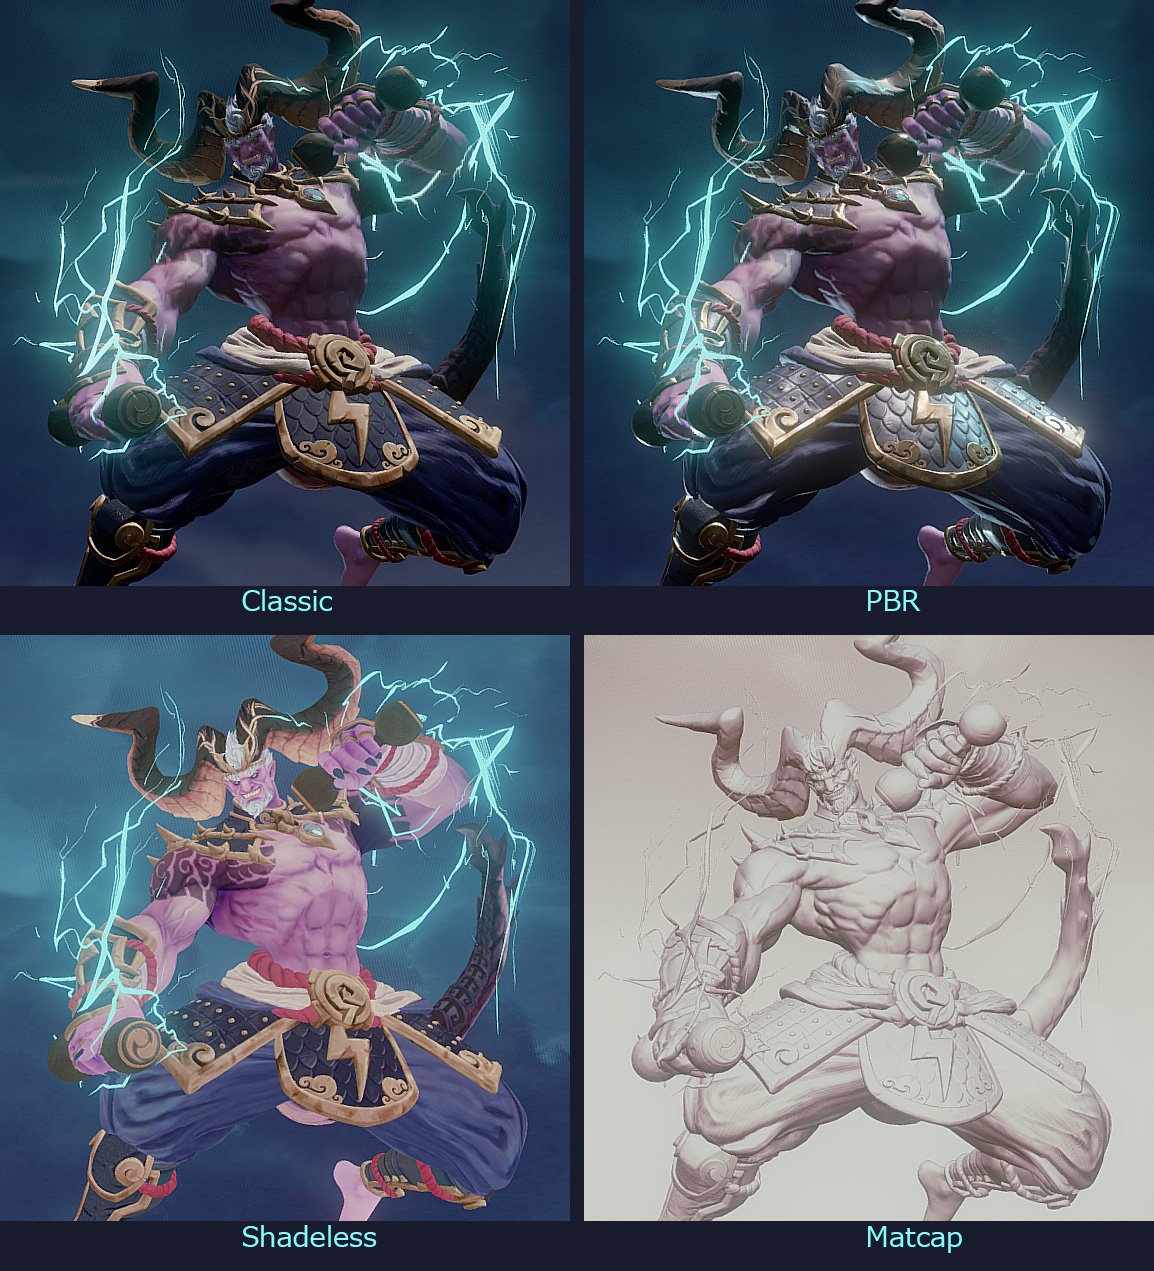
Before I began the texturing process, I thought about about the shader. Sketchfab has three renderers (Classic, PBR, Matcap) and two shading options (Lit, Shadeless).
In my previous work “Hunter”, which had hand-painted textures, I went with the Shadeless option because physical shade and shadow easily conflicts with hand-painted textures.
Although this project, “Raijin”, was also going to be painted by hand, I chose the PBR shader to get rim light.
Rim light separates characters from the background and emphasize their silhouettes. I thought a rim light would be helpful to show my work as an epic one even if I didn’t have enough time for painting. The only thing to keep in mind when you use rim light is choosing a reasonable light source. For this project, it’s lightning.
All baking was done in Substance Painter. I usually bake carefully with Marmoset Toolbag, but this time I could not afford it. Fortunately, the baking feature of Substance Painter had been significantly improved, and it baked quickly and without major problems.
When creating Albedo textures, I first created grayscale textures using baked AO, Curvature, and other maps. I added a little color to the grayscale using a Gradient Filter, marking bright areas in yellow and dark areas in blue. Finally, the unique colors that were painted with ZBrush were overlaid with Overray and fine-tuned.
To use the PBR renderer, it is necessary to create textures such as Roughness, Specular LV, etc. To speed up the workflow, I created several Substance Painter filters that automatically converted one channel to another. The conversion function was created with Substance Designer, and nodes were exported in SBSAR format. To use the SBSAR filter in Substance Painter, I simply loaded it as a filter and then dragged and dropped it onto the layer.
With these converters, creating other textures was almost just a tweak.
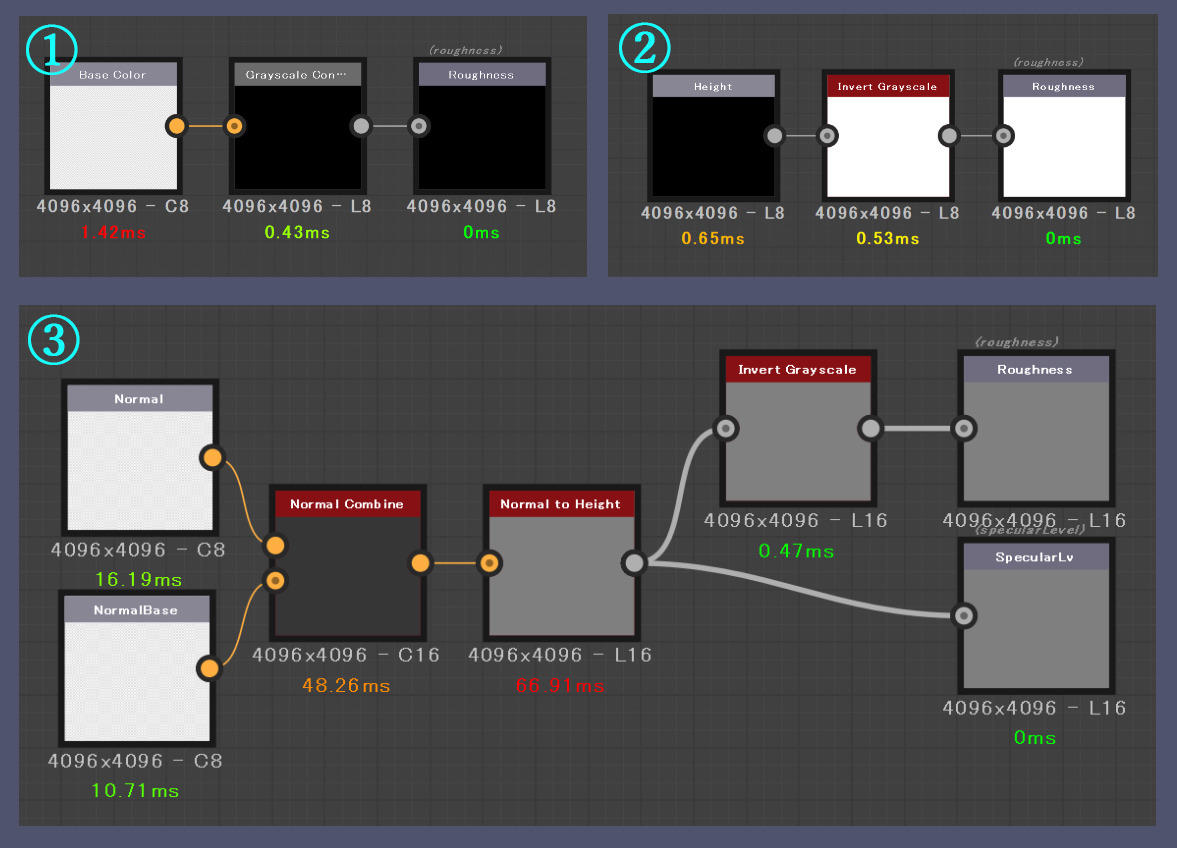
1.Albedo to Roughness converter
2.Height to Roughness converter
3.Normal to Roughness / Specular LV converter
Making the Background
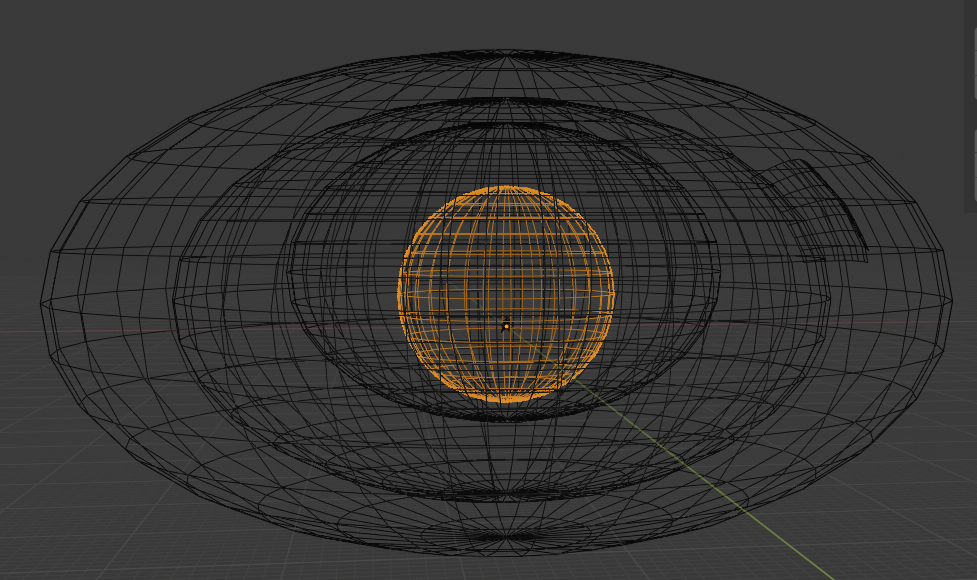
I prepared 4 large spheres to represent the sky, and expressed the depth by using a transparent map. All 4 have the same albedo texture, but have different transparency maps.
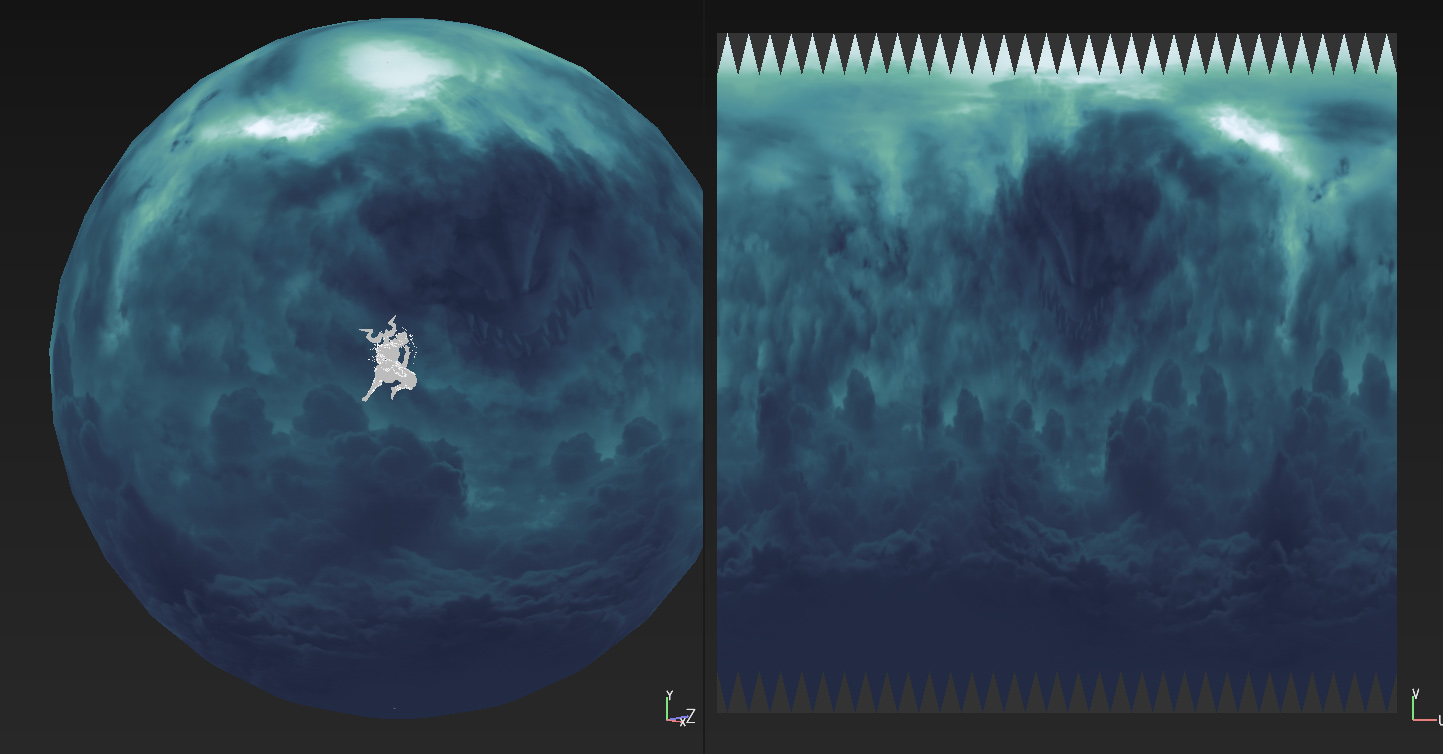
To paint the albedo texture, I projected a cloud picture onto a sphere with Substance Painter. As for the picture of the cloud, cc0 textures on sites such as HDRI Haven and Pixabay were very convenient.
First, I concentrated on value only and created a grayscale texture.
Color tone was added by applying a Gradient Filter.
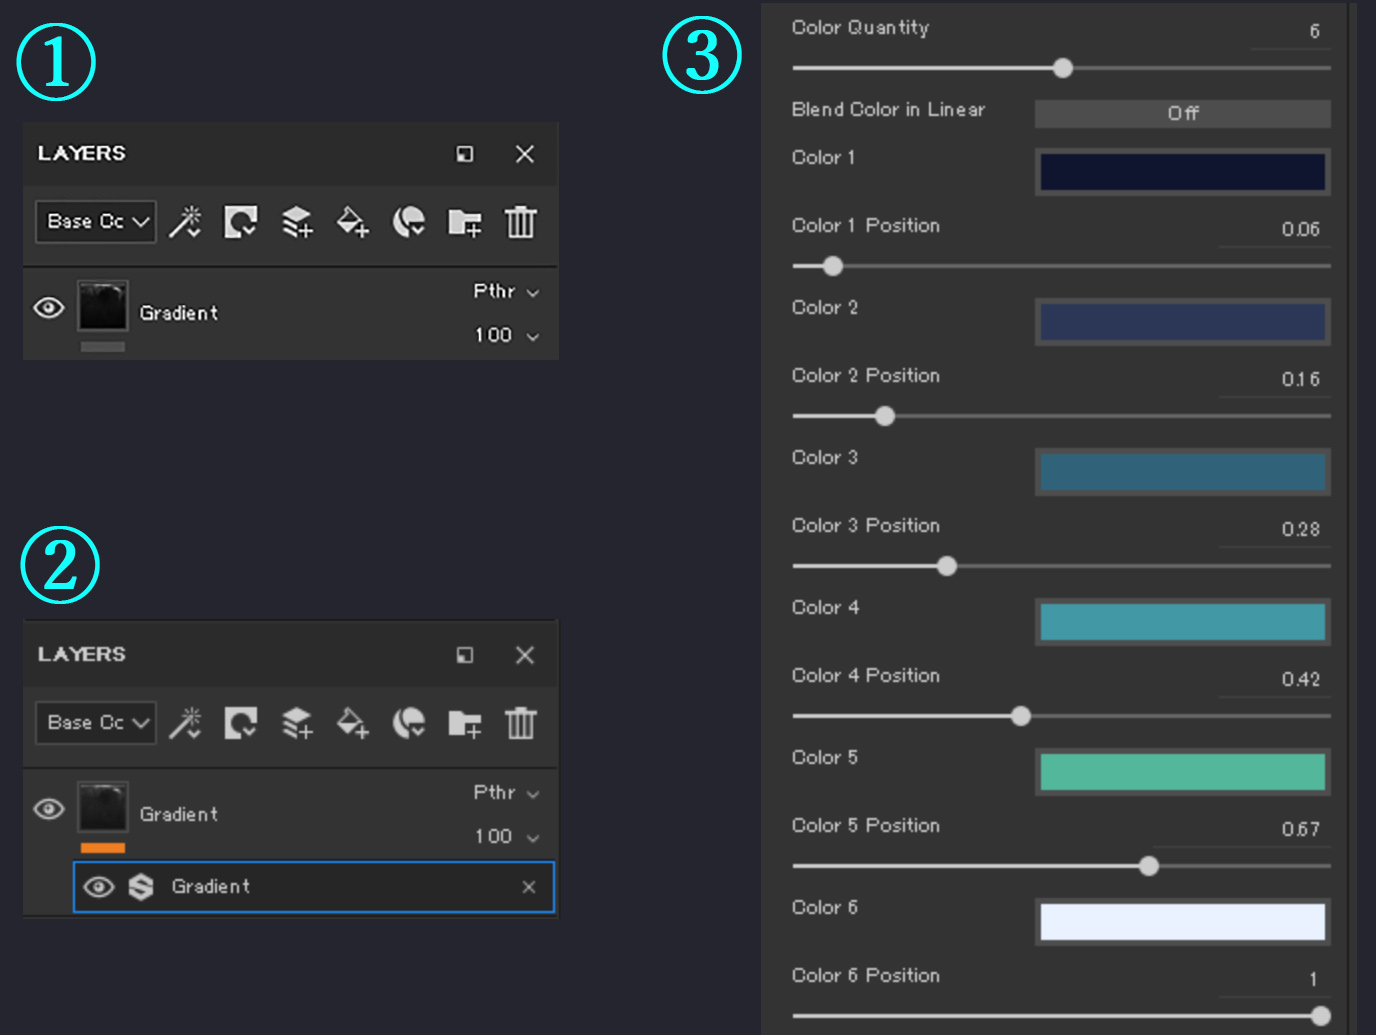
1.Add a layer on top of your layers and set Blending mode to Passthrough
2.Add a filter and choose Gradient filter
3.Adjust Gradient filter setting
The point when using a Gradient Filter is to change the hue slightly. Although the color is blue overall, the brighter value hues are slightly shifted to yellow.
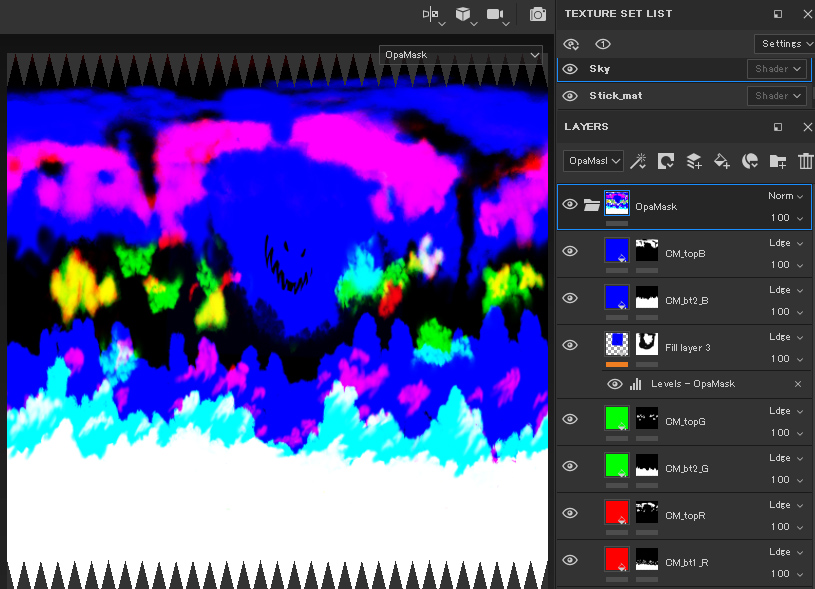
To paint 3 opacity masks, I added a user channel set to RGB8 and named it OpaMask.
I painted the nearby background on the R channel, middle distance background on the G channel, and distant background on the B channel.
The biggest sphere doesn’t have an opacity mask. It is important to overlap each layer with Blend mode set to Linear Dodge (add).
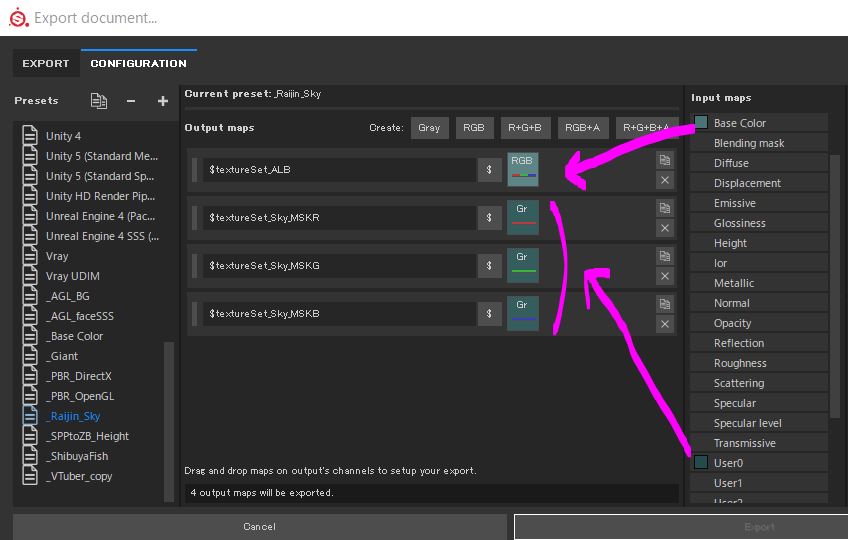
By setting the export configurations like this, 1 albedo and 3 grayscale opacity masks could be exported.
Effects
I used Grease Pencil in Blender to create the lightning effects. It was my first time using Grease Pencil in earnest, but I quickly realized that it was a very suitable tool to create a stylized effect.
I made a video explaining how to actually draw with Grease Pencil and prepare for exporting to Sketchfab.
Sketchfab Settings
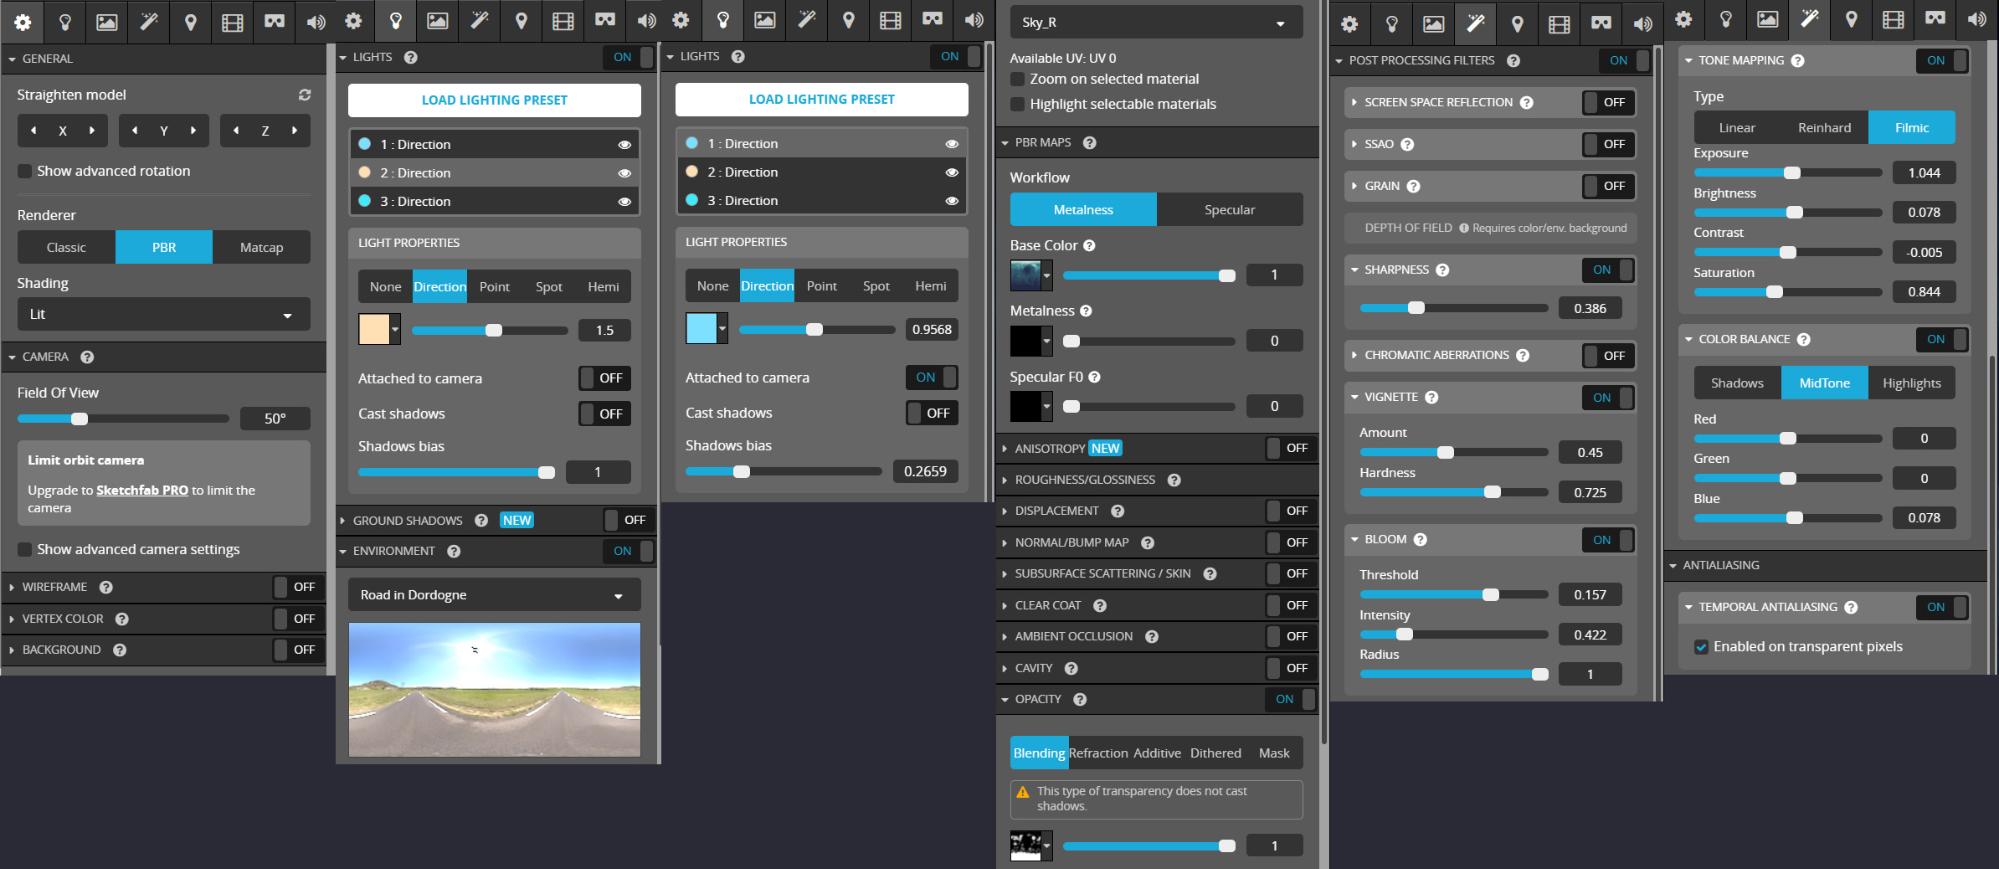
As mentioned above, I chose PBR for the Renderer and Lit for Shading.
The main light has a warm color and comes from above. The angle was set to emphasize the Greek arch of the belly.
The first rim light comes from the left. The angle has been adjusted so that the serratus anterior muscle (a.k.a. the boxer’s muscle) is illuminated and looks powerful. The second rim light illuminates from the right, emphasizing the silhouette. I checked “Attached to camera” for both rim lights.
Please refer to this image for settings about cloud materials and post-processing effects:
Outcome and Future Effort
After finishing this personal work, it was really good that I had been able to achieve my goal of submitting to the Challenge. Although I abandoned making the drums, I was able to complete the character by the deadline anyway.
I’m not satisfied with my other goal, working in Blizzard’s style. I needed more time to tweak the textures to better blend the hand painted texture with PBR.
In my future artistic work, I would like to take enough time to draw more brilliant textures.
On the technical side, I will challenge myself to use Houdini to add procedural details onto simple objects to speed up the stylized sculpting workflow. There are many things I could work on right away, such as distorted beveling, metallic surface detailing, and random sword cuts.
Thank you for your time and reading to the end.
You can find me and more of my works on: ArtStation / Twitter / LinkedIn

