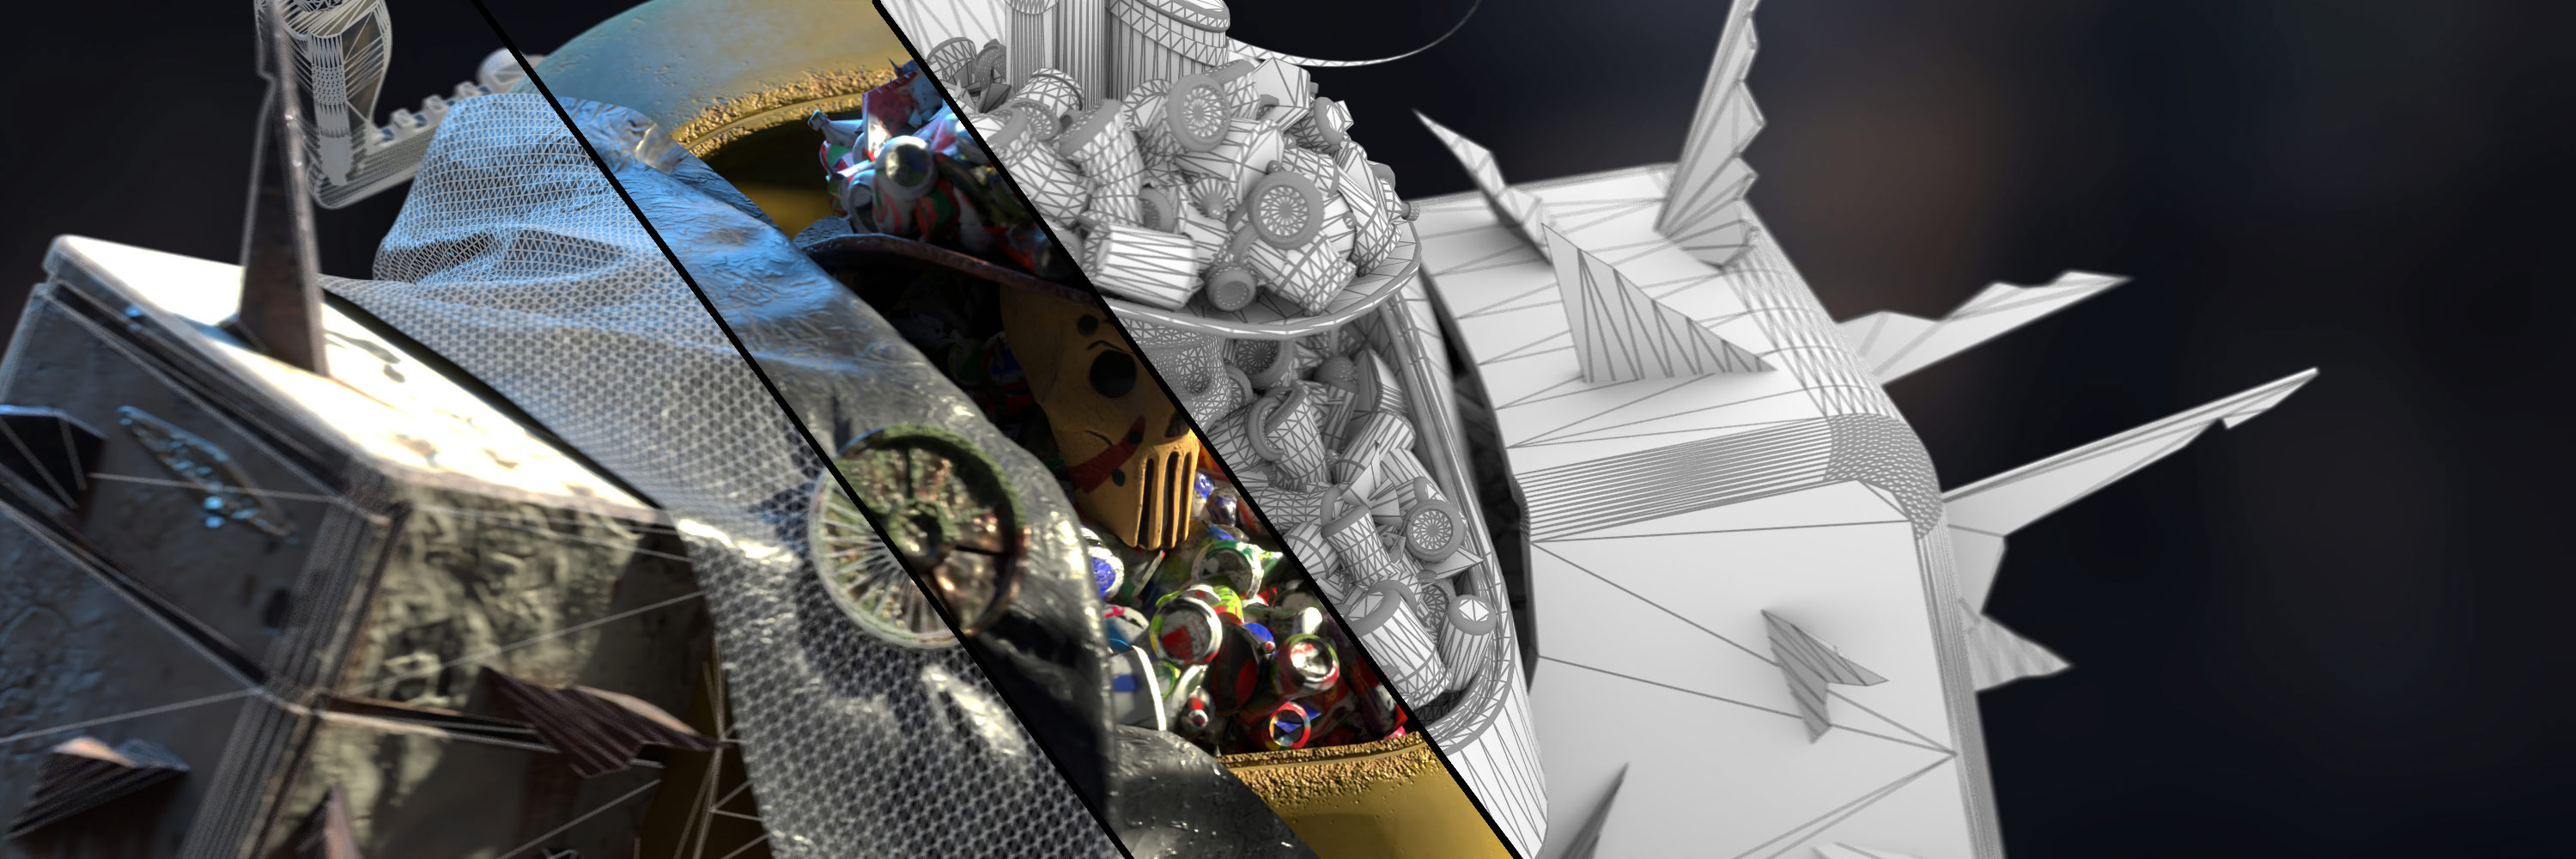
Who I am and why this article should be interesting to anyone
Well, hello, my dear reader. Glad to see you making it through the inter-webs to this article. So, make yourself comfortable and let’s begin.
My name is Bohdan Lvov and I’m your storyteller today. Besides that humble but important role, I am characterizing myself as a 3D artist from Ukraine. Recently I participated in Sketchfab Modeling Challenge: Trash and happened to take the first place, which immediately necessitated further exploration of the process of creating the winning entry. Here it is:
So, without further ado, let’s dive into the thick of it.
Design and importance of planning
The theme of the challenge was trash. Like literally, some wasted materials that nobody wanted anymore. It sounded pretty straightforward and a bit boring, plus someone in the comments noted that one of the prizes is a framed art print of the winning entry, so the idea of having a picture of trash as a prized possession seemed off the mark.
But, as the old man said: “if you don’t know what to do, make a character”, so I’ve followed this mantra once more. I’ve done it before, so it was worth a shot:
Keeping in mind time limitations and that the end goal of the project would be a real-time model in a web-player, I decided that it should be a single character, without any surroundings. All of the resources will be dedicated to the character itself. These limitations could serve as an advantage and help to shape the character itself. Since the presence of trash was a requirement for this theme, I determined that the character should have some trash embedded in itself. So it was then that I realized the character should originate in the junkyard, probably as a result of careless disposal of dangerous waste, just like in the Teenage Mutant Ninja Turtles.
So, I started to sketch.
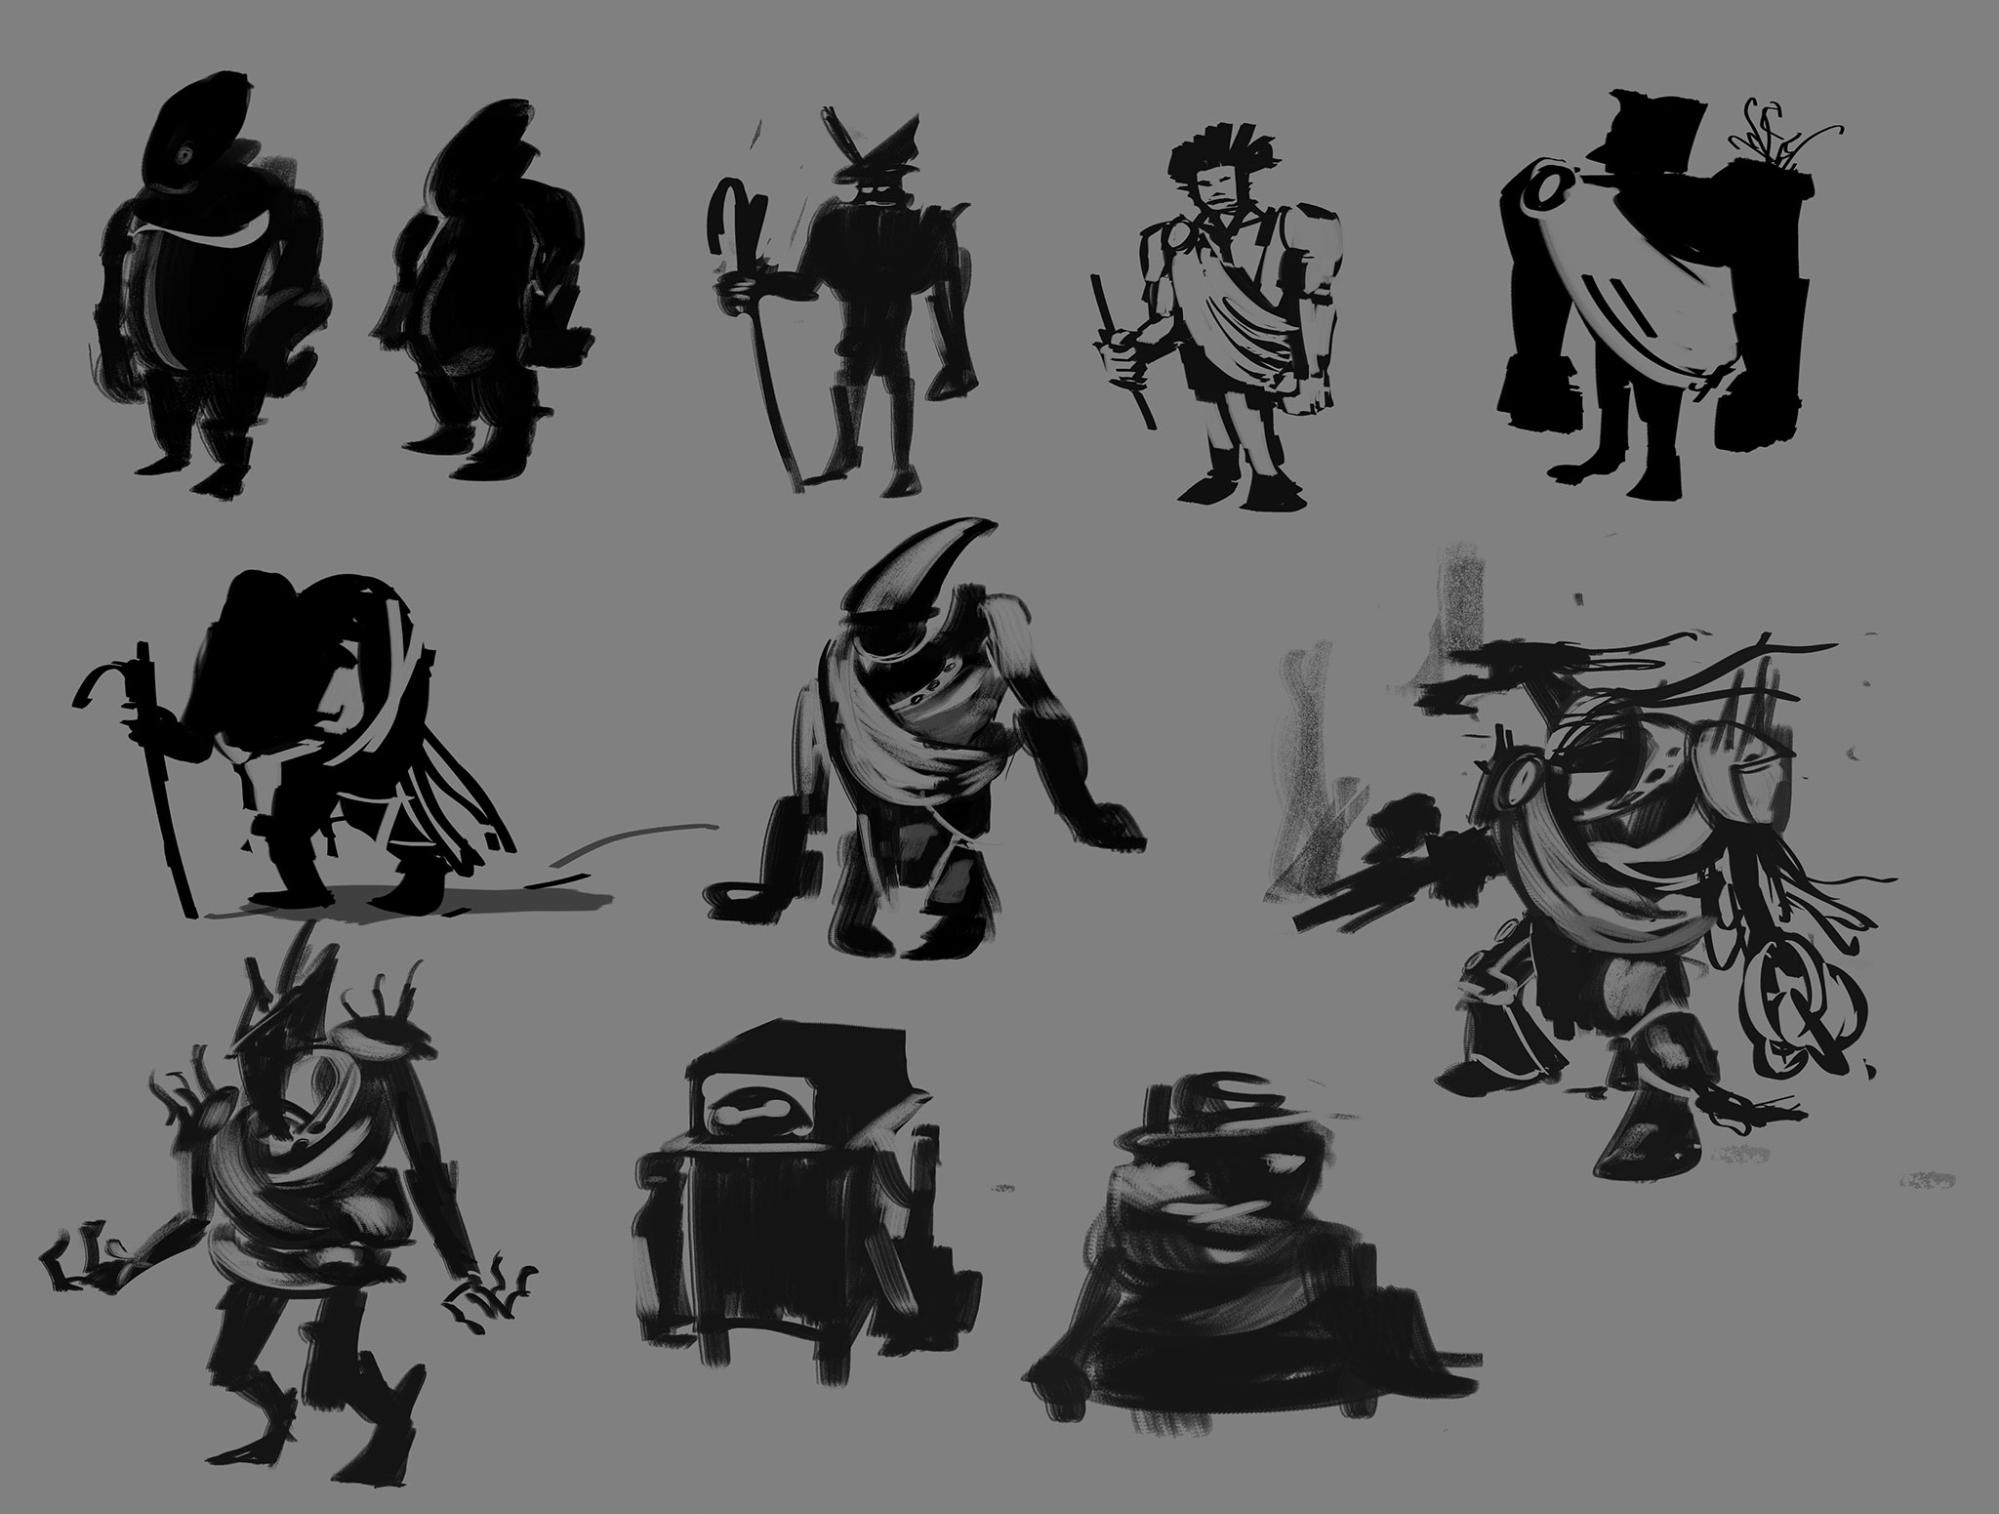
There was one problem, though: as a lot of 3D artists do, I chose this medium because I wanted to express myself visually, but couldn’t draw or paint. After a while, however, issues started popping up: there was a huge toolset at my disposal, but I had no idea what exactly to do with it. This led to a great amount of struggle and a lot of wasted time in which I tried to compensate for my shortcomings. Fortunately, some time ago I actually started to sketch regularly, which gave enabled me to sketch for this project:
It ain’t much, but it’s honest work, as they say.
Yeah, even if initially I intended those to be silhouettes, they ended up as whatever this is, so this stage turned into the making of “preliminary sketches”, as I call them. Of the many forms, one in particular seemed to stand out a bit more than the others. I decided that beefy gladiator-like figures looked most interesting, so I proceeded with more detailed sketches:
As you can see, that’s when the skirt and torn cloth parts appeared. It’s not a coincidence, since at this point I suddenly remembered that few years ago I had made some trash bags models:
Looks like people were really into those bags, since they’ve popped up as top search results on Sketchfab, ArtStation and even Google Search itself!
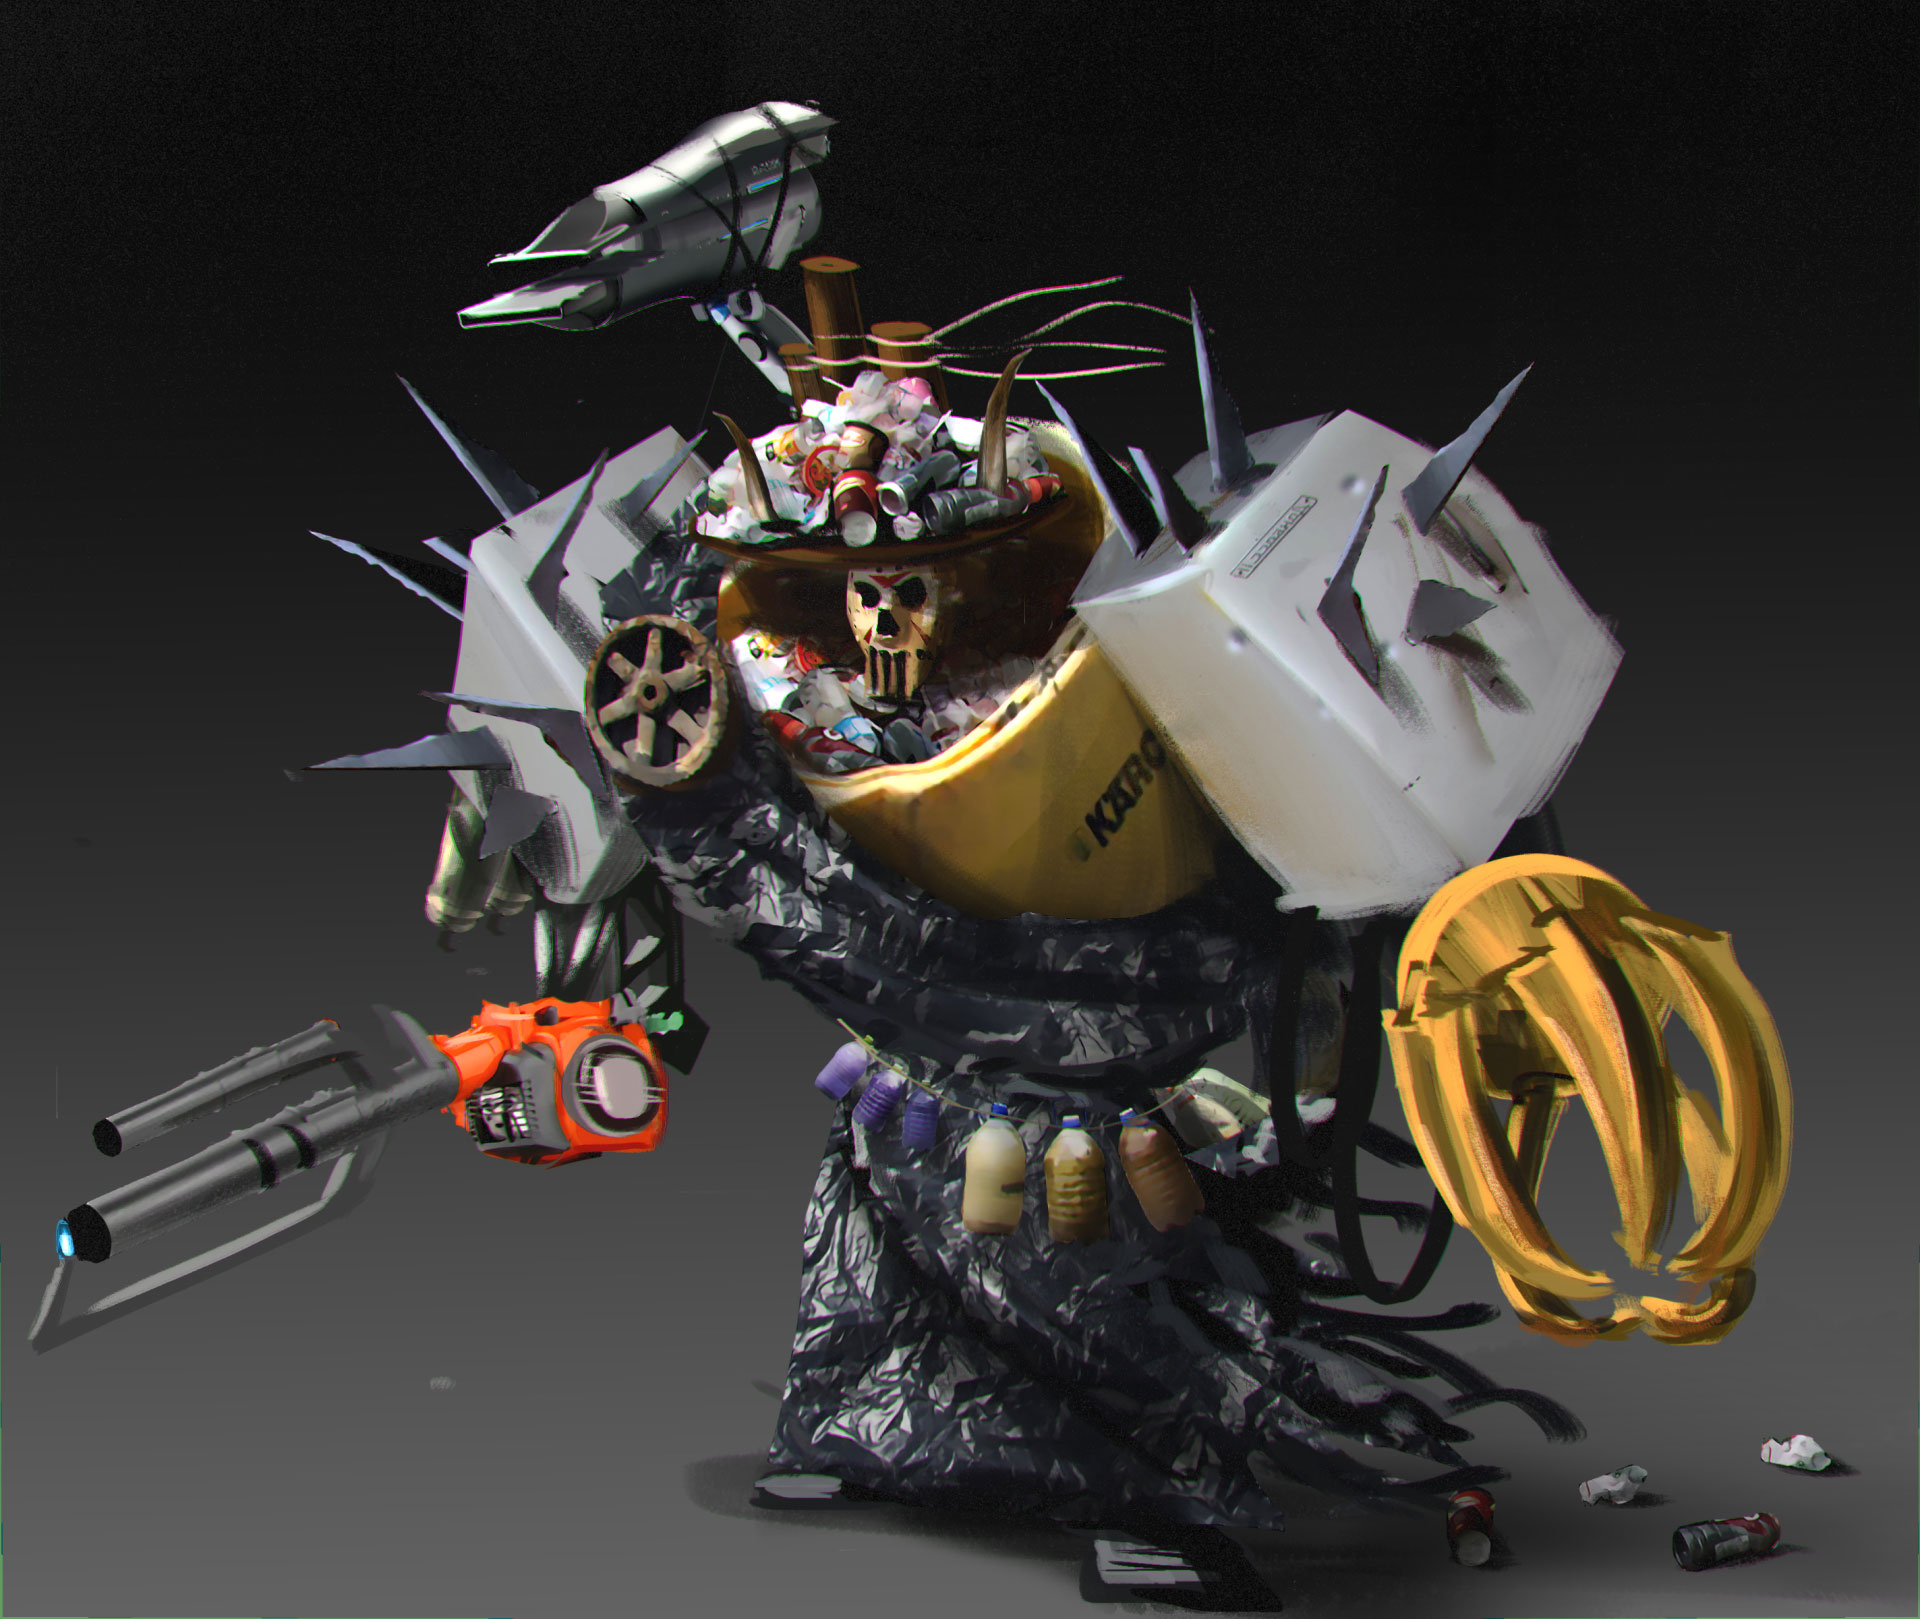
I was confident that this amount of simulation would be doable and I could make it look convincing enough. Since the main parts were already developed, it was the right time for the more detailed color sketch:
It’s important to understand what the final result will look like and what the point of the whole operation is. Back in the day I tried to work on projects like this without preparation, just designing everything on the go, and I missed the target again and again. This time, thanks to the sketches and early defined direction, the process was enjoyable and relaxing. Except for the fact, of course, that I had three days left to do everything else. Did I forget to mention that I completely ignored the deadline and started literally at the last possible moment? Right, I forgot to manage my time limits the same way as I just forgot to mention them. But did I eventually deliver on schedule? Well, you’ll find out in the next sections.
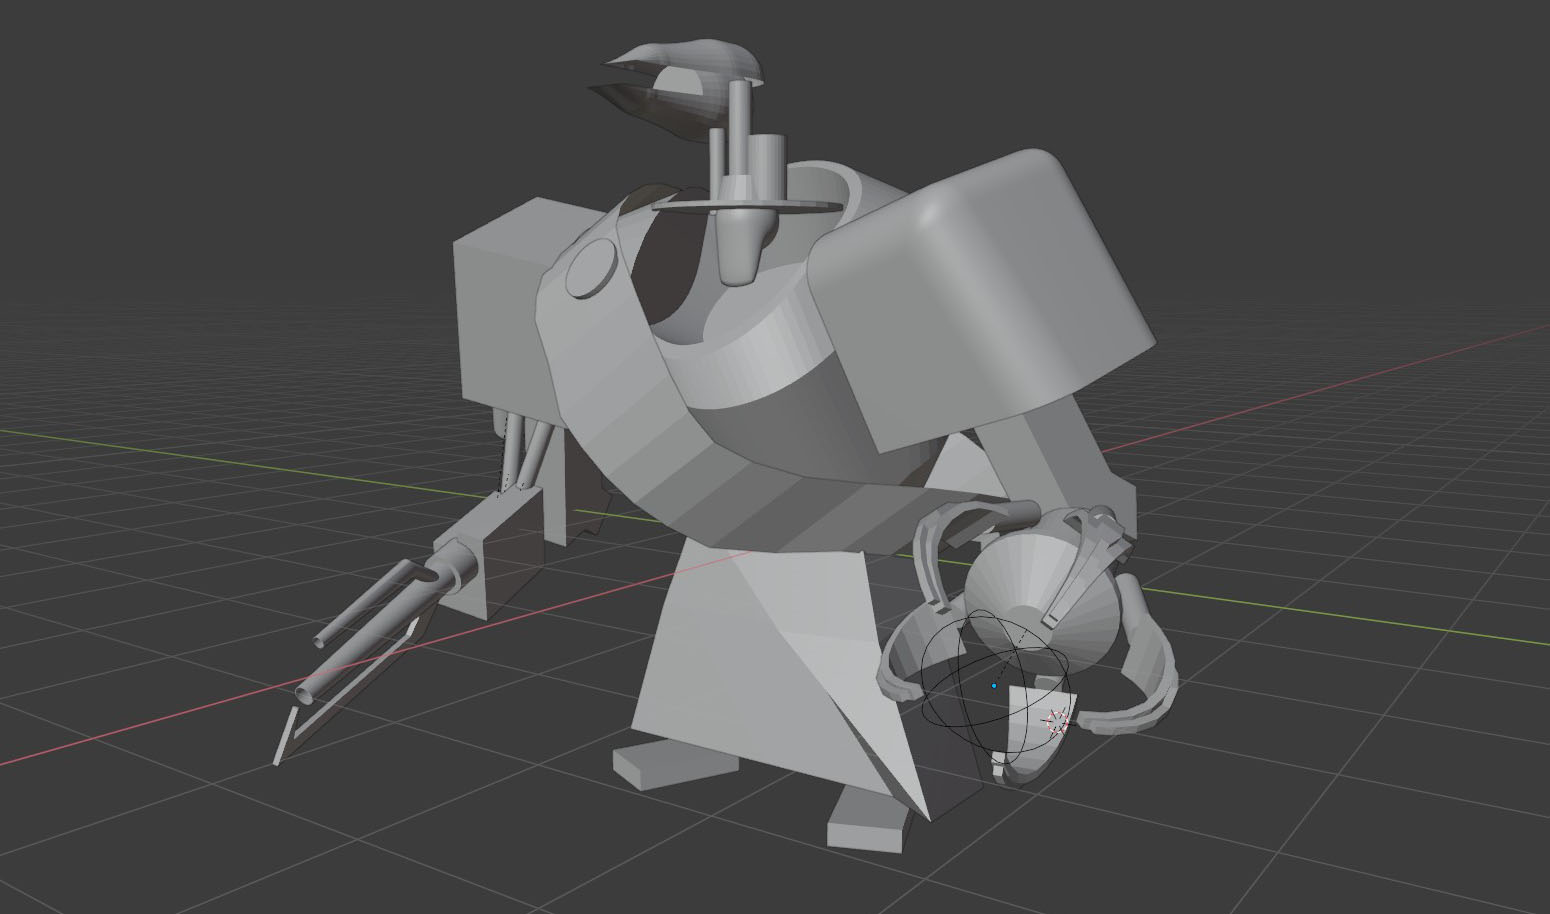
Modeling of base forms
As with the sketches itself, it’s important to start as simple as possible. Fewer polygons and objects means fewer problems with their rearrangement and editing, since the point of this step is to define basic forms of geometry and make them a roadmap, basically.
As my tool of choice, I used Blender 2.90, which was in Alpha at the moment when this model was in production.
Blender is not only an awesome piece of software, but also has an incredible community that allows users to utilize a multitude of add-ons, a few of which I will mention in the sections below.
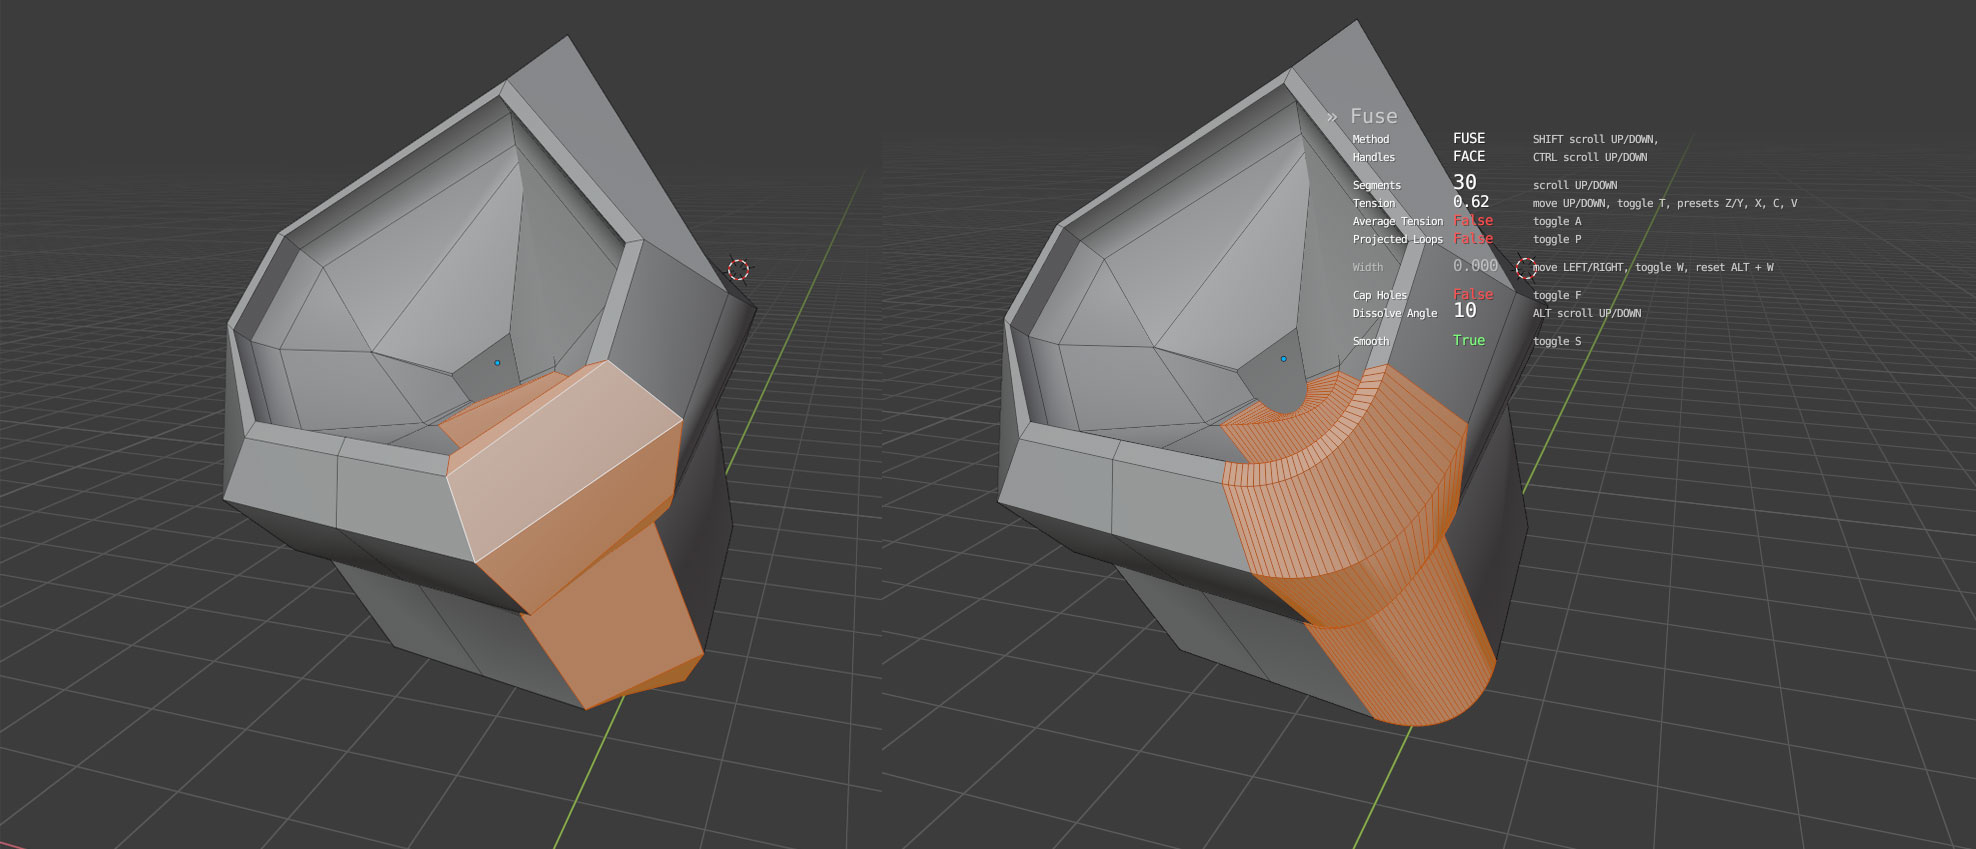
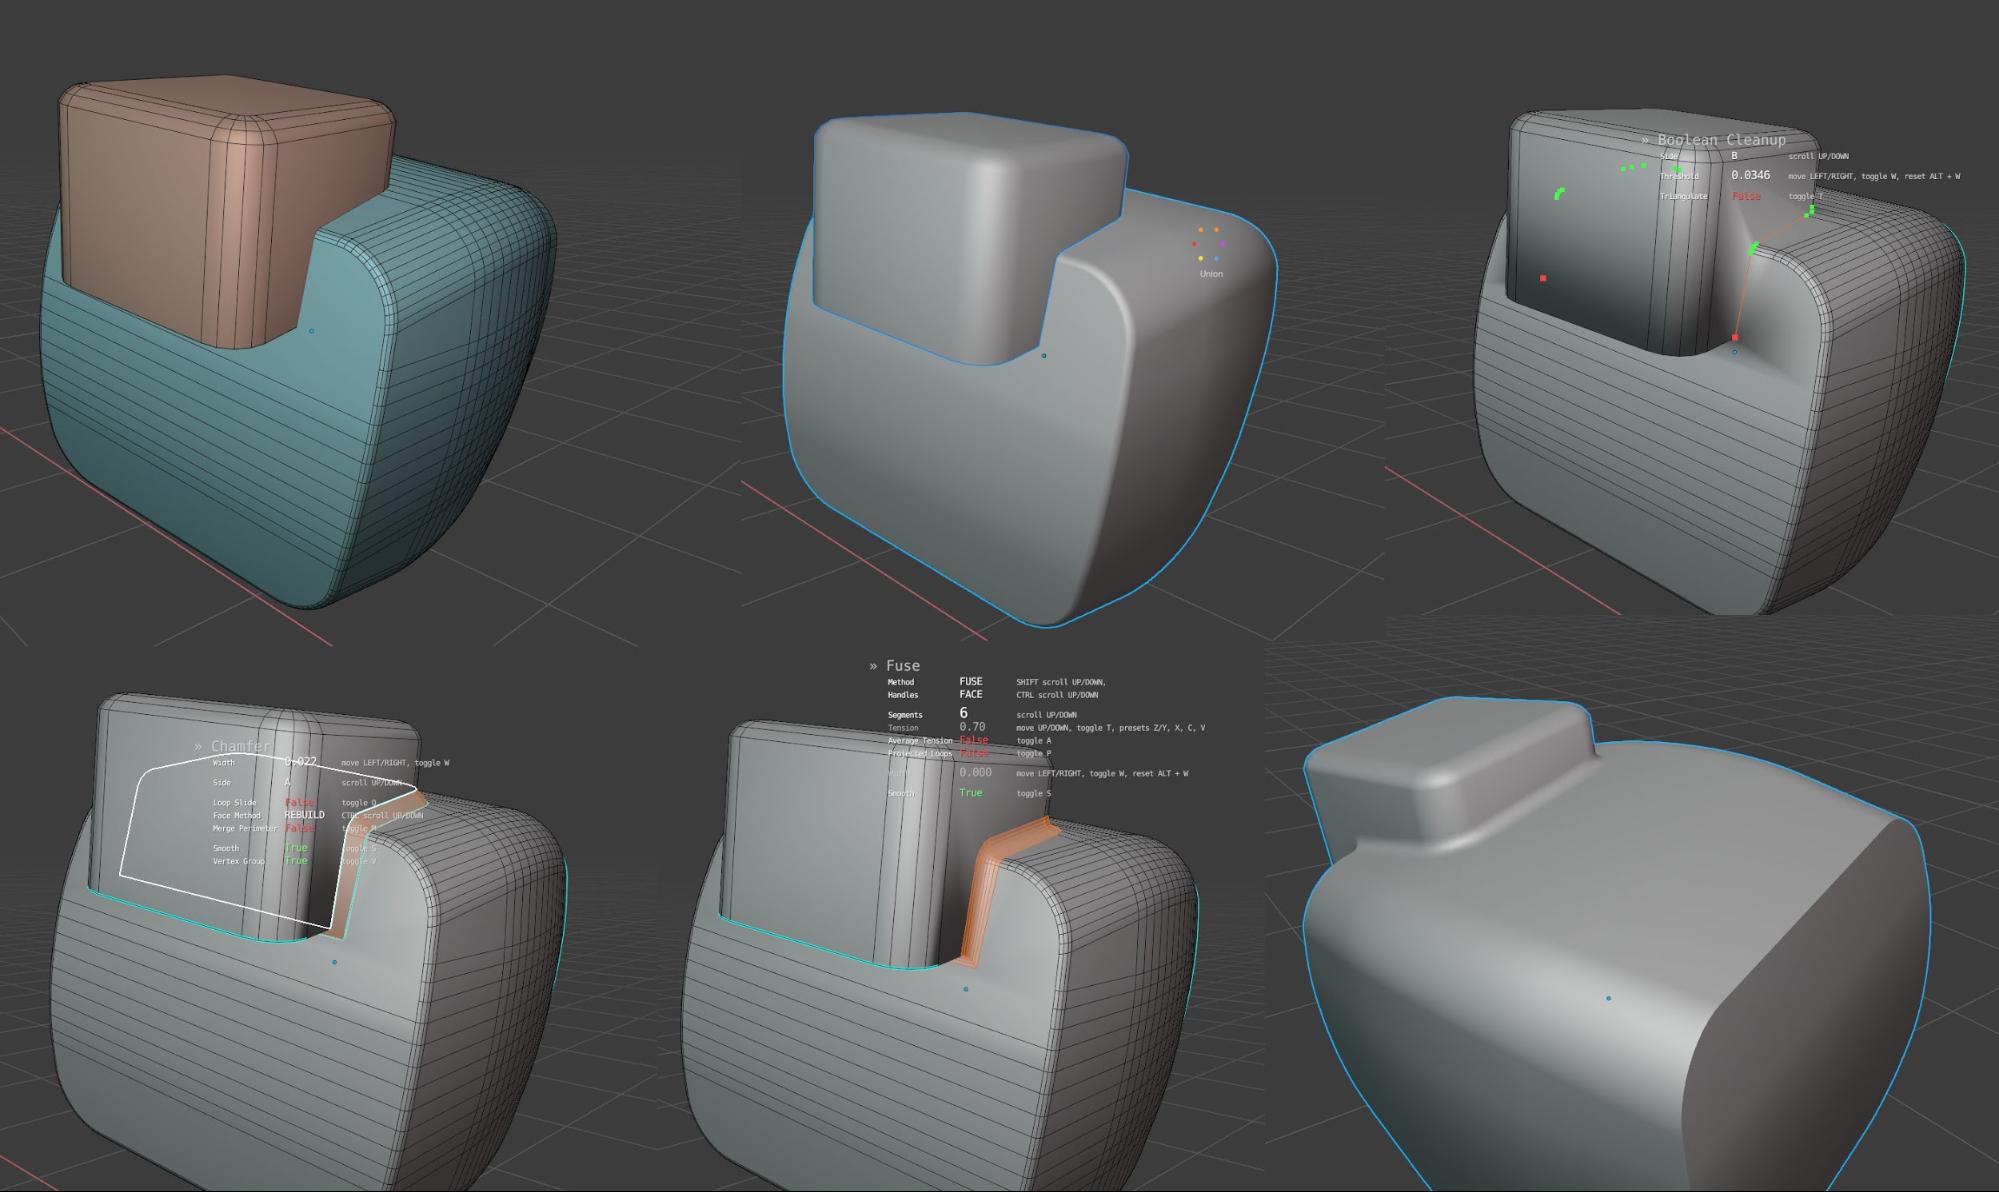
The first of the add-ons, MESHmachine, was a great help on the quest to make a more polished middle part of the model.
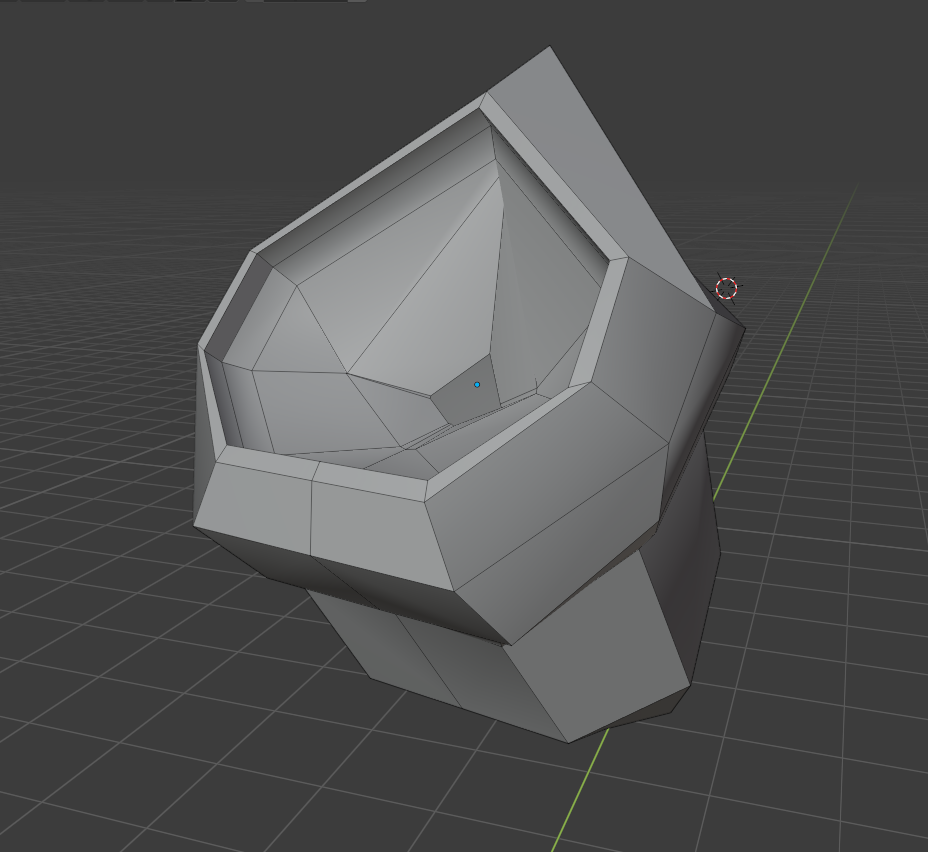
As you can see, there are very few vertices in this model, which makes it easy to control.
Thanks to MESHmachine, it quickly became a finished piece.
All of these crazy settings allowed me to fine-tune the bevel for the best possible result. This toolset is especially useful with washouts:
Of course, the same can be done in Blender without any addons, by shifting a row of vertices along the edge, double-tapping G and then beveling it, but after the first thousand repetitions of this operation it gets tiresome, so this addon comes in handy.
Simulations
The body
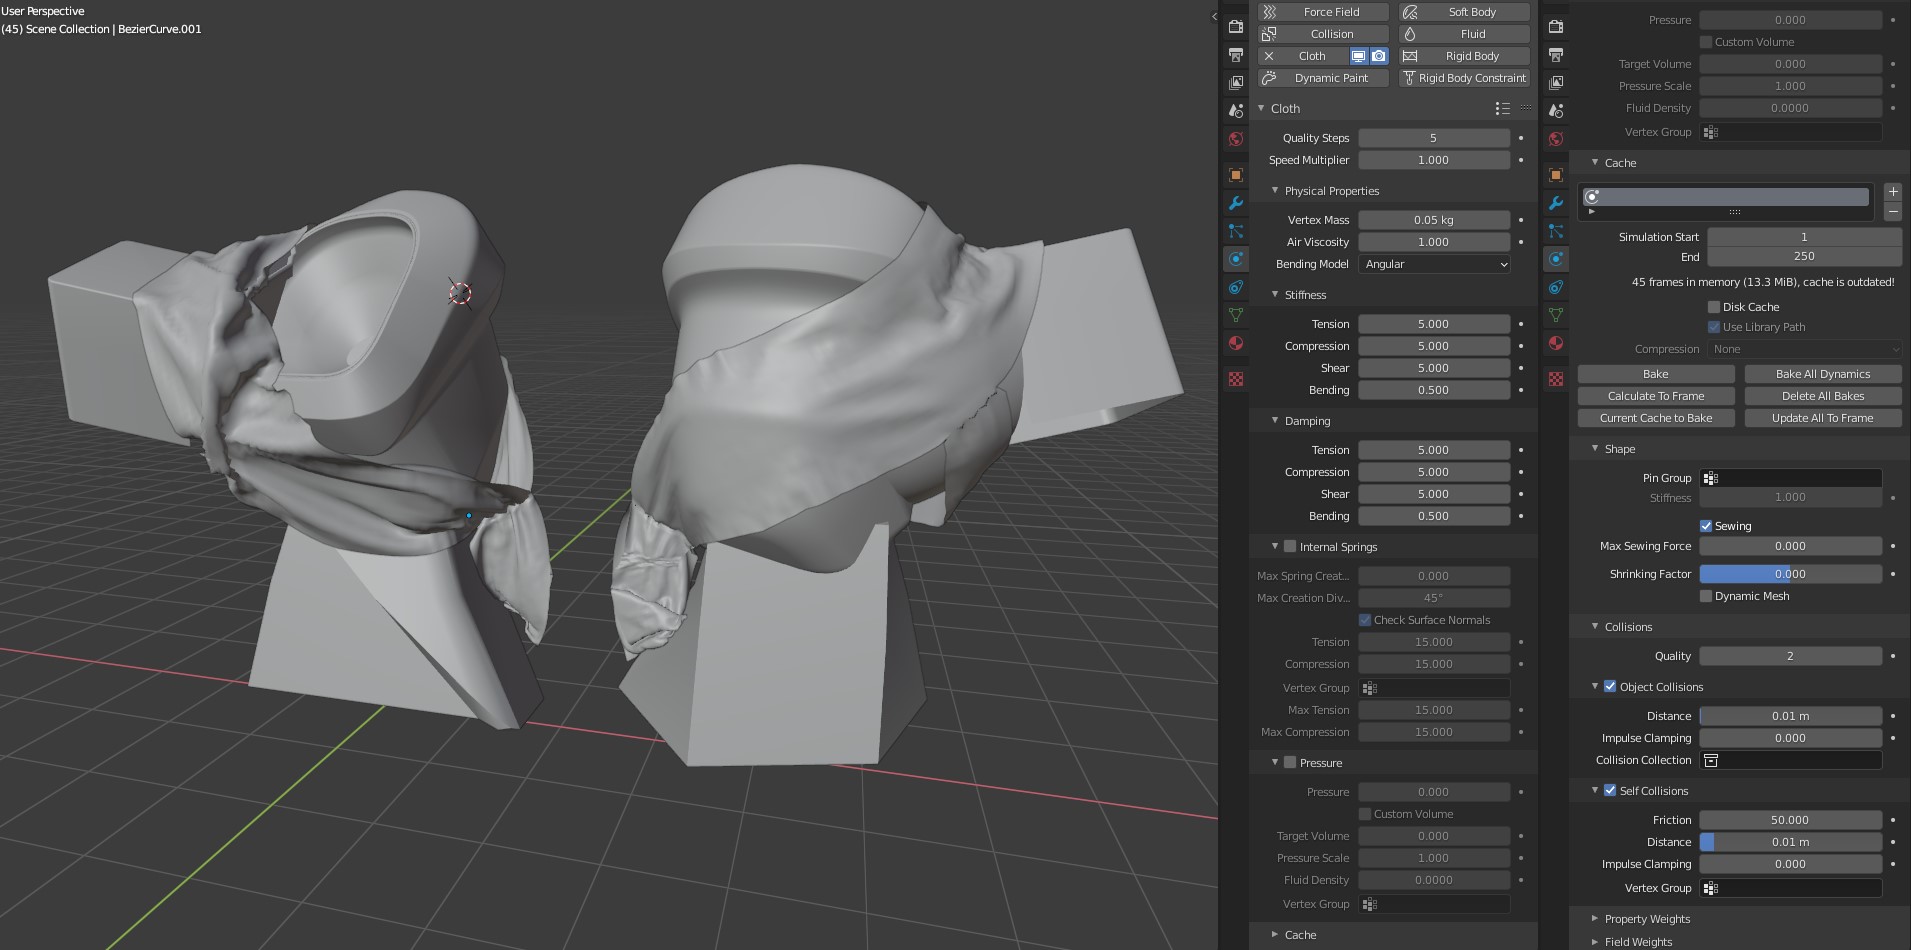
For the sake of simplicity, all the objects that cloth would be interacting with were merged into one object, just to keep my settings in a single place:
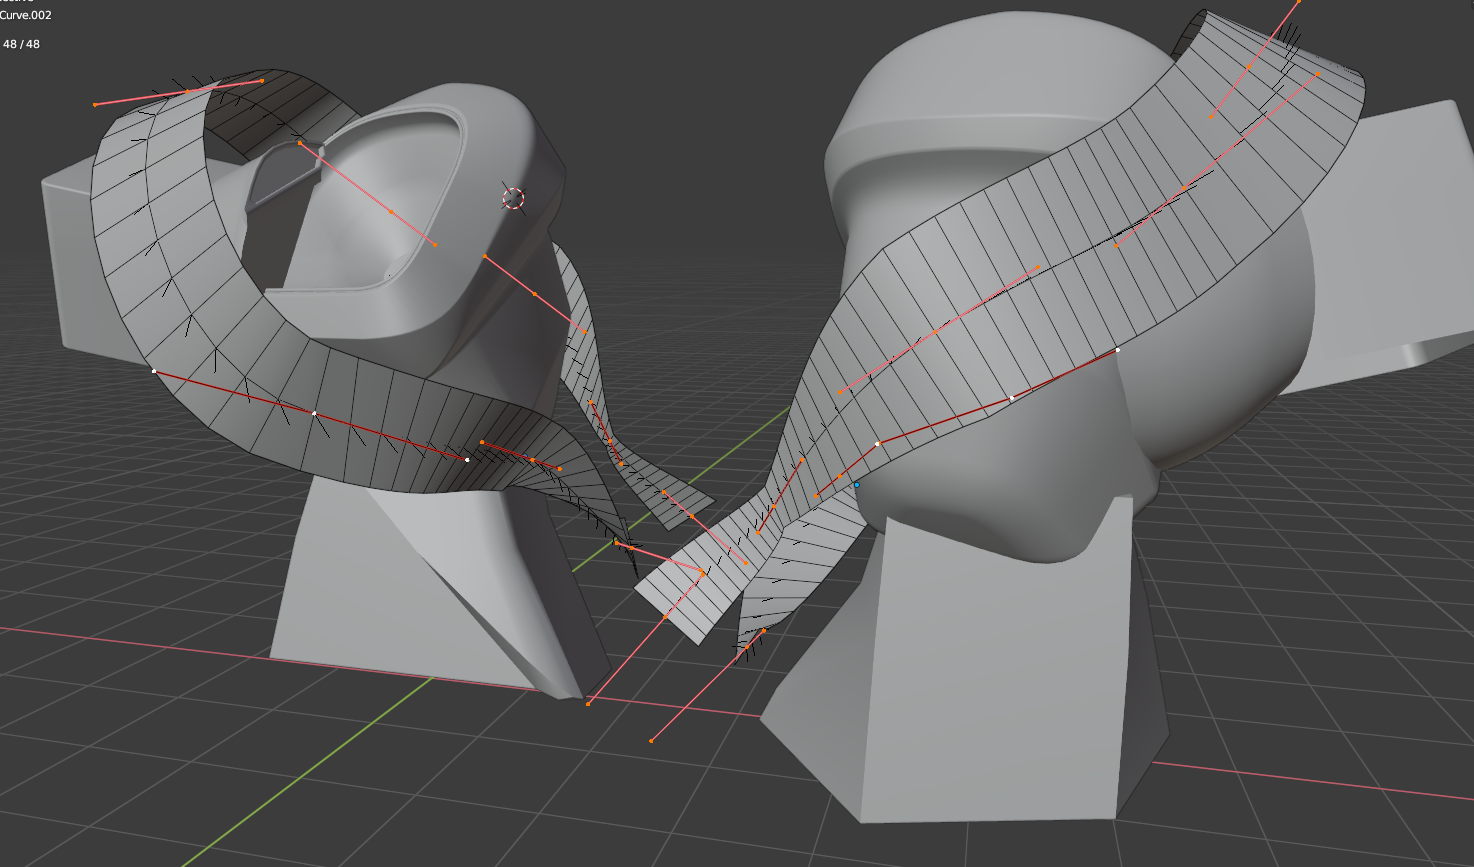
I needed some basic geometry for the cloth itself. For that task the most controllable and easy way to work was with Bezier Curves.
Since the length and width of the strips were eyeballed, there was no chance that it would land correctly on the first try. At this point it was crucial to back up the curve before doing any further operations. After that, geometry needed to be converted to mesh and the edges had to be added.
Cloth sewing
It’s necessary to add edges between two loops to sew them together. I find it easiest to do this using the Bridge Edge Loops tool and then deleting faces:
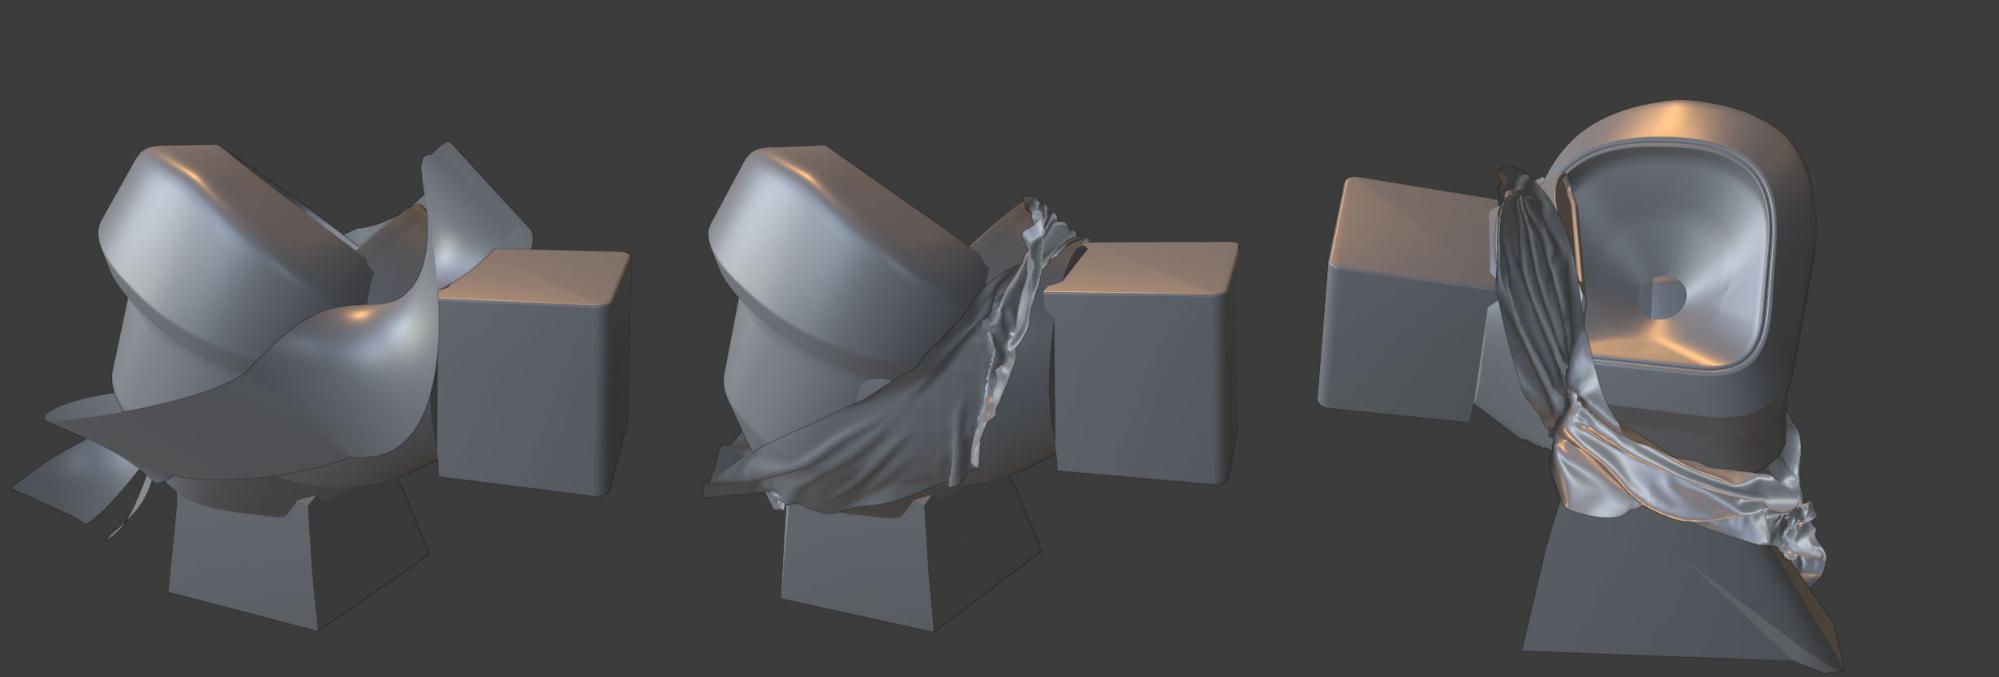
Following this process, a few attempts were made: in some cases the bandage was purposefully twisted, but it didn’t look as good as expected after the sim.
After a few trials and errors, the optimal configuration of the curve was found and under the right arm there was a bandage added to restrict cloth from sliding too low and to cover initial design flaws.
As you can see, the settings here are pretty basic. You can explore the project with the simulation set up here.
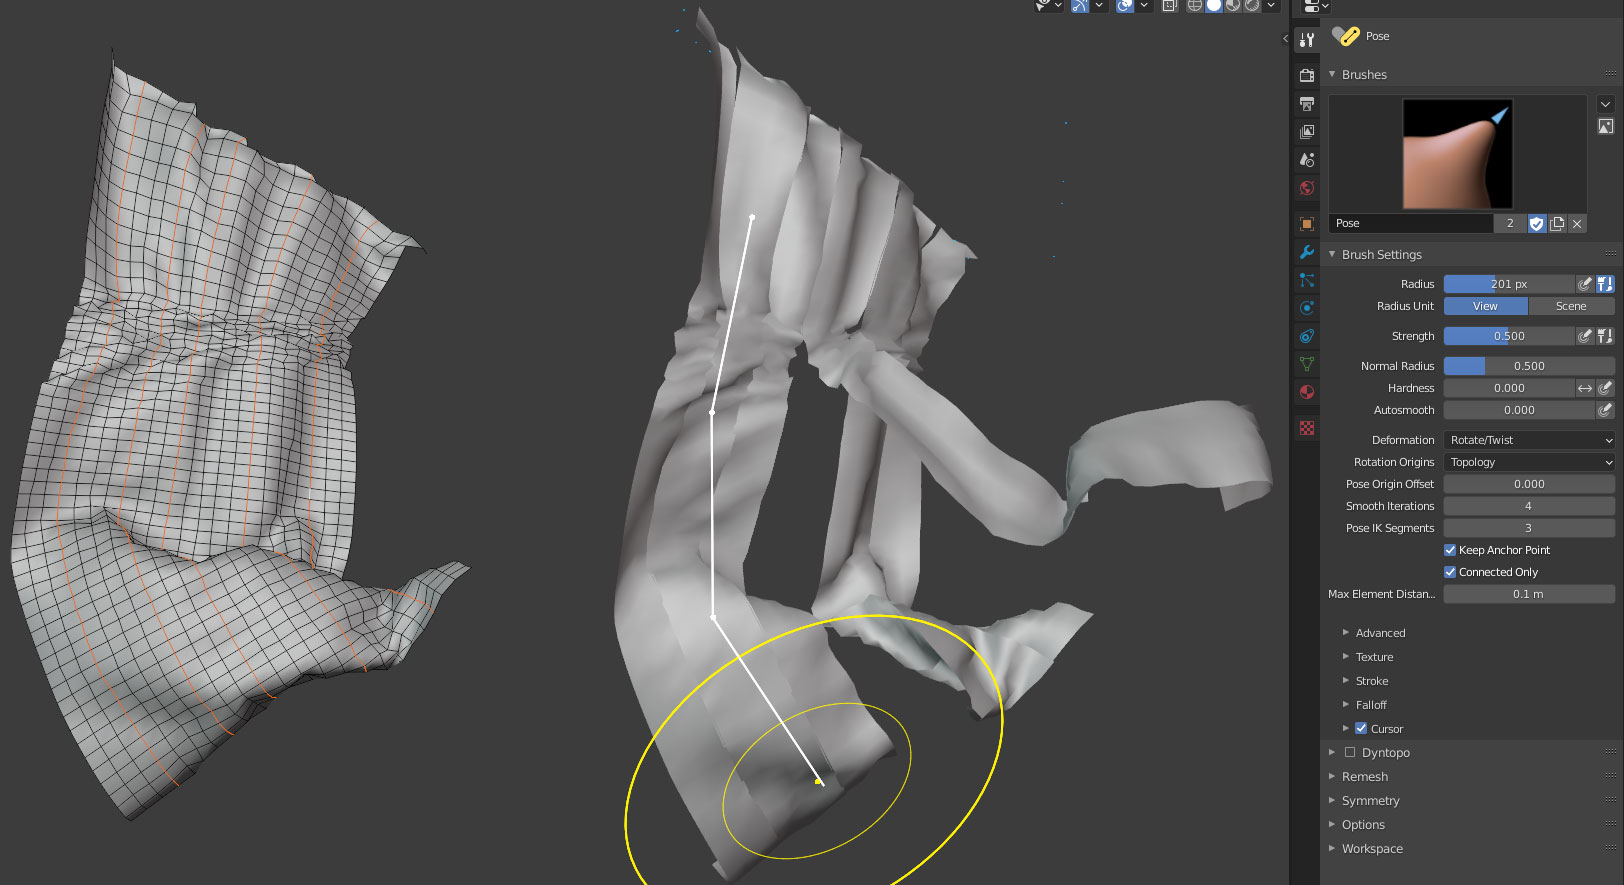
After that, it was time for Pose Brush to shine. This tool happened to support Inverse Kinematics, which allowed for bending and twisting geometry as though it were rigged.
Making holes and tears
As a quick way to make tears in geometry, I found the next trick.
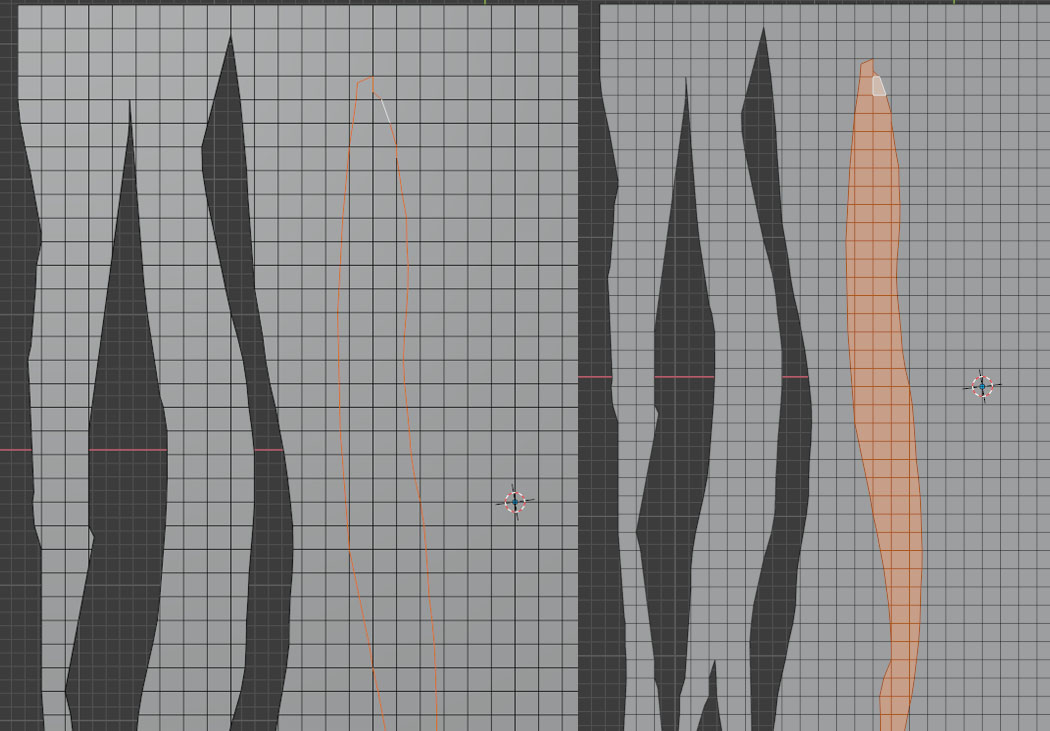
There’s another add-on, called MACHIN3tools and it has a tool that’s called Smart Edge. What it does is convert edge selections to face selections, but only of the faces that are encircled by the selected edges.
That really made the tears reachable within the shortcut. The only thing I had to do was to decide on the form and how to cut it with the Knife tool.
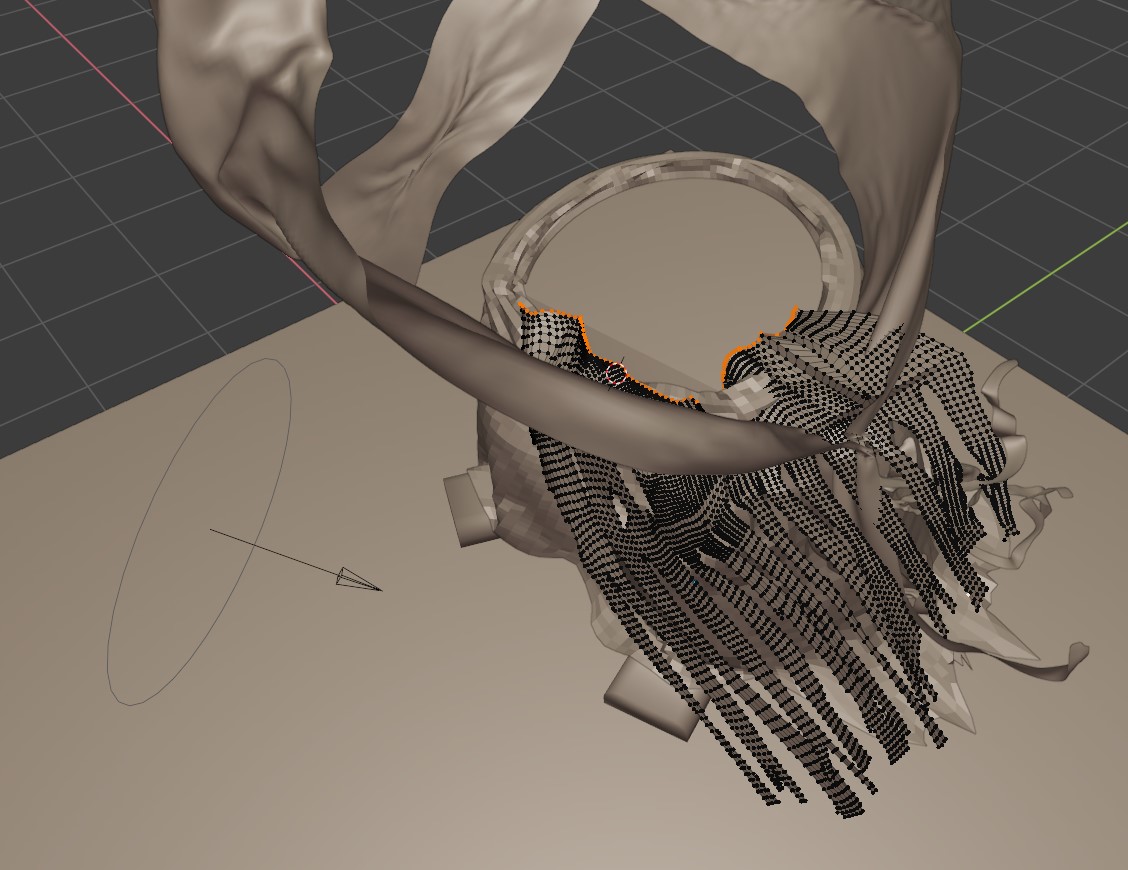
With enough ribbons, I proceed to pin the top row of the cloth and simulate it. Results were pretty convincing almost instantaneously, even without any manual adjustments in the sculpt mode:
The pile of trash
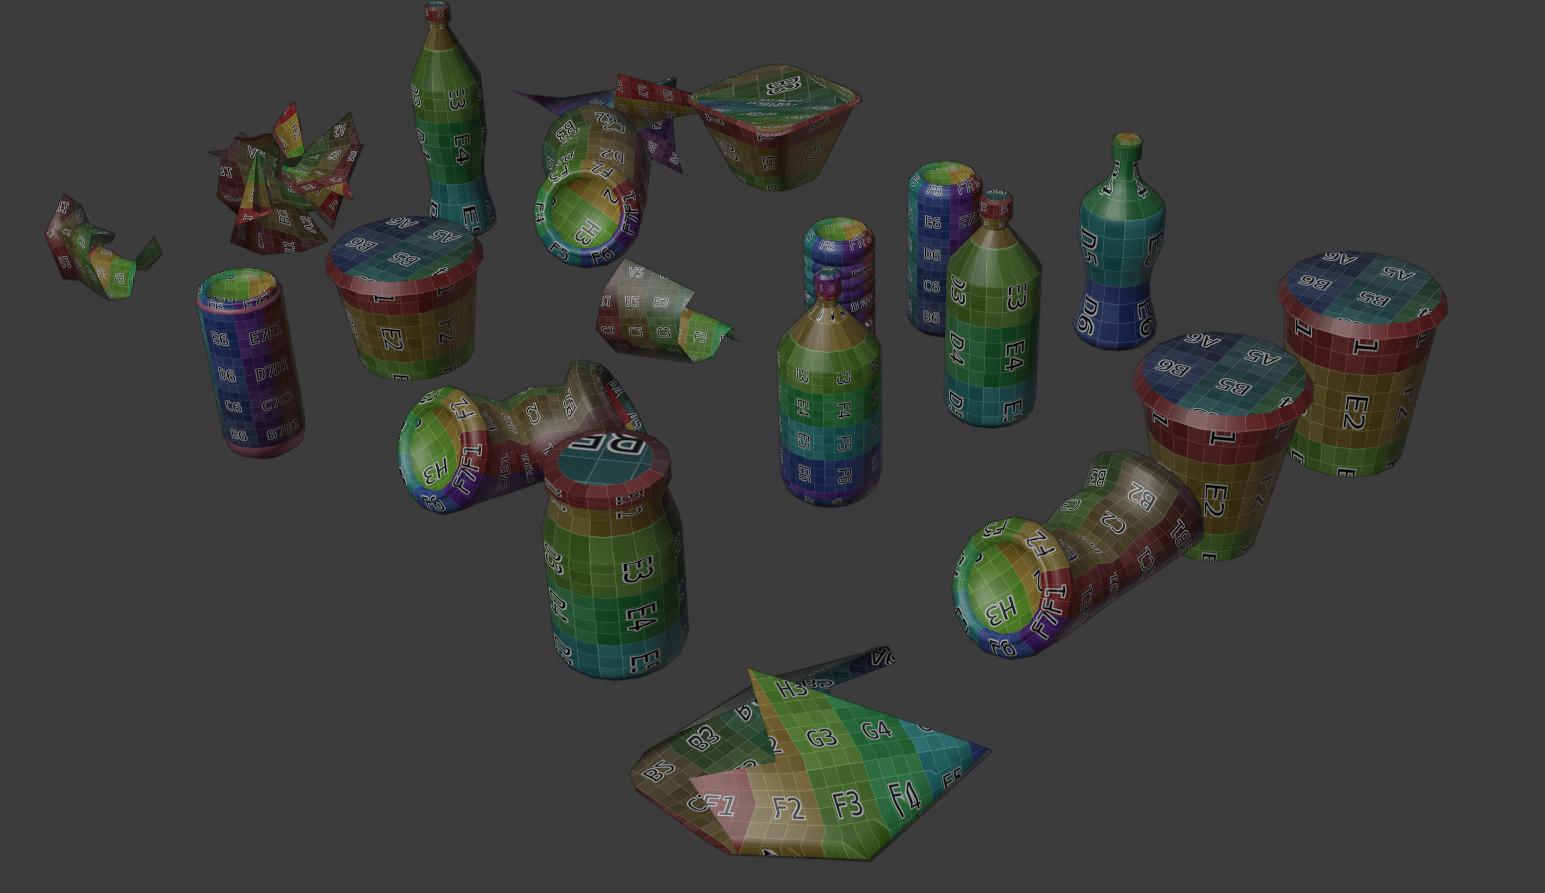
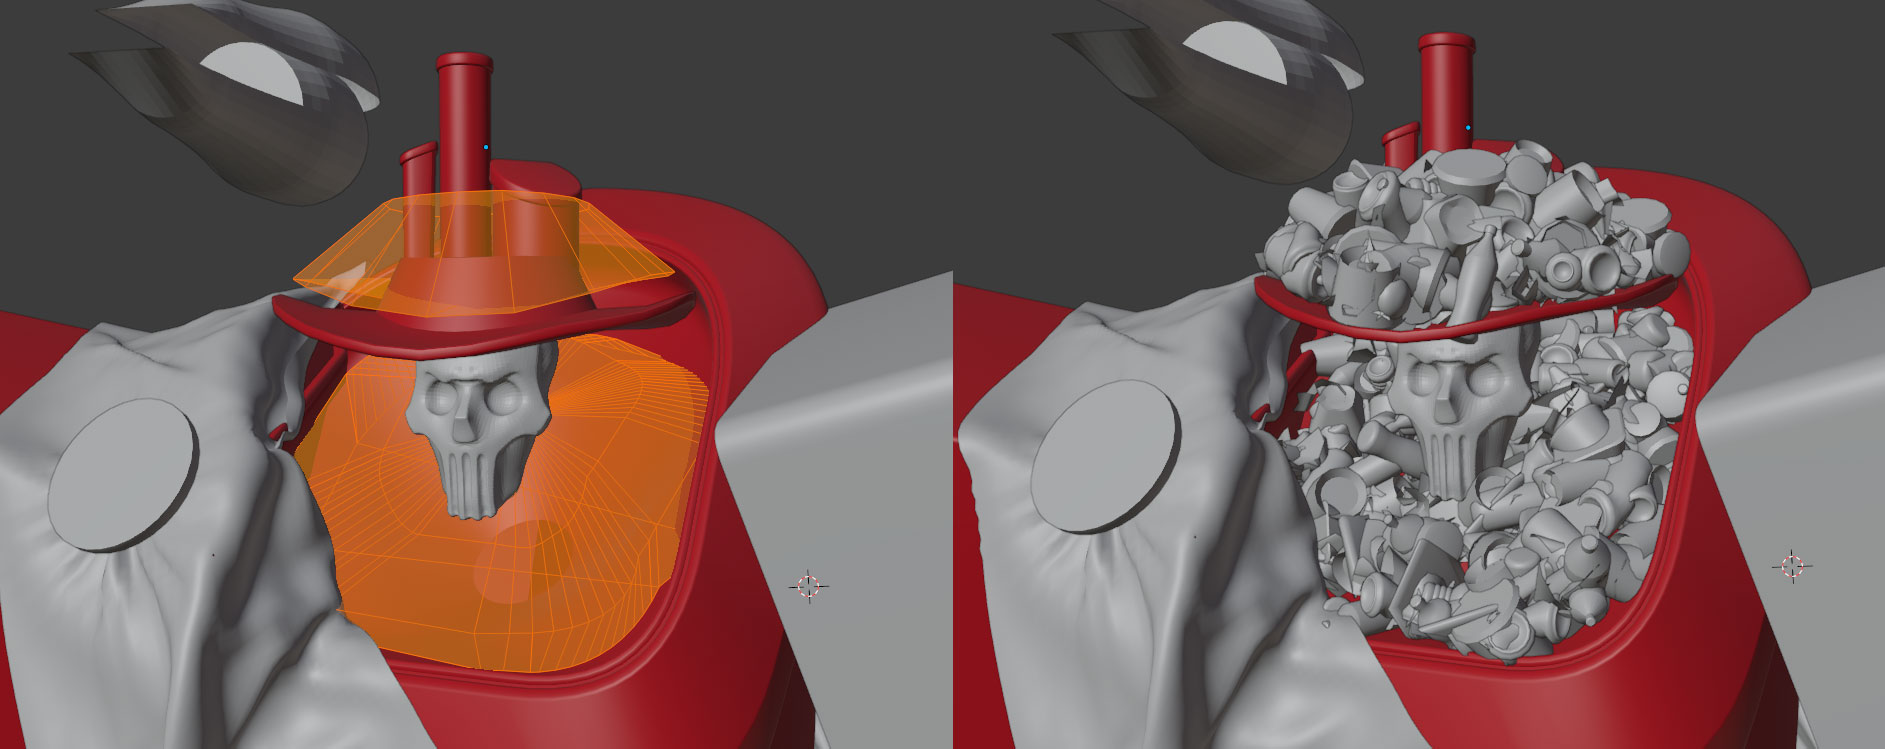
My initial idea was to use the real physics simulation to prevent geometry intersecting with neighboring items, but this method proved to be overly time-consuming and seemed to be an overkill for my purposes. That’s why the particle system replaced the simulation on this project.
Nevertheless, particle systems still require objects to generate from, so I made 20 of them, distantly resembling litter.
It was important that these models should be simple, and have UVs already, since it would be a nightmare and pointless waste of time to unwrap every single instance of the same object when the final number would be in the hundreds.
Every particle system requires an emitter, and in this case it was very convincing to use a mesh as one, since it would help to restrict the domain of the particles, preventing them from going where they weren’t supposed to be.
Modeling of the final geometry
The approach to booleans
Finally, it was a turn to more traditional ways of modeling.
First were Booleans, which were surprisingly useful, especially with BoxCutter and Hard Ops. Those addons are a great deal of help when it comes to cutting boxes and other shapes. It was the perfect choice for the hard-surface design of the arms, for instance. And the non-destructive nature of this approach allowed me to tweak the design in a matter of seconds.
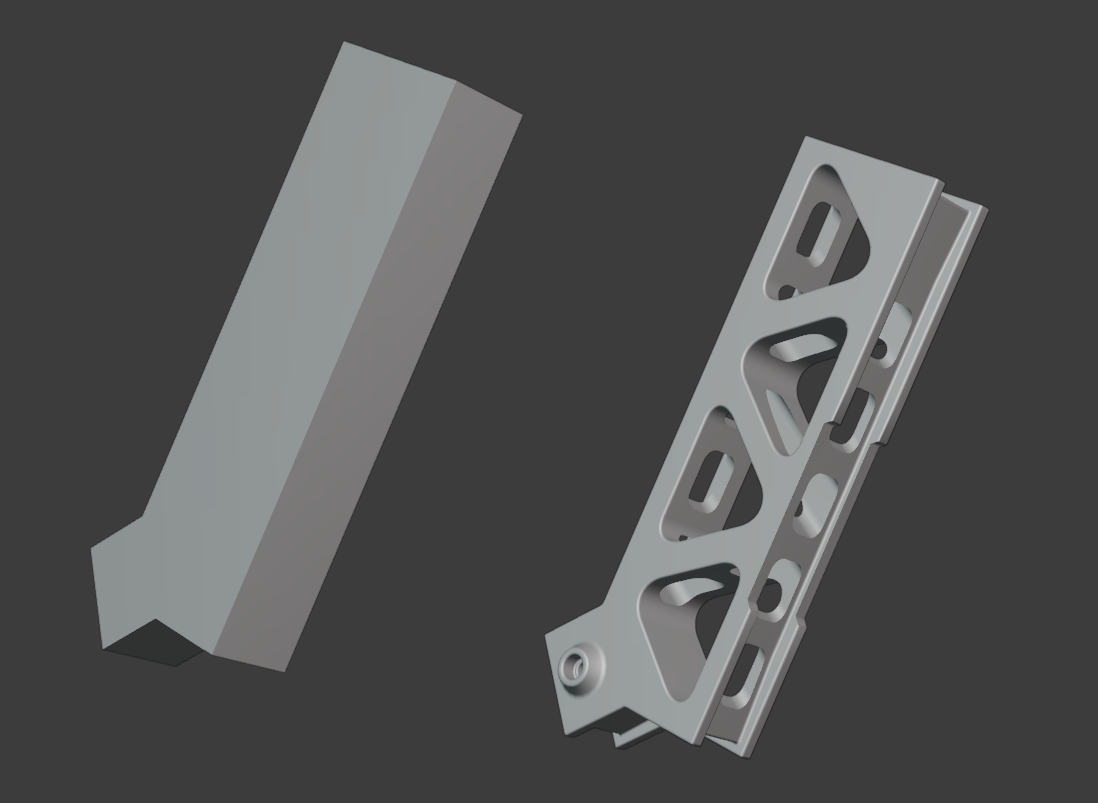
Booleans can be destructive, too, and pretty useful in that form. Let’s take a look at the leaf blower part. It consists of two beveled boxes. In my case, these boxes didn’t even match topologically. Under normal circumstances, merging them can become a headache and a very time-consuming task. MESHmachine came to the rescue once more, allowing me to quickly merge these objects with a nice and smooth transition.
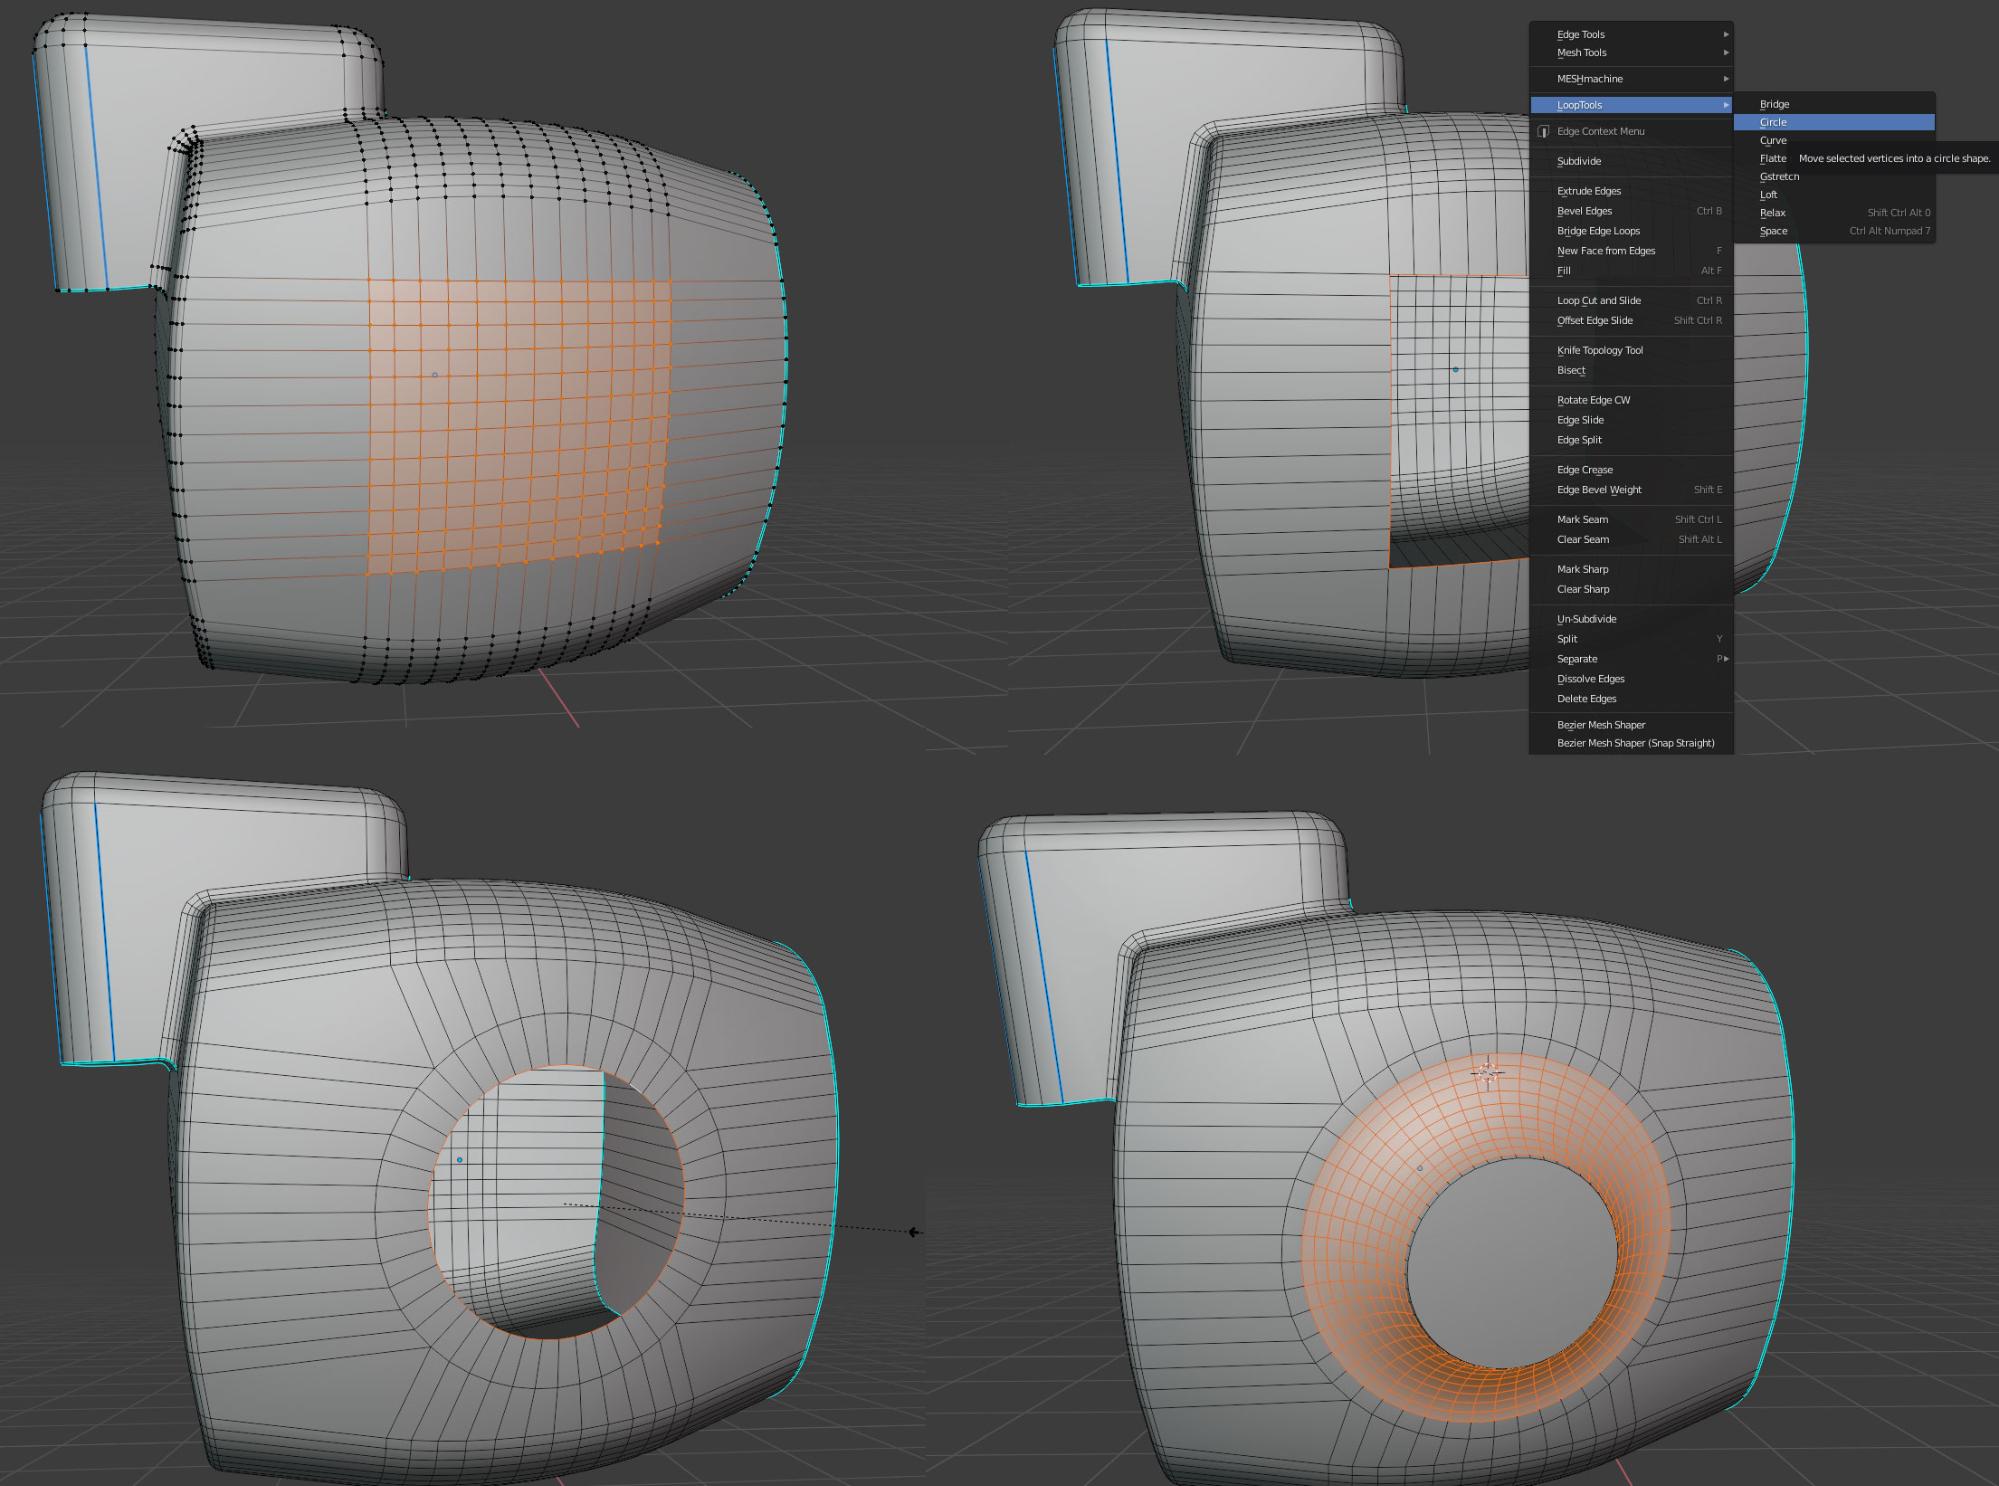
Booleans are a great and powerful tool, but sometimes there’s no need for them to visually merge the shapes. I needed to add a circular bump to the side of the object in the last image. I could have used Union, but it’s a bit faster to select desirable edges, delete any faces within them manually, or using Smart Face, and then use the Circle operation from the Loop Tools add-on. Loop Tools is shipped with Blender and can be enabled in preferences.
After I made the circle, the process became even easier. I just had to inset the circle, extrude the body of the bump and then bevel the edge that separates it from the original circle, as shown below:
And that’s it with the geometry. The rest of the process was absolutely straightforward and consisted of a total grind of slicing and dicing polygons for them to take desired shape.
Of course, not all of it ended up looking exactly like on the sketch, but that was the initial plan and the reason for the painting to be fairly loose—to have a bit of wiggle room and to solve small design tasks in the field.
UV mapping of trash pile
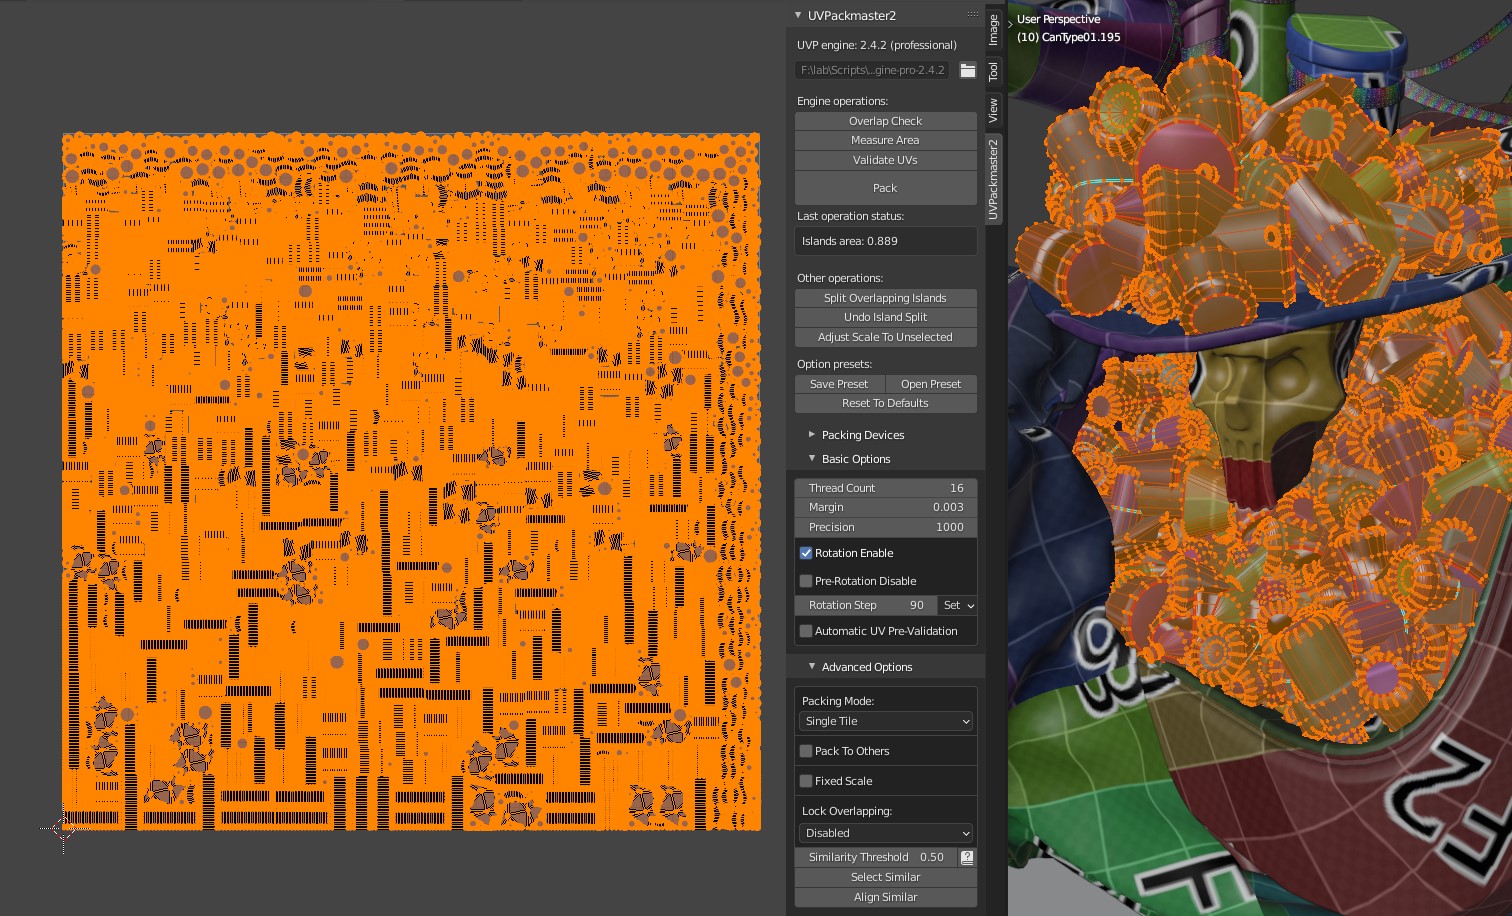
Most of the issues at this point were with the trash pile. To work with that number of objects, I merged all of them into a single object to manipulate UV maps. This object had 300 UV islands, so special forces were required to sort that amount of work.
Fortunately, I found the solution in another addon, called UVPackmaster 2. Thanks to it, I was able to achieve 88.9% coverage of the texture space in a matter of seconds thanks to UVP2’s GPU acceleration:
Sure, some of the litter could be instanced for the sake of saving UV space, but since there were very few models in the pile, it seemed reasonable to make it more diverse and distinct using textures.
Texturing
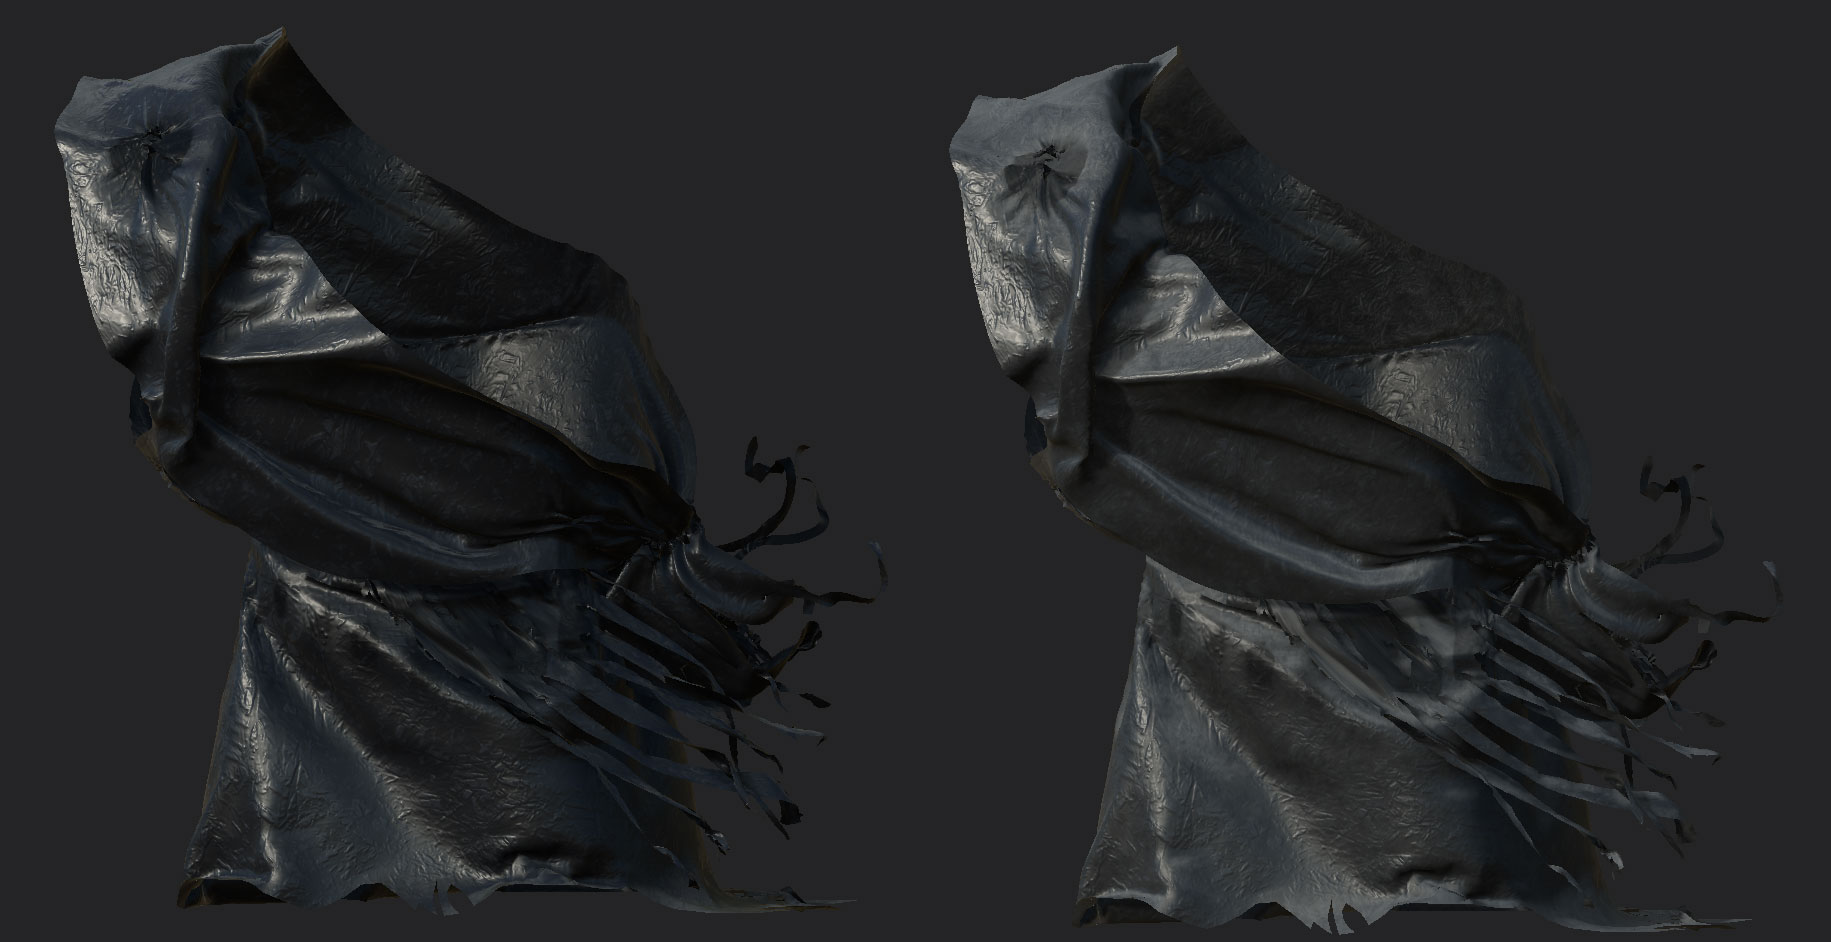
As mentioned earlier, I had some experience with making trash bags. I had created a Smart Material, which you can find here.
With a few tweaks and overlaps of the base texture, it was ready. Most of the difference from the original material, probably, is the result of the Dirt layer.
It was important to set projection type to UVs, though, so the maps were actually deformed along with the geometry itself.
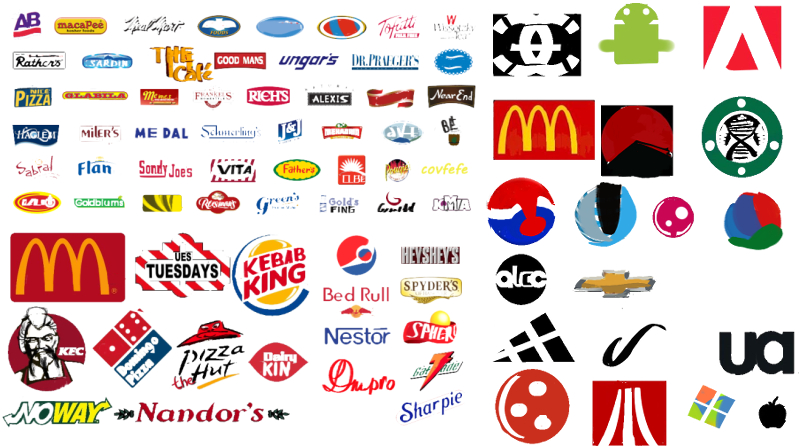
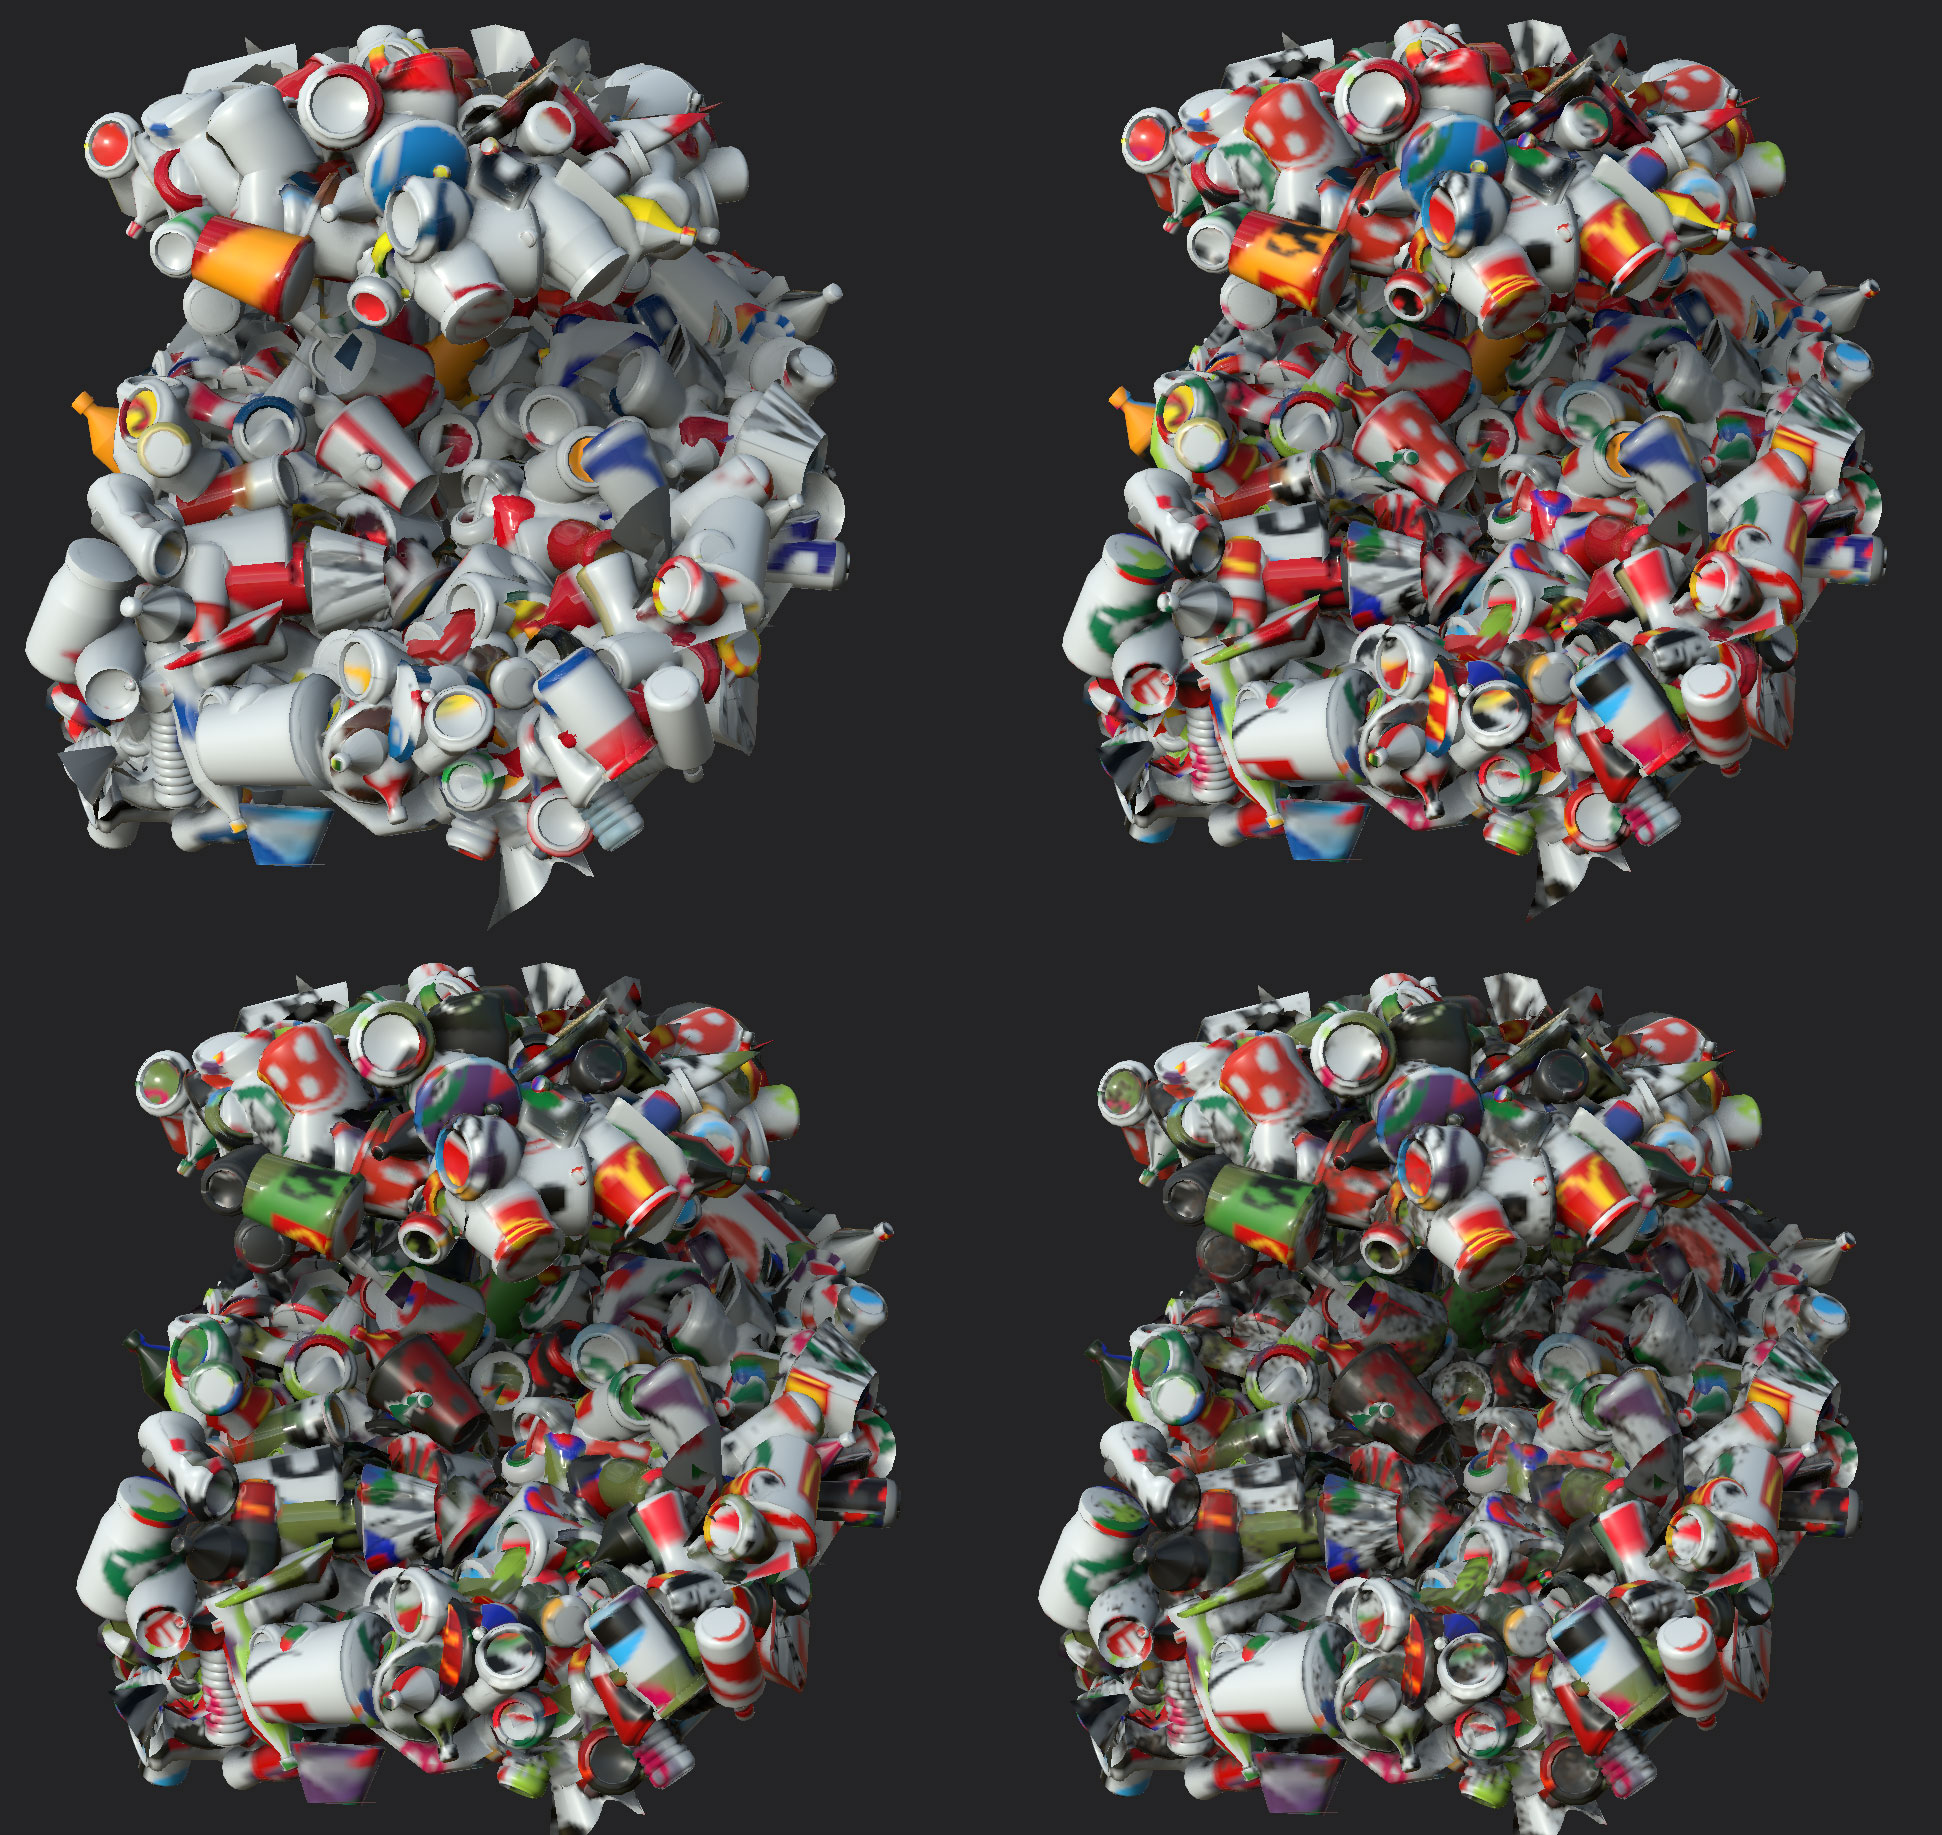
The next part was the texturing of the garbage pile. Initially, I had feared that some of the objects—or even every single one of them—had to be textured manually, but salvation came after the few attempts to do the job and without a ridiculous amount of work. It turned out to be enough to throw a bunch of random shapes at the model and shuffle them up a bit.
Instead of a solid white background, there was transparency, just for the ease of blending.
Even the first pass on the empty white material looked good! Unfortunately, the texture didn’t look as good with the second layer on top: it was noisy beyond acceptable. It turned out to be easily fixable by hue alteration and slight value change. Some of the cans were recolored to black, so the whole array became less uniform. I added a dash of dirt masked by AO and the material started to look used while also covering geometry artifacts.
I found the final result pretty convincing, which highlights the idea that sometimes less is more. It probably wouldn’t have looked this good—and it definitely wouldn’t have been as fast—if every can were painted manually.
At this dramatic moment, I’ve run out of space in this article. Come back Thursday to see how I set my model up in the Sketchfab Editor!
In the meantime, feel free to check my other work:
Blender Artists / ArtStation / Facebook / Instagram
