My name is Kristian LaGrange, I’m 22 years old and I currently live in Kortrijk, Belgium. I’m a student in Game Graphics production at Howest University, currently completing my third and final year in the hopes of earning a bachelor’s degree. I also have experience in 3D animation that I acquired on part-time jobs and internships during the summer holidays. 3D graphics have been a hobby of mine since I was a kid and I hope to turn it into a full-time job.
Inspiration
The idea for this model came to me while looking at images of Rio de Janeiro. I imagined a scenario where the apocalypse finally arrives and the whole world is flooded, but I wanted the overall tone of the scene to feel comedic. The style I went for was meant to resemble that of family-friendly mobile games which contain low-poly assets with hand-painted textures.
Modeling
The process of making the scene was very iterative. I generally start with a simple shape, such as a cube or a cylinder, and expand the scene with details that grow smaller as I progress from that point. I then keep modifying the placement of these details until I’m satisfied with the result.
The program I used for modeling was Maya. The statue of Jesus Christ is an iconic monument, so, naturally, it became the focus of my scene. I started by modeling the base for the statue and the natural landscape around it with the help of photographic reference. Then I placed the flat side of a cylinder, which acts as the water’s surface, over the scene and I began adding smaller details like bushes, buildings, cars, and rowboats that float above or below the water’s surface.
The shapes and proportions of all the scene’s elements were purposefully tweaked to make everything compact and lively. Once the environment was complete, the Jesus statue was added onto the base and surrounded by tiny people in rowboats. The last details were the two planes hovering above everything. Finally, the whole scene was placed under a spherical dome which became the sky.
UVs and Texturing
I also used Maya to unwrap all the assets. I debated whether or not to use flat shaders for the material definition. I went with a regular lambert in the end because I wanted the objects to cast shadows when under a light for extra effect.
All textures were hand-painted in Photoshop. When painting the environment, I tried to spread texture details evenly across the entire scene to make it look alive from as many angles as possible, not just from a single point of view. Objects that were underwater were given a blue tint in their textures to give the impression of being truly submerged.
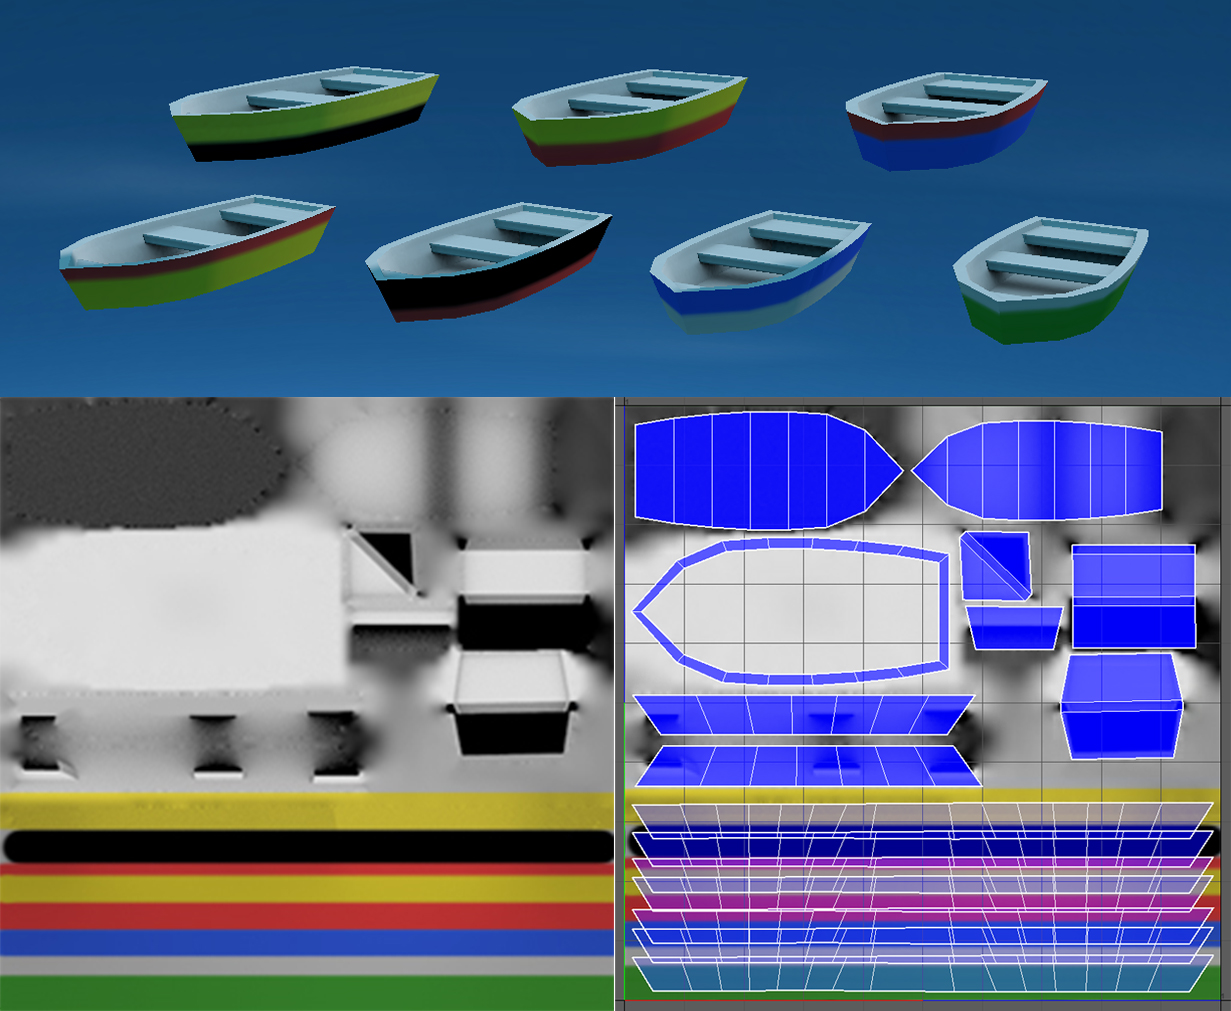
When it came to the assets, many of the same objects are scattered around the scene and it would have been a pain having to texture each of them individually. For the sake of time and efficiency, a single asset was unwrapped, textured, and then duplicated. Each asset then had the position of its UVs adjusted to a different part of the texture map which contained a different set of colors.
An image below shows the UV layout for the rowboats and the one texture that was used for all of them.
Sketchfab
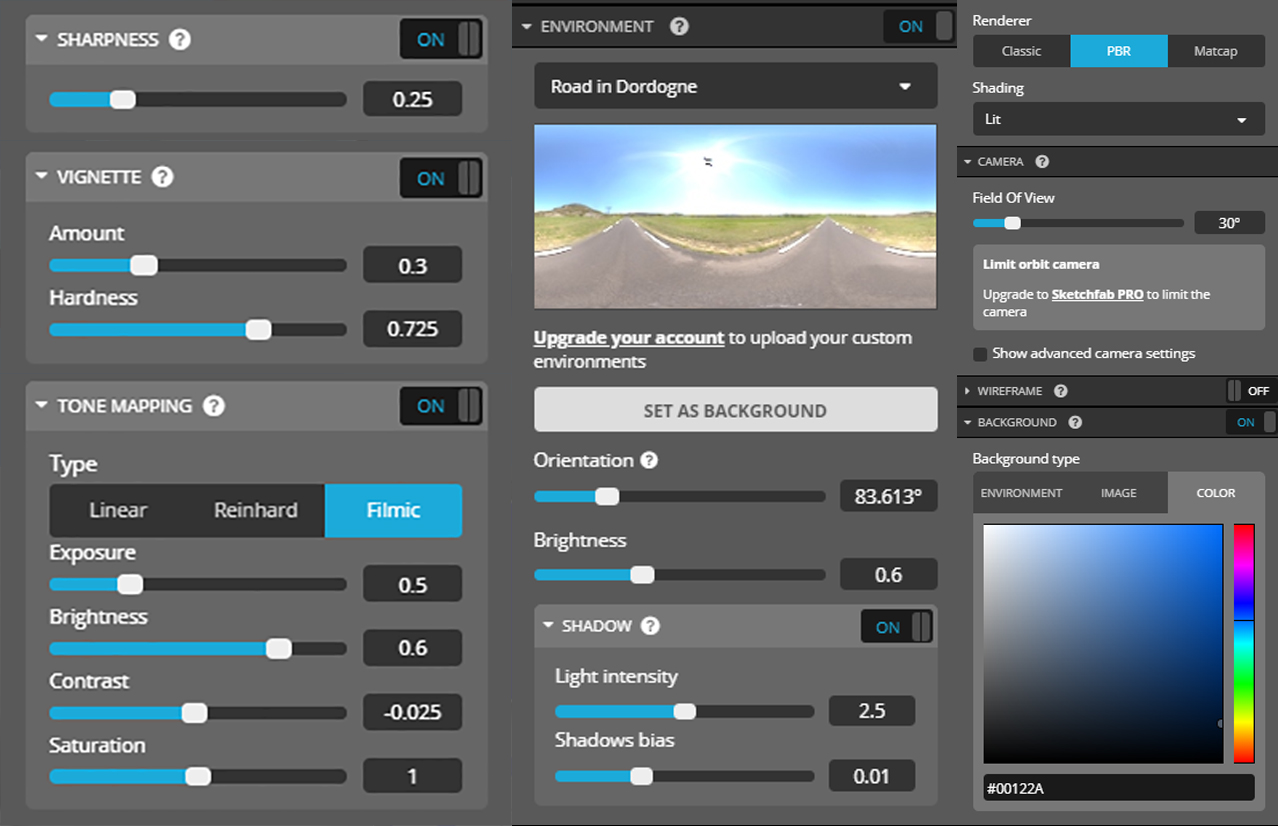
The materials in Sketchfab had the Specular FO function turned to zero with only the textures being visible. Some objects, like the sky or the emoji word bubbles, had their textures placed inside the emission slot with an additional transparency map. I tweaked the sharpness a little and added a subtle vignette on the edges of the frame. Lastly, I changed the tone mapping from Linear to Filmic, tweaked a few of the settings, and the model was complete.
Thank you very much for reading!


