About Me
Hello everyone, my name is Mikaël Sévère and I’m an archaeologist based near Mulhouse in France. I have a master’s degree in archaeology and I mainly worked on the transition between Late Antiquity and the Early Middle Ages.
My experience with 3D began with photogrammetry. I learned it on excavations, where it’s used to produce orthoimages of archeological finds. Then, being a gamer myself and having always been curious about how games and 3D FX are made, I decided to learn Blender by myself to create 3D reconstructions of archeological sites.
I’m now providing photogrammetry and 3D reconstruction services to archaeologists, museums, and other cultural heritage actors.
Inspiration
My inspiration came from a book about Roman architecture by Jean-Pierre Adam where I found a hand-drawn architectural section of a Roman heating system called a hypocaust.
The hypocaust system is well known by people who study Roman architecture and it wasn’t the first sketch of it I saw. But it always seems to me that these sketches were hard to understand to people who don’t know Roman architecture. I had a hard time trying to explain to people what a hypocaust is and how it works.
Indeed, with the relationship between its above-ground and underground areas and with its furnace between two rooms, the hypocaust system is complex and is, in a way, a tridimensional architectural concept. Therefore, in reconstructing the hypocaust, simple sketches are restricted whereas 3D modeling seems the way to go.
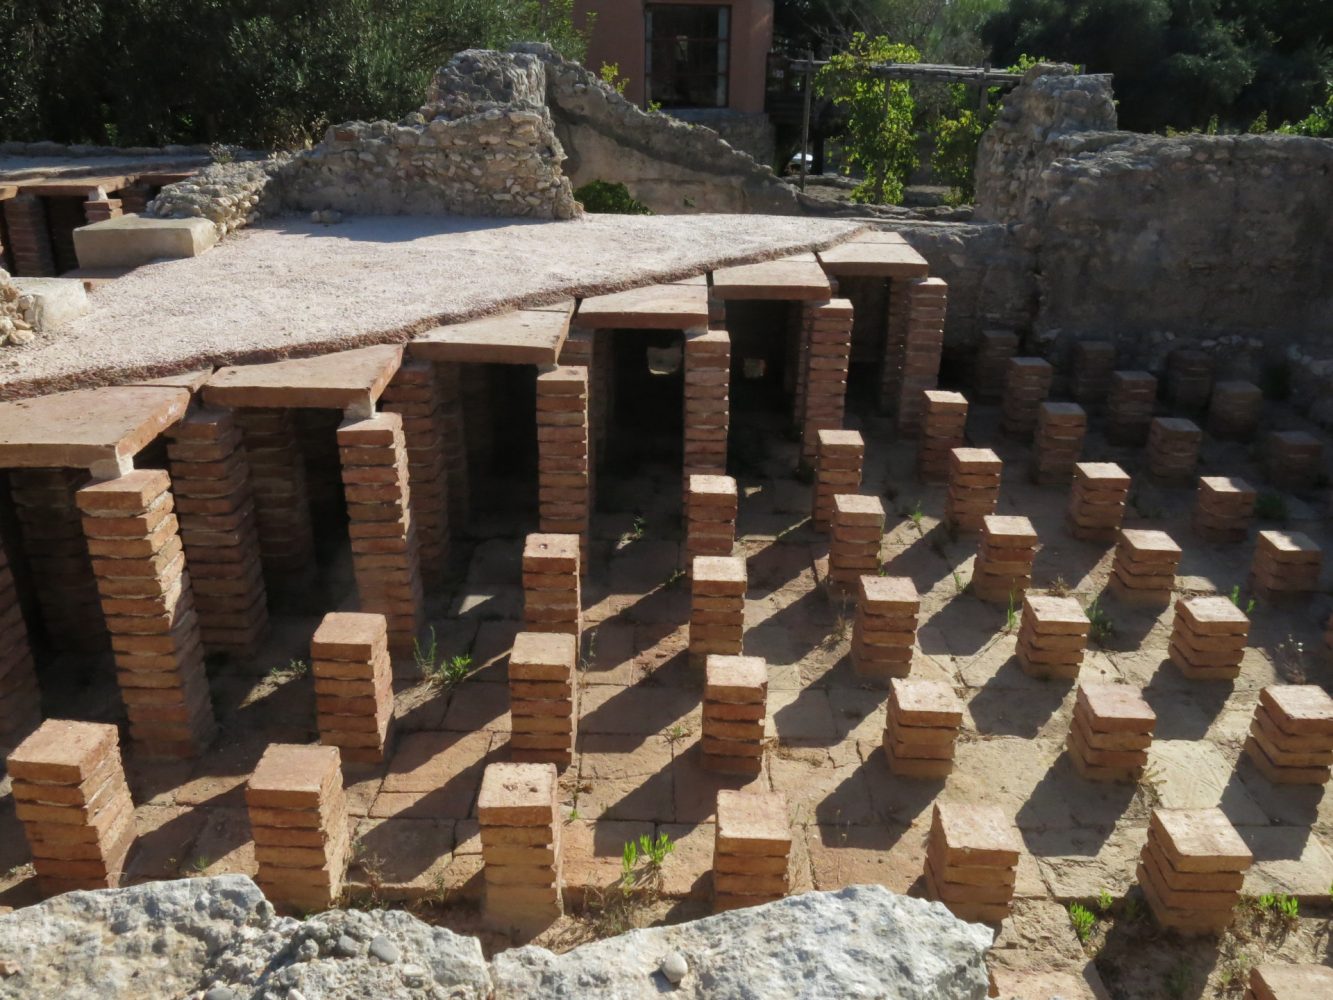 Remains of a hypocaust in a Roman villa in Altafulla, Spain (Source)
So the idea was to create a 3D model of the hypocaust architectural concept for educational purposes. This pedagogical approach guided my general workflow: on the one hand, I needed my model to be clear and clean like sketches are, to be instantly understandable by anyone. On the other hand, I wanted it to be good-looking, to “attract” people.
Modeling
I used Blender 2.83 for modeling. To follow the general workflow described above, I chose to keep very simple shapes in my modeling, adding only a subdivision level to give more roundness to all.
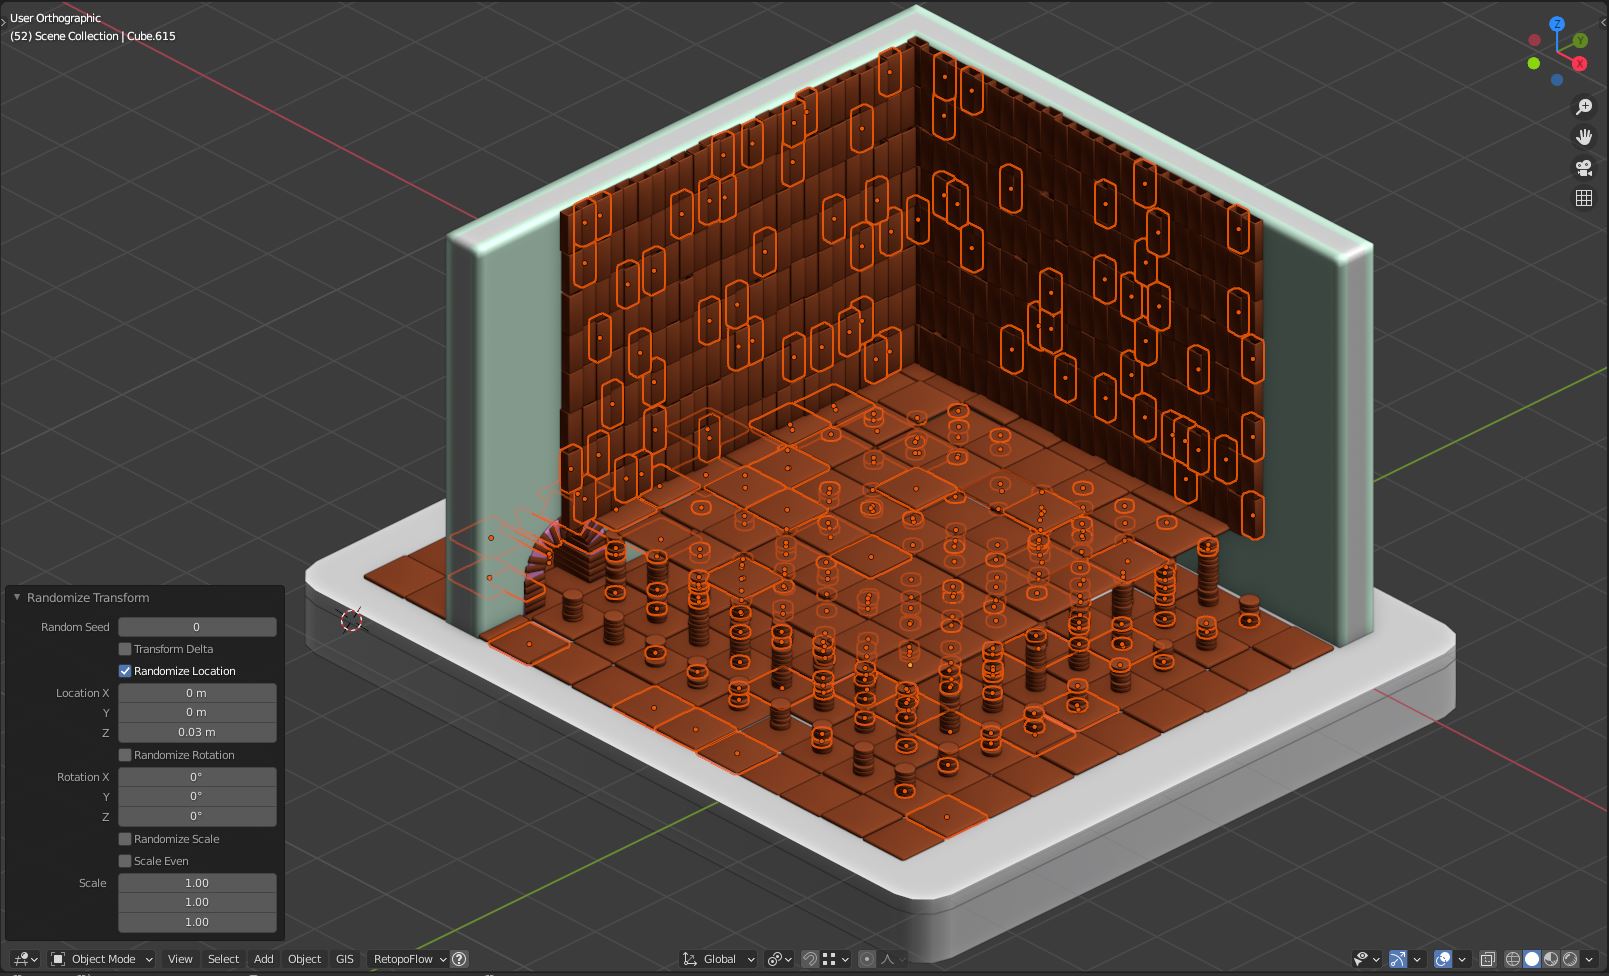
Tubuli in the walls, floor tiles and terracotta piles in the underground were simply created with array modifiers. To break the perfect tiling effect created by array modifiers, I applied all the arrays and separated each mesh from the others. I then usedthe “select random” and “randomize transform” features of Blender to slightly move and rotate each mesh.
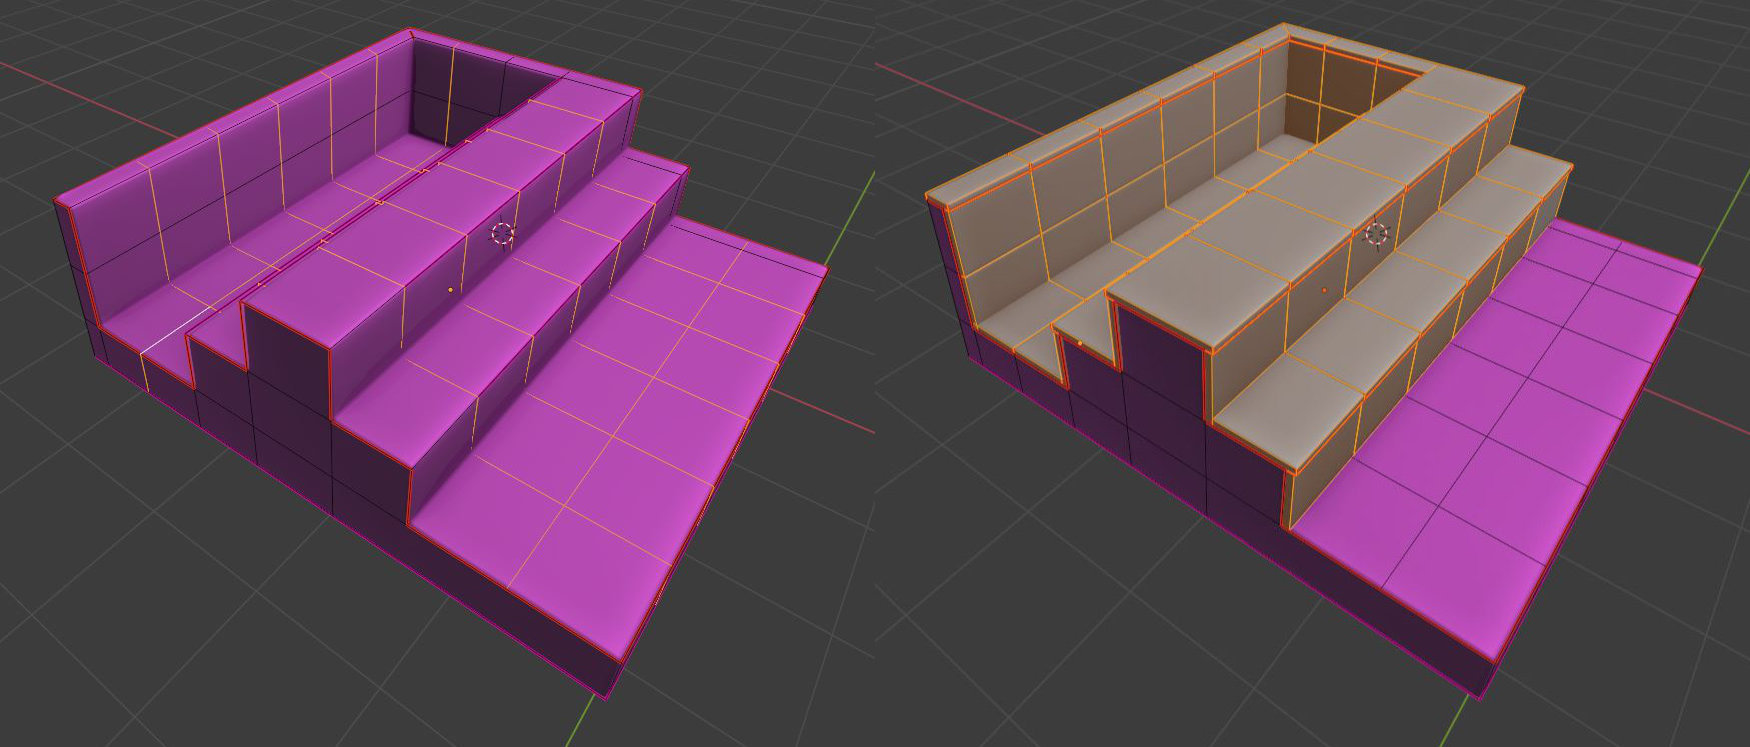
I then created the mortar mesh (pink in the images) which is also the base for the pool and the mosaic. To quickly create pool tiles, I added loop tiles to the mortar mesh to obtain squarish faces, each face corresponding to a pool tile. I made each of these faces individuals and used solidify modifiers to give them thickness. I finally just had to modify some tiles to make them overlap the others on the edges of the bath.
Animation
I used an icosphere to create fire, its top vertex being stretched with the proportional editing feature active to create a kind of drop shape. It was then animated by two displace modifiers driven by animated empties (for more information on this I recommend this tutorial).
The water animation is somewhat similar in technique since I used a displace modifier with a magic texture controlled by an empty rotating on a Bezier Circle.
- Fire undisplaced shape
- Water mesh and displace modifier parameters
Finally, smoke and steam were made with particle systems emitting a simple mesh made of cross planes.
Optimization
Before texturing, since I chose to have quite a high texel density of around 10.24px/cm, I optimized UV space usage in different ways. The most obvious one was to delete most hidden meshes and faces.
Secondly, I decided to keep only two versions of each mesh created with arrays (floor tiles, piles,…)—the other ones being duplicates. Thanks to the “randomize transform” that I had used before, the use of only two real meshes isn’t that obvious.
Finally, the base being the biggest part of the model, I decided to break it into four parts and to mirror a quarter of it to save UV space.
Texturing
To create a clear, clean, and good-looking 3D model, I chose to avoid realistic texturing, which can become unclear with the addition of too much detail. To me, a stylized approach was the way to go. Moreover, I wanted to think about color usage. A hypocaust system being mainly made of terracotta, my scene could have quickly become too uniformly orangish. I had to counterbalance this with other materials.
Textures were created with Substance Painter and Substance Designer. When possible, I used Substance Source resources, like for the dirt on the base or white and red plaster, which is only a “Stylized Spanish plaster” that I colored with a “Pompeian Red” in the lower part.
The most interesting textures to create were this pink hydraulic mortar and the mosaic. The Roman hydraulic mortar was made of mortar mixed with crushed terracotta, which, from a distance, gave it a pink or orange color. I had to think about how I could reproduce this effect in a stylized way. At first, I tried to reproduce terracotta inclusions with a noise mask but it didn’t work well. It was messy and the resolution was too low for this. I finally chose to simplify it, using a stylized concrete preset mixing two colors. In order to give my scene some color variation and, in an educational approach, limiting myself to colors this mortar can really have, I colored it in pink, not orange.
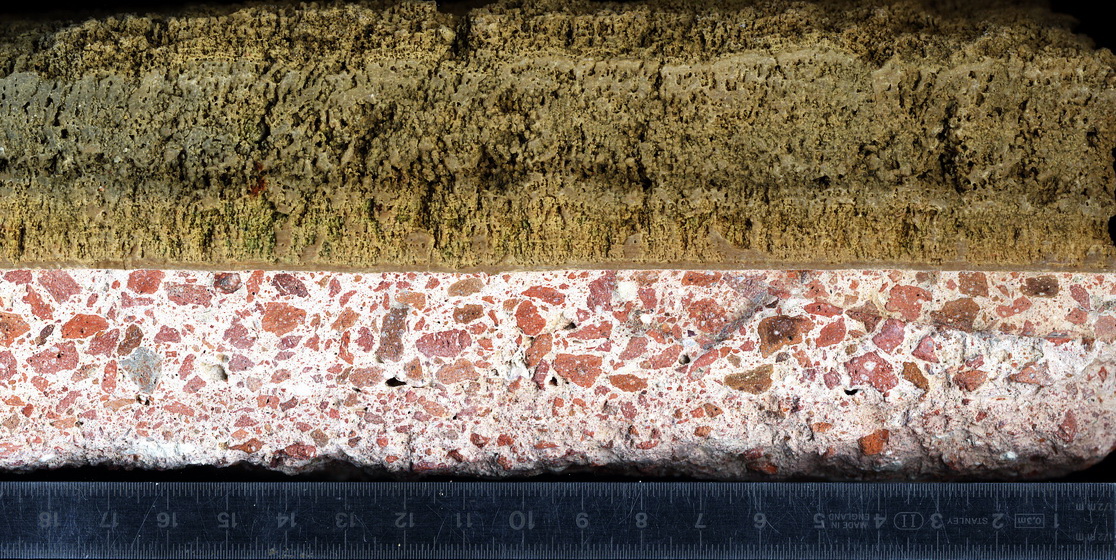 Section of Roman hydraulic mortar (Source)
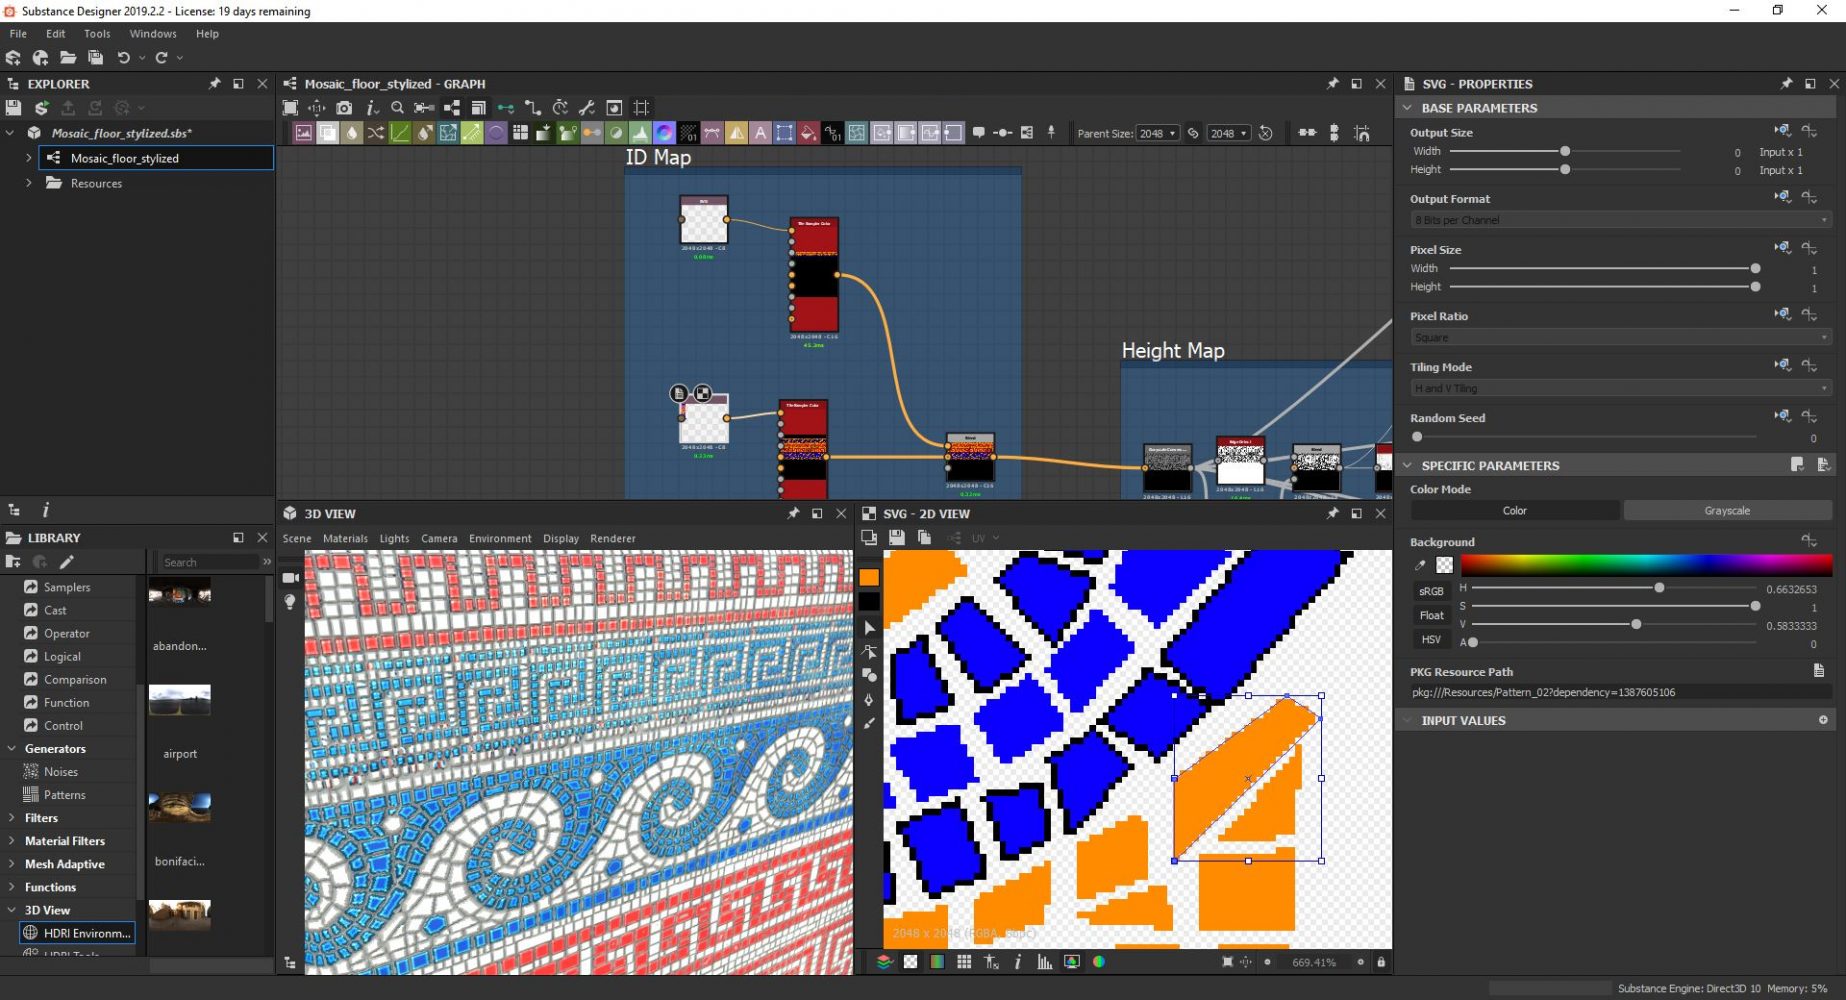
The mosaic texture was created in Substance Designer and was mainly based on a great tutorial by Vincent Dérozier that shows how to use the SVG vector drawing feature of Designer to hand draw the mosaic. This technique is certainly the most effective way for creating convincing mosaics, a fully procedural approach always seeming too perfect for this kind of material. This mosaic was my main opportunity to bring non-orange colors into my scene. I decided to reflect on this mosaic the colors that were already being used in other parts of the scene, to give them more space in front of the orange terracotta. So I reflected white and red from the painted walls and, above all, blue from the pool’s water.
This blue water, inspired by a Japanese anime style I have always liked, was really important in color management. Blue is the complementary color of orange and this means it stands out in front of terracotta. Translucent water, which I considered for a time, would never create the same effect.
Sketchfab
Before uploading to Sketchfab, I had to make my scene compatible. Indeed I used Blender’s particle systems to create steam and smoke effects as well as displacement modifiers driven by animated empties to animate the water and fire. To convert my Blender scene to a Sketchfab one, I needed to replace these features with keyframes.
To add keyframes to my particle systems, I converted each particle to a real mesh thanks to a Python script that also automatically inserts keyframes for location, rotation, scale, and visibility of each mesh. I recommend being careful with this script, especially if you have thousands of particles or more; it can freeze Blender for quite a long time depending on your hardware. For an upload to Sketchfab, I also suggest reducing the number of particles. Here I had to reduce them to around 50 for the upload process to work.
For fire and water, I saved several transformations of meshes as shape keys, which is directly possible within the displacement modifier. I then deleted the displacement modifiers and inserted a keyframe on shape keys values every 5 frames.
- Saving displacement as a shape key
- Adding keyframes to shape keys values
Finally, in Sketchfab’s 3D settings, I used a studio environment to give the scene ambient unsaturated lighting. Two directional lights were used to light the scene and a point light is placed on the fire to reproduce its light.
I finally did some tone mapping and added some post-processing filters like SSAO before including annotations, which are essential in an educational project like this one. Annotations are maybe an underestimated function of Sketchfab but, to me, they make it far more usable professionally.
What’s next?
This hypocaust scene began as a small personal work and I’m really happy to see people enjoy it. I will probably continue on this course by creating other models explaining ancient architectural or technical concepts. I already have some ideas that will, I hope so, also be liked by the Sketchfab community. Meanwhile, for non-Sketchfab projects, feel free to visit my website or my ArtStation page. ?

