About Me
Hello! My name is Nikki Lemon and I live in Columbus, Ohio. I work locally as both an adjunct animation instructor and freelance 3D artist. My background is in fine art, which eventually meandered into an MFA thesis about previsualization techniques for animated filmmaking, spurred by my interest in environment modeling, film editing and camera composition. My very favorite topic is environments that feel like they have a history and personality. Tell a story.
Inspiration
When work is slow (the life of a freelancer, right?), I use the free time to work on adding to my portfolio with personal projects. I have a document on my computer with a big list of concepts that I add to whenever I get an idea that I don’t have time to work on. It’s gotten pretty long. When I do get the time, I delve into that list and pick out something that suits my mood and the amount of time I have. Wizard Market Stall comes from an interest in D&D, and wanting to work on my prop modeling skills.
Sketching
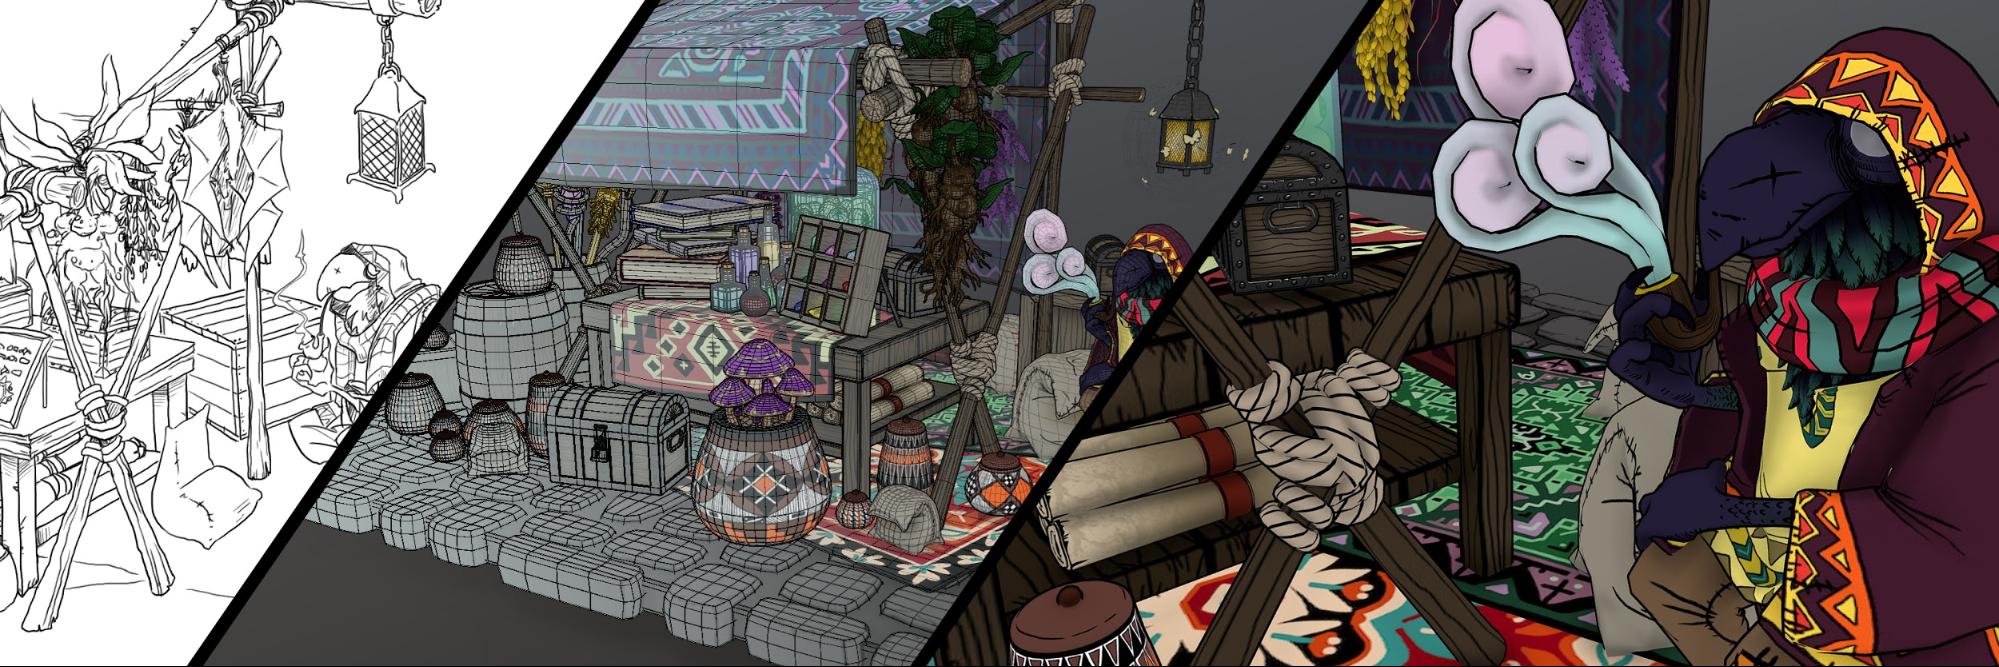
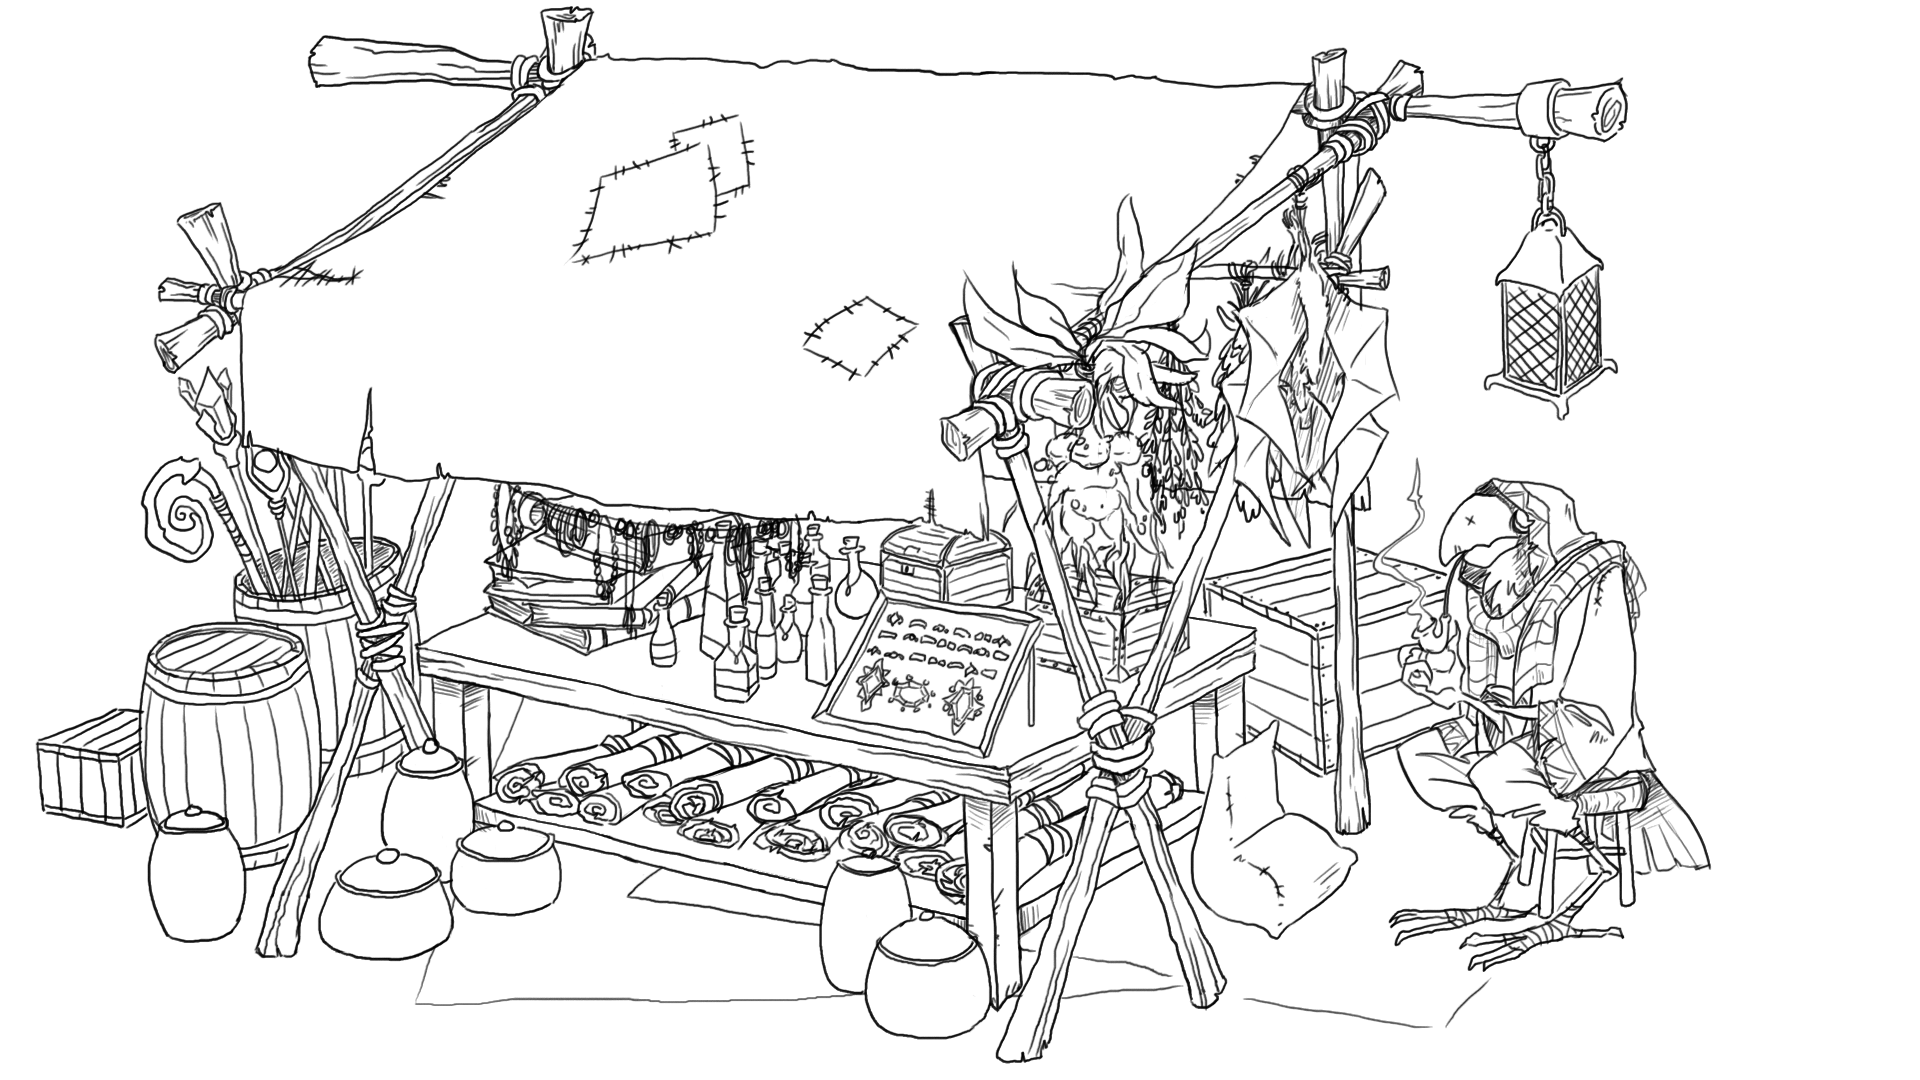
Though I don’t always, this project had enough little pieces that I decided to sketch out the basics, first. I knew I would probably alter things a little bit as I modelled, but it’s good to have a general plan to test out things like how clothing works on a bird-person, or how he sits with his weird legs, or what items he might be selling in the market stall. That was when I decided he was a wizard of some sort, and to focus the props on things that seemed “magical.”
Modeling
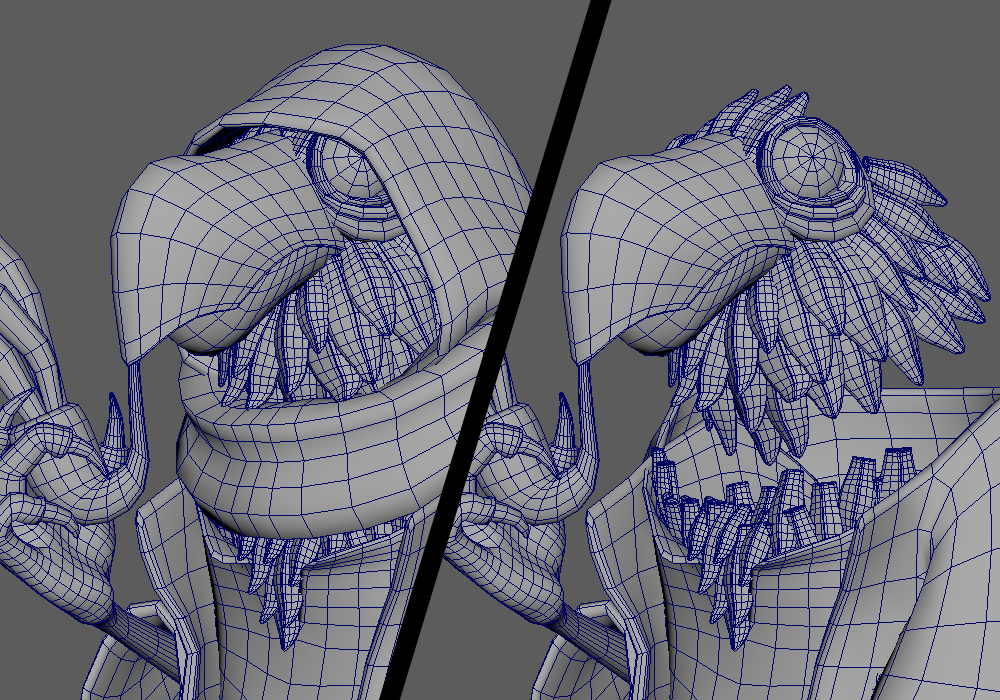
One of the best pieces of advice I can give is to avoid modeling something that will never be seen. In the case of a still image or in a film, that means you only have to model what the camera can see. You can hide messy geometry and texture seams in the back. With something like a game model, or with the intention to be used in VR or uploaded to Sketchfab, it’s important to me that the model/composition looks good and interesting from as many angles as possible. Still, there are tricks to employ. The Kenku, for example, is only what you can see. I mean that if I were to hide the hood and scarf, you can see that there was no need to model his full head and a ton of feathers that would be hidden. This saves time and polygon count!
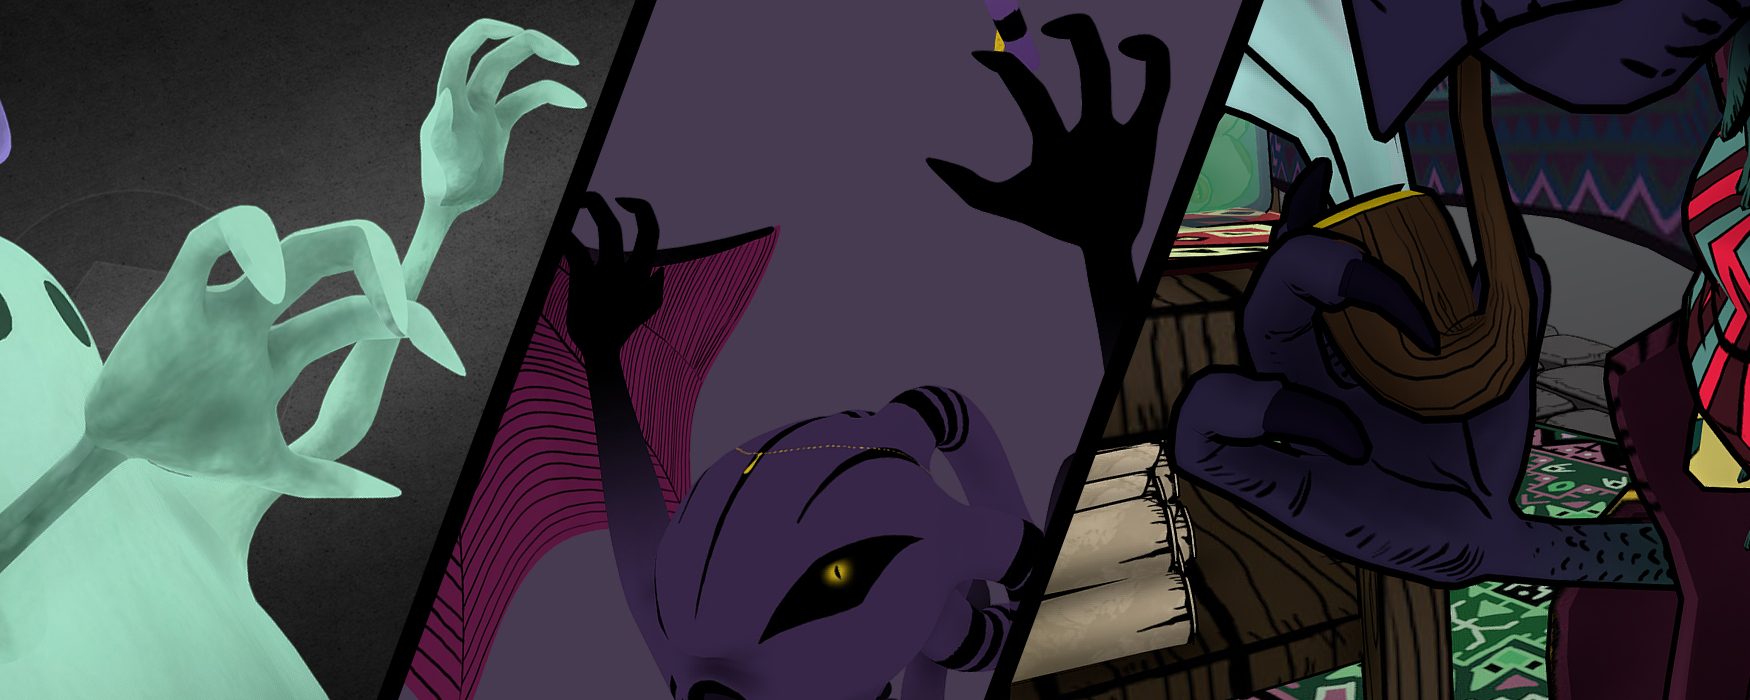
I also re-use models sometimes, often with modifications. The Kenku’s hands are originally from my “Spirits” model (and also used in the “Pandora’s Box” model). Who wants to re-model hands when you have some perfectly good ones you’ve already made? I did modify them to improve the geometry and add the claws. And, of course, change the pose.
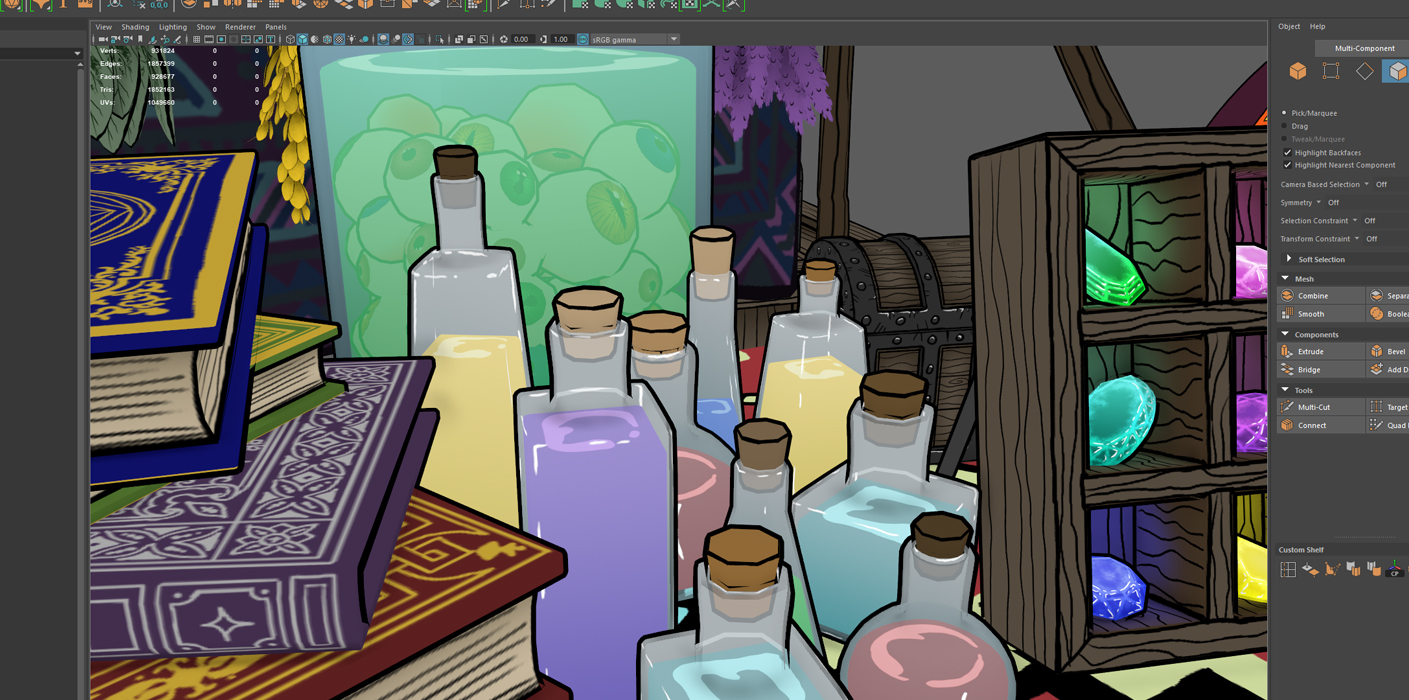
I usually model entirely in Maya. I’m not a big fan of sculpting, when I can avoid it. (I can admit it – I don’t like to retopologize.) Most objects start with a cube or cylinder, and most edges get beveled. More organic objects, like the Kenku character’s clothes, start with a single polygon and I use an edge-extrusion method to build it up and eventually extrude the whole thing to give it thickness. Lots of smooth preview is involved, as I try to model as low-poly as I can. It can be difficult to find the right balance in poly-count sometimes, and I find that it tends to depend on the texture style. Sometimes I think I can get away with something very low poly, only to find that the textures emphasize the faceting in an unpleasant way. This model had an additional complication: outlines.
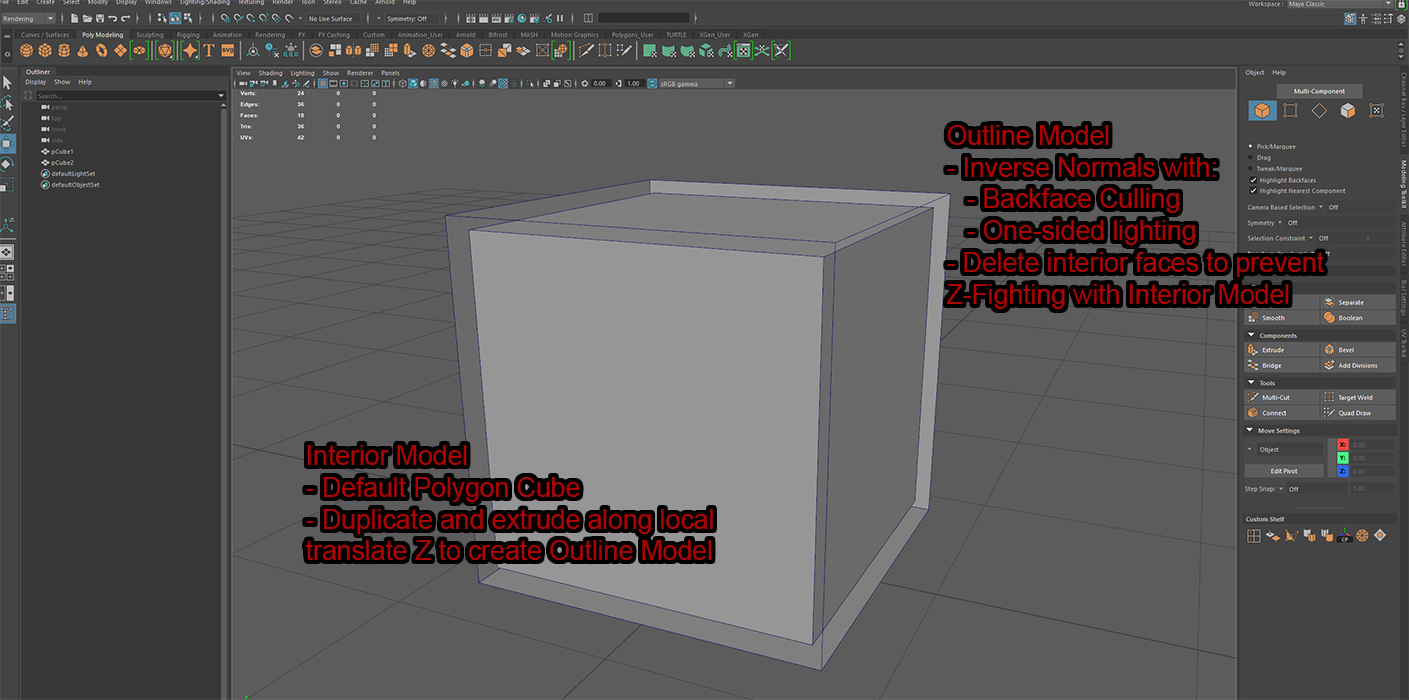
It wasn’t until I was nearly done with the modeling process that I decided to try using outlines, as it had been some time since I had used that style. But outlines mean increasing the geometry, which could cause some file size issues. Maya has some nifty outline tools, but as I was going for a design that would need to work outside Maya, I used a method I learned years ago from examining games like Okami. That is, taking advantage of one-sided shading.
I accomplish this by duplicating the geometry. It needs to be a little bigger than the base model. To ensure an even outline thickness and correct placement, I extrude the outline model using local translate Z. (I find that doing the UVs before this step is helpful, as then I can use UV shells to more easily target and delete the now unneeded interior bits of the outline model.) The outline model then needs to have the normals inverted. In Maya, make sure backface culling and one-sided lighting are enabled for it to display properly. At that point, the outline model only needs a black shader and boom! Outlined.
Texturing
Rendering and lighting are not really my jam. I’ve always enjoyed styles that let me see it immediately in the viewport, so it’s easier to iterate. Thus, I use lots of surface shaders and enjoy hand-painting my textures.
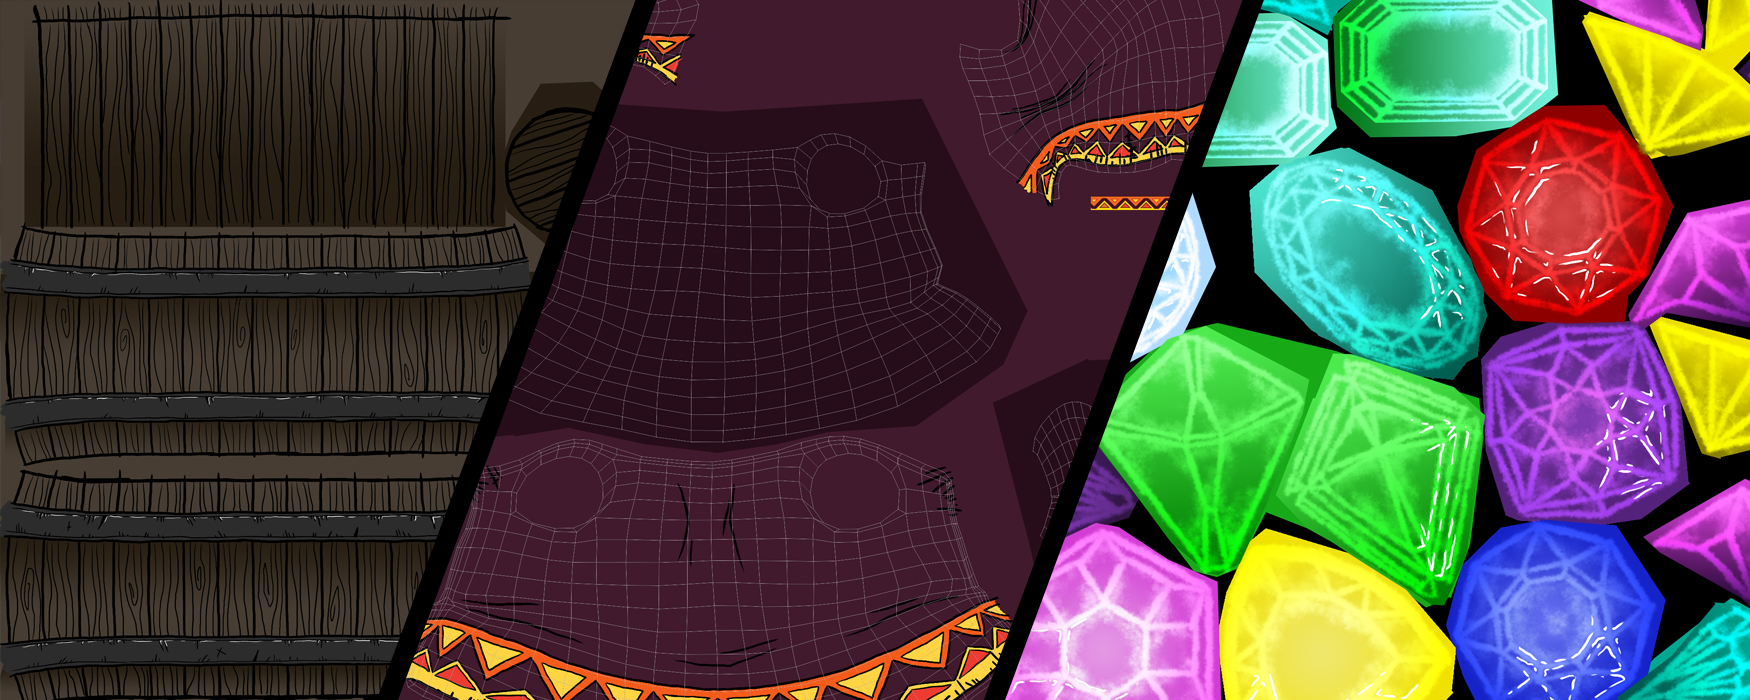
References are your friend! I wanted lots of colors and patterns for this project, so before I started texturing I researched things like Native American pottery and Mexican textiles.
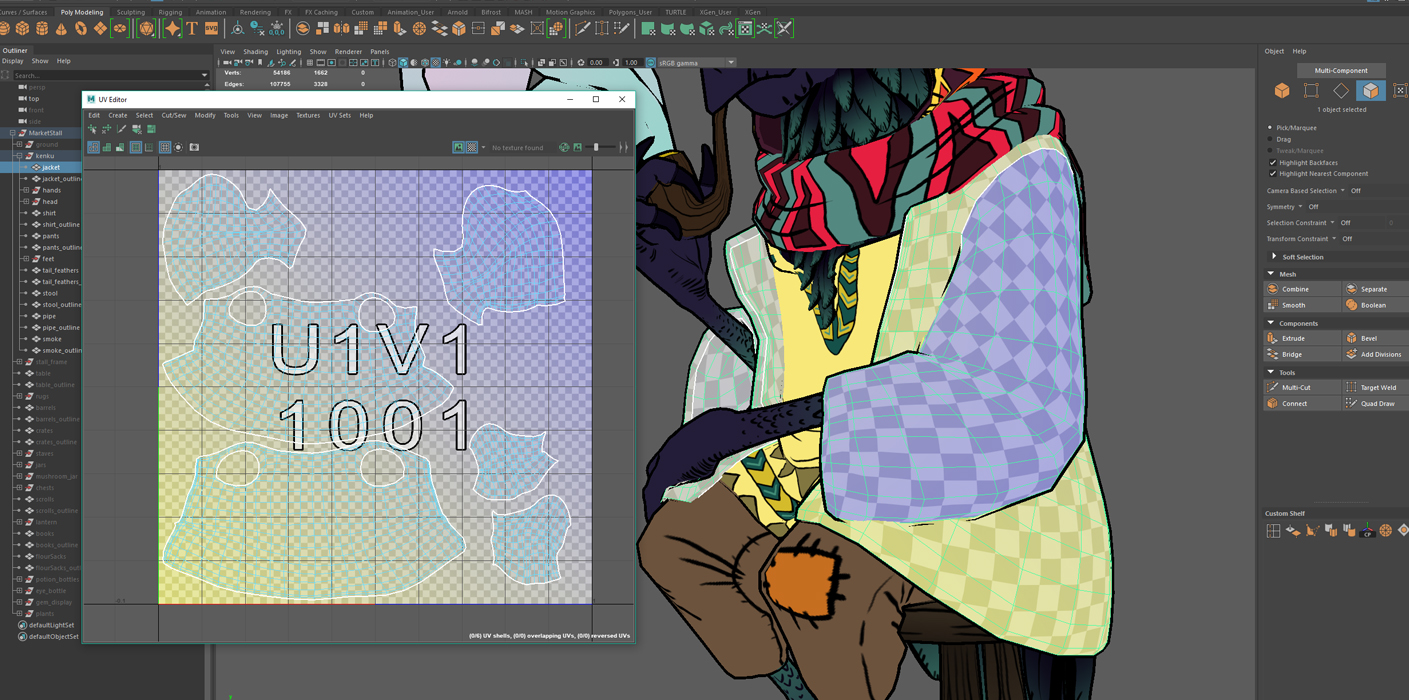
Next step: UVs. I know you kids with your newfangled programs like Substance Painter make you think that you can half-ass your UV layout, but the teacher in me feels the need to emphasize how important this skill is. Make sure your texels are an even size and shape! Optimize that seam placement!
Once I’m in Photoshop, it’s painting time! I use a lot of brushes, mostly from Alex Ruiz or Kyle Webster. This model had lots and lots of little details, so lots of hand cramps. (It’s important to take breaks and stretch your hand and arm muscles!)
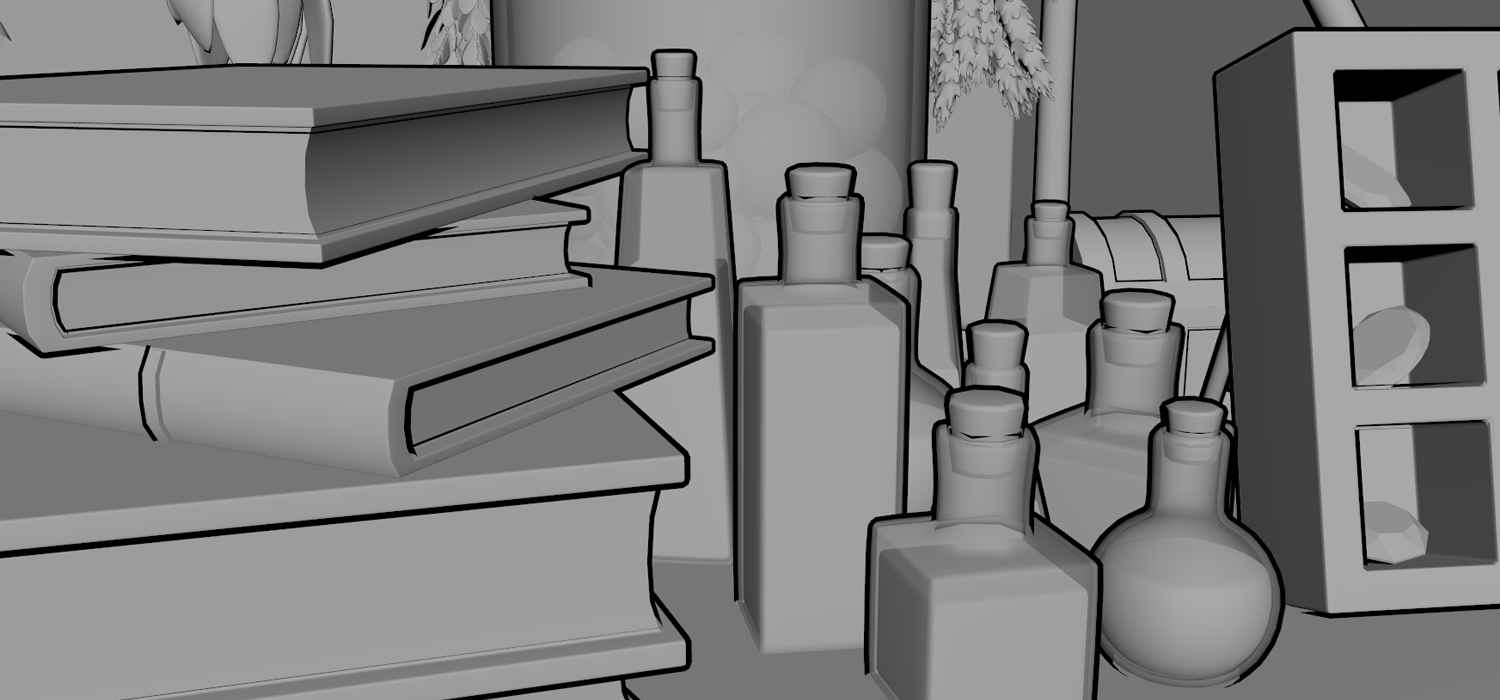
The bottles of potions and eyeballs were the trickiest bits, as there were multiple layers of various transparencies to work with – outline, glass, semi-transparent liquid (in the case of the eye-jar). This required a bit of experimentation with which direction to face the normals for each layer, as well as playing with the transparencies and things like highlights on the glass.
Sketchfab
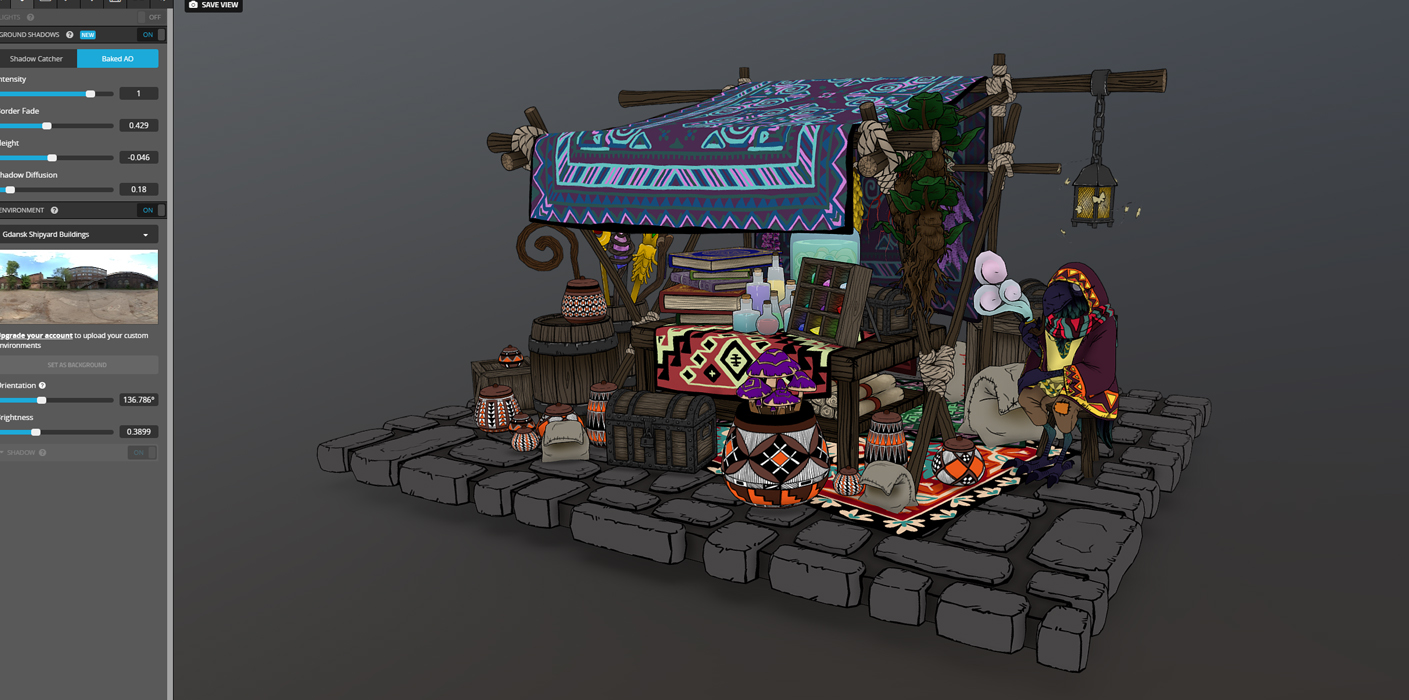
Finally, it was time to transition the project to Sketchfab. I like to design my environments to be explored, viewed from more than a single angle, and often find that a single image has a hard time capturing the whole composition. A series of screenshots is ok, or a video, but ideally I like people to be able to look at my work in a 3D environment and explore at their own leisure, which is where Sketchfab comes in.
At first, my file size was too big (over 50MB). I was able to reduce the size by using FBX instead of OBJ, so that was a relief.
Sketchfab has settings available for both surface shaders (shadeless) and one-sided rendering for the outlines, so I wasn’t worried about getting the model to look the way I wanted. It did take a little bit of time to upload all the textures and get them all connected to the right materials – this is why it’s important to practice good habits with your naming conventions! It makes a process like this one much less painful.
In this case, I kept things pretty simple. I utilized SSAO to help keep the model from looking too flat, and added sharpness to keep the textures from looking blurry.
I do enjoy the new Ground Shadows feature, which lets me bake in a shadow underneath the model while still keeping the model itself unlit.
And that’s about it!
Thank you, Sketchfab, for the spotlight!
