About Me
Hello my name is Volodymyr Borovkov. I was born in Ukraine and have lived in Germany for 20 years.
I did a bachelor’s degree in computer science and worked as a software developer for a while. But I am not as happy with my career as with my hobby which I have had all my life: 3D modeling and visualization.
Back in 2000 everything started with 3ds Max 2^^ which my father bought in Ukraine in the mid 90s. First I tried to model Formula One cars as I am a big F1 fan, but it was not the best idea for my first 3D model. Later I switched to student versions of 3ds Max and VRay and gained more experience in modeling, as there were more tutorials and even videos on web. After my studies I stopped using Max as I was still doing 3D as my hobby. So I’ve switched to Blender and actually never looked back because it also has everything I need. I can’t actually explain this, but since that switch I began to spend more time on my hobby and build way more models in a shorter time. And finally after my registration on ArtStation and Sketchfab last year (on the same day btw) I have made my models in a professional way and even start earning money.
Ok, now about the Futuristic F1 car 🙂 In February I participated in the NVIDIA Metropia 2042: Vehicles of the Future challenge on ArtStation. And as I already mentioned I am a big F1 fan, so it was a logical conclusion to model a futuristic F1 car.
Process
In the beginning I did a lot of research into how a Formula One car might look in 20 years. Design, power unit, tires and so on. As a starting point I used the official concept art of F1 2021 as inspiration for my car.
I started with the nose of the car and used subdivisions a lot. Then I added sidepods, bargeboards, suspension, halo tires and both spoilers.
At this point I was not sure if I should continue with this draft at all. (The only part that I was sure of is that the car has to be electric so I didn’t care for exhaust at the back of the car.) But I continued to shape every part of the car so it looked something like this:
At this stage, when the car was 80% ready, I started with first renderings, placing cameras at interesting angles and creating first materials. And after some renders I had the idea to make some interesting LED light paths all over the car, as it looked somehow futuristic, and also to rebuild the rims to light up the wheels:
The final step was to make the rubber more scientific and, of course, the painting of the car, so that it would feel like it was able to generate electricity from the light and heat. Therefore I added a Gimp generated honeycomb/hexagon pattern to the body as an additional layer. And, to be honest, I never planned this, so that’s why I like to do the rendering process a bit early and do the final attachments after that.
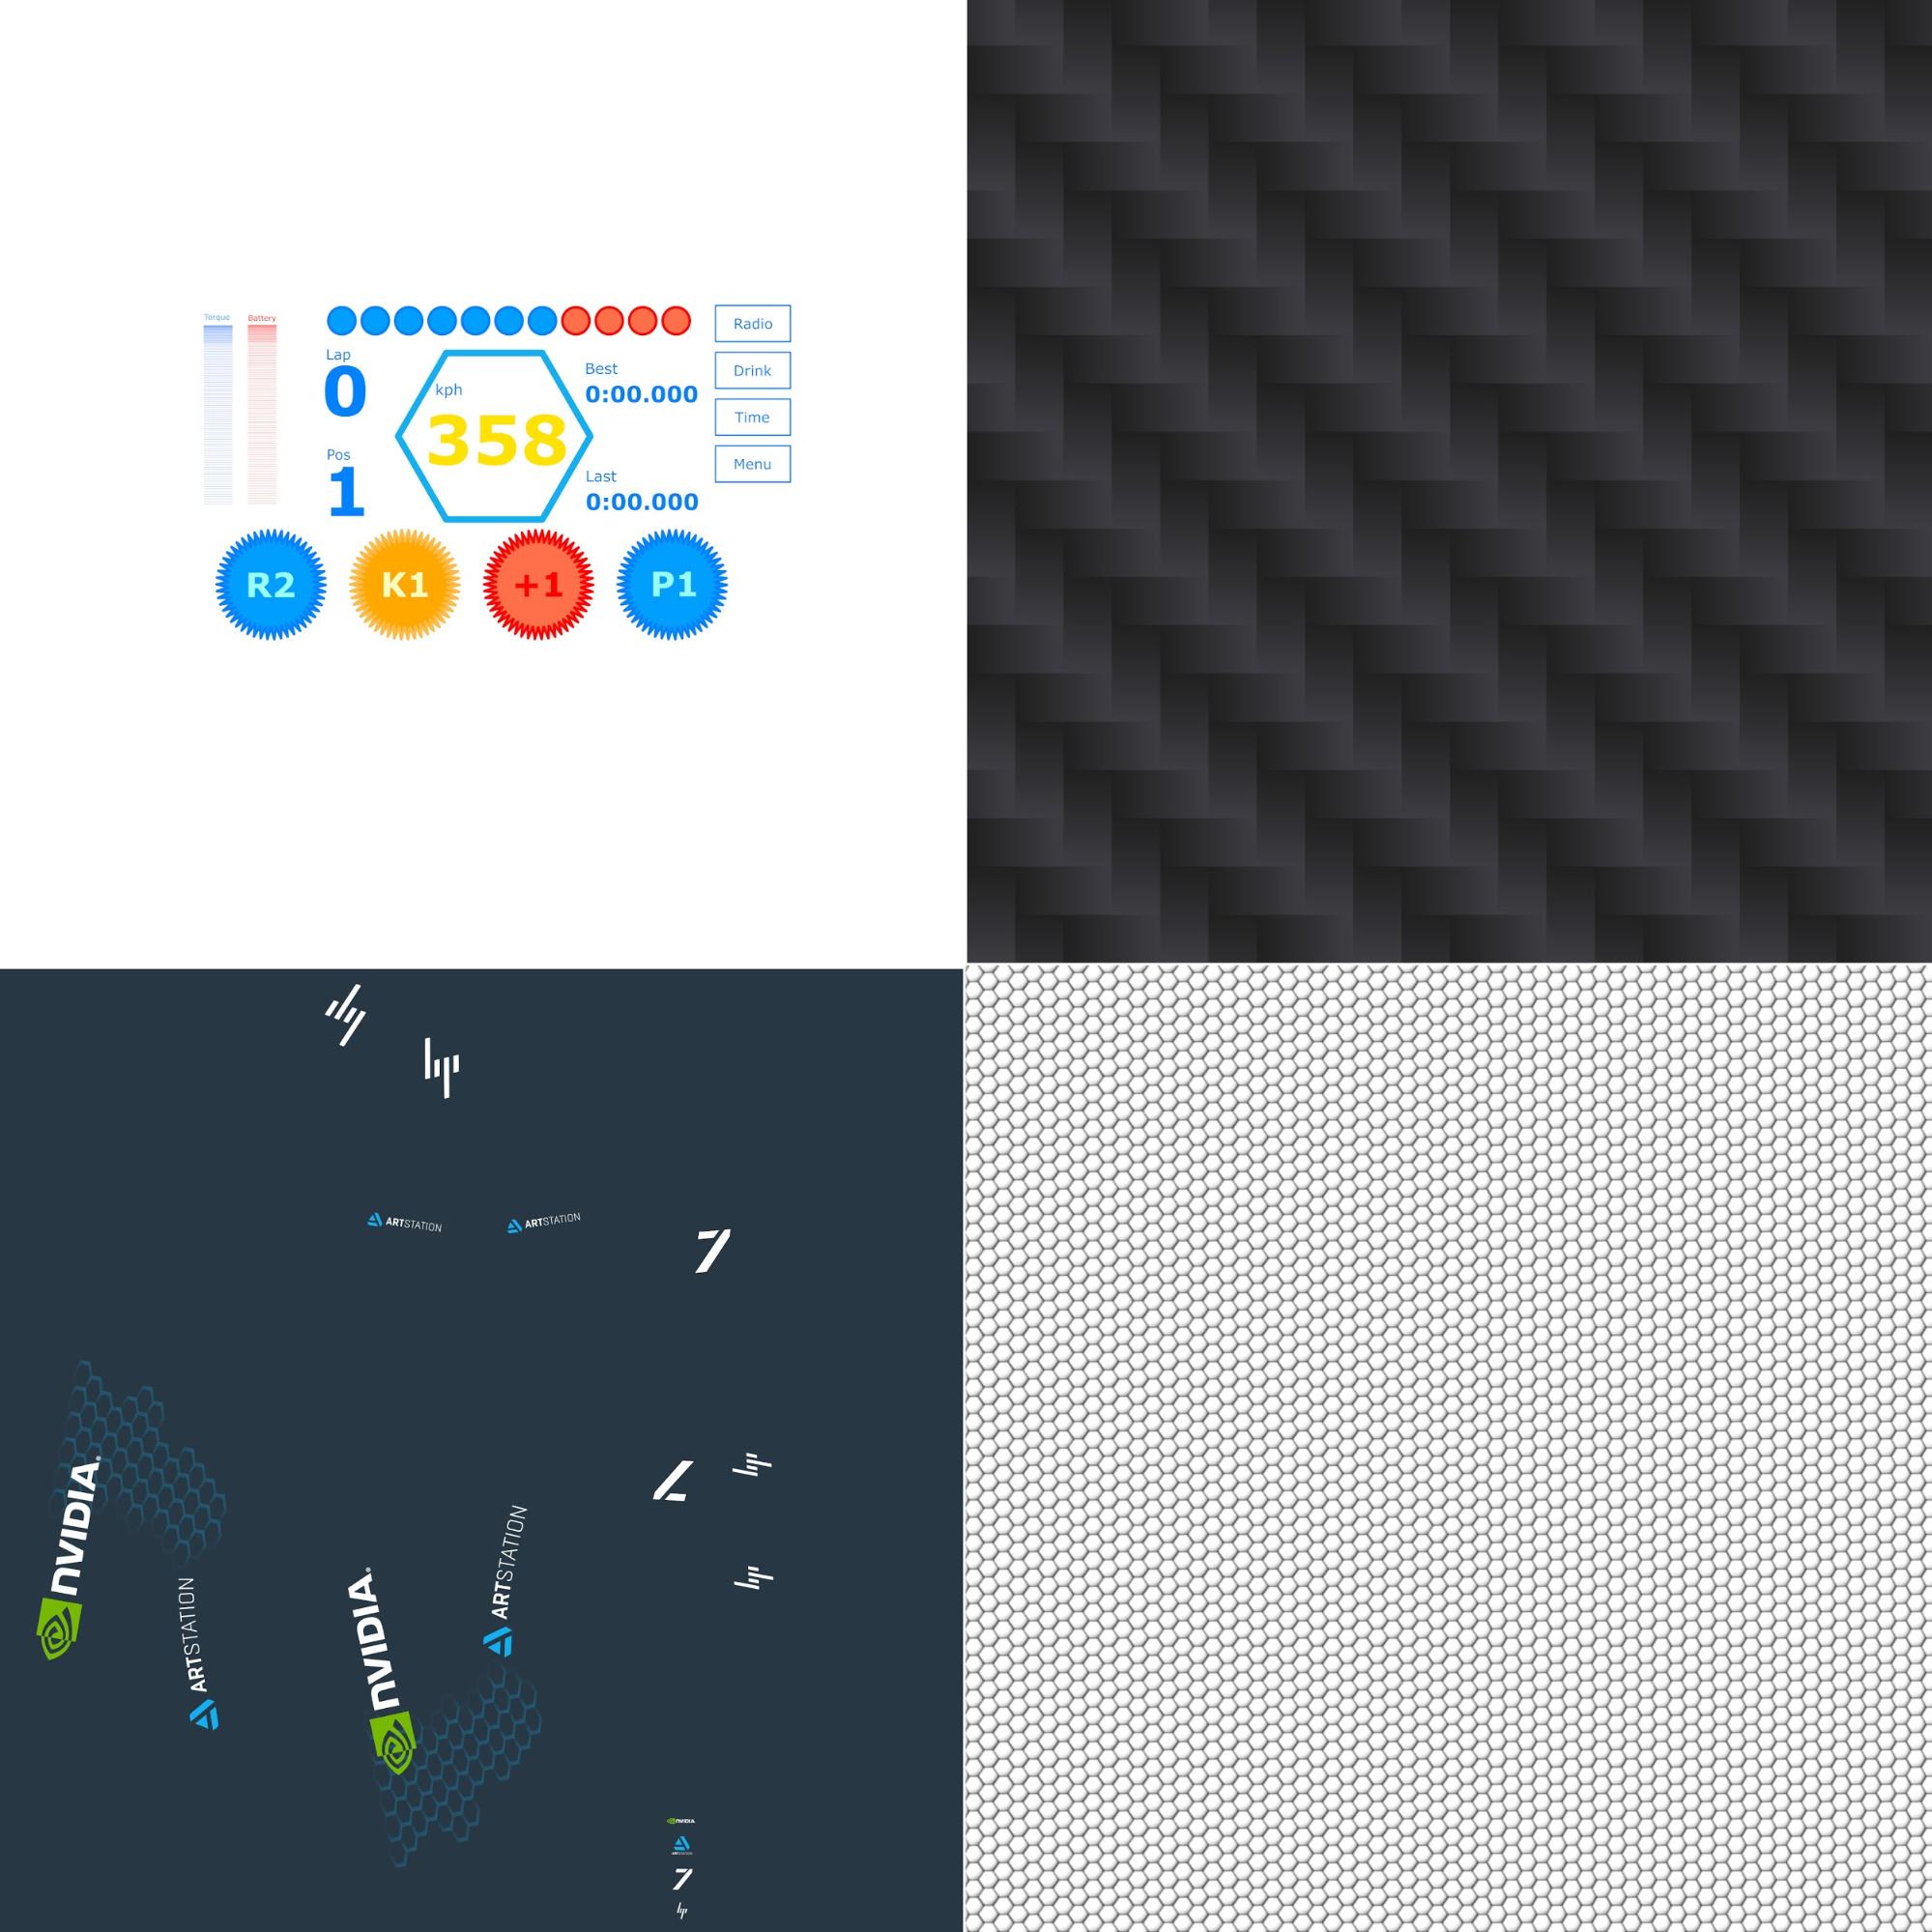
For this car I used 15 Materials (like rubber, chrome, neon, emission light…) and only four textures:
The top right texture is the only one which is not mine. It’s from CC0 textures. The top left I did in Inkscape for the steering wheel display. Bottom left is my UV map for sponsors on the body of the car, and finally, the bottom right, as I already mentioned, is the honeycomb/hexagon pattern for the body as an additional layer.
And here is one of the final renders:
Sketchfab
After spending hundreds of hours rendering the car in every perspective in Blender Cycles and submitting those to the contest, I also wanted to share a real 3D model with the ArtStation and the Sketchfab communities so that everybody could explore this car not only by renders but in 3D from every angle.
First I reduced the number of Polygons from 1.3 Million to 400,000 as I wanted a smooth exploring experience for the user. Next I converted my 4K texture from .png to .jpg to make loading time shorter. And then I started to play the whole day with the Sketchfab editor.
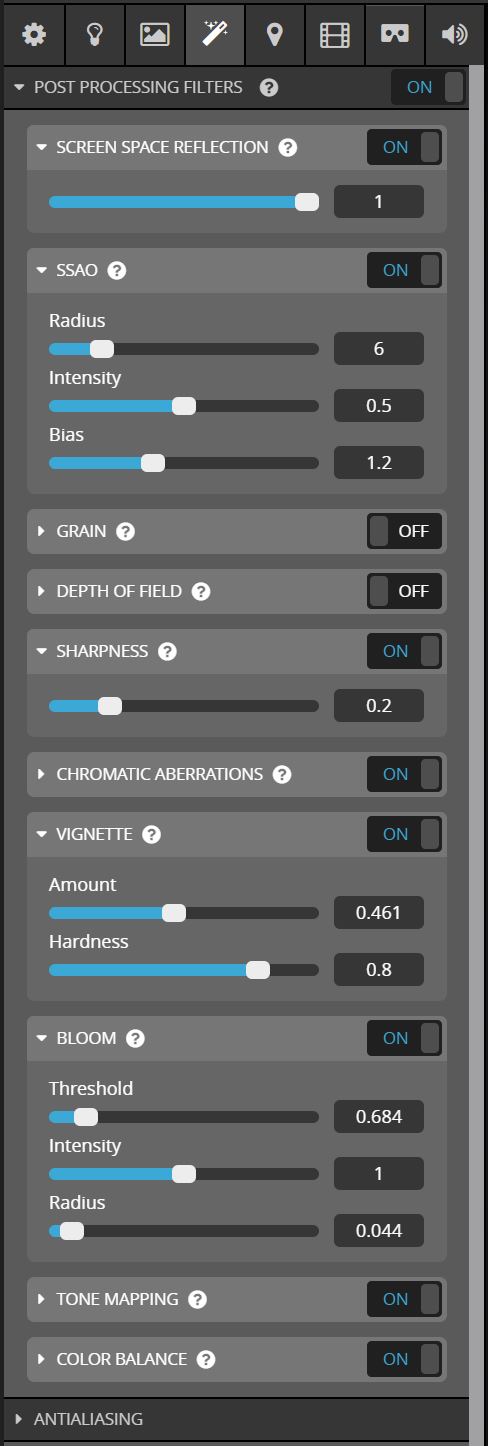
I definitely wanted a dark background to make those lights shine more. I really like the ground plane shadows feature in Sketchfab so I don’t have to import some ground planes by myself and make them somehow transparent in the editor. I’ve turned on nearly all post production options available:
And of course, I added a clear coat material to the car (love that feature) and emission material for the lights.
The result was very satisfying 🙂
https://sketchfab.com/3d-models/futuristic-f1-car-265ffc858ebf4339b3c87eb07cdc557c
The only feature I miss in Sketchfab is being able to make some kind of UV scaling/tiling for the textures, so I could put my carbon texture on the black parts of the car as I did in Blender.
I hope you liked this article and I really want to thank Sketchfab for giving me the opportunity to be in the spotlight.
You can see more of my works on ArtStation.


