In Art Spotlight, we invite Sketchfab artists to talk about one of their designs.
Hey Everyone!
My name is Liam Broughm. I work as a technical artist, but I’ve always loved dabbling in the other departments as much as possible. Over the course of my career, I’ve had the opportunity to do just that, jumping back and forth across the threshold between film and game.
I always find it exciting when I get thrown into something new I don’t understand. My most recent project is a perfect example of this. When I started, it was only intended for learning the shading system in unity, creating custom shaders to give my scenes that extra little nudge. However; by the time I was happy with the result, I had discovered so much more about the program, and couldn’t stop myself jumping in for some extra exploration.
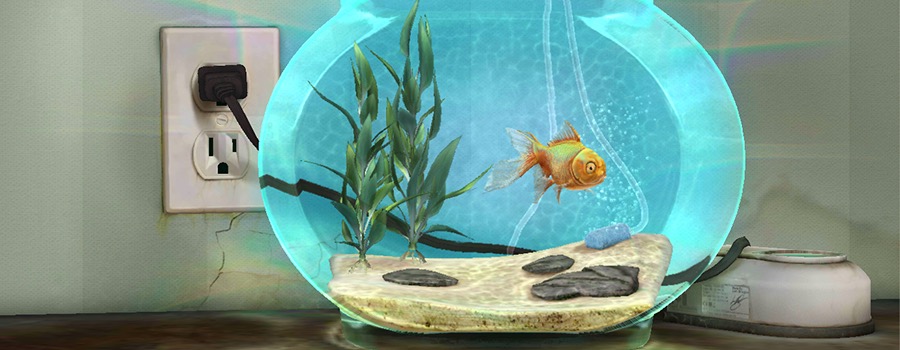
Considering I really didn’t know anything going in from a programming front, what resulted is, what I would consider a fairly decent simulated pet goldfish.
The “Hero”
Let’s not get to ahead of ourselves. The main character of this project is the reason I was invited to do this spotlight, and is the main focus. And yes my “Hero” is a goldfish, I am doing a goldfish simulation after all. This is the version you’ll find on Sketchfab:
The Model
The original sculpt for the fish was done in Sculptris and was actually a leftover from my previous learning projects. Sculptris is free if you’re looking to give this type of thing a try yourself and is great if you’re just starting.
For the low poly mesh I used TopoGun. It’s a great tool designed with the express purpose of making low-poly geo and maps from high-poly models.
Textures
For the most part I use Photoshop to do all my texture work. I’ve never really had any difficulty imaging how my textures will look on their 3D model so I’m fine working in a 2D environment. I do quite a bit of strait 2D digital art as well so Photoshop is just what I’m used to working in.
The normal and ambient maps, are computer generated using the high-poly model
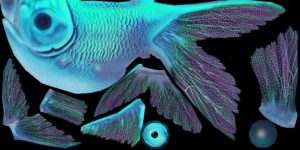
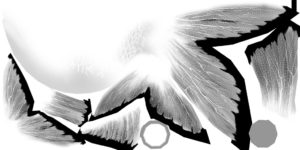
Diffuse and Specular
Since this character is for a game I wanted to save as much space as possible so the final result would run smoothly (every little bit counts). For that reason I overlapped everything symmetrical making the maps themselves half the size. I even took it one step further and set the transparency and specular roll maps as the alpha channels for diffuse and specular-color.
Ambient Occlusion (Sketchfab only)
Normally I just bake my ambient texture directly into my other maps. I separated it out this time so I could get a little more definition out of the PBR system on Sketchfab.
Normal Map
For my normal map I created unique UVs with no overlapping UVS. since normals are based off the faces direction mirrored UVs doesn’t work well, this method helps to avoid any obvious texture seems.
Mat-Cap
This was actually my first time using one of these wonderful little things. Instead of physically lighting your scene all the “lights” are pulled form this texture and applied to the models based on normal direction relative to the camera. If you have a relatively static camera angle, this is a great (and cheap), way of lighting

Alpha Issues
Over all my textures worked pretty good in the shader I was building, that is except for transparency. Coming from film I had never encountered issues with anything transparent, if something was closer to the camera it always just rendered where it belonged. Much to my surprise that didn’t appear to be the case when it came to Unity.
Unity was fine if I just used my map as a clipping mask, but as soon as I wanted anything halfway transparent it seemed to have no idea what to do and would put random faces in front of everything else regardless of where they actually were in 3D space. Apparently the most common way to deal with this was to create multiple copies of the material then simply assign the correct rendering order to them. I wasn’t a huge fan of this method as it required multiple render calls for something that should only need to be one material, I figured there must be a more elegant solution to the problem.
After a little more research I discovered that the way the model was rendering was actually in the order of its faces. It turns out faces on a model get assigned a number in the order they are created. With this in mind I went back to my mode and stared cutting it up and gluing it back together until I got to a point where everything was organized in a way that made sense.
I ended up ordering everything into groups of faces as seen below:
Finally my character was looking like a fish and not the Frankenstein monster. Here’s a sample of how the final shader ended up looking.
YouTube material preview
Project Evolution
Once I got this far, I just keep going. Next it was a refractive glass shader. Then I wanted animations, and player control. I even got some basic AI working! There is still so much left for me to explore, and this project is likely going to keep evolving as I do.
For those of you who are curious here is what I’ve managed to build so far. Everything you see was created by me from the ground up, and that’s not just art I’m talking about, the scripts are mine as well.
YouTube final preview
Final Thoughts
Not knowing what you’re doing is one of the best reason for doing it in the first place. Don’t be afraid to try new things. It’s great to hone the skill you already have, but make sure to keep adding to your foundation so it stays strong. Those new skills will start to find their way into your normal workflow, normally augmenting it for the better. Who knows, your pet projects may eventually grow into something cool you can be proud of.
Thanks to Sketchfab for the great platform they offer to help our artistic community grow and share, all the great software used for this project (Maya, Unity, Photoshop, Sculptris, and TopoGun), And lets not forget all those people who helped me out whenever I hit a snag, you know who you are!
Thanks Liam!
You will find more of Liam’s work on his Sketchfab portfolio.


