Hello! My name is Corinne Cook and I am a 3D Character Artist based in Florida. While I have professional experience in creating characters for 3D print, in my free time I enjoy making game-ready characters. I first got into 3D at Drexel University studying Digital Media. However, my knowledge of creating characters didn’t really start until I joined Shane Olson’s 3D Character Workshop. Once I joined, I learned how to use ZBrush, block out characters, and bring them all the way from a nice sculpt to an animatable game-ready character.
Inspiration
I chose to create Ilse because I was looking for a character that would challenge my skills, but would also hold my interest from beginning to end. I had a few characters I was debating on sculpting, but I kept going back to Bea Castillo’s concept, because of its appeal and how it would enhance my skill set.
My ultimate goal for the character I was going to create was to challenge my ability to sculpt cloth—and Ilse definitely checked that box.
Blockout
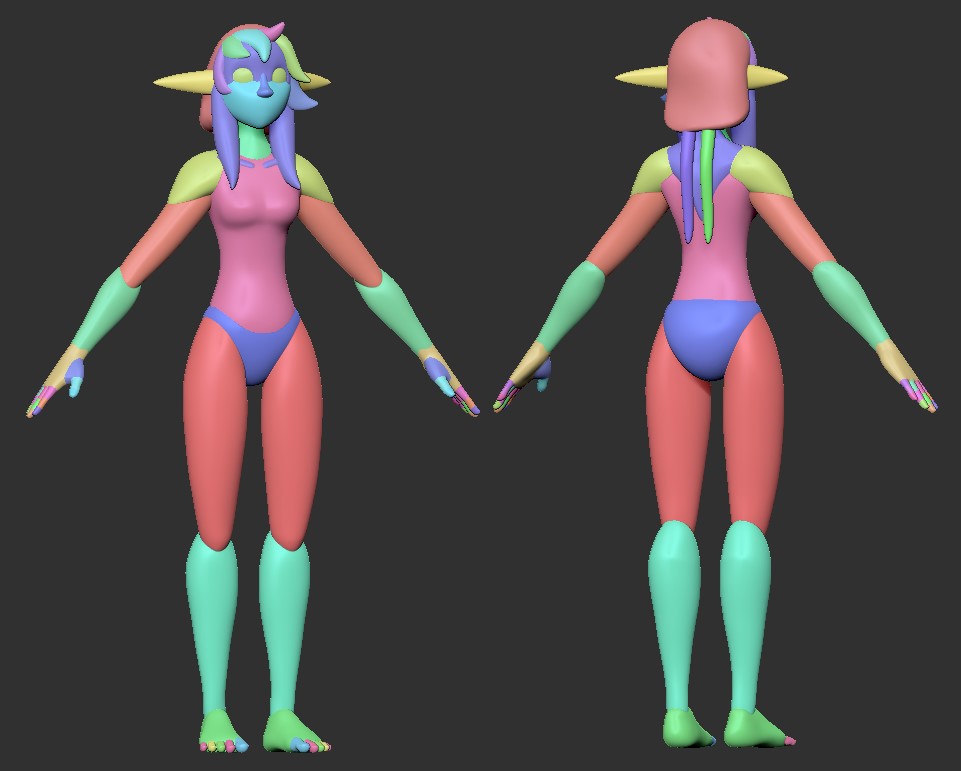
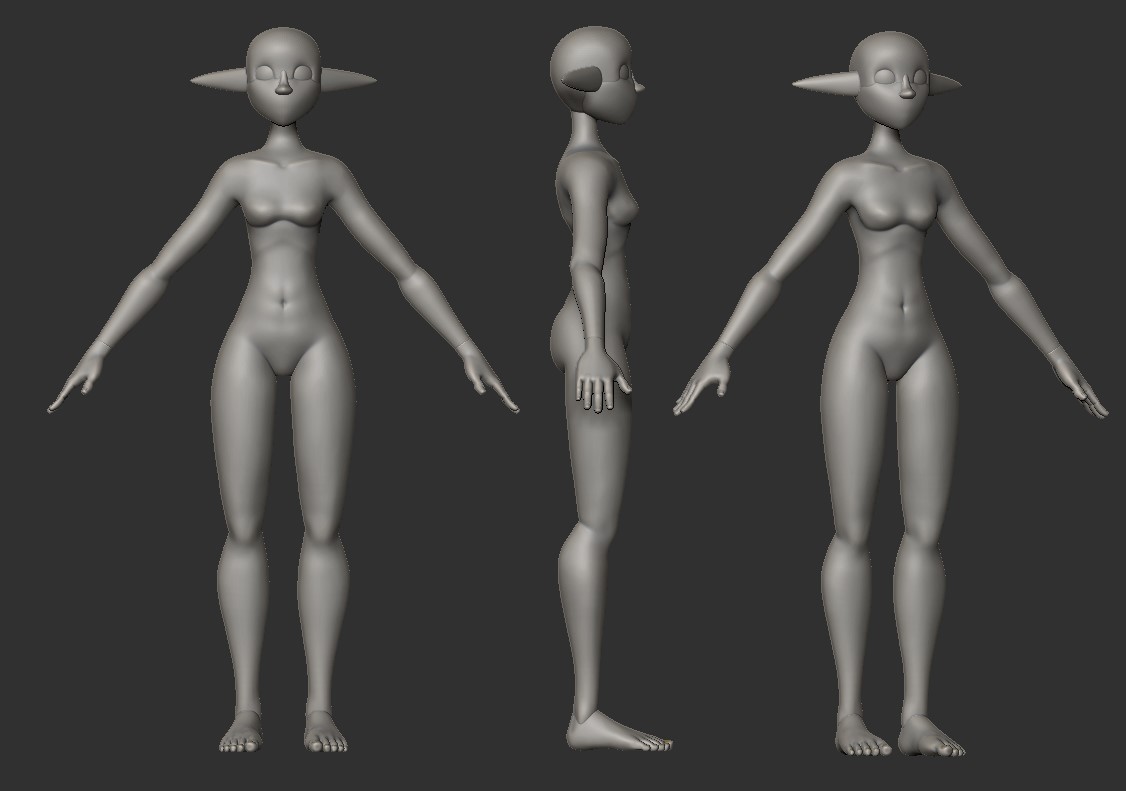
Before I start any new project, I gather references. After that, I move on to the initial blockout. When I start to block out a character in ZBrush, I always use primitive shapes to block out proportions. I try to get all of the basic shapes in there without adding any details. While it isn’t always perfect, it’s a great starting point to begin sculpting.
Detailing
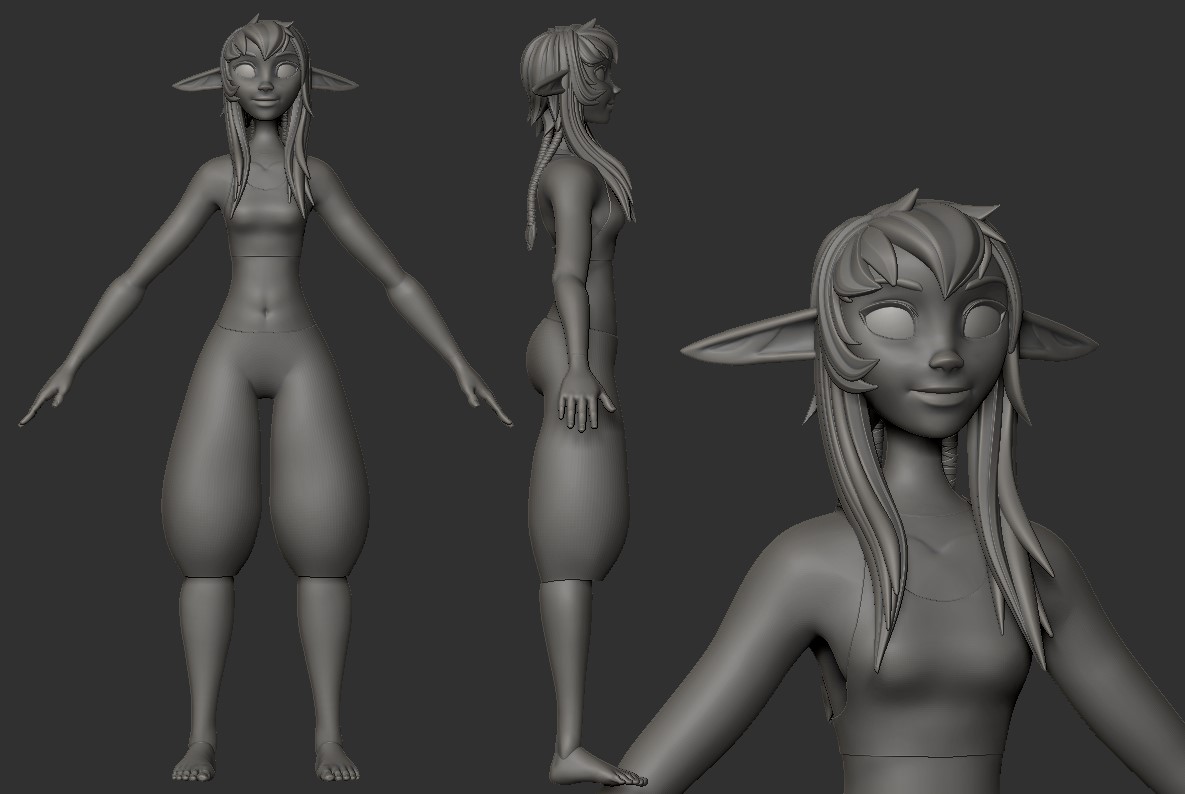
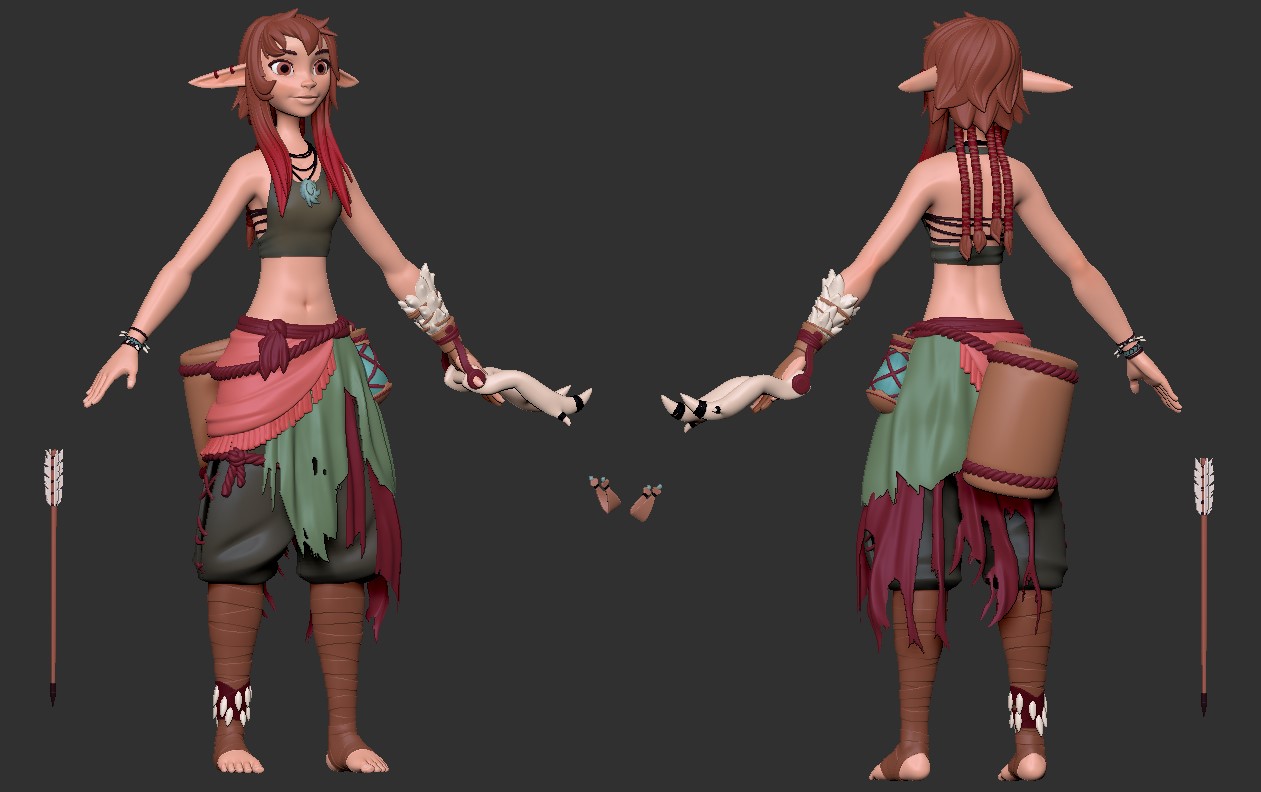
Once I think I have everything blocked out with proportions as close to the concept as possible, I merge it all together, ZRemesh it, then start sculpting. I started working on the body first, then moved to her face and hair. I always try to focus on anatomy, without going overboard, always staying true to the concept. I kept her hands and feet separate from the rest of the body initially so that I could control the amount of topology in each area. This keeps the body from having too much topology where it isn’t needed, while also allowing the hands and feet to still have detail.
Next, I moved on to working on her face and hair. The face is where I tend to spend most of my time as it is a key focal point. Before I merged the blocked out face together, I created a hole for the mouth so the lips would flow better than if they had just been sculpted onto the front of her face. After everything on the head was merged together, I started sculpting, trying to get the overall shape before adding details. I also added the eyebrows and eyelashes fairly early on as they help to shape the eye and give it more life.
After I felt fairly comfortable with the face, I moved on to the hair. After experimenting with a couple hair brushes, I chose to use the Makkon hair brush from Funky Bunnies. I drew the curves one by one onto my blocked out hair, then moved each piece into place with a large move brush. The larger brush helps to try and keep the mesh looking clean.
At this point, I also put in single-sided meshes for her shirt and pants to help visualize her silhouette better. To start clothing, I usually duplicate off the body, delete any unnecessary parts then ZRemesh, and move it around until it matches close to the concept. Keeping it single-sided helps avoid any penetration from one side into the other. After the base shape is blocked out, I will add thickness by extruding, then subdivide and add details.
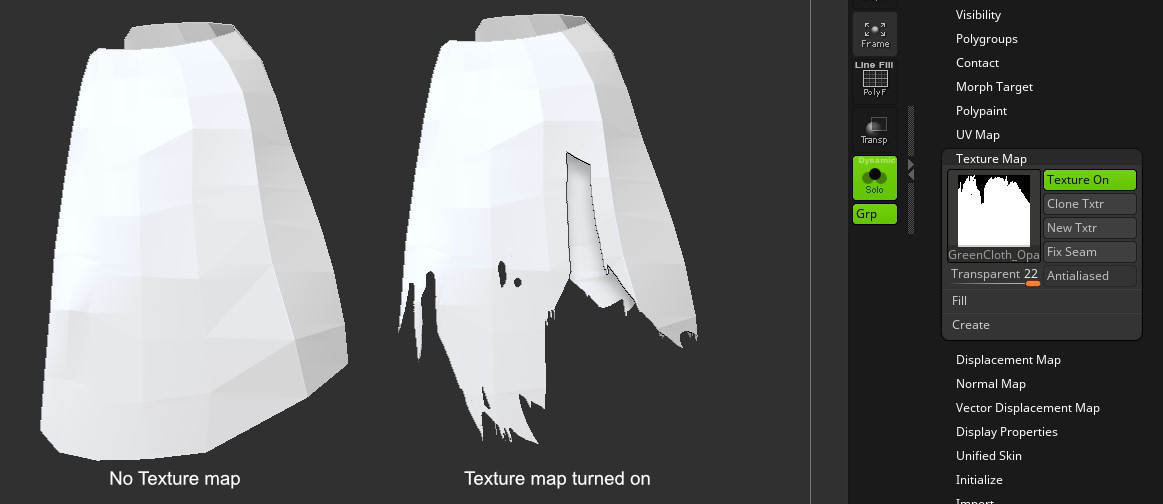
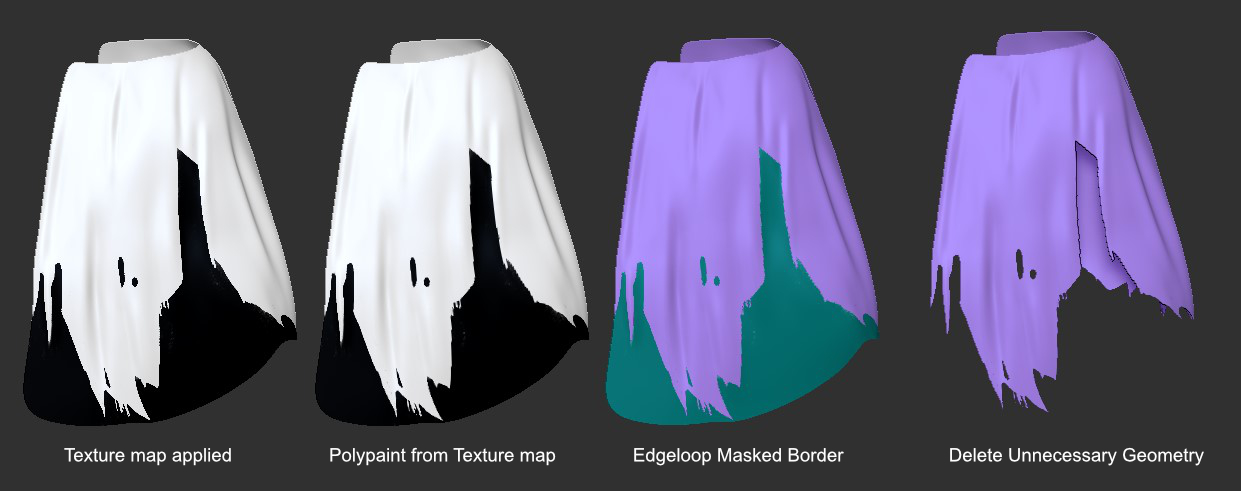
The pieces of cloth hanging by her hip were my biggest challenge. I ended up wrapping single-sided planes around her hip, doing a quick unwrap, and painting opacity maps in Affinity Photo. I then applied the maps to the planes in ZBrush, turned up the transparent slider, and continued moving the planes around until they looked just right. Here’s a screenshot showing what the low poly plane looks like subdivided with and without the opacity map applied.
Once I had a good base of Ilse sculpted, I added in her props, added thickness and details to the clothes, and did overall tweaks to get her closer to the concept. I also added polypaint at this point as color helps me see things differently and helps me fix any problems.
Retopology and unwrapping
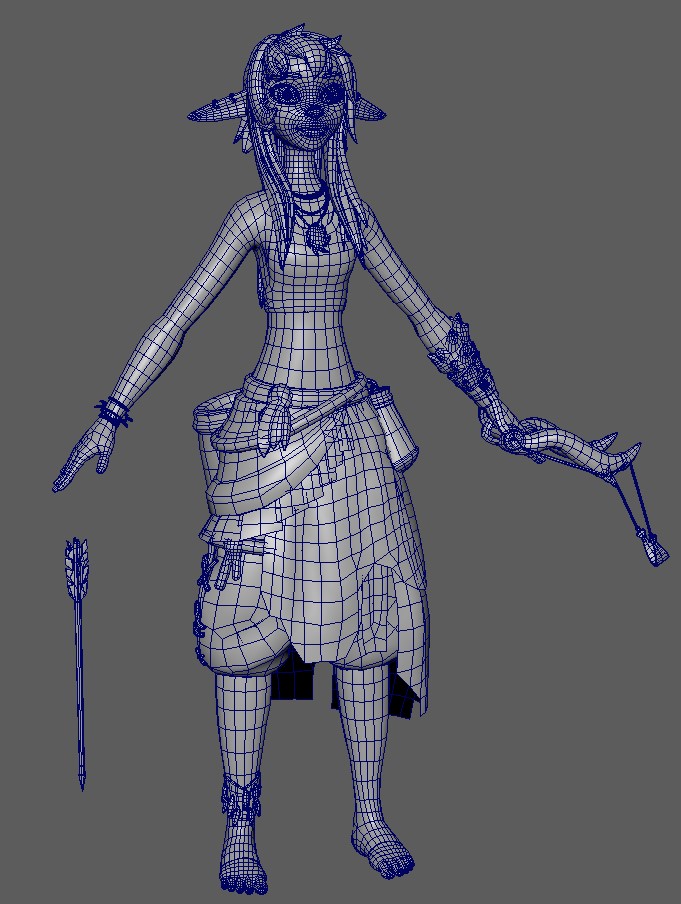
Once I was happy with where my high-poly was, I moved on to retopoing and unwrapping in Maya. I kept the ripped cloth by her hip and the fringe on her pink cloth as single-sided planes to be baked onto later. This approach avoids any headache with retopo and also makes it easier to be animated. I didn’t have a target polycount, but I knew I wanted to keep it as low as possible without losing too much detail. She ended up being around 68k triangles with five sets of UVs: head, body, hair, cloth, and props.
Baking and texturing
I chose to do all my baking with Marmoset Toolbag, as its live cage feature helps alleviate baking issues.
Since the ripped cloth pieces were moved around, the topology wasn’t clean. In order to get a clean high-poly mesh for baking, I ended up subdividing and converting the texture map in ZBrush to polypaint. Then, in order to isolate just the cloth and remove the areas I didn’t want, I deleted the lower subdivisions and used ‘mask by intensity’. Masking by intensity masks out the darker areas based on the polypaint. Next, I used ‘edgeloop masked border’ which creates two polygroups: one for the cloth and one for the background. Finally, I deleted the black areas and had a very dense plane that I could use to bake.
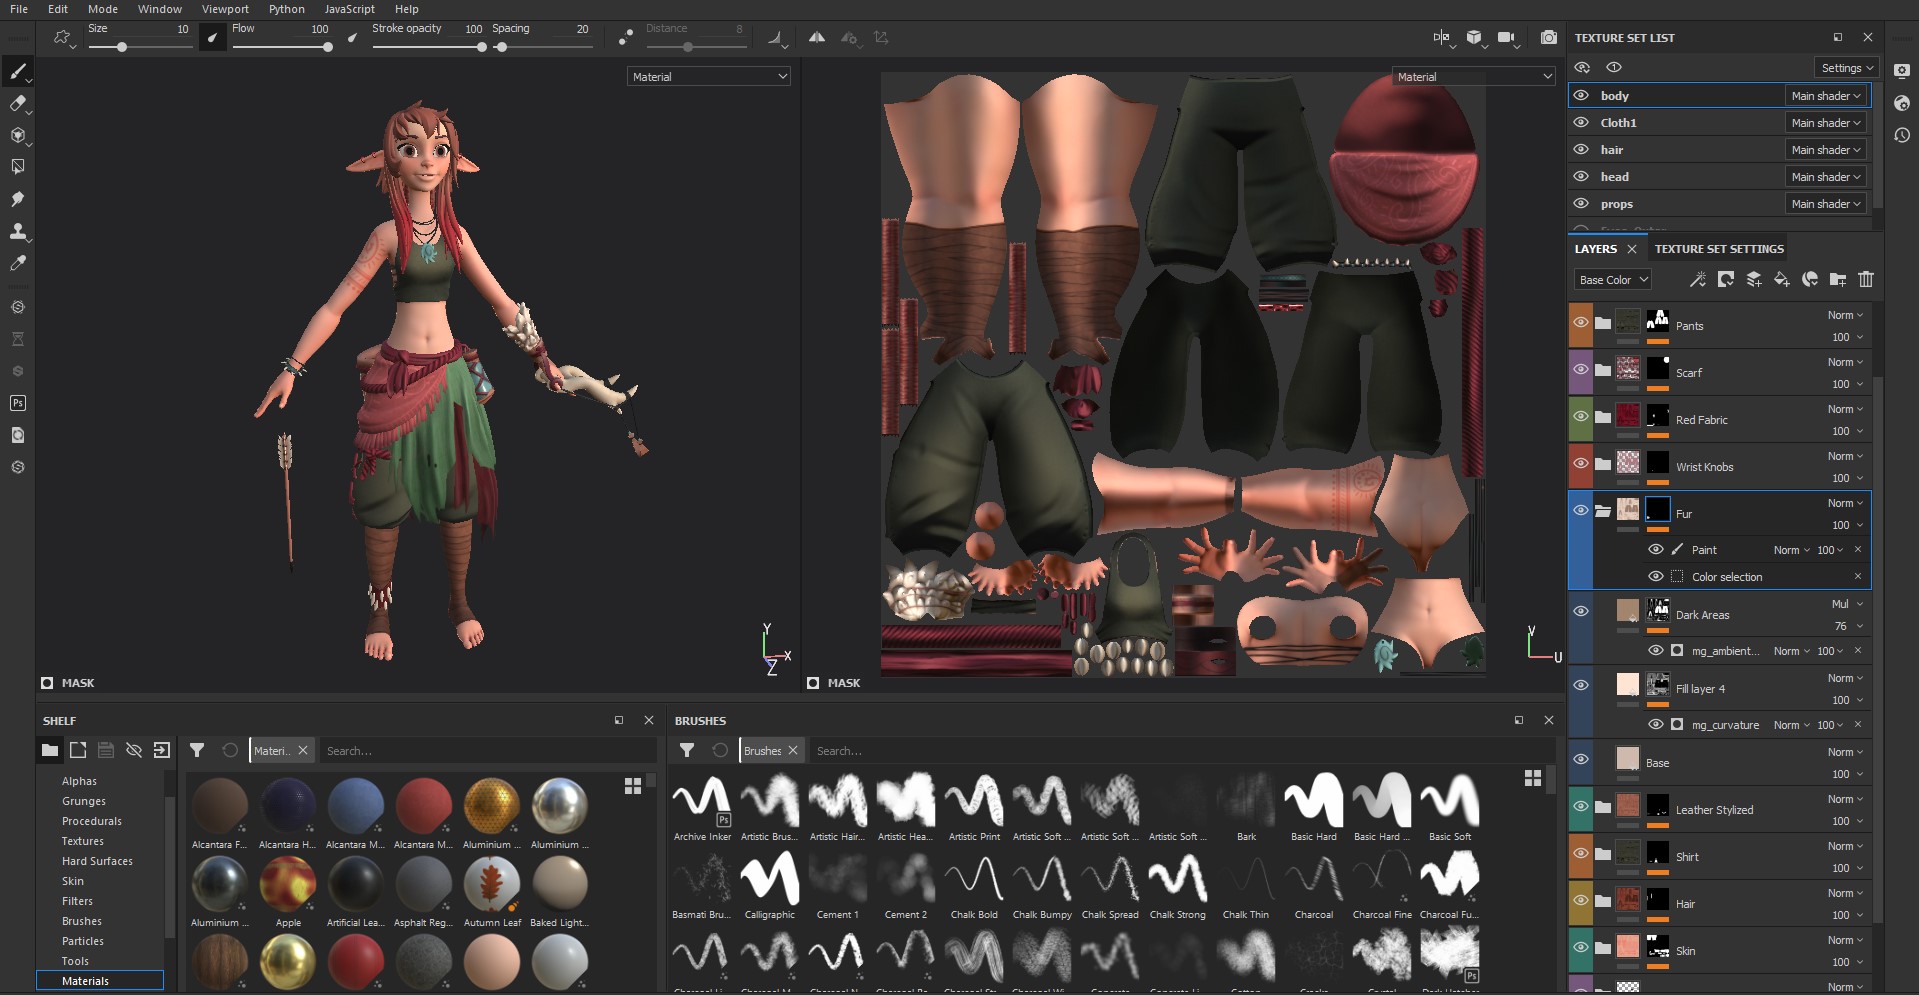
In Substance Painter, I tend to start out with base materials that come with the program. Once I am happy with the base, I will add fill layers with masks and generators to enhance the overall look. I use the Ambient Occlusion and Curvature generators the most as they are able to target the edges and creases more efficiently. I hand-painted her tattoo and the designs on her bag and cloth. The last thing I do when texturing is to add gradients to almost everything using either the position generator or the green channel of my world normals map. This helps to give the character an overall more interesting look.
Posing and Rendering
In order to pose my low-poly mesh, I went back into ZBrush. There, I used Transpose Master to pose my characters to match as close to the concept as possible while still keeping it interesting from all angles. Transpose Master allows me to move multiple subtools together making it easier to pose a lot of things at once. After her basic pose was finished, I had to go back to sculpting to clean up any areas that broke while posing, like her elbows and fingers.
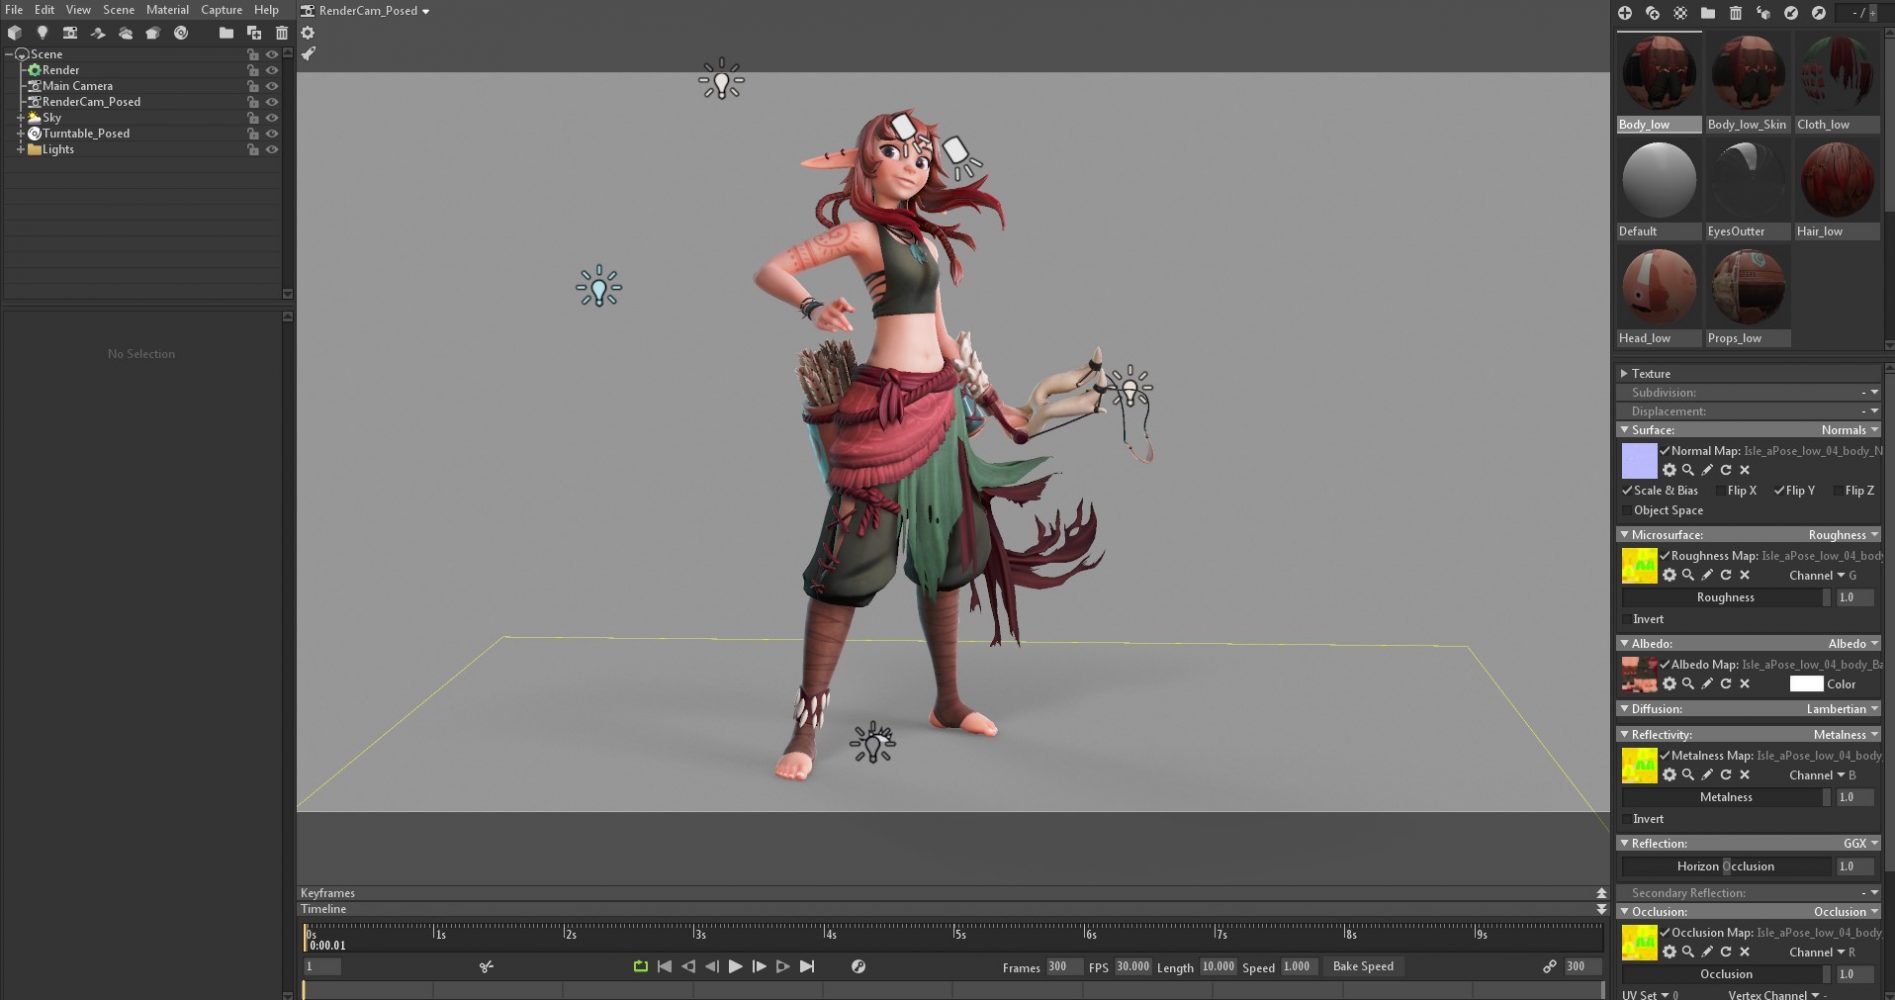
After she was posed, I went back into Marmoset Toolbag with the posed mesh and maps from Substance Painter. I set up all of the materials and also added things like subsurface scatter to the skin and anisotropy to the hair. For lighting, I always start with an HDRI with the brightness turned down. Then I will add key, fill, and rim lights. I also added small but very bright lights to add highlights to her eyes.
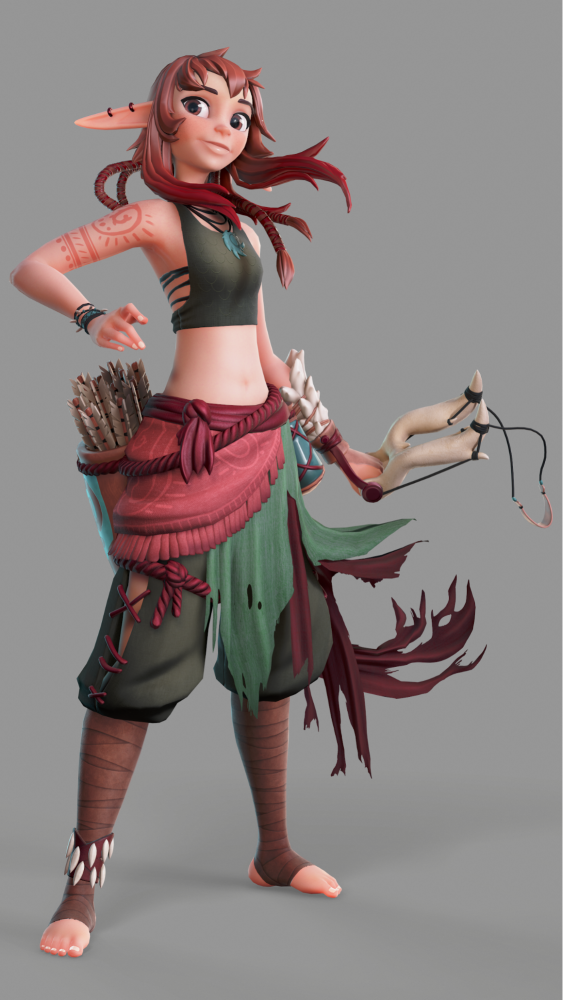
Final render:
Sketchfab
After I finished up all of my renders, I decided to upload Ilse to Sketchfab as well. I re-exported my maps from Substance Painter using the Sketchfab preset. Then I uploaded Ilse and the maps and assigned each map to its respective mesh. After all maps were assigned, I adjusted any materials to add subsurface scattering to the skin and anisotropy to the hair, just like I did in Marmoset Toolbag. I then found an HDRI that was close to what I used in Marmoset and tried to match my lighting and post process settings as close to my original render as I could.
Here’s a screenshot of the post process settings I used:
Final Thoughts
I learned a lot while working on Ilse and while it was a challenge at times, I really enjoyed bringing her to life in 3D. Thank you again to Bea Castillo for letting me model her character. If you would like to check out more of my work or see the final renders of Ilse, please check out my ArtStation.

