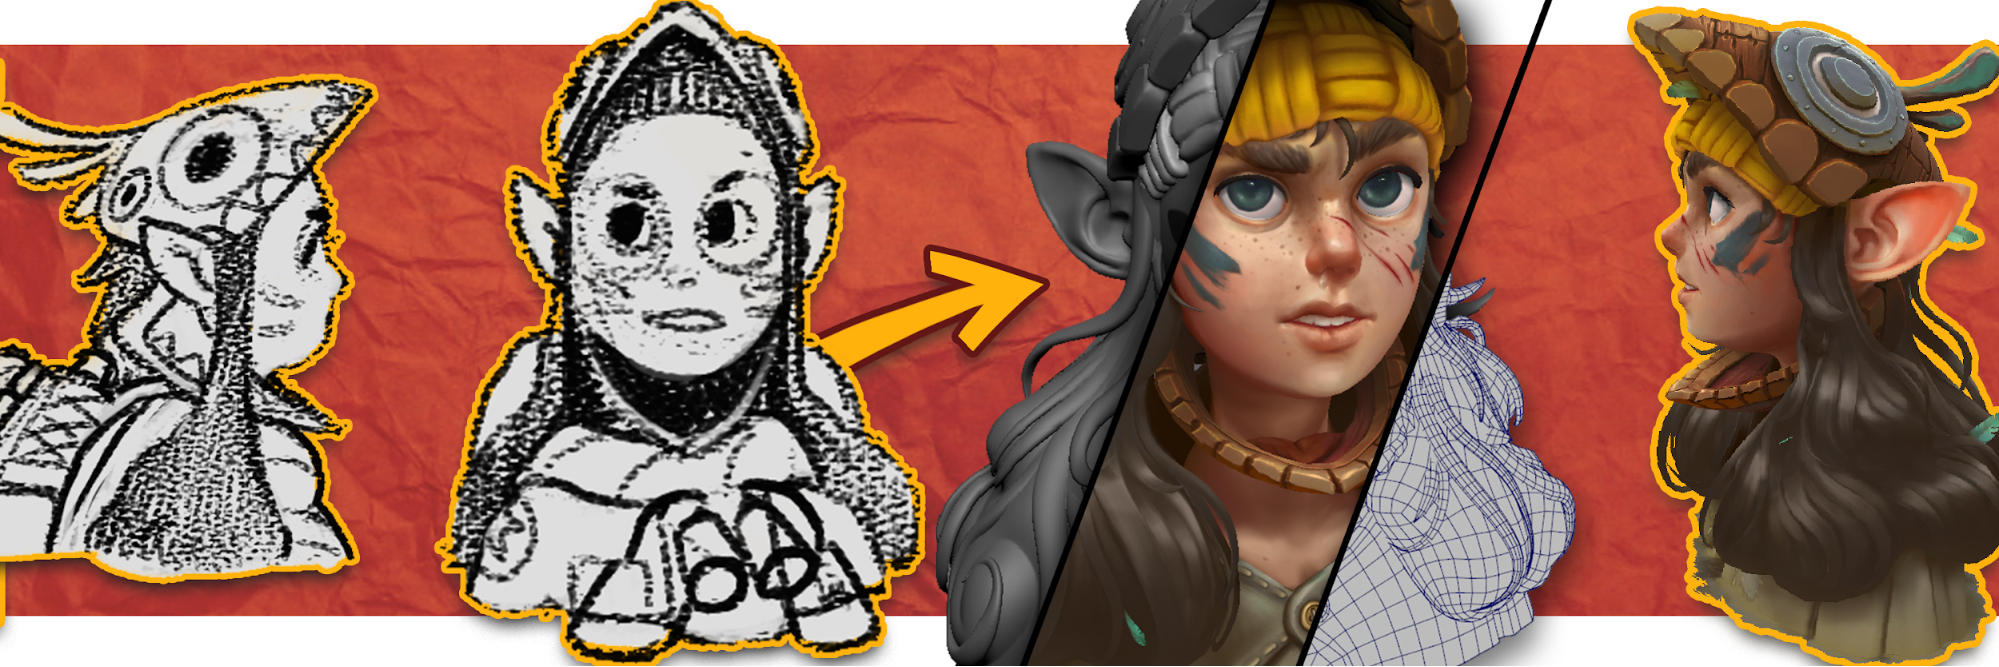
Who?
Hey! I’m Manuel Sitompul, 21, studying Visual Art at Breda University of Applied Sciences in Breda, Netherlands.
Games have always been a big interest for me. As a child I spent the majority of my time exploring the story and worlds of Zelda, Pokémon and Rayman. I got so immersed in these worlds that I decided to start making my own by playing with Game Maker and learning GML.
My passion for games persisted over the years, so 2 years ago I decided to apply at a game development school to surround and familiarize myself with the world of game art.
Inspiration
A friend of mine told me about Yekaterina Bourykina who was hosting a 3D Bust Challenge for hand-painted characters. The timing was perfect, as I was looking to get into hand-painting at the time.
When I started concepting, my mind automatically went for a bird themed character. Since I started studying Visual Art, I implemented a small bird in every single project I’ve worked on. The source of that inspiration? Probably because my free time mainly consists of watching bird memes.
Anyways, let’s get to it. My general character workflow is as follows:
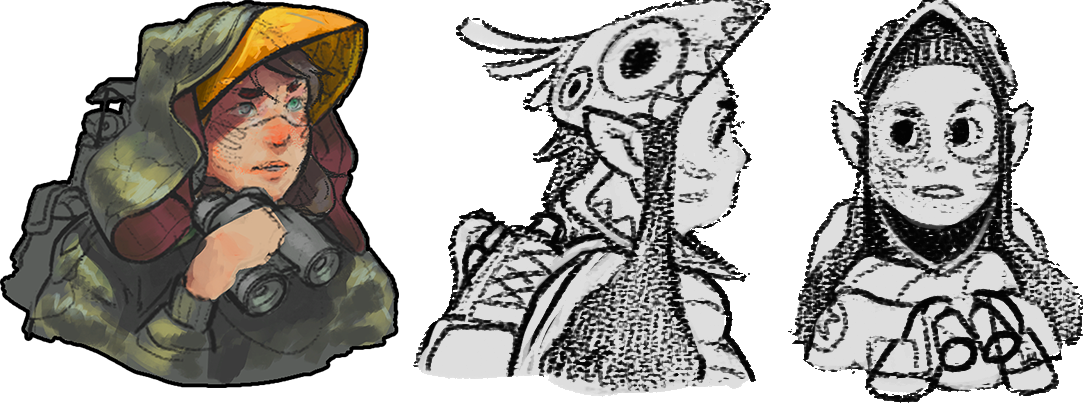
- Creating a Clear Concept – It doesn’t matter if you find or create your own concept, it’s important to draw all the information you need for when you’re modeling/sculpting. Are you using someone else’s concept but the back of the character isn’t illustrated? Go make a sketch, otherwise you’ll postpone working on that area until the end of production.
- Creating a Base – I like to start my sculpt by modeling a base in Maya. Simply modeling over image planes and getting the dimensions right is faster for me in Maya than in ZBrush. Use the software you’re fastest with!
- Sculpting – After I import the base in ZBrush, I start by Dynameshing it and sculpting the rough shapes and facial features. Once the shapes are in place I ZRemesh it so I can use multiple subdivision levels.
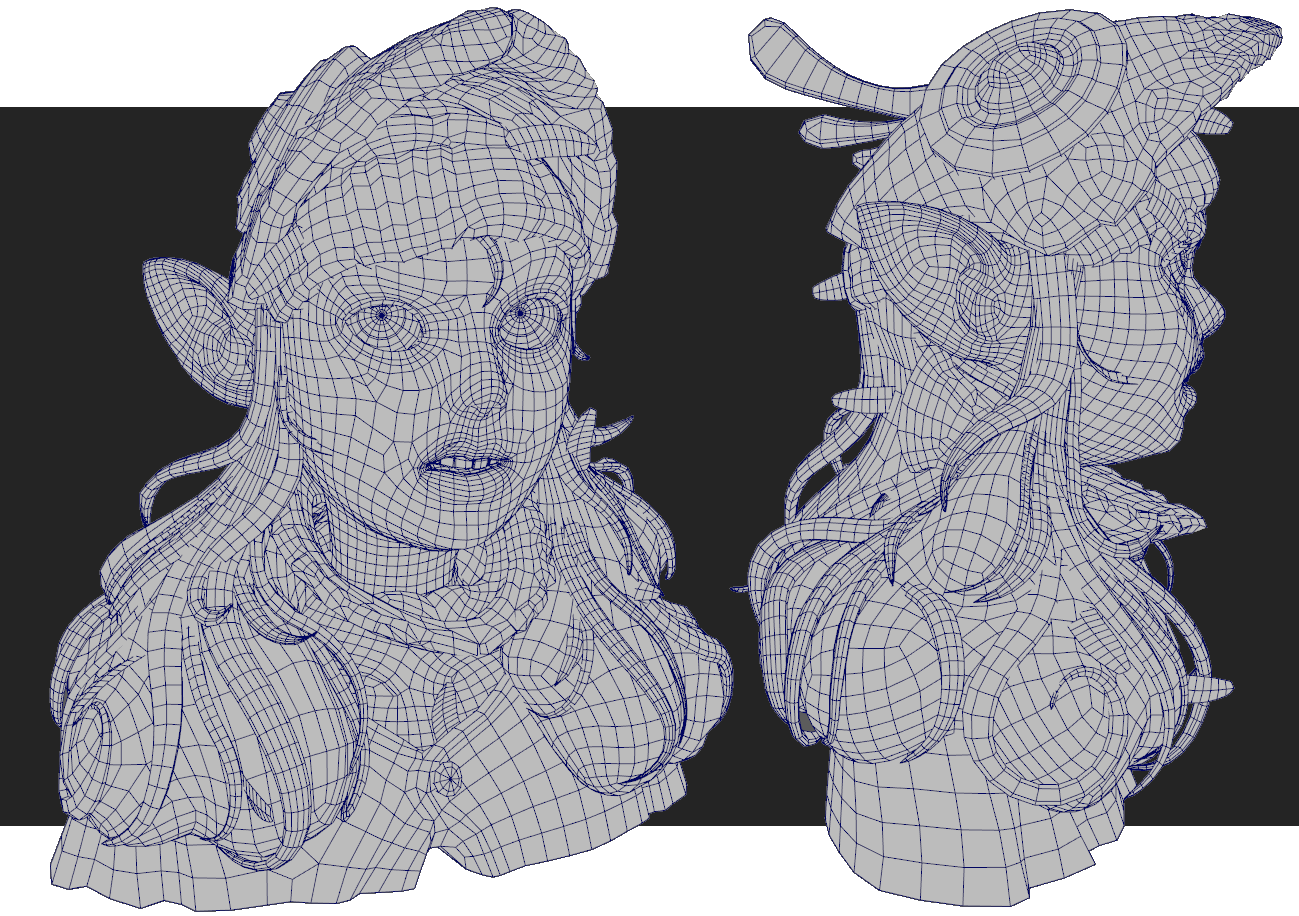
- Retopologizing – When the sculpt is finished, I take a decimated version of the sculpt in Maya and use Quad Draw to build my topology.
- Unwrapping – I use Maya to unwrap my newly retopo’d model, I don’t need to worry about perfect unwraps on organic characters. However, I do apply a checker pattern on my mesh to make sure my texel density stays consistent.
- Rigging – The work you do here really depends on what you’re using the rig for. In the case of this bust I cheaped out and made a purely functional rig, however if this was a game character I would spend a lot of time properly skinning, creating advanced controls and blend shapes.
- Animating – This is your opportunity to breathe life into your character. Go have fun!
Concepting
I’m a massive fan of the Legend of Zelda and its characters, so I’m always aiming to give my characters a lot of expression and personality. The idea started with a sketch of a girl using a bird mask as camouflage. This sparked new ideas like a veterinarian trying to save birds from poachers.
Creating a Base
When the concept was done, I imported the images as image-planes in Maya. From there I created simple subdivided blocks to build a base. I didn’t worry about the topology, because I was going to Dynamesh it anyway.
Sculpting
I imported the base in ZBrush and started subdividing it to get rid of the hard edges, and continued by Dynameshing it to get a good surface to sculpt on. I try to keep the mesh as low-res as possible while sculpting, and only add more resolution with Dynamesh when I really need it.
During the sculpting phase, I used screenshots and overpainted them to get a better idea on how to proceed. For example, I used this technique to figure out the placement of the hair and hat.
I mainly used the Orb brushes by Michael Vicente for head and clothing, and Makkon_Haircurves by Benjamin Hale for the hair.
Retopology
Since the 3D Bust Challenge didn’t have a tri-count limit and was mainly about the end result, I cut some corners. I made my goal to participate and create a bust that feels alive, instead of creating something that is clean and game-ready. That’s why instead of using Maya to manually retopo, I used ZRemesher…
…which was a mistake. Turns out using ZRemesher on an asymmetrical face is very hard to pull off. Eventually I got something I could work with, but nothing beats retopology by hand.
Texturing
To speed up my texturing process, I used SoMuchDiffuse to create a base diffuse texture in Substance Painter. My main goal with this was to lay out the simple colors with the use of a baked AO map.
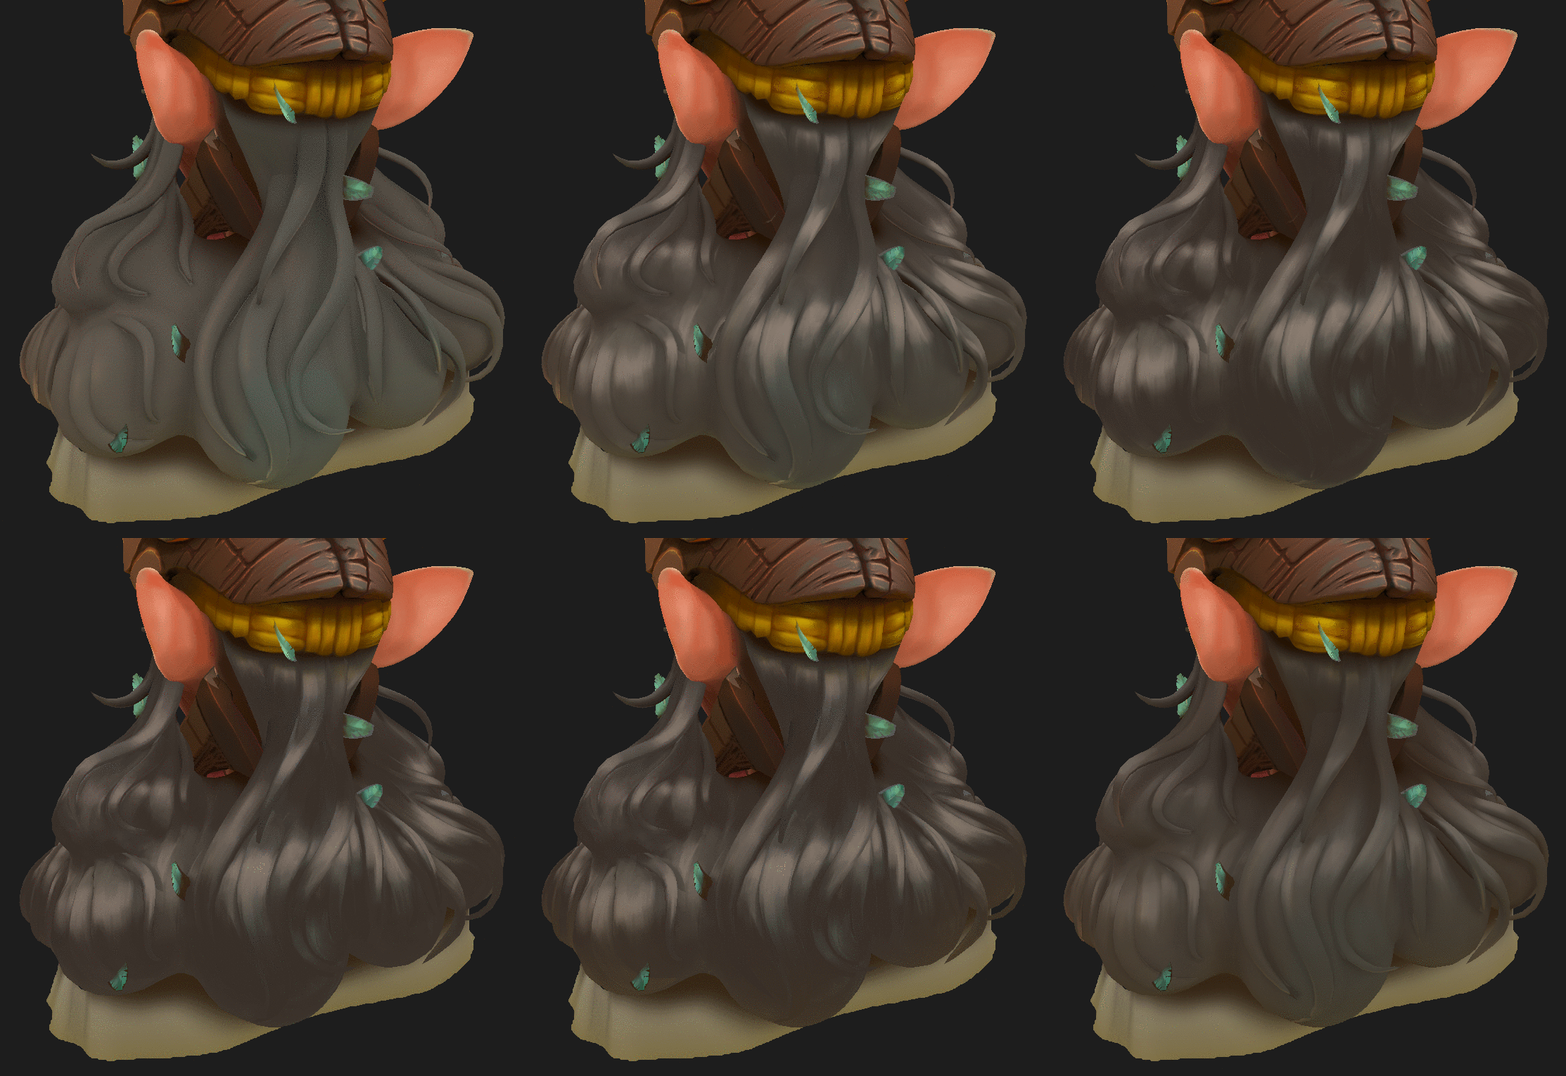
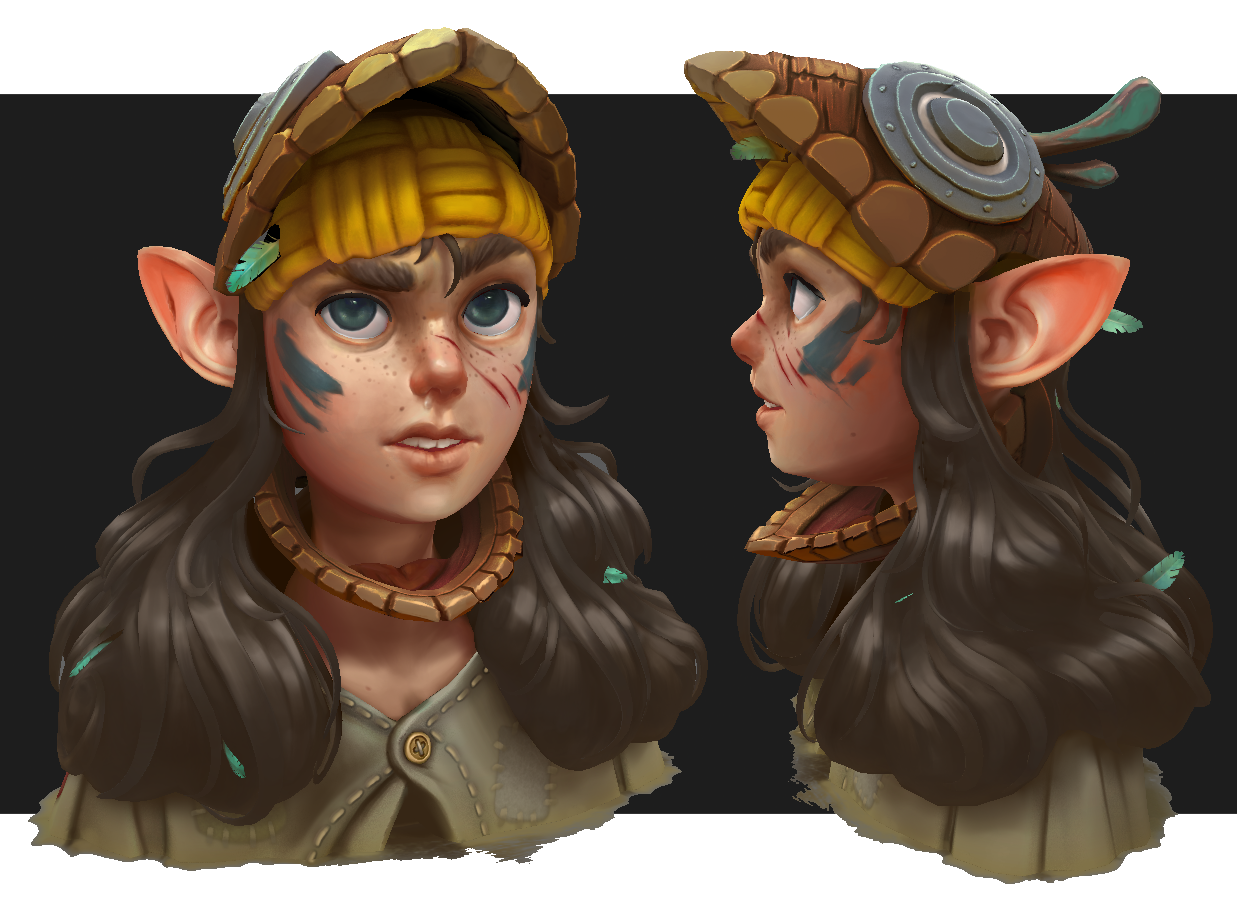
My next step was to paint over the base using 3D-Coat. This is where the real hand-painting starts. I got the face blocked out fairly quickly. In my work, I really try to stay true to realism and backstory. I strongly believe that imperfections like scars, cuts, snot, and skin variation all add to create a more real and believable image.
Since the bust had to be hand-painted, there would be no calculated lighting, reflection or AO. That’s why I made sure to bleed different colors together to make the bust more coherent but also to fake reflection. For example, the yellow hat reflects strongly on the skin below it, just like the hair darkens the skin around the neck.
Animation
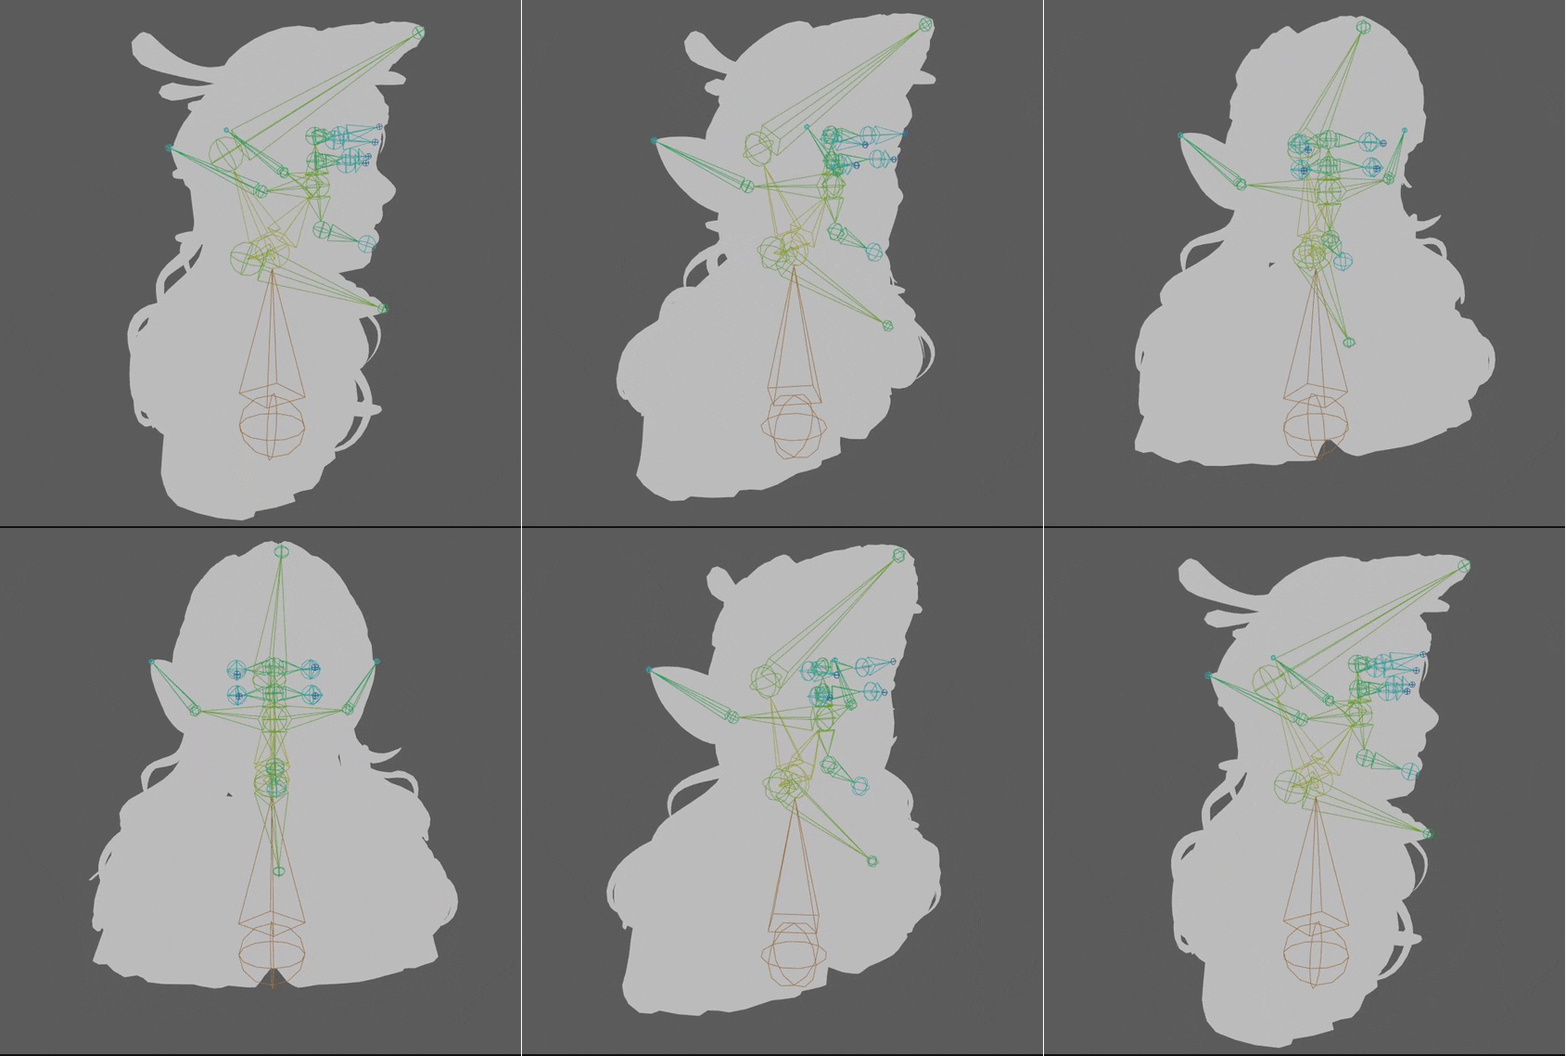
After I finished the textures, I still had half a day left before the deadline. So, I decided to have some fun and animate the bust. I kept the skeleton really simple as I had no intention to use it for anything outside Sketchfab. I made some bones for the jaw, hat, eyes, eyebrows, ears and head.
I made the animations based on audio made by my friend Vincent Steenstra Toussaint who was kind enough to sound-design the piece. This helped me get the rhythm of the breathing down and make the character react to the ambient audio.
Sketchfab
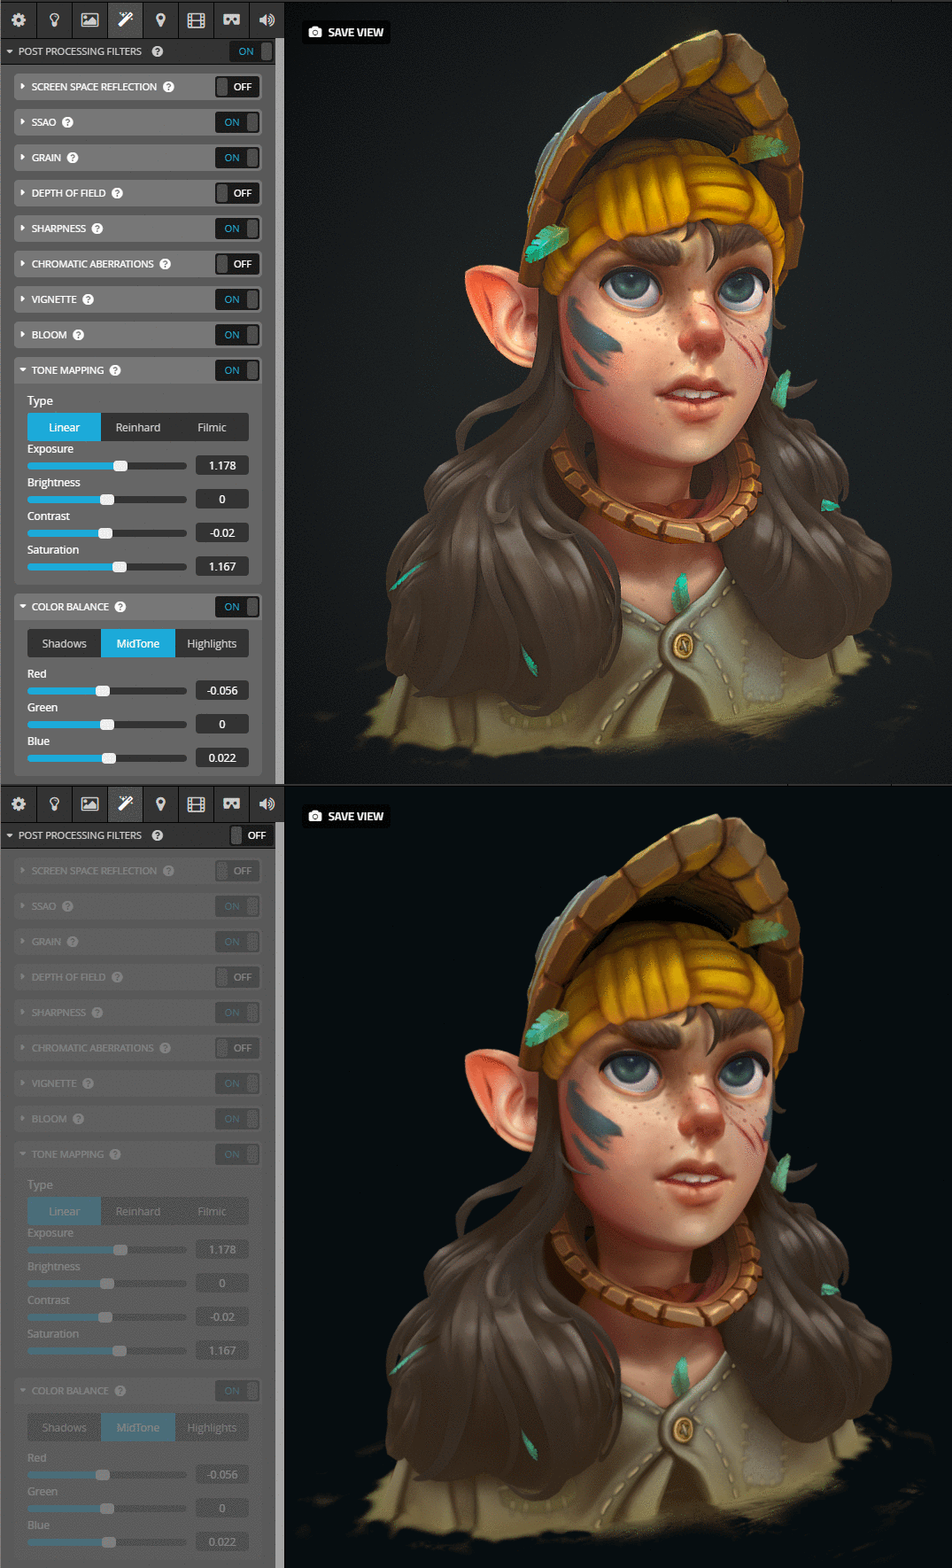
The bust was hand-painted, so simply enabling Shadeless did the trick. The girl is in a threatening scenario: she’s alone, in the dark, together with a monster – I wanted to use the camera to push that feeling. I set the Field of View to 60° and placed the camera low, looking up to the girl.
I tried to keep the post-processing minimal so it doesn’t distract from the actual bust. Tone Mapping and Color Balance helped me make the colors pop more, while SSAO and Sharpness helped me make the image more readable.
Conclusion
Overall, working on this challenge was a great experience for me. I learned about hand-painting and finishing a product in a short amount of time. Additionally, I really enjoyed using Sketchfab because it allowed me to show my model and animations without rendering a single frame!
Thanks to Yekaterina Bourykina for hosting this awesome challenge, and my friend Vincent Steenstra Toussaint for sound designing this project! Thank you very much for reading!
Manuel’s Artstation / Instagram
