Hi! My name is Kimico, I just graduated this year from La Haute Ecole Albert Jacquard in Belgium, where I studied the art of 3D film animation, and during which I did an internship at FrostyFroggs, an indie game studio in Brussels.
After graduation, because I didn’t feel super confident about applying for a job right away since I felt I was lacking some skills, I took a modeling class at AnimSchool while working on my portfolio, so I could learn more about character’s modeling deepest secrets.
Why the rooster?
Because I had realized that I only had human creatures in my portfolio, I wanted to try modeling animals for a change. I’ve always wanted to model one of Shiloh Gordon’s illustrations since I have a big crush on them. I immediately picked the rooster because I thought he looked so fun!
Blocking and modeling
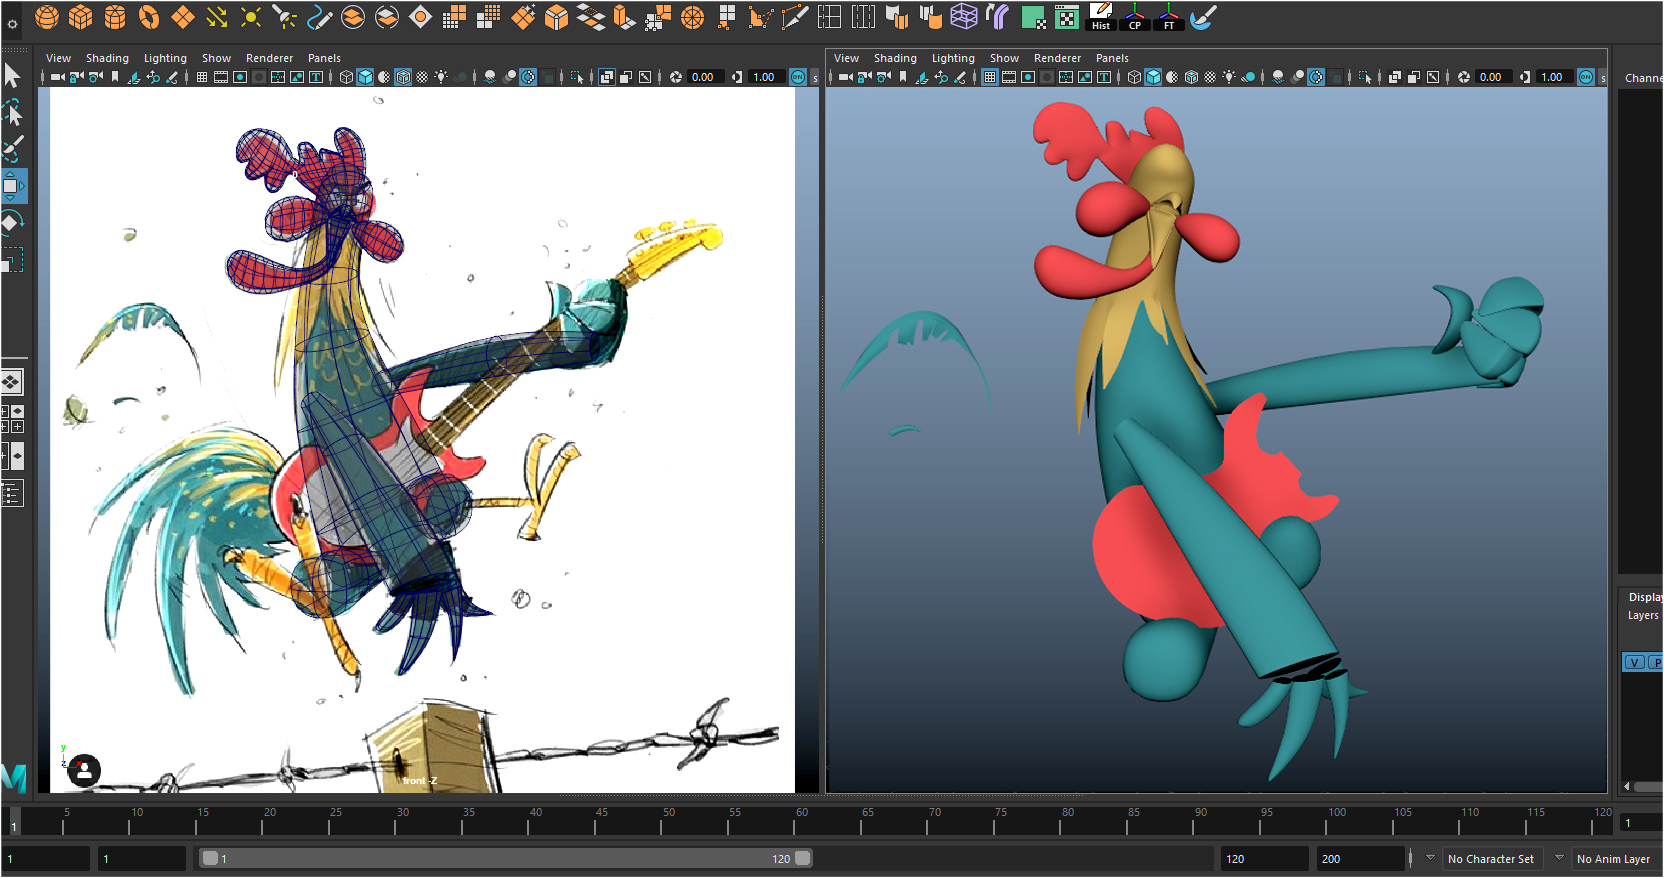
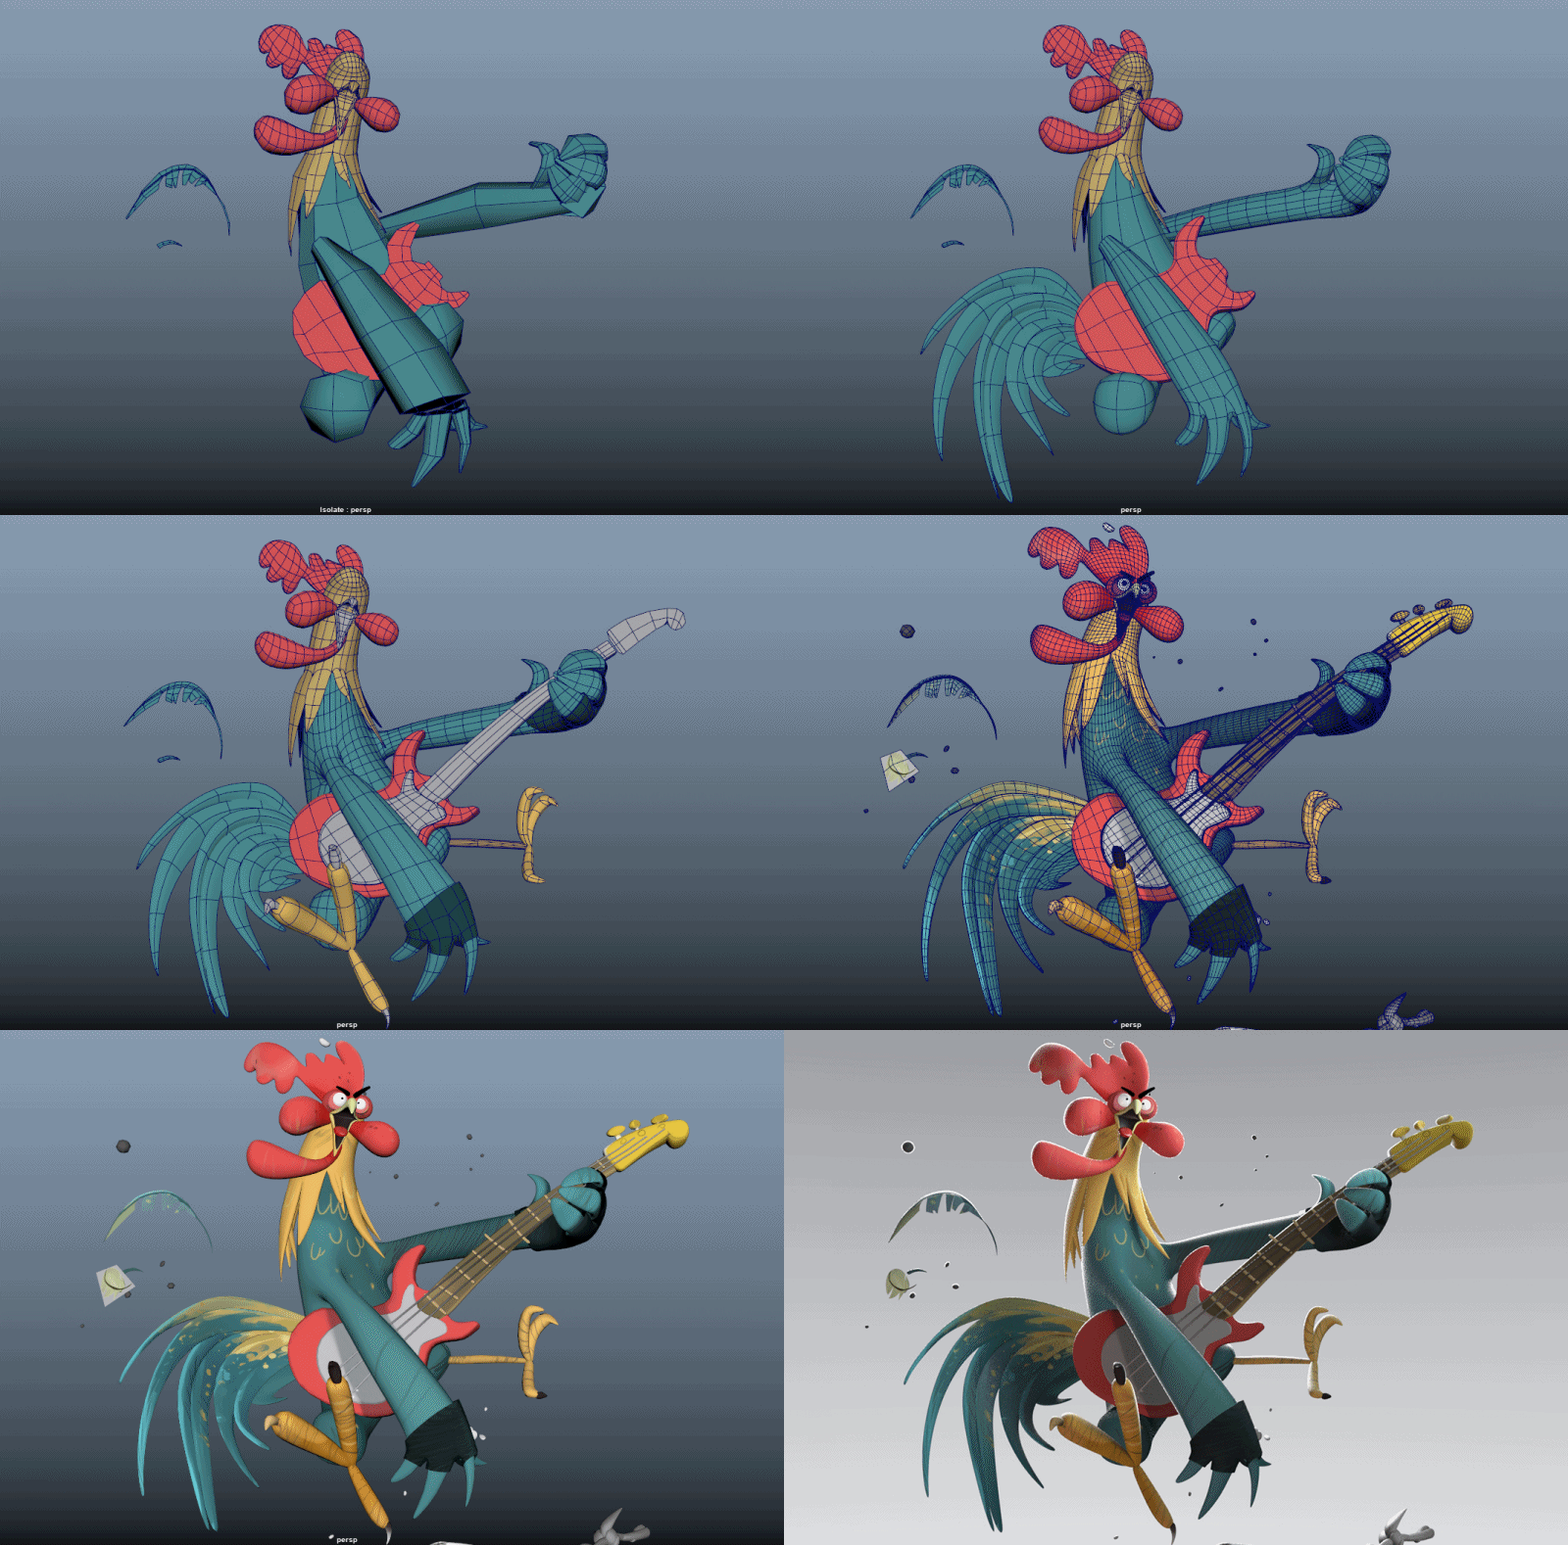
I first blocked out the primary shapes in Maya with cubes that I subdivided.
I feel more comfortable modeling each piece separately so that I could move them very quickly before attaching them all together with the bridge tool.
Because the concept art was front facing, blocking the body was the easiest part, and quite relaxing.
For the bird’s red comb, I used the polygon tool and traced out the shape directly over the drawing.
Then tweaked it a little bit with the lattice tool to give it some movement.
For the neck hackle, I simply extracted the neck, and extruded every feather before shaping them according to the concept.
For the claws, I tried to translate the drawing’s flaws into 3D. If you look closely at the drawing, some claws are attached, some not, some are black and some are white or yellow; this is one thing I learned at AnimSchool: not to be afraid to reproduce the concept’s flaws.
Difficulties (tail and eyes)
The TAIL is what gave me NIGHTMARES.
Because on the drawing it looks relatively flat, I struggled a lot to make the tail look nice from every angle, while keeping it close to the concept.
The solution of using a lattice tool again turned out to be the most effective, quickest and easiest way to achieve what I was aiming for. But as the idea didn’t come to my mind right away, I first tortured myself by trying several different methods that were all failures before thinking about using lattice again.
I had to give extra care to the tail to avoid a weird render from the front.
The eyes
I thought in relief that I was finally done with the most difficult part, but then came the eyes.
Because this rooster had literally no forehead, I didn’t know where and how I could stick the eyes on. I tried with round spheres first, but he looked like an alien or a frog.
So I looked for inspiration on the internet, crying in despair, and that’s when I saw Moana’s dumb rooster, and the revelation hit me. The solution was simply to carve the spheres in, like if you punch your fist into bread dough, and layer them on top of each other. They still kind of look a little bit funny on the side view, but have mercy for my soul.
The mistake
(and I’m not proud of this one)
I realized that mistakes had been made when I saw that something looked slightly off when I compared the drawing and the modeling side-to-side. The proportions weren’t right, and yet, the vertices all seemed to match the drawing line art, so what the fork was happening?!
The reason was that all this time, I had been modeling it through the front orthographic view, and that had deformed everything. Fortunately, it was easy to fix thanks to the lattice tool again and a little bit of soft selection.
Texturing
One thing I really enjoyed on Shiloh’s drawing was the sketchy style with rough lines and extreme rim light. But before diving directly into texturing, I took some time to think about what decisions I should make.
- Should I add a toon outline to mimic the pencil effect ?
- Should I draw the rim light directly on the textures ?
- Should I do more detailed textures ?…
Because I expected to post it on Sketchfab, I thought it would be more interesting for the viewers if the rim light was a real light that could follow the model as they are looking around it.
For the textures, I first imported the model into ZBrush to quickly draw a draft texture, then I imported them again into Photoshop for the cleaning. I really focused on reproducing the rough/flawed style, so I deliberately added some black strokes as if it were pencil hatching.
Lighting on Sketchfab
LIGHTS, the part I was waiting for the most! Because there is a very strong white rim light on Shiloh’s drawing, I really enjoyed working on the lighting to get the same effect.
Once I had imported the model into Sketchfab, it was really easy to get what I was looking for.
For the rim light, I set up two directional lights, one on the left and one on the right and brought the slider to 10. Since the rim light was the catchiest part of the drawing, I felt free to go crazy with the intensity.
As for the third light, because there weren’t any strong shadows on the concept art, I just added one blue-grey direction light in a way that it would light the entire model while avoiding shadows.
Post processing
I really love playing with every post process filter available on Sketchfab, but I always need to be careful not to go too wild with them. In this case I didn’t need much – just some sharpness, and contrast & saturation to make the colors pop out.
And tada!
Conclusion
Don’t make my mistake, be careful with the orthographic and perspective views!
Otherwise, modeling this rooster was so much fun And it helped me to develop a more effective workflow.
I really want to thank Sketchfab’s staff, as well as the whole community, for giving me the opportunity to be in the spotlight this week! I hope this article was able to give you useful tips, and I really want to give credit to Shiloh Gordon because he is the mastermind behind this piece of art!


